

Student Presentation Reflections
Teachers as Paragons
I struggle with articulating this point, but for the purposes of this post, I think that the most valid student-teacher dynamic is not the Jedi Master and Padawan method, but instead one where a teacher serves as a paragon of a small set of skills/attributes and the student’s role is to assimilate their experiences with all of their teachers into their own paradigm.
While this viewpoint is not revolutionary, I find that hubris often prevents a teacher from maximizing the benefit of this approach. Too often I find myself or my peers trying to be too many things to too many students. I think it is important for a teacher to make explicit commitments about which skill or attribute they wish to be the avatar for.
I chose presentation skills as my niche of instruction because I benefited greatly from the Public Speaking and Speech and Debate classes I took in high school. When I was in college, I saw very clearly those of my peers who did not have those same opportunities. I vowed that my students would be afforded opportunities to develop their presentation skills in my class no matter the other classes offered by my school.
Reflection Process
I plan on creating many posts about the different resources, examples, and assignments that I use to improve my students’ presentation skills. One of the core strategies, and I believe the most powerful, that I use to improve student presentations is a presentation reflection process.
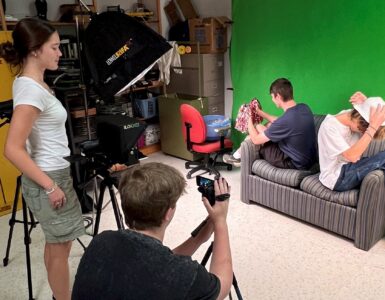
In order to make presentation reflections be a valid assignment, you must film your students as they present—something that my 11th grade Public Speaking teacher Mrs. Shank did for me 15 years ago. Admittedly, being filmed for a presentation was nerve-wracking; however, it was also amazing beneficial. However, instead of recording presentations on VHS cassette like Mrs. Shank did, I record presentations digitally and post them as unlisted YouTube videos .
Recording Presentations
Do yourself a favor and make sure that you use a tripod to record the student presentations. You might think you can cobble together books and tape to hold a camera steady, but this is the wrong call.
- If you plan on using your phone as the camera, you will need a mount to attach it to your tripod , and an improved microphone will certainly help with the audio quality, but it’s not necessary.
- If you plan on using a DSLR or mirrorless camera, then you really need to improve the audio. To improve the quality of the video’s captured sound, I suggest using a shotgun microphone .
Whatever hardware you use, it is important to share with the students the camera’s field of view, so they know where they should stand. The reflection assignment is much harder if the student does not appear on camera.
Reflection Assignment
Recording the presentation is the first step, but students will need to thoughtfully watch their presentations to see areas for improvement. To guide the students’ thoughts while they watch their presentation video, I developed three sequential reflection assignments, one for each of the major presentations in my class.
This reflection process is truly eye-opening. Students are routinely shocked when they watch the video and see the nervous fidgeting or hand-wringing that they swear never happened. The pedagogical impact of a student watching themselves on video is many times more powerful than even the most helpful rubric or feedback.
In addition to reflecting on what happened, an important part of the assignment is also identifying five points on which to improve and coming up with action items for each point. An example of an improvement point and an action item would be:
- I will look up the phonetic pronunciation of the words ahead of time and practice saying them to my teacher.
I always assign this as homework and give students a week to do the assignment after their presentation. I try very hard to make sure the videos get processed, uploaded, and shared with the students as soon as possible to make sure that things are fresh in their mind.
Students sometimes balk at the number of words they have to write. However, since they are writing semi-informally about themselves and have a video to go off, students routinely surpass 1000 words without blinking an eye.
Sometimes when I explain presentation reflections to teachers, they exclaim that it is too much work for them to do or they don’t know how to do the “video stuff” or something else along those lines. The video recording/editing process can be as basic or as advanced as you want it to be. Since video editing is a core part of my multimedia business, there is a lot of stuff that I do to the videos that is unnecessary but a point of pride for me.
In all honesty, a perfectly functional presentation video takes less than 3 minutes more than the presentation itself. Whether you spend 3 minutes or 30 minutes editing a presentation video, that time is returned many-fold by the presentation skill increase of your students.
Hands down, the most consistent piece of feedback I receive from alumni is that they dominate their presentations in college. This makes me very proud. I committed to developing presentation skills in my students since my very first year of teaching. Hearing back from alumni that they are drastically better than their peers at presenting puts a smile on my face every time.
You might also like

Leave a Reply
Leave a reply cancel reply.
Your email address will not be published. Required fields are marked *
Notify me of follow-up comments by email.
Notify me of new posts by email.
This site uses Akismet to reduce spam. Learn how your comment data is processed .


Video Presentation and Reflections
At-home activity.
For this assignment, students work in small groups to create and edit short video presentations (flexible in genre) to recast their research for a new audience. Students then reflect on their presentations.
Guide to Oral/Signed Communication in Writing Classrooms
To remediate the findings of a research project into a different genre; to work together in a team to produce and edit a short video; to practice oral communication skills in the context of a video; to reflect on the entire course and the research project.
oral presentations; video editing; multimodality; metacognition; remediation of research into a new genre
Part 1: Video
- Prepare (alone or with 1-2 partners) a recorded video presentation that somehow draws upon your research and what you’ve learned about songs or albums this semester.
- Make sure that your video is at least 1 minute long, but ideally less than 3 minutes long, for every student participating. Each partner should be prominent in the video, though there is no need to divide the time exactly evenly.
- Work together to create a topic; you may draw on some or all of the participants’ major research papers, but your topic does not need to be directly connected to everyone’s papers as long as it clearly reflects what you’ve learned in the course.
- writing and performing an original song
- performing a monologue (as yourself or in character as an author, poet, character, etc. from course/research sources)
- making an original music video for a song
- giving a “TED Talks”-style mini-lecture teaching how to analyze a given exhibit source
- creating a video review of an exhibit source
- making a film “trailer” for a biopic or documentary that you envision of one of the authors you researched/encountered
Part 2: Reflections/Analysis/Explanation
- Write an explanation and analysis of your Video Presentation (at least 200 words; up to half of this may be co-written with your partners), explaining how it was informed by your research and what you learned this semester.
- Mention at least 5 specific sources (background, exhibit, and/or argument) that fed or inspired your project. Point to specific moments in your video.
- Note some things you wanted people to notice or take away from your video.
Our Awesome Intercultural Community
The story of us: eapp 8385 spring 16.

Self Reflection on 1st Presentation
Self-Critique of my first presentation Presenter: Drilona Aliu
Description of Experience
Since I was the last one to present in class, I had the advantage of seeing everyone else presenting and catching on their strategies. It seemed that all the previous presenters were very comfortable on presenting and they rarely showed any sign on nervousness. Usually, I am able to control my nervousness by giving a “talk” to myself and I imagine myself as the subject matter expert. By having these positive thoughts in my mind, I am able to control nervousness that may be created as a result of the fear of talking in front of people and sharing something very personal such as part of my childhood.
The most challenging aspect of this presentation was creating a meaningful story through an effective framework that would transmit my emotions as a child and my journey to learn English. I find it very challenging when I have a lot to share but do not know how to properly deliver my message in a logical order. While watching the DVD, I was able to identify that this challenge was evident although I tried to hide it as I was speaking. The most surprising aspect of my speech was that I used a lot of facial expressions. This might have always been the case but because I never watched myself presenting I have not been able to identify this habit. I could have done better in certain areas such as volume and speech rate, but I believe that I gave a good overall impression.
I believe that my first speech was effective and kept the audience interested. There is more room to improve upon the introduction and conclusion such as engaging the audience in my opening question: As a child, what did you want to be when you grew up? Such questions are always a good way to start the speech as it keeps the audience interested. I also think that due to time management constraints, I could have done a better job on the conclusion such as ending my speech how this journey affected the path I chose in life. This would “justify” how English has played a role in my life and how he has influenced my personal and professional growth.
I believe that my delivery was generally clear and organized; however, while watching the DVD I noticed that I need to work more on the speech flow and find effective ways to engage the audience. My posture and eye contact were good but I definitely need to work on my speech rate, such as making more pauses so the audience is able to “digest” the information provided and not feel overwhelmed with the amount of the information at a fast pace. I also think I “overdid” my hand gestures and this is something that I need to improve. Being from the Balkan region, it is part of our culture to excessively use hands when we talk. We are very expressive that way and that may be distracting for many people in the audience. There is also room for eliminating fillers such as um as I tend to use them quite a bit, especially in the beginning of my speech.
Overall, I believe that I have many strengths such as the ability to speak without feeling overwhelmed or very nervous, to quickly think and avoid mistakes without getting frustrated (mistakes are for human beings), and to deliver my speech with effective voice projection and eye contact. The main areas for improvement would be to engage the audience as they may relate more to my speech, use fewer facial and hand gestures, speak at a slower pace and make appropriate pauses, and use fewer fillers throughout the speech.
As a result, my goals to improve in public speaking are:
- Effectively organize and clearly deliver my main points. Each main point should be backed up with effective supporting points and examples to make it more illustrative for the audience. The steps I would take to improve on this goal are to develop a detailed speech outline and rehearse it several times while timing itso I do not run out of time.
- Improve my speech rate. I tend to talk too fast and make very few or short pauses. It is my goal to improve my speaking pace so the audience will be able to follow it better. This can be achieved through multiple rehearsals and ability to select only worthy arguments (quantity vs quality).
- Last but not least is hand gesture control. Watching myself on the DVD made me realize that I use my hands a lot when I speak and sometimes that can be distracting for the audience. I need to work on using my hand gestures appropriately and a way to improve that is through recording myself every time I deliver a speech and reviewing it as that is something I do unconsciously.
There are many other things to improve and I am confident that I will be able to incorporate these changes in my next presentation!
COMM 234: Spring 2018
Digital culture.

Week #15: Video Essay Reflection
For this “penultimate” blog entry, please reflect on the biggest and final project of the semester–the video essay. Use the following questions to get you started:
- What is your main point or thesis in the video essay?
- What strategies did you use to convince or persuade your viewers?
- What is the general tone or mood of your video?
- What do you believe is the most powerful part of your video?
- What part is least powerful?
- What challenges did you encounter in creating this project, and how did you overcome them?
- Have you carefully and sparingly used outside sources, citing them in MLA format where necessary?
- What did you learn about video production and the technical aspects of film-making and editing through this project?
- Have you enjoyed working on this project?
13 thoughts on “ Week #15: Video Essay Reflection ”
My main point of the video essay is to spread the word about the dangers of hacking and how it will be used in future wars and the damage it can bring. I would persuade by viewers by showing the video of some of the current problems companies and governments deal with. The general tone of my video is dignified of hacking because it is basically a documentary type video. I believe the most powerful part of my video is the portion talking about how cyberterrorism can be used to shut down major parts of our infrastructure. The least powerful part is goofier portion when I am talking about a scene in Live Free or Die Hard and showing a picture/video clip from the movie. Some of the challenges I encountered on the project was just creating the video itself and redoing multiple takes, over and over again. All the sources I have found, are all MLA cited and will be provided at the end of the video. I’ve learned about video production from previous technical classes in middle school, high school, and some friends over the years. This project was fun to work on, but I felt like it would have been a little bit better if we had started working on this project sooner.
The main point of my video project is show the effect Kim Kardashian (reality and social media star) has on social media bloggers and the lengths they’ll go to (plastic surgery to look like her) to create a successful “brand” by utilizing Instagram as their platform. I’ve used numerous pictures (before and after), of some of the girls, videos and text to show the comparison and how drastic they’ve gone to imitate Kardashian and although its borderline creepy, this has helped them gain followers on social media and create successful brands of their own. The most powerful part of the video will be the before and after photos of some of the Instagram girls because a few look identical to Kardashian, so much so that they look like clones, it’s disturbing. It’s also interesting that so many girls claim authenticity, yet they are going to extremes to look like someone else. I may also incorporate a slip screen at the end of my face one side completely bare and the other with full makeup and talk about how long it takes and how unrealistic this lifestyle. I think the least powerful part is using Kardashian as a segway to talk about the real issues. Most people don’t like Kardashian and I’m also not a fan but her social media presence is so strong and she has such an influence on people it was hard for me to ignore. I didn’t encounter any issues because I used imovie in a previous assignment so it was relatively easy. All pictures, videos and information are cited using MLA format.
The main point of my video shows the bad consequences of cyberbullying, appeal to people to pay more attention to cyberbully and the ways to stop it. I use a lot of reliable research sources, facts to show the audiences. These numbers improve the reliability of my video. And help to convince my audiences. In the first part of my video, the tone is sad. I create a sad story about the negative impacts of cyberbullying. The whole mood is quite negative. However, in the other half of the video, I give some tips on how to prevent and stop cyberbullying. So, the mood becomes invigorating. Encouraging people to fight with cyberbullying. The negative mood turns into positive. I think the whole video is quite powerful. The sad story I made can strike audiences’ mind. Also the scientific numbers and facts. The tips I give to the audiences are also very powerful. If I have to say the least powerful one…It might be the story part. The story brings up people’s emotion, but the numbers and tips are really helpful and powerful. The time is a big issue. There is not enough time for me to do this video, and this is my first time making a video. Putting the sound effects and narration into the video is a little difficult. Also, drawing all the pictures and cut them is really hard to do. I try my best to use all my free time on making this project. And I try out a lot of ways to put sounds into it. Finally, I just record my voice over the video. Now, I am still working on this video. I will put the citations at the end of the video. Film-editing is really interesting. It feels like a magic while I’m making them. From these projects, I learned how to cut away the parts I do not like. The way to put music and narration in. And I learned how to use applications like iMovie and Garageband. Yes, I enjoy the process of making this video. It feels so good to make the first video in my life.
My video essay is to spread awareness of the effects of inappropriate media on adolescents. To do this, I incorporate various forms of media and show how easily accessible it is to view this media. The topics I cover fall under internet, music, video games, and television. All of these have become a large part of everyday life for this age group.
The tone set is very concerned as this is the future of our culture with each generation. The most challenging aspect for this is that it’s a lot of information to get across in just 6 minutes so cutting and focusing the point within this time frame requires a lot of planning and skill. From this I learned video creating/editing can be very difficult especially without a full plan or well defined layout.
Knowing the audience and having a clear goal helps to focus the material of the video. It’s also a good idea to implement video tools such as picture in picture to add more to the video. This also helps with an appeal to the eye and requires the viewer to pay more attention.
My video covered the ways social media has affected politics. The tone was relaxed and meant to be as informal as possible. There wasn’t as much persuasion as there was relation of facts to the audience. Being that this technically was an essay, the content itself was more important, especially with this topic, than the presentation. Also, it’s difficult to make information like this using a video platform powerful. There was nothing that was more or less powerful as a result. The obvious challenge was how to make an essay entertaining. Some of the topic are about serious subjects, on which it’s not important to be entertaining. The source that I used was included at the end of the video. I tried to follow the MLA format but also wanted it to be informal and not sound like a robot. I personally dislike video production and editing. Considering we only had about 3 weeks to do this project combined with the timing of this assignment being at the end of the semester with final exams and projects looming, it didn’t lend itself to a lot of creativity. I personally didn’t like the assignment at all. I aspire to be a writer, not a filmmaker. If this was strictly an IST course, having an assignment like this would make more sense.
The main point in my video was to bring more awareness to piracy and files-haring, what is it and what are the affects of doing so. I tend to have fun when it comes to making a present like assignment whether it be a powerpoint or a video. Although in my case it’s a powerpoint presentation with some pictures and videos. The overall tone of my video tends to be light hearted and silly most of the time especially when it comes to talking about a serious topic like piracy because piracy is basically stealing with less consequences.
If I had to choose a particular strong point probably the simplicity of my video. It’s something I have been doing since high school because at an early age I have come to realize everyone would always do the same mundane presentation whether it be a powerpoint or just some poster board with their information. A lot of the things I put in my presentation are more for me and less for the view mainly because while presenting I know there are a lot of people who are not really paying attention and if some of the snarky comments and remarks I place in my video makes them laugh then maybe I can get them more interested in the subject being discussed. One of the main reasons why I feel people don’t tend to do their own research and knowledge seeking is because they find it tedious and boring, so if I can convey the information I have in a simple and fun way then that is how I am going to present it. Plus it’s fun knowing how much I can get away with without people noticing. Weak point of my video would also probably be the simplicity of my presentation. It’s a double edged sword. In a class room I feel like that my presentation would be fine, but in the real world presenting this to a board of directors would probably not be okay.
In terms of sources and citation, I just followed the usual format, I made a slide with all my sources in MLA format. In terms of film-making I didn’t really learn anything because I didn’t use a camera, but in production, things I found annoying about doing presentation still persists like finding credible sources and knowing what information to use so I stay concise and don’t use up too much time.
Overall since I can never take anything too seriously, I tend to have fun with these kinds of assignments.
My main point it to show viewers a new form of technology that is advancing today and could be the future and I show examples of how to use it and a demonstration of it being used. I used examples and tried to show all the possible ways you could use Apple Pay, what it is used for and how you use it as well as why it should be used The tone of my video is all meant to be convincing, and more importantly get apple users to set up Apple Pay to make purchases fast and efficient so you can make your purchase and be on your way. I wanted the tone to be laid back and have the viewers feel confident whenever they want to use Apple Pay they know it will be fast and easy from just holding up their phone screen to another screen in just a blink of an eye. The most powerful part of my video is showing how Apple Pay works, that is what my video is about and most powerful part because it is strictly showing you the new piece of technology or in other words, an app that may change your life in someway. The least powerful part would be setting up the Apple Pay, it does have a downside of only being for apple users so thats where I would say it is least powerful and not everyone can have that advantage unless you own something apple based. It was really challenging trying to create persuasive media without sounding like a commercial or I was trying to sell a product but more so sound persuasive at the same time while trying to tell about a product. My editing skills were okay, I had no problems working with iMovie, my camera was my phone so it was not the best quality. It was a little hard with my story board to make the video because for myself its easier to plan inside my head how I would want the video to look like. I over came them by thinking the video through and how the viewers would want to learn about something in a short video. I have used outside sources and cited them in MLA to give credit at the end of my video. I actually took TV in high school so I was familiar with how to use iMovie and the different types of shots so it was not at all hard for me to edit and make a video so it was pretty simple for myself. I did enjoy this project, I am a comm major so am I all about anything media and digital wise. I am strong about technology and love to edit things so I did enjoy this project a lot and was a change for me to get back to making a video and editing it to my best ability to show my desired content.
The main point of the video is to show the digital divide between America, China, India and Asia by focusing on the differences in the usage of social media, specifically Facebook because it is the most popular platform around the world.
I made the video a mix between a sketch and a documentary. The video uses word-of-mouth from students from the aforementioned countries to show what the public generally thinks about Facebook in other countries and accurate statistics to show where people often get misguided about the digital divide.
The general mood is very light. My intent is to be comedic to keep the audience engaged. My intent was to create a dramatic irony where a fake detective is trying to investigate the digital divide by ‘kidnapping’ Facebook. The irony is that if anything, Facebook promotes the decrease of digital divide somewhat unintentionally by being the most popular social media platform.
Well, if people don’t figure out the irony or understand the humor… then the entire video is… is weak. Figuring out how to fix the sound because most of the interviews for I shot were outdoors and it was difficult to work around all the outside noise. Also, trying to export the video to a decent quality is a current challenge. I think the video is good but it looks like it was made in the ‘80s… but worse.
I used a lot of sources to gather statistics. I admit, my research was done mostly after I had shot the video. I didn’t know how my interviewees would respond to the questions I posed but it turns out that the research I had in mind correlated with the responses. It was then a straight forward process to look for sources that backup my claim.
I learnt how to use Adobe Premiere CC Pro from scratch. Aside from just what different options did to my video, I learnt that video production takes a lot of time and attentiveness. Making a list of what you want really helps. Also, having your script/storyboard helps you make sense of the entire project… because editing makes you question the relevance of even important scenes. Just like the textbook said, use equipment that are familiar with. It was for that reason that I didn’t edit with iMovie because while iMovie is user-friendly, I’m a fan of apple products. Therefore, using Adobe Premiere on a Dell was easy for me to understand. Last thing… YouTube knows everything about everything, literally!
I love every second of working on this project. I forced me to meet people and actually notice my campus. Even the two all-nighters I pulled for this video were fun. I got to laugh at my own jokes; and most importantly, I figured out how to use Adobe Premiere Pro… like a Pro.
The main point of my video is to discuss net neutrality and its effects on both businesses and everyday consumers such as myself. To convince/persuade my viewers, I used a lot of informational data and points, while also showing the cause and effect associated with net neutrality. The general tone and mood of my video is more informational and analytical as to what net neutrality is and how it affects basically everyone.
I think the most powerful part of the video is when I discuss other countries that do not have legislation similar to net neutrality, thus showing what the US could become once the repeal begins to take place. On the other hand, I think the least powerful would be the beginning/intro since it is not as eye-catching (and convincing) as I initially had hoped it to be. One of the many challenges I encountered in creating this project was finding the right videos to support the points I was trying to make. To overcome this, I had to do a lot of research and searching for videos that would fit the script and storyboard I created. Another challenge was that of the time constraint since we only had a few weeks to complete the project, and creating good video does take quite a lot of time. I did use a number of outside sources which are also properly cited in MLA format.
The main thing I learned with the technicalitites of video production and editing is just how tedious it can be to edit videos, especially with cutting out footage that was not necessary at certain points. And overall I did enjoy working on this project since it allowed me to explore a topic I was not completely familiar with, while also letting me develop my video production and editing skills.
My video essay is chiefly intended as an introduction to the idea of social credit, and includes some specific examples, one in the realm of fiction, and one in the not too distant future, which should be a terrifying thought. I wasn’t really trying to convince or persuade them of anything, merely trying to present information. The general tone of my video starts out informative, and stays that way for most of the presentation.
The ending is probably the most powerful part, along with the part immediately preceding it, when I explain all the limitations and controls the Chinese government will be able to exercise over the Chinese people. Conversely, the least powerful part is the beginning, where I explain social media in a very basic sense. The biggest challenge I faced was something of a self-imposed one, in that I didn’t want to use iMovie to create this project, since I prefer to use my computer. I went through several pieces of software before I found one that was free, relatively easy to use, accepted common video formats, and didn’t include a watermark. I eventually succeeded with VSDC Free Video Editor. I only used two or three exterior sources, mostly for images and videos, which have been cited as properly as I know how to. The main thing I learned about video creation was how little I actually knew about video creation. The many intermediate steps between scripting and video production were fairly easy to figure out, but the process of completing them was more difficult that I initially anticipated. When I first saw the prompt asking if I enjoyed working on this project, I was fully prepared to say ‘no.’ That has changed. this project gave me a chance to try something new, which I was initially not thrilled about, but the opportunity to try new things in a scholastic environment is a welcome one.
Coming in a little late on this one, but I wanted to have the video complete and submitted before answering.
For my video, I decided to go for a more informative tone. My main point or goal was to educate my viewers on how digital currencies are penetrating society today. Instead of attepting to persuade my viewers to one side or the other, I decided to provide arguments from both sides of the fence and allow the viewers to come to their own conclusion. I think the most powerful point I make in the video is the discussion of the volatility and security of crypto coins as understanding this can be difficult for some. The least powerful argument I think I made is tne segment regarding the effect mining has on the consumer graphics card market, as this is simple supply and demand, and while annoying, is ultimately just how the free market works.
I faced two big challenges while creating this video. The first was the difficulty I faced when trying to decide on a topic for which I held a strong opinion on. I may be a pretty heavy gamer, but outside of that, I don’t spend much time concerning myself with the online culture. I use my facebook mostly for direct messaging between clients and friends, and I don’t use any other social media outlets like twitter or instagram. I thought about discussing how self righteous and pretentious people are in the online world, but I felt it would just end up just being me ranting about how much people online suck. So instead I decided to cover a topic that has roots in the digital world, but has effect on the real world.
The second challenge I faced came when actually trying to create the video. Ispent about 10-12 hours trying to shoot myself talking to the camera about my subject, taking a firm position against the adoption of cryptocurrency, but once I had it edited down and watched it back, I felt like it ended up being the same ranty garbage that I was trying to avoid in the first place. It didn’t feel professional, and it didn’t feel genuine, mostly because I don’t actually feel strongly against the idea of cryptocurrency use. I stand in a middle ground. I think it’s a great concept, but is inherently flawed in several ways that need to be rectified before I can fully support it. So that’s when I scrapped the entire thing and started from scratch, this time taking a more informative approach, leaving my personal feelings(along with my face) out of the discussion. What I ended up with was a much more professional looking and sounding product that I believe has real value for the uninformed viewers who may be looking for some basic and easy to understand explanations of this explosive new online trend.
When it came to information sources, I didn’t really need to do any research beforehan because most of my content was knowledge I already possessed through my own experimentation and discussion with other hardware enthusiasts regarding the subject of cryptocurrency and mining. So at the advice of Dr. Weisser, I sought out sources of articles and statistical charts after the fact to back up the statements I made in my video.
What i learned about film-making and editing is that I have a newfound respect for the guys who spend their days doing full time content creation for YouTube. Planning shots, getting proper lighting, doing takes over and over and over again. Making sure your performance and content are both equally engaging, and on top of all of that, editing gave me a new appreciation for these people who are on the hustle to put out videos every single day to keep their viewers watching and happy.
As far as having fun with the project, I feel that due to the type of video we needed to do, i.e. a research backed essay, a lot of the fun was taken out of it. I understand that part of the reasonfor this is that the project needs to be acedemic in some way, but I also feel that as a project for a class surrounding digital cultures, the options should have been more open. I feel the project should be to create a video that reflects some sort of digital culture, rather than searching for issues within it. I, for example, would have liked to create some sort of PC building guide, others may have created a funny cat video, or a Vlog about their opinions on a certain subject(without needing to back it up, because an opinion doesn’t need to be right). Just something that better reflects the things people generally watch on YouTube, focusing more on creating an online persona for ourselves as a content creator. This would turn the focus more on understanding and implementing the things we learned from reading the final book. For me, that would have been a lot more fun, yet still relevant to the focus of the course.
My main point for this video essay is to see the evolution of digital technology involving vehicles and how it affects us when driving and traveling. Some strategies that I used to persuade my viewers are facts and features that come with this technology and how they keep us connected with social media when we are on the road. I gave keep aspects of cell phones and the car that used to be limited to USB ports for charging and Bluetooth connections for calling and music, but the options today are much more plentiful. Products like Apple CarPlay and Android Auto allow motorists to use nearly all of their mobile’s functions from the driver’s seat, including messaging, music, podcasts, and a variety of applications completely hands-free. The mood of my video is neutral but appealing towards manufactures and industries. The most powerful part of my video is the integration of cell phone use, navigation, and wifi use within the car. Some challenges that I came across is how I’m I going to make something good and professional to my viewers. How am I going to structure it to keep people watching and what makes a video appealing towards others. All of these were answered while I was recording and reading. It was much simpler than I thought and it was like the snowball effect when all things fell into place, for the most part. For my outside sources, I put them in the format of MLA and cited them within my video. It seems hard at first but with the right software and equipment, it could be as simple as taking a picture. For the most part, I enjoyed this project and had a blast with it.
I did my video project on Virtual Reality. Because many people don’t know a whole lot about virtual reality I gave a long explanation as to what exactly virtual reality is and how it came to be. I think it is important for people to really know what it is since VR is kind of a niche topic. Although you cannot fully understand VR without trying it out I just tried to do a good job of explaining it. On top of this I tried to show the viewer that VR can be used for so much more other than video games. Medicine, architecture, and education are all fields that can benefit a lit from VR. I also tried to make the intro fun and conclude the video by speculating about the future of VR. I used a lot of videos from outside sources because especially for the history portion of the video I think it is much better to see exactly how the devices are used with video. I was not able to utilize the MLA format because most if not all of my sources were from YouTube and there are no authors clearly stated on these videos. I didn’t learn a lot about video production because I was already pretty knowledgable on the subject. Overall I enjoyed this project because making videos is something I enjoy doing.
Leave a Reply Cancel reply
You must be logged in to post a comment.
Daring Leadership Institute: a groundbreaking partnership that amplifies Brené Brown's empirically based, courage-building curriculum with BetterUp’s human transformation platform.

What is Coaching?
Types of Coaching
Discover your perfect match : Take our 5-minute assessment and let us pair you with one of our top Coaches tailored just for you.
Find your coach
-1.png "reflection on video presentation")
We're on a mission to help everyone live with clarity, purpose, and passion.
Join us and create impactful change.
Read the buzz about BetterUp.
Meet the leadership that's passionate about empowering your workforce.

For Business
For Individuals
30 presentation feedback examples

Jump to section
You're doing great
You should think of improving
Tips to improve
3 things to look for when providing presentation feedback
3 tips for giving effective feedback.
We’re all learning as we go.
And that’s perfectly OK — that’s part of being human. On my own personal growth journey, I know I need to get better at public speaking and presenting. It’s one of those things that doesn’t necessarily come naturally to me.
And I know there are plenty of people in my shoes. So when it comes to presenting in the workplace, it can be intimidating. But there’s one thing that can help people continue to get better at presentations: feedback .
The following examples not only relate to presentations. They can also be helpful for public speaking and captivating your audience.
You’re doing great
- You really have the natural ability to hand out presentation material in a very organized way! Good job!
- Your presentations are often compelling and visually stunning. You really know how to effectively captivate the audience. Well done!
- You often allow your colleagues to make presentations on your behalf. This is a great learning opportunity for them and they often thrive at the challenge.
- Keeping presentations focused on key agenda items can be tough, but you’re really good at it. You effectively outline exactly what it is that you will be discussing and you make sure you keep to it. Well done!!
- You created downloadable visual presentations and bound them for the client. Excellent way to portray the company! Well done!
- Your content was relevant and your format was visually appealing and easy to follow and understand. Great job! You’re a real designer at heart!
- You always remain consistent with the way you present and often your presentations have the same style and layout. This is great for continuity. Well done!
- You always remain consistent with every presentation, whether it be one on ones, small group chats, with peers, direct reports, and the company bosses. You have no problem presenting in any one of these situations. Well done!
- You are an effective presenter both to employees and to potential clients. When controversial topics come up, you deal with them in a timely manner and you make sure these topics are fully dealt with before moving on. Well done!
- You effectively command attention and you have no problem managing groups during the presentation.

You should think of improving
- You’re a great presenter in certain situations, but you struggle to present in others. Try to be more consistent when presenting so that you get one single-minded message across. This will also help you broaden your presentation skills by being able to portray one single idea or message.
- You tend to be a little shy when making presentations. You have the self-confidence in one-on-one conversations , so you definitely have the ability to make compelling presentations. Come on! You can do it!
- During presentations, there seems to be quite a lack of focus . I know it can be difficult to stick to the subject matter, however you need to in order for people to understand what the presentation is about and what is trying to be achieved.
- To engage with your audience and make them attentively listen to what you have to say, you need to be able to use your voice in an effective manner to achieve this. Try to focus on certain words that require extra attention and emphasis these words during your presentation.
- Knowing your audience is critical to the success of any presentation. Learn to pick up on their body language and social cues to gauge your style and tone. Listen to what your audience has to say and adjust your presentation accordingly.

- During presentations, it’s expected that there will be tough questions . Try to prepare at least a couple of days before the time so that you can handle these questions in an effective manner.
- To be an effective presenter you need to be able to adjust to varying audiences and circumstances. Try learning about who will be in the room at the time of the presentation and adjust accordingly.
- Remember not to take debate as a personal attack. You tend to lose your cool a little too often, which hinders the discussion and people feel alienated. You can disagree without conflict .
- The only way you are going to get better at public speaking is by practicing, practicing, practicing. Learn your speech by heart, practice in the mirror, practice in front of the mirror. Eventually, you’ll become a natural and you won't be afraid of public speaking any longer.
- Your presentations are beautiful and I have no doubt you have strong presentation software skills. However, your content tends to be a bit weak and often you lack the substance. Without important content, the presentation is empty.
Tips to improve
- Remember it’s always good to present about the things you are passionate about . When you speak to people about your passions they can sense it. The same goes for presentations. Identify what it is that excites you and somehow bring it into every presentation. it’ll make it easier to present and your audience will feel the energy you portray.
- Sometimes it can be easier to plan with the end result in mind. Try visualizing what it is you are exactly expecting your audience to come away with and develop your presentation around that.
- Simplicity is a beautiful thing. Try to keep your presentations as simple as possible. Make it visually appealing with the least amount of words possible. Try interactive pictures and videos to fully immerse your audience in the presentation.
- It’s a fine balance between winging the presentation and memorizing the presentation. If you wing it too much it may come across as if you didn't prepare. If you memorize it, the presentation may come off a bit robotic. Try to find the sweet spot, if you can.
- When presenting, try to present in a way that is cause for curiosity . Make people interested in what you have to say to really captivate them. Have a look at some TED talks to get some tips on how you can go about doing this.
- Remember presentations should be about quality, not quantity. Presentations that are text-heavy and go on for longer than they should bore your audience and people are less likely to remember them.
- Try to arrive at every staff meeting on time and always be well prepared. This will ensure that meetings will go smoothly in the future.
- Remember to respect other people's time by always arriving on time or five minutes before the presentation.
- Remember to ask the others in the meeting for their point of view if there are individuals during presentations.
- If you notice presentations are deviating off-topic, try to steer it back to the important topic being discussed.
Presentation feedback can be intimidating. It’s likely the presenter has spent a good deal of time and energy on creating the presentation.
As an audience member, you can hone in on a few aspects of the presentation to help frame your feedback. If it's an oral presentation, you should consider also audience attention and visual aids.
It’s important to keep in mind three key aspects of the presentation when giving feedback.

Communication
- Were the key messages clear?
- Was the speaker clear and concise in their language?
- Did the presenter clearly communicate the key objectives?
- Did the presenter give the audience clear takeaways?
- How well did the presenter’s voice carry in the presentation space?
Delivery
- Was the presentation engaging?
- How well did the presenter capture their audience?
- Did the presenter engage employees in fun or innovative ways?
- How interactive was the presentation?
- How approachable did the presenter appear?
- Was the presentation accessible to all?
Body language and presence
- How did the presenter carry themselves?
- Did the presenter make eye contact with the audience?
- How confident did the presenter appear based on nonverbal communication?
- Were there any nonverbal distractions to the presentation? (i.e. too many hand gestures, facial expressions, etc.)
There are plenty of benefits of feedback . But giving effective feedback isn’t an easy task. Here are some tips for giving effective feedback.
1. Prepare what you’d like to say
I’m willing to bet we’ve all felt like we’ve put our foot in our mouth at one point or another. Knee-jerk, emotional reactions are rarely helpful. In fact, they can do quite the opposite of help.
Make sure you prepare thoughtfully. Think through what feedback would be most impactful and helpful for the recipient. How will you word certain phrases? What’s most important to communicate? What feedback isn’t helpful to the recipient?
You can always do practice runs with your coach. Your coach will serve as a guide and consultant. You can practice how you’ll give feedback and get feedback … on your feedback. Sounds like a big loop, but it can be immensely helpful.
2. Be direct and clear (but lead with empathy)
Have you ever received feedback from someone where you’re not quite sure what they’re trying to say? Me, too.
I’ve been in roundabout conversations where I walk away even more confused than I was before. This is where clear, direct, and concise communication comes into play.
Be clear and direct in your message. But still, lead with empathy and kindness . Feedback doesn’t need to be harsh or cruel. If it’s coming from a place of care, the recipient should feel that care from you.
3. Create dialogue (and listen carefully)
Feedback is never a one-way street. Without the opportunity for dialogue, you’re already shutting down and not listening to the other person. Make sure you’re creating space for dialogue and active listening . Invite questions — or, even better, feedback. You should make the person feel safe, secure, and trusted . You should also make sure the person feels heard and valued.
Your point of view is just that: it's one perspective. Invite team members to share their perspectives, including positive feedback .
You might also offer the recipient the opportunity for self-evaluation . By doing a self-evaluation, you can reflect on things like communication skills and confidence. They might come to some of the same important points you did — all on their own.
Now, let’s go practice that feedback
We're all learners in life.
It's OK to not be perfect . In fact, we shouldn't be. We're perfectly imperfect human beings, constantly learning , evolving, and bettering ourselves.
The same goes for tough things like presentations. You might be working on perfecting your students' presentation. Or you might want to get better at capturing your audience's attention. No matter what, feedback is critical to that learning journey .
Even a good presentation has the opportunity for improvement . Don't forget the role a coach can play in your feedback journey.
Your coach will be able to provide a unique point of view to help you better communicate key points. Your coach can also help with things like performance reviews , presentation evaluations, and even how to communicate with others.
Understand Yourself Better:
Big 5 Personality Test
Madeline Miles
Madeline is a writer, communicator, and storyteller who is passionate about using words to help drive positive change. She holds a bachelor's in English Creative Writing and Communication Studies and lives in Denver, Colorado. In her spare time, she's usually somewhere outside (preferably in the mountains) — and enjoys poetry and fiction.
How to not be nervous for a presentation — 13 tips that work (really!)
The self presentation theory and how to present your best self, how to make a presentation interactive and exciting, reading the room gives you an edge — no matter who you're talking to, how to give a good presentation that captivates any audience, 6 presentation skills and how to improve them, 8 clever hooks for presentations (with tips), josh bersin on the importance of talent management in the modern workplace, coaching insider: trusting your team as a new manager, 30 communication feedback examples, 30 leadership feedback examples for managers, your guide to what storytelling is and how to be a good storyteller, stay connected with betterup, get our newsletter, event invites, plus product insights and research..
3100 E 5th Street, Suite 350 Austin, TX 78702
- Platform overview
- Integrations
- Powered by AI
- BetterUp Lead™
- BetterUp Manage™
- BetterUp Care®
- Sales Performance
- Diversity & Inclusion
- Case studies
- ROI of BetterUp
- What is coaching?
- About Coaching
- Find your Coach
- Career Coaching
- Communication Coaching
- Personal Coaching
- News and Press
- Leadership Team
- Become a BetterUp Coach
- BetterUp Briefing
- Center for Purpose & Performance
- Leadership Training
- Business Coaching
- Contact Support
- Contact Sales
- Privacy Policy
- Acceptable Use Policy
- Trust & Security
- Cookie Preferences

Spreading the Practice of Video Reflection
Creating a video-friendly culture, amplifying choice, turning the spotlight on students, room to grow.

Premium Resource

Guiding Questions
› Do teachers in your school commonly use video for self-reflection and professional learning? If not, what obstacles stand in the way and how could they be addressed?
› As a school leader, how could you help initiate or enhance this practice (while ensuring that it's teacher-led)?
› What advantages might video-based reflection have as a form of professional learning? How could it improve instructional practices in your school district?
Garet, M. S., Porter, A. C., Desimone, L., Birman, B. F., & Yoon, K. S. (2001). What makes professional development effective? Results from a national sample of teachers. American Educational Research Journal, 38 (4), 915–945.
Knight, J. (2014). What you learn … when you see yourself teach . Educational Leadership, 71 (8), 18–23.
Knowles, M. S., Holton, E. F., & Swanson, R. A. (2012). The adult learner (7th ed.). New York: Routledge.

Todd Nesloney is the lead learner and principal of Webb Elementary School in Navasota, Texas, best-selling education author, and international speaker.
ASCD is a community dedicated to educators' professional growth and well-being.
Let us help you put your vision into action., related articles.

Using AI to Fuel Engagement and Active Learning

Is the STEM Job Shortage Overhyped?

EL Takeaways

Is Social Media Hurting Our Students?

The Power of Digital Storytelling
From our issue.


Video reflection and feedback in learning and development
Talk to any teacher, hospitality manager or healthcare professional and they’ll tell you that communication and interpersonal skills are an essential part of their practice. One of the most effective ways to develop these skills is through the use of video reflection and feedback – an instructional approach in which learners view recordings of themselves and their peers and evaluate and discuss their performance. This enables learners to focus on professional behaviours, be they more holistic skills or concrete microbehaviours. For example, a nurse could watch recordings of his interactions with a simulated patient and rate himself on how sensitive or kind he is towards the patient. Elsewhere, a teacher might count how many open questions she asks over the course of a lesson, or a restaurant manager may examine how closely she applies the different stages of a communication model when handling a customer complaint.
In any professional training programme, video reflection and feedback can help learners analyse not only verbal aspects of communication (i.e. what is being said) but also how paralingual aspects (e.g. tone, pace and volume) and non-verbal aspects (posture, eye contact and gestures) affect the overall message. Focusing on these aspects is key to developing a variety of professional communication skills: receptive (e.g. asking open questions or looking at the other person to gather information), informative (e.g. explaining things clearly and calmly) and relational (e.g. asking about the other person’s experiences and using appropriate body language to show empathy and develop an emotional bond).
In order to really improve performance, video reflection and feedback needs to emphasise positive empowerment, focusing on what learners are doing well. Any negative feedback should focus on specific behaviours, rather than the person. To make sure comments are specific and detailed, learners should use a structured evaluation form. It’s important that they understand the evaluation criteria, so it’s good practice to involve learners in writing and agreeing on these before recording. It’s also helpful to give learners space to reflect on their own performance first, before receiving feedback from a peer.
Video offers a number of technical possibilities which make it an ideal tool for reflection and feedback. Learners can play recordings in slow motion or at a faster speed; pause to focus on specific moments in an interaction; review images without sound, or replay audio without pictures; use a split-screen technique to show the impact of behaviour on another person; edit recordings to focus on part of an interaction; or join recordings together to show development over time. Modern video recording and sharing platforms, such as IRIS Connect, VEO, Echo360 and Panopto, also allow learners to post time-stamped comments at specific points in a recording to facilitate reflection and discussion. This is supported by a variety of additional platform-specific features, including a customisable digital evaluation form (IRIS Connect), ‘tags’ to count microbehaviours or time activities (VEO), or the ability to search automatically-generated transcripts by keyword (Panopto and Echo360).
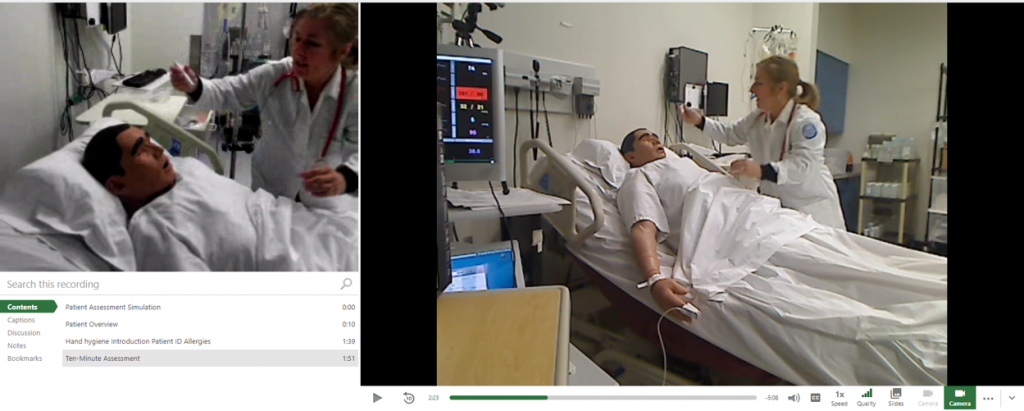
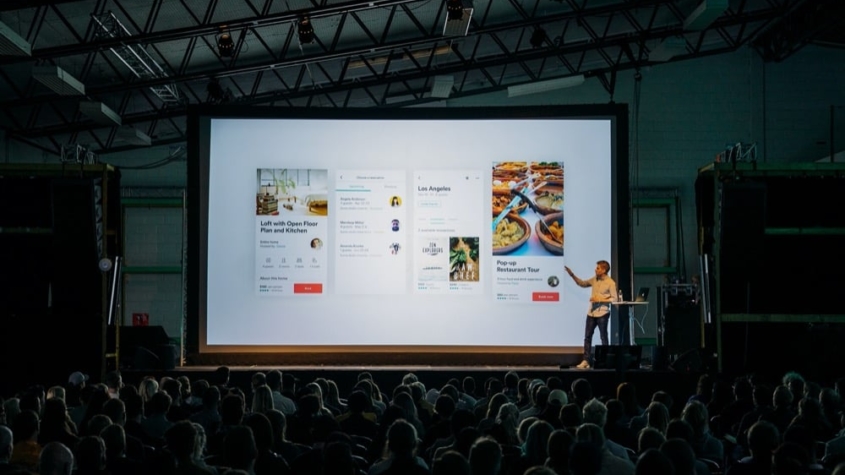
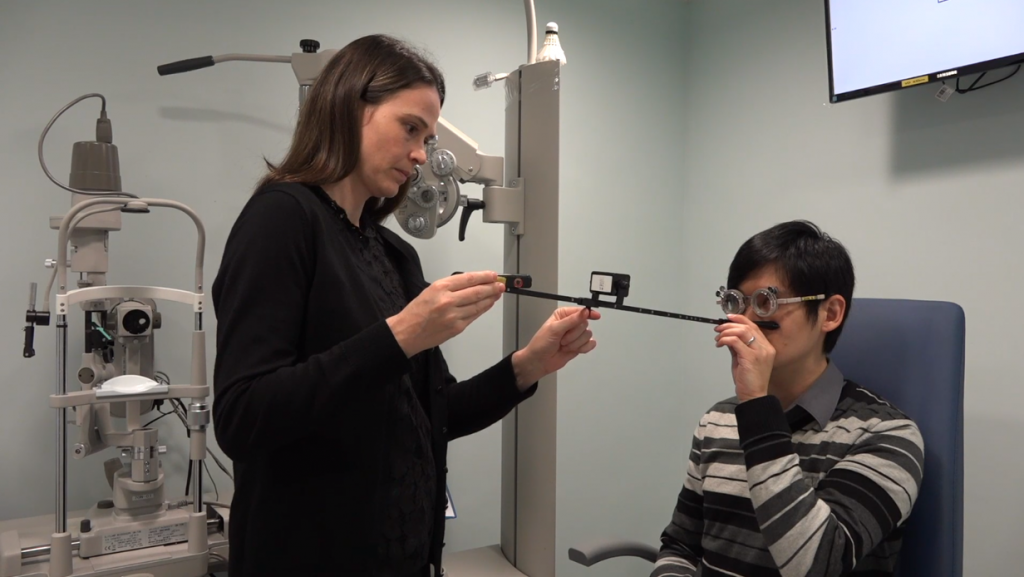
Recently, faculty members at The Hong Kong Polytechnic University have begun using Panopto to facilitate reflection and feedback, most notably in the School of Optometry, to build students’ confidence in interacting with patients, and in the English Language Centre, to develop presentation skills. Over the next few years, it is hoped that this approach will be used much more widely in other disciplines, including nursing, rehabilitation science, marketing, and hotel and tourism management. It also has the potential to support faculty development.
Dave delivered a much appreciated workshop on this topic at the recent Media & Learning Conference, you can find his notes and presentation slides on our online programme , Just navigate to 14:30 on Wednesday 5 June in the Paviljoenenzaal.
Dave Gatrell
Educational Development Officer, Educational Development Centre, The Hong Kong Polytechnic University,
You may also like

Bringing presence to the screen: the role of the Interrotron in educational media
by Lucy Kendra, Heriot-Watt Online, UK. We often think of technology as working against the possibility of intimacy. But there are so many counter-examples. The telephone is a good counter-example. There are things we...

AI in education for self-regulated learning
by S. Kazem Banihashem, Open University, the Netherlands.The future of education is becoming increasingly entwined with Artificial Intelligence (AI). The integration of AI into education is an inevitable trajectory that...
Media Literacy through Filmmaking
by Andrea DeGette, Alamance Community College, USA. Media Literacy Through Filmmaking posits: the building blocks of media literacy are pulled from the box of media production then put together in order that sense...
- AR & VR 249
- Artificial Intelligence 131
- AV Technologies 552
- Media Literacy 606
- Primary & Secondary Education 287
- Higher Education 967
- Lifelong Learning 139
Recent posts

Just launched: EDMO Guidelines for Effective Media Literacy Initiatives

“Please Touch the Artwork 2” scores at 2024 Belgian Games Awards

Call for Proposals: Congress on Journalism and Education in the Age of Disinformation, 13 December, Barcelona.

European Festival of Journalism & Media Literacy, Zagreb, Croatia, 28 February – 1 March 2025

Bett UK, London, UK, 22-24 January 2025

Building inclusive education and training systems, Brussels, 19 November 2024
Social media.
Find Media & Learning on the following social media:
Email Newsletter
Subscribe now to our monthly newsletter to receive the latest and greatest news in your mailbox.
Terms and Policies
- Terms of Use
- Terms of Sale
- Privacy Policy
- Cookie Policy

Co-funded by the European Union. Views and opinions expressed are however those of the author(s) only and do not necessarily reflect those of the European Union or the European Education and Culture Executive Agency (EACEA). Neither the European Union nor the granting authority can be held responsible for them.
- Association
- Become a Member
- Advisory Committee
- Newsletters
- Content Submission
Cookie Settings
Michaelkhan's Blog
- Reflection on presentation
As I look back on my presentation and the preparation that when into it I am amazed by the amount I’ve leaned from this one small exercise. This was my first proper presentation in a long time therefore I didn’t have much practice presenting in the last few years and had to do a lot of work preparing for it. Although there was a lot of work in preparing for this exercise, improvements can always be made.
Before I started this exercise I really didn’t know the amount of work that would go into a presentation. I thought I could put together a presentation in 20 minutes and look over it once and be ready to present it. I now know that this isn’t realistic if you want to make a good presentation. My slide show alone took nearly an hour to decide what was going to go into it and make it. I then had to look over it and look into things I was going to say during each slide as the slides contained only small bullet points that needed to be further explained. Usually a lot more time would have to go into researching the topic of the presentation as I was very familiar with the topic and only had to research some small parts concerning the history of the sport and a how big the NFL is in the world.
In the rest of this reflection I am going to write reflecting on different parts of my presentation and how I could have done it better and improve it for the next time.
I definitely found that to make a presentation on a topic the presenter must have an interest and a great knowledge of the topic. I didn’t think this was a problem with my presentation as we were allowed to make the presentation on any topic we wished so I could pick a topic I was very interested and had a good knowledge of. For future presentations I believe more research must go into the topic if I am not so familiar with it.
I also found that if visual aid is going to be used for the presentation, like a power point presentation a lot of work has to go into developing and making sure that the visual aid isn’t the whole presentation and that you have other notes to help with it. It is also important that if visual aid is going to be used you make sure that it will work at the time of the presentation. I didn’t think this was a big problem with my presentation as I tried to have more things to say than just what was on the slides and after witnessing a power point presentation that didn’t work on the computer I made sure to test mine before the presentation to make sure that everything was working fine.
I found that structure of the presentation is very important so that the audience can follow it and understand the presentation. I had a problem with this in my presentation. My presentation was poorly structured and therefore hard to follow. For future presentations I will try to pick a structure that will suit my topic.
Finding what information is relevant to a presentation is key so that you make sure that you present all important parts of the topic and don’t make it tedious for the addressees. I had a small problem with this in my presentation. I expanded too much into the structures of the NFL and left out key information about the rules and pitch markings and sizes. For future presentations I will try to make the information in the presentation more relevant to the audience.
Nervousness is a major problem for many people during public speaking. I was a bit nervous during my presentation and I thought that it may have resulted in me leaving out parts of what I was going to say. I think that nervousness is a problem that can only be solved with experience and every presentation I believe that I will get better at dealing with it.
The delivery of the presentation is crucial for its success. The delivery of my presentation could have been better. My voice could have been louder and more variant. I think the solution to this problem is to practice more when getting ready for the presentation.
I would like to thank my fellow classmates and lecturer for the feedback I was given for this presentation which helped me write this reflection and improve my presenting skills.
Share this:
- No comments yet.
- No trackbacks yet.
Leave a comment Cancel reply
Recent posts.
- Object Oreinted Programming for IOS
- Line Drawing Method – Bribery
- Use of human corpses in crash tests
- The concept of responsibility in engineering as interpreted through the Challenger disaster
- Team Work Reflection
- American Football Presentation
- Hello world!
- Uncategorized
- WordPress.com
- WordPress.org
- November 2011
- November 2009
- October 2009
- September 2009
- Already have a WordPress.com account? Log in now.
- Subscribe Subscribed
- Copy shortlink
- Report this content
- View post in Reader
- Manage subscriptions
- Collapse this bar
- SUGGESTED TOPICS
- The Magazine
- Newsletters
- Managing Yourself
- Managing Teams
- Work-life Balance
- The Big Idea
- Data & Visuals
- Case Selections
- HBR Learning
- Topic Feeds
- Account Settings
- Email Preferences
What It Takes to Give a Great Presentation
- Carmine Gallo

Five tips to set yourself apart.
Never underestimate the power of great communication. It can help you land the job of your dreams, attract investors to back your idea, or elevate your stature within your organization. But while there are plenty of good speakers in the world, you can set yourself apart out by being the person who can deliver something great over and over. Here are a few tips for business professionals who want to move from being good speakers to great ones: be concise (the fewer words, the better); never use bullet points (photos and images paired together are more memorable); don’t underestimate the power of your voice (raise and lower it for emphasis); give your audience something extra (unexpected moments will grab their attention); rehearse (the best speakers are the best because they practice — a lot).
I was sitting across the table from a Silicon Valley CEO who had pioneered a technology that touches many of our lives — the flash memory that stores data on smartphones, digital cameras, and computers. He was a frequent guest on CNBC and had been delivering business presentations for at least 20 years before we met. And yet, the CEO wanted to sharpen his public speaking skills.
- Carmine Gallo is a Harvard University instructor, keynote speaker, and author of 10 books translated into 40 languages. Gallo is the author of The Bezos Blueprint: Communication Secrets of the World’s Greatest Salesman (St. Martin’s Press).
Partner Center
Academia.edu no longer supports Internet Explorer.
To browse Academia.edu and the wider internet faster and more securely, please take a few seconds to upgrade your browser .
Enter the email address you signed up with and we'll email you a reset link.
- We're Hiring!
- Help Center

Download Free PDF
Using Self-Recorded Video as a Reflective Practice Tool to Foster Students' Learning Autonomy

For the last 10 years, video based learning has gained its eminence in the educational sphere to facilitate students' learning. This paper to some extent investigates two main foci: (1) how the utilization of self-recorded video mediated the students to reflect their own performances and (2) how video based reflective practice enabled the students to build their learning autonomy. To meet the needs, a study on 25 students of the public speaking class was conducted. To collect the data, the participants of this study were required to fill out the guided log journals based on their own video mediated performances in the public speaking class. In addition, they were interviewed to figure out how the use of self-recorded video enabled them to conduct reflection both in and on practices. In this chapter, reflection in practice refers to students' reflection on their performance; meanwhile reflection on practice refers to students' reflection of the whole tasks. Finally, the data was interpreted and analyzed through thematic content analysis. This study reveals three key findings, they are (1) considerations in speech developing process; (2) video mediated self-reflection in pre, while, and post-performance; and (3) self-assessment as an inter-dialogic negotiation. The main contribution of this study is to illuminate the exploitation of self-recorded video as a powerful tool to guide students to do reflective practice which is beneficial to encourage the students to become autonomous learners. Video based learning: rationale Video based learning has become a catalyst in the classroom settings to create different learning environment. Nowadays, while some students as well as teachers enjoy taking note using pen and paper during lectures, some others prefer photographing the presentation note or videotaping the lectures using video camera. Wachob (2011) argues that video tools including camera and mobile phones are effective to be utilized to enhance learning because they are practical and easy to use to videotape, download, and store any important moments being captured. In the context of language learning, McNulty and Lazarevic (2012) state that video merits the learners with additional instructional value for being able to help them recognize the sync of audio visual based performance such as tone, gestures, and facial expressions. Reflecting on the importance of those paralinguistic elements derived from the recorded video, in that case, is essential to boost the development of students' knowledge and awareness particularly on spoken language. For non-native English speaking trainees, Orlova (2009) argues that video recording gives considerable assistance for them to reflect on their language skills and competence. Simply saying, this simple technology for classroom use has caused fundamental change in students' and teachers' practices and has brought video as a tool into play to be exploited to facilitate language teaching and learning.
Related papers
The Journal of Quality in Education
The purpose of learning a foreign language is communication, which can be through speaking or writing. That is to say, the mastery of a foreign language can be ensured by being able to speak that language. Thus, this paper investigates the impact of self-video recording on the development of students’ speaking skill in an engineering school. To examine the cause/ effect relationship between the two variables, a quasi-experimental study was conducted relying on a pre- and post-tests. Two intact groups were selected and assigned to control and experimental groups. The data were analysed using descriptive and inferential statistics including the mean, standard deviation, independent sample t-test, and effect size. The results of the experiment indicated that there is an effect of self-video recording on the development of students’ speaking skill and 6.43% of difference to the treatment. This implies that self-video recording has an effective role in enhancing students’ speaking skill....
WAFFEN-UND KOSTUMKUNDE JOURNAL, 2020
Speaking is a noteworthy language skill to be mastered in order to obtain success in one's life, yet it is considered to be a crucial skill to be acquired in a language classroom, because of its limited exposure for the second language learners. The present paper attempts to explore the learners' perceptions about the use of video recordings in developing students' speaking skills and expressing abilities while participating in presentation, group discussion and debate in the ESL classroom. Sixty professional students, from a professional college are formed as the sample for this study. To ascertain the effectiveness of using video recording in the classroom teaching for developing the learners' oral skills, the students' questionnaire was administered to acquire the data. The questionnaires were analysed to establish the measures of oral fluency of learners in their video recordings. The results expressed that the integration of video recordings in speaking classes significantly improved the learners' oral proficiency. However, it was found that video recordings aided to encourage the learners to participate in speaking activities confidently and efficiently.
Abstract: Speaking is a complete package activity. It is not merely deals with sound production but closely related to facial expression, rhythm of speaking and body language as well. Since those elements of speaking are very crucial to emphasis and sharpened the intension of speaking. The major aim of this study is to promote the students expressions skill in speaking by employed classroom action research. Well selected video as the reasonable media bring the ideal role model through its picture. Students are expected to absorb the skills needed to be applied in the daily conversation.For self reflection and rehearsal, the students record their performance in order to know whether which part should be improved. 25 students who are the subject of this study improve their expression skills in speaking with the qualification score good for 16 students and fair for 9 students. The teacher conclude this study by arguing that video is very useful in promoting the students expression skil...
English Language Teaching Educational Journal
Integrated teaching has been advocated and implemented for decades. Lately it has been accelerated by the development of video making. This study aims to investigate the benefits of integrating video making in a speaking class of the 29 first semester students of a public university in Surabaya, East Java Province, Indonesia. It employed action research which was done to improve the quality of the teaching and learning process of the class. The data were collected through direct observation in the classroom, video reviews, and survey. The findings showed that the integration of video making in a speaking class gave benefits to students in the form of four components i.e. social, language and literary, psychological, and technical. The class has been successful in integrating the video making in a speaking class which means that the integration may be applied again in the same class in the future or for a wider scope with similar conditions or settings.
Journal of English for Academic and Specific Purposes (JEASP)
The change in the learning system from the previous teacher-centeredness to learner-centeredness makes the students demand to take responsibility, manage learning, and implement knowledge to become autonomous learners, especially in speaking class. However, in learning to speak, teachers dominate most learning activities, making students passive to take their responsibilities. Because of this problem, teachers must be innovative and engage students in interactive learning activities to make them active by using technology. One of the ways is through video recording. Previous studies claimed that students who used video recording in speaking class improved their speaking competencies and self-confidence. Nevertheless, previous studies mainly focused on students’ speaking competence rather than learner autonomy. Hence, this study aims to investigate learner autonomy in speaking class with video recording. The participants of this study were an English lecturer and students taking a Pu...
English Education, 2017
This article describes an action research held at seventh grade students of a junior high school in Surakarta on the implementation of reflective practice through students’ dialogue video recording to improve students’ speaking skill. The research data are collected through observation, interview, questionnaire and speaking tests. The data are then analysed through the procedure of assembling, coding, comparing, building interpretations, and reporting the outcomes. The research findings point out that reflective practice through students’ dialogue video recording improves students’ speaking skill which including: 1) the students developed their vocabularies; 2) most of the students could pronounce in acceptable pronunciation; 3) many students could speak fluently without too many pauses or repetition; 4) students could correctly use the grammar and they could recognize the wrong and correct the grammar that had been taught. Besides, the students’ mean score also improves from 34 in ...
Cambridge Scholars Publishing, 2013
Speaking is an essential part of English exams, in which it is difficult for testees to recognize their weaknesses in the oral evaluation. It is not easy to understand what is wrong while they are reading. To solve the problem, the student’s speeches were recorded and then were played. Therefore, they could evaluate theirs performance better by observing their own behaviors. The other evaluation tools were rubrics and band descriptors. The research was done at Guilan University, Iran (EFL context), on students at the intermediate level of proficiency and also at Metropoint College, Malaysia (ESL context), on the students at the upper-intermediate level of proficiency. The advantage of video recording is that students and teachers will be entertained by watching the films and can criticize them later. Video technology helps in student centered situations in the class. The students will be the examiner themselves and the teacher just helps them in the evaluation.
Computer‐aided teaching methods are fully introduced and widely used in classes nowadays. In language classes, the traditional application of CIT means the use of audio‐visual materials and Powerpoint. This paper introduces an innovative method of language learning from the part of students based on a pedagogical experiment carried out among the students in Sino‐Italian Campus of Tongji University at their second year of Italian language study. With the help of video camera and computer, interactions between teachers and students in class are registered in video clips. Students are asked to review these video clips and to observe their behaviors in the activities, with the aim of reflecting on and autocorrecting their mistakes on inappropriate use of language as well as finding a way to make some progress.
Proceedings of the 1st International Conference on Recent Innovations, 2018
In Dragoş Gheorghiu, Vincent Paladino (eds), Anthropomorphism, Anthropogenesis, Cognition. Archaeopress Archaeology, 2024
Ariel-a Review of International English Literature, 2004
Phronimos, 2024
Investigaciones fenomenológicas, 2015
Montereal (C Congresso Società Filologica Friulana-Montereale Valcellina), 2023
霊長類研究所年報, 1988
Journal of Asian Studies, 2020
The Chronicle of higher education, 2009
Tokovi istorije, 2010
Zgodovinski časopis 71, 2017
ΣΚΗΝΗ, 2023
IDTA Newsletter 16 (4), 4-12, 2021
Plant Pathology Journal, 2006
American Journal of Roentgenology, 2007
- We're Hiring!
- Help Center
- Find new research papers in:
- Health Sciences
- Earth Sciences
- Cognitive Science
- Mathematics
- Computer Science
- Academia ©2024

- Scriptwriting
What is a Video Essay? The Art of the Video Analysis Essay
I n the era of the internet and Youtube, the video essay has become an increasingly popular means of expressing ideas and concepts. However, there is a bit of an enigma behind the construction of the video essay largely due to the vagueness of the term.
What defines a video analysis essay? What is a video essay supposed to be about? In this article, we’ll take a look at the foundation of these videos and the various ways writers and editors use them creatively. Let’s dive in.
Watch: Our Best Film Video Essays of the Year
Subscribe for more filmmaking videos like this.
What is a video essay?
First, let’s define video essay.
There is narrative film, documentary film, short films, and then there is the video essay. What is its role within the realm of visual media? Let’s begin with the video essay definition.
VIDEO ESSAY DEFINITION
A video essay is a video that analyzes a specific topic, theme, person or thesis. Because video essays are a rather new form, they can be difficult to define, but recognizable nonetheless. To put it simply, they are essays in video form that aim to persuade, educate, or critique.
These essays have become increasingly popular within the era of Youtube and with many creatives writing video essays on topics such as politics, music, film, and pop culture.
What is a video essay used for?
- To persuade an audience of a thesis
- To educate on a specific subject
- To analyze and/or critique
What is a video essay based on?
Establish a thesis.
Video analysis essays lack distinguished boundaries since there are countless topics a video essayist can tackle. Most essays, however, begin with a thesis.
How Christopher Nolan Elevates the Movie Montage • Video Analysis Essays
Good essays often have a point to make. This point, or thesis, should be at the heart of every video analysis essay and is what binds the video together.
Related Posts
- Stanley Kubrick Directing Style Explained →
- A Filmmaker’s Guide to Nolan’s Directing Style →
- How to Write a Voice Over Montage in a Script →
interviews in video essay
Utilize interviews.
A key determinant for the structure of an essay is the source of the ideas. A common source for this are interviews from experts in the field. These interviews can be cut and rearranged to support a thesis.
Roger Deakins on "Learning to Light" • Video Analysis Essays
Utilizing first hand interviews is a great way to utilize ethos into the rhetoric of a video. However, it can be limiting since you are given a limited amount to work with. Voice over scripts, however, can give you the room to say anything.
How to create the best video essays on Youtube
Write voice over scripts.
Voice over (VO) scripts allow video essayists to write out exactly what they want to say. This is one of the most common ways to structure a video analysis essay since it gives more freedom to the writer. It is also a great technique to use when taking on large topics.
In this video, it would have been difficult to explain every type of camera lens by cutting sound bites from interviews of filmmakers. A voice over script, on the other hand, allowed us to communicate information directly when and where we wanted to.
Ultimate Guide to Camera Lenses • Video essay examples
Some of the most famous video essayists like Every Frame a Painting and Nerdwriter1 utilize voice over to capitalize on their strength in writing video analysis essays. However, if you’re more of an editor than a writer, the next type of essay will be more up your alley.
Video analysis essay without a script
Edit a supercut.
Rather than leaning on interview sound bites or voice over, the supercut video depends more on editing. You might be thinking “What is a video essay without writing?” The beauty of the video essay is that the writing can be done throughout the editing. Supercuts create arguments or themes visually through specific sequences.
Another one of the great video essay channels, Screen Junkies, put together a supercut of the last decade in cinema. The video could be called a portrait of the last decade in cinema.
2010 - 2019: A Decade In Film • Best videos on Youtube
This video is rather general as it visually establishes the theme of art during a general time period. Other essays can be much more specific.
Critical essays
Video essays are a uniquely effective means of creating an argument. This is especially true in critical essays. This type of video critiques the facets of a specific topic.
In this video, by one of the best video essay channels, Every Frame a Painting, the topic of the film score is analyzed and critiqued — specifically temp film score.
Every Frame a Painting Marvel Symphonic Universe • Essay examples
Of course, not all essays critique the work of artists. Persuasion of an opinion is only one way to use the video form. Another popular use is to educate.
- The Different Types of Camera Lenses →
- Write and Create Professionally Formatted Screenplays →
- How to Create Unforgettable Film Moments with Music →
Video analysis essay
Visual analysis.
One of the biggest advantages that video analysis essays have over traditional, written essays is the use of visuals. The use of visuals has allowed video essayists to display the subject or work that they are analyzing. It has also allowed them to be more specific with what they are analyzing. Writing video essays entails structuring both words and visuals.
Take this video on There Will Be Blood for example. In a traditional, written essay, the writer would have had to first explain what occurs in the film then make their analysis and repeat.
This can be extremely inefficient and redundant. By analyzing the scene through a video, the points and lessons are much more clear and efficient.
There Will Be Blood • Subscribe on YouTube
Through these video analysis essays, the scene of a film becomes support for a claim rather than the topic of the essay.
Dissect an artist
Essays that focus on analysis do not always focus on a work of art. Oftentimes, they focus on the artist themself. In this type of essay, a thesis is typically made about an artist’s style or approach. The work of that artist is then used to support this thesis.
Nerdwriter1, one of the best video essays on Youtube, creates this type to analyze filmmakers, actors, photographers or in this case, iconic painters.
Caravaggio: Master Of Light • Best video essays on YouTube
In the world of film, the artist video analysis essay tends to cover auteur filmmakers. Auteur filmmakers tend to have distinct styles and repetitive techniques that many filmmakers learn from and use in their own work.
Stanley Kubrick is perhaps the most notable example. In this video, we analyze Kubrick’s best films and the techniques he uses that make so many of us drawn to his films.
Why We're Obsessed with Stanley Kubrick Movies • Video essay examples
Critical essays and analytical essays choose to focus on a piece of work or an artist. Essays that aim to educate, however, draw on various sources to teach technique and the purpose behind those techniques.
What is a video essay written about?
Historical analysis.
Another popular type of essay is historical analysis. Video analysis essays are a great medium to analyze the history of a specific topic. They are an opportunity for essayists to share their research as well as their opinion on history.
Our video on aspect ratio , for example, analyzes how aspect ratios began in cinema and how they continue to evolve. We also make and support the claim that the 2:1 aspect ratio is becoming increasingly popular among filmmakers.
Why More Directors are Switching to 18:9 • Video analysis essay
Analyzing the work of great artists inherently yields a lesson to be learned. Some essays teach more directly.
- Types of Camera Movements in Film Explained →
- What is Aspect Ratio? A Formula for Framing Success →
- Visualize your scenes with intuitive online shotlist software →
Writing video essays about technique
Teach technique.
Educational essays designed to teach are typically more direct. They tend to be more valuable for those looking to create art rather than solely analyze it.
In this video, we explain every type of camera movement and the storytelling value of each. Educational essays must be based on research, evidence, and facts rather than opinion.
Ultimate Guide to Camera Movement • Best video essays on YouTube
As you can see, there are many reasons why the video essay has become an increasingly popular means of communicating information. Its ability to use both sound and picture makes it efficient and effective. It also draws on the language of filmmaking to express ideas through editing. But it also gives writers the creative freedom they love.
Writing video essays is a new art form that many channels have set high standards for. What is a video essay supposed to be about? That’s up to you.
Organize Post Production Workflow
The quality of an essay largely depends on the quality of the edit. If editing is not your strong suit, check out our next article. We dive into tips and techniques that will help you organize your Post-Production workflow to edit like a pro.
Up Next: Post Production →
Showcase your vision with elegant shot lists and storyboards..
Create robust and customizable shot lists. Upload images to make storyboards and slideshows.
Learn More ➜
- Pricing & Plans
- Featured On
- StudioBinder Partners
- Ultimate Guide to Call Sheets
- How to Break Down a Script (with FREE Script Breakdown Sheet)
- The Only Shot List Template You Need — with Free Download
- Managing Your Film Budget Cashflow & PO Log (Free Template)
- A Better Film Crew List Template Booking Sheet
- Best Storyboard Softwares (with free Storyboard Templates)
- Movie Magic Scheduling
- Gorilla Software
- Storyboard That
A visual medium requires visual methods. Master the art of visual storytelling with our FREE video series on directing and filmmaking techniques.
We’re in a golden age of TV writing and development. More and more people are flocking to the small screen to find daily entertainment. So how can you break put from the pack and get your idea onto the small screen? We’re here to help.
- Making It: From Pre-Production to Screen
- What is Tone? — A Guide for Storytellers
- What is Symbolism? Definition & Examples
- What Is a Plot? Types of Plot, Definitions, and Examples
- 50+ Types of Camera Shots, Angles, and Techniques
- How to Make a Music Video Storyboard: A Step-by-Step Guide
- 100 Facebook
- 0 Pinterest
IMAGES
VIDEO
COMMENTS
Reflection Assignment. Recording the presentation is the first step, but students will need to thoughtfully watch their presentations to see areas for improvement. To guide the students' thoughts while they watch their presentation video, I developed three sequential reflection assignments, one for each of the major presentations in my class.
Part 1: Video. Prepare (alone or with 1-2 partners) a recorded video presentation that somehow draws upon your research and what you've learned about songs or albums this semester. Make sure that your video is at least 1 minute long, but ideally less than 3 minutes long, for every student participating. Each partner should be prominent in the ...
Self Reflection on 1st Presentation. Self-Critique of my first presentation Presenter: Drilona Aliu. Description of Experience. Since I was the last one to present in class, I had the advantage of seeing everyone else presenting and catching on their strategies. It seemed that all the previous presenters were very comfortable on presenting and ...
Best Foot Forward teacher, North Carolina (2013) 1: Video for Self-ReflectionStructured self-reflection plays an important role in te. chers' professional growth. Teachers may enter the profession with preconceived ideas about what good instruction looks like based on their prev. ous experiences as a student. This leads to imitative, rath.
13 thoughts on " Week #15: Video Essay Reflection " Tyler Carlin Williams April 18, 2018 at 6:00 pm. My main point of the video essay is to spread the word about the dangers of hacking and how it will be used in future wars and the damage it can bring. I would persuade by viewers by showing the video of some of the current problems ...
Reflection On Video Reflection. Video Reflection Presentation skills are an important part of becoming a professional in the field in which we are choosing to pursue. These skills are also important for the individual success of a person in their field of choice. Strengthening these skills allows for an individual to also strengthen other ...
30 presentation feedback examples. We're all learning as we go. And that's perfectly OK — that's part of being human. On my own personal growth journey, I know I need to get better at public speaking and presenting. It's one of those things that doesn't necessarily come naturally to me.
Self-evaluation after a presentation Giving a presentation at university is a learning opportunity, so it is always a good idea to reflect on how to improve for next time. Use the following questions to support your reflection. If the answer to any of the questions is 'no', decide what action you will take to improve for next time. Content
While the value of video study is widely documented and video has been used in education since the 1960s, video-based professional development still isn't a pervasive practice in today's schools. We believe that using video for guided self-reflection has the power to transform professional learning in schools in a manner that truly places ...
Furthermore, presentation tasks are a common type of task in English language teaching. In order for students to take full advantage of the learning opportunity, they need to integrate the feedback we give them in order to improve their reflections. Effective feedback will help them to make these improvements in their presentation skills.
Learning Reflection Questions For Students. Also, I previously created questions students can ask themselves before, during, and after learning to improve their thinking, retention, and metacognition. A few highlights from the 'after learning' (which qualify them as reflective questions for learning) include: 1. How did that go?
Panopto interface and sample video. Recently, faculty members at The Hong Kong Polytechnic University have begun using Panopto to facilitate reflection and feedback, most notably in the School of Optometry, to build students' confidence in interacting with patients, and in the English Language Centre, to develop presentation skills.
Reflection on presentation. 22 September 2009 Michael Khan Leave a comment Go to comments. As I look back on my presentation and the preparation that when into it I am amazed by the amount I've leaned from this one small exercise. This was my first proper presentation in a long time therefore I didn't have much practice presenting in the ...
Here are a few tips for business professionals who want to move from being good speakers to great ones: be concise (the fewer words, the better); never use bullet points (photos and images paired ...
Online peer feedback on video presentations: type of feedback and improvement of presentation skills. Indira N. Z. Day Leiden University, ... I. Lam, L. Wildschut, P. R.-J. Simons, and W. Admiraal. 2009. "Streaming Video to Enhance Students' Reflection in Dance Education." Computers & Education 52 (open in a new window) (1 (open in a new ...
For the last 10 years, video based learning has gained its eminence in the educational sphere to facilitate students' learning. This paper to some extent investigates two main foci: (1) how the utilization of self-recorded video mediated the students to reflect their own performances and (2) how video based reflective practice enabled the students to build their learning autonomy.
As states and K-12 organizations around the country look for ways to support teachers in improving classroom practice, attention is increasingly turning to video. For self-reflection and peer collaboration, video provides an opportunity for teachers and coaches to observe lessons from the same point of view and allows classroom observation to ...
This video and associated document explains what reflective writing is (also called writing a reflection), along with visual examples and a short assessment!...
A video essay is a video that analyzes a specific topic, theme, person or thesis. Because video essays are a rather new form, they can be difficult to define, but recognizable nonetheless. To put it simply, they are essays in video form that aim to persuade, educate, or critique. These essays have become increasingly popular within the era of ...
This work is licensed under a Creative Commons Attribution-NonCommercial-ShareAlike 4.0 International License https://creativecommons.org/licenses/by-nc-sa/4...