Reference management. Clean and simple.

How to make a scientific presentation

Scientific presentation outlines
Questions to ask yourself before you write your talk, 1. how much time do you have, 2. who will you speak to, 3. what do you want the audience to learn from your talk, step 1: outline your presentation, step 2: plan your presentation slides, step 3: make the presentation slides, slide design, text elements, animations and transitions, step 4: practice your presentation, final thoughts, frequently asked questions about preparing scientific presentations, related articles.
A good scientific presentation achieves three things: you communicate the science clearly, your research leaves a lasting impression on your audience, and you enhance your reputation as a scientist.
But, what is the best way to prepare for a scientific presentation? How do you start writing a talk? What details do you include, and what do you leave out?
It’s tempting to launch into making lots of slides. But, starting with the slides can mean you neglect the narrative of your presentation, resulting in an overly detailed, boring talk.
The key to making an engaging scientific presentation is to prepare the narrative of your talk before beginning to construct your presentation slides. Planning your talk will ensure that you tell a clear, compelling scientific story that will engage the audience.
In this guide, you’ll find everything you need to know to make a good oral scientific presentation, including:
- The different types of oral scientific presentations and how they are delivered;
- How to outline a scientific presentation;
- How to make slides for a scientific presentation.
Our advice results from delving into the literature on writing scientific talks and from our own experiences as scientists in giving and listening to presentations. We provide tips and best practices for giving scientific talks in a separate post.
There are two main types of scientific talks:
- Your talk focuses on a single study . Typically, you tell the story of a single scientific paper. This format is common for short talks at contributed sessions in conferences.
- Your talk describes multiple studies. You tell the story of multiple scientific papers. It is crucial to have a theme that unites the studies, for example, an overarching question or problem statement, with each study representing specific but different variations of the same theme. Typically, PhD defenses, invited seminars, lectures, or talks for a prospective employer (i.e., “job talks”) fall into this category.
➡️ Learn how to prepare an excellent thesis defense
The length of time you are allotted for your talk will determine whether you will discuss a single study or multiple studies, and which details to include in your story.
The background and interests of your audience will determine the narrative direction of your talk, and what devices you will use to get their attention. Will you be speaking to people specializing in your field, or will the audience also contain people from disciplines other than your own? To reach non-specialists, you will need to discuss the broader implications of your study outside your field.
The needs of the audience will also determine what technical details you will include, and the language you will use. For example, an undergraduate audience will have different needs than an audience of seasoned academics. Students will require a more comprehensive overview of background information and explanations of jargon but will need less technical methodological details.
Your goal is to speak to the majority. But, make your talk accessible to the least knowledgeable person in the room.
This is called the thesis statement, or simply the “take-home message”. Having listened to your talk, what message do you want the audience to take away from your presentation? Describe the main idea in one or two sentences. You want this theme to be present throughout your presentation. Again, the thesis statement will depend on the audience and the type of talk you are giving.
Your thesis statement will drive the narrative for your talk. By deciding the take-home message you want to convince the audience of as a result of listening to your talk, you decide how the story of your talk will flow and how you will navigate its twists and turns. The thesis statement tells you the results you need to show, which subsequently tells you the methods or studies you need to describe, which decides the angle you take in your introduction.
➡️ Learn how to write a thesis statement
The goal of your talk is that the audience leaves afterward with a clear understanding of the key take-away message of your research. To achieve that goal, you need to tell a coherent, logical story that conveys your thesis statement throughout the presentation. You can tell your story through careful preparation of your talk.
Preparation of a scientific presentation involves three separate stages: outlining the scientific narrative, preparing slides, and practicing your delivery. Making the slides of your talk without first planning what you are going to say is inefficient.
Here, we provide a 4 step guide to writing your scientific presentation:
- Outline your presentation
- Plan your presentation slides
- Make the presentation slides
- Practice your presentation

Writing an outline helps you consider the key pieces of your talk and how they fit together from the beginning, preventing you from forgetting any important details. It also means you avoid changing the order of your slides multiple times, saving you time.
Plan your talk as discrete sections. In the table below, we describe the sections for a single study talk vs. a talk discussing multiple studies:
Introduction | Introduction - main idea behind all studies |
Methods | Methods of study 1 |
Results | Results of study 1 |
Summary (take-home message ) of study 1 | |
Transition to study 2 (can be a visual of your main idea that return to) | |
Brief introduction for study 2 | |
Methods of study 2 | |
Results of study 2 | |
Summary of study 2 | |
Transition to study 3 | |
Repeat format until done | |
Summary | Summary of all studies (return to your main idea) |
Conclusion | Conclusion |
The following tips apply when writing the outline of a single study talk. You can easily adapt this framework if you are writing a talk discussing multiple studies.
Introduction: Writing the introduction can be the hardest part of writing a talk. And when giving it, it’s the point where you might be at your most nervous. But preparing a good, concise introduction will settle your nerves.
The introduction tells the audience the story of why you studied your topic. A good introduction succinctly achieves four things, in the following order.
- It gives a broad perspective on the problem or topic for people in the audience who may be outside your discipline (i.e., it explains the big-picture problem motivating your study).
- It describes why you did the study, and why the audience should care.
- It gives a brief indication of how your study addressed the problem and provides the necessary background information that the audience needs to understand your work.
- It indicates what the audience will learn from the talk, and prepares them for what will come next.
A good introduction not only gives the big picture and motivations behind your study but also concisely sets the stage for what the audience will learn from the talk (e.g., the questions your work answers, and/or the hypotheses that your work tests). The end of the introduction will lead to a natural transition to the methods.
Give a broad perspective on the problem. The easiest way to start with the big picture is to think of a hook for the first slide of your presentation. A hook is an opening that gets the audience’s attention and gets them interested in your story. In science, this might take the form of a why, or a how question, or it could be a statement about a major problem or open question in your field. Other examples of hooks include quotes, short anecdotes, or interesting statistics.
Why should the audience care? Next, decide on the angle you are going to take on your hook that links to the thesis of your talk. In other words, you need to set the context, i.e., explain why the audience should care. For example, you may introduce an observation from nature, a pattern in experimental data, or a theory that you want to test. The audience must understand your motivations for the study.
Supplementary details. Once you have established the hook and angle, you need to include supplementary details to support them. For example, you might state your hypothesis. Then go into previous work and the current state of knowledge. Include citations of these studies. If you need to introduce some technical methodological details, theory, or jargon, do it here.
Conclude your introduction. The motivation for the work and background information should set the stage for the conclusion of the introduction, where you describe the goals of your study, and any hypotheses or predictions. Let the audience know what they are going to learn.
Methods: The audience will use your description of the methods to assess the approach you took in your study and to decide whether your findings are credible. Tell the story of your methods in chronological order. Use visuals to describe your methods as much as possible. If you have equations, make sure to take the time to explain them. Decide what methods to include and how you will show them. You need enough detail so that your audience will understand what you did and therefore can evaluate your approach, but avoid including superfluous details that do not support your main idea. You want to avoid the common mistake of including too much data, as the audience can read the paper(s) later.
Results: This is the evidence you present for your thesis. The audience will use the results to evaluate the support for your main idea. Choose the most important and interesting results—those that support your thesis. You don’t need to present all the results from your study (indeed, you most likely won’t have time to present them all). Break down complex results into digestible pieces, e.g., comparisons over multiple slides (more tips in the next section).
Summary: Summarize your main findings. Displaying your main findings through visuals can be effective. Emphasize the new contributions to scientific knowledge that your work makes.
Conclusion: Complete the circle by relating your conclusions to the big picture topic in your introduction—and your hook, if possible. It’s important to describe any alternative explanations for your findings. You might also speculate on future directions arising from your research. The slides that comprise your conclusion do not need to state “conclusion”. Rather, the concluding slide title should be a declarative sentence linking back to the big picture problem and your main idea.
It’s important to end well by planning a strong closure to your talk, after which you will thank the audience. Your closing statement should relate to your thesis, perhaps by stating it differently or memorably. Avoid ending awkwardly by memorizing your closing sentence.
By now, you have an outline of the story of your talk, which you can use to plan your slides. Your slides should complement and enhance what you will say. Use the following steps to prepare your slides.
- Write the slide titles to match your talk outline. These should be clear and informative declarative sentences that succinctly give the main idea of the slide (e.g., don’t use “Methods” as a slide title). Have one major idea per slide. In a YouTube talk on designing effective slides , researcher Michael Alley shows examples of instructive slide titles.
- Decide how you will convey the main idea of the slide (e.g., what figures, photographs, equations, statistics, references, or other elements you will need). The body of the slide should support the slide’s main idea.
- Under each slide title, outline what you want to say, in bullet points.
In sum, for each slide, prepare a title that summarizes its major idea, a list of visual elements, and a summary of the points you will make. Ensure each slide connects to your thesis. If it doesn’t, then you don’t need the slide.
Slides for scientific presentations have three major components: text (including labels and legends), graphics, and equations. Here, we give tips on how to present each of these components.
- Have an informative title slide. Include the names of all coauthors and their affiliations. Include an attractive image relating to your study.
- Make the foreground content of your slides “pop” by using an appropriate background. Slides that have white backgrounds with black text work well for small rooms, whereas slides with black backgrounds and white text are suitable for large rooms.
- The layout of your slides should be simple. Pay attention to how and where you lay the visual and text elements on each slide. It’s tempting to cram information, but you need lots of empty space. Retain space at the sides and bottom of your slides.
- Use sans serif fonts with a font size of at least 20 for text, and up to 40 for slide titles. Citations can be in 14 font and should be included at the bottom of the slide.
- Use bold or italics to emphasize words, not underlines or caps. Keep these effects to a minimum.
- Use concise text . You don’t need full sentences. Convey the essence of your message in as few words as possible. Write down what you’d like to say, and then shorten it for the slide. Remove unnecessary filler words.
- Text blocks should be limited to two lines. This will prevent you from crowding too much information on the slide.
- Include names of technical terms in your talk slides, especially if they are not familiar to everyone in the audience.
- Proofread your slides. Typos and grammatical errors are distracting for your audience.
- Include citations for the hypotheses or observations of other scientists.
- Good figures and graphics are essential to sustain audience interest. Use graphics and photographs to show the experiment or study system in action and to explain abstract concepts.
- Don’t use figures straight from your paper as they may be too detailed for your talk, and details like axes may be too small. Make new versions if necessary. Make them large enough to be visible from the back of the room.
- Use graphs to show your results, not tables. Tables are difficult for your audience to digest! If you must present a table, keep it simple.
- Label the axes of graphs and indicate the units. Label important components of graphics and photographs and include captions. Include sources for graphics that are not your own.
- Explain all the elements of a graph. This includes the axes, what the colors and markers mean, and patterns in the data.
- Use colors in figures and text in a meaningful, not random, way. For example, contrasting colors can be effective for pointing out comparisons and/or differences. Don’t use neon colors or pastels.
- Use thick lines in figures, and use color to create contrasts in the figures you present. Don’t use red/green or red/blue combinations, as color-blind audience members can’t distinguish between them.
- Arrows or circles can be effective for drawing attention to key details in graphs and equations. Add some text annotations along with them.
- Write your summary and conclusion slides using graphics, rather than showing a slide with a list of bullet points. Showing some of your results again can be helpful to remind the audience of your message.
- If your talk has equations, take time to explain them. Include text boxes to explain variables and mathematical terms, and put them under each term in the equation.
- Combine equations with a graphic that shows the scientific principle, or include a diagram of the mathematical model.
- Use animations judiciously. They are helpful to reveal complex ideas gradually, for example, if you need to make a comparison or contrast or to build a complicated argument or figure. For lists, reveal one bullet point at a time. New ideas appearing sequentially will help your audience follow your logic.
- Slide transitions should be simple. Silly ones distract from your message.
- Decide how you will make the transition as you move from one section of your talk to the next. For example, if you spend time talking through details, provide a summary afterward, especially in a long talk. Another common tactic is to have a “home slide” that you return to multiple times during the talk that reinforces your main idea or message. In her YouTube talk on designing effective scientific presentations , Stanford biologist Susan McConnell suggests using the approach of home slides to build a cohesive narrative.
To deliver a polished presentation, it is essential to practice it. Here are some tips.
- For your first run-through, practice alone. Pay attention to your narrative. Does your story flow naturally? Do you know how you will start and end? Are there any awkward transitions? Do animations help you tell your story? Do your slides help to convey what you are saying or are they missing components?
- Next, practice in front of your advisor, and/or your peers (e.g., your lab group). Ask someone to time your talk. Take note of their feedback and the questions that they ask you (you might be asked similar questions during your real talk).
- Edit your talk, taking into account the feedback you’ve received. Eliminate superfluous slides that don’t contribute to your takeaway message.
- Practice as many times as needed to memorize the order of your slides and the key transition points of your talk. However, don’t try to learn your talk word for word. Instead, memorize opening and closing statements, and sentences at key junctures in the presentation. Your presentation should resemble a serious but spontaneous conversation with the audience.
- Practicing multiple times also helps you hone the delivery of your talk. While rehearsing, pay attention to your vocal intonations and speed. Make sure to take pauses while you speak, and make eye contact with your imaginary audience.
- Make sure your talk finishes within the allotted time, and remember to leave time for questions. Conferences are particularly strict on run time.
- Anticipate questions and challenges from the audience, and clarify ambiguities within your slides and/or speech in response.
- If you anticipate that you could be asked questions about details but you don’t have time to include them, or they detract from the main message of your talk, you can prepare slides that address these questions and place them after the final slide of your talk.
➡️ More tips for giving scientific presentations
An organized presentation with a clear narrative will help you communicate your ideas effectively, which is essential for engaging your audience and conveying the importance of your work. Taking time to plan and outline your scientific presentation before writing the slides will help you manage your nerves and feel more confident during the presentation, which will improve your overall performance.
A good scientific presentation has an engaging scientific narrative with a memorable take-home message. It has clear, informative slides that enhance what the speaker says. You need to practice your talk many times to ensure you deliver a polished presentation.
First, consider who will attend your presentation, and what you want the audience to learn about your research. Tailor your content to their level of knowledge and interests. Second, create an outline for your presentation, including the key points you want to make and the evidence you will use to support those points. Finally, practice your presentation several times to ensure that it flows smoothly and that you are comfortable with the material.
Prepare an opening that immediately gets the audience’s attention. A common device is a why or a how question, or a statement of a major open problem in your field, but you could also start with a quote, interesting statistic, or case study from your field.
Scientific presentations typically either focus on a single study (e.g., a 15-minute conference presentation) or tell the story of multiple studies (e.g., a PhD defense or 50-minute conference keynote talk). For a single study talk, the structure follows the scientific paper format: Introduction, Methods, Results, Summary, and Conclusion, whereas the format of a talk discussing multiple studies is more complex, but a theme unifies the studies.
Ensure you have one major idea per slide, and convey that idea clearly (through images, equations, statistics, citations, video, etc.). The slide should include a title that summarizes the major point of the slide, should not contain too much text or too many graphics, and color should be used meaningfully.
This page has been archived and is no longer updated
Oral Presentation Structure
Finally, presentations normally include interaction in the form of questions and answers. This is a great opportunity to provide whatever additional information the audience desires. For fear of omitting something important, most speakers try to say too much in their presentations. A better approach is to be selective in the presentation itself and to allow enough time for questions and answers and, of course, to prepare well by anticipating the questions the audience might have.
As a consequence, and even more strongly than papers, presentations can usefully break the chronology typically used for reporting research. Instead of presenting everything that was done in the order in which it was done, a presentation should focus on getting a main message across in theorem-proof fashion — that is, by stating this message early and then presenting evidence to support it. Identifying this main message early in the preparation process is the key to being selective in your presentation. For example, when reporting on materials and methods, include only those details you think will help convince the audience of your main message — usually little, and sometimes nothing at all.
The opening
- The context as such is best replaced by an attention getter , which is a way to both get everyone's attention fast and link the topic with what the audience already knows (this link provides a more audience-specific form of context).
- The object of the document is here best called the preview because it outlines the body of the presentation. Still, the aim of this element is unchanged — namely, preparing the audience for the structure of the body.
- The opening of a presentation can best state the presentation's main message , just before the preview. The main message is the one sentence you want your audience to remember, if they remember only one. It is your main conclusion, perhaps stated in slightly less technical detail than at the end of your presentation.
In other words, include the following five items in your opening: attention getter , need , task , main message , and preview .
Even if you think of your presentation's body as a tree, you will still deliver the body as a sequence in time — unavoidably, one of your main points will come first, one will come second, and so on. Organize your main points and subpoints into a logical sequence, and reveal this sequence and its logic to your audience with transitions between points and between subpoints. As a rule, place your strongest arguments first and last, and place any weaker arguments between these stronger ones.
The closing
After supporting your main message with evidence in the body, wrap up your oral presentation in three steps: a review , a conclusion , and a close . First, review the main points in your body to help the audience remember them and to prepare the audience for your conclusion. Next, conclude by restating your main message (in more detail now that the audience has heard the body) and complementing it with any other interpretations of your findings. Finally, close the presentation by indicating elegantly and unambiguously to your audience that these are your last words.
Starting and ending forcefully
Revealing your presentation's structure.
To be able to give their full attention to content, audience members need structure — in other words, they need a map of some sort (a table of contents, an object of the document, a preview), and they need to know at any time where they are on that map. A written document includes many visual clues to its structure: section headings, blank lines or indentations indicating paragraphs, and so on. In contrast, an oral presentation has few visual clues. Therefore, even when it is well structured, attendees may easily get lost because they do not see this structure. As a speaker, make sure you reveal your presentation's structure to the audience, with a preview , transitions , and a review .
The preview provides the audience with a map. As in a paper, it usefully comes at the end of the opening (not too early, that is) and outlines the body, not the entire presentation. In other words, it needs to include neither the introduction (which has already been delivered) nor the conclusion (which is obvious). In a presentation with slides, it can usefully show the structure of the body on screen. A slide alone is not enough, however: You must also verbally explain the logic of the body. In addition, the preview should be limited to the main points of the presentation; subpoints can be previewed, if needed, at the beginning of each main point.
Transitions are crucial elements for revealing a presentation's structure, yet they are often underestimated. As a speaker, you obviously know when you are moving from one main point of a presentation to another — but for attendees, these shifts are never obvious. Often, attendees are so involved with a presentation's content that they have no mental attention left to guess at its structure. Tell them where you are in the course of a presentation, while linking the points. One way to do so is to wrap up one point then announce the next by creating a need for it: "So, this is the microstructure we observe consistently in the absence of annealing. But how does it change if we anneal the sample at 450°C for an hour or more? That's my next point. Here is . . . "
Similarly, a review of the body plays an important double role. First, while a good body helps attendees understand the evidence, a review helps them remember it. Second, by recapitulating all the evidence, the review effectively prepares attendees for the conclusion. Accordingly, make time for a review: Resist the temptation to try to say too much, so that you are forced to rush — and to sacrifice the review — at the end.
Ideally, your preview, transitions, and review are well integrated into the presentation. As a counterexample, a preview that says, "First, I am going to talk about . . . , then I will say a few words about . . . and finally . . . " is self-centered and mechanical: It does not tell a story. Instead, include your audience (perhaps with a collective we ) and show the logic of your structure in view of your main message.
This page appears in the following eBook
Topic rooms within Scientific Communication

Within this Subject (22)
- Communicating as a Scientist (3)
- Papers (4)
- Correspondence (5)
- Presentations (4)
- Conferences (3)
- Classrooms (3)
Other Topic Rooms
- Gene Inheritance and Transmission
- Gene Expression and Regulation
- Nucleic Acid Structure and Function
- Chromosomes and Cytogenetics
- Evolutionary Genetics
- Population and Quantitative Genetics
- Genes and Disease
- Genetics and Society
- Cell Origins and Metabolism
- Proteins and Gene Expression
- Subcellular Compartments
- Cell Communication
- Cell Cycle and Cell Division
© 2014 Nature Education
- Press Room |
- Terms of Use |
- Privacy Notice |

Visual Browse

- AMERICAN SOCIETY OF PLASTIC SURGEONS
- PLASTIC & RECONSTRUCTIVE SURGERY
- PRS GLOBAL OPEN
- ASPS EDUCATION NETWORK
- Subscribe to journal Subscribe
- Get new issue alerts Get alerts
- Become an ASPS Member
Secondary Logo
Journal logo.
Colleague's E-mail is Invalid
Your message has been successfully sent to your colleague.
Save my selection
The Art of a Scientific Presentation: Tips from Steve Jobs
Horiuchi, Sakura B.S.; Nasser, Jacob S. B.S.; Chung, Kevin C. M.D., M.S.
Washington, D.C.; and Ann Arbor, Mich.
From the George Washington School of Medicine and Health Sciences; and Section of Plastic Surgery, University of Michigan Medical School.
Received for publication April 27, 2021; accepted October 13, 2021.
Disclosure: Dr. Chung receives funding from the National Institutes of Health and book royalties from Wolters Kluwer and Elsevier. The remaining authors have no financial interests to declare .
Kevin C. Chung, M.D., M.S., Comprehensive Hand Center, Michigan Medicine, 1500 East Medical Center Drive, 2130 Taubman Center, SPC 5340, Ann Arbor, Mich. 48109-5340, [email protected] , Twitter: @kecchung
Presentations are commonly used to share knowledge in all scientific fields, particularly in medicine, where they play an integral role in medical school and graduate medical education as well as in medical society conferences and continuing medical education activities. Though the use of presentations as learning tools has become universal, how often are they truly effective ? Virtually everyone has experienced the jaw-clenching cringe while suffering through a particularly bad presentation, just as everyone has, one hopes, appreciated the vitality, insight, and inspiration that accompany a carefully constructed, well-delivered presentation. Creating effective presentations is a skill, a form of art, and an engineering process that requires time and practice; it is not an intuitive process.
Effective presentations begin by establishing a clear objective and a rapport with the audience. To be a physician is to be a teacher, and one must diagnose the audience’s needs. It is often helpful to acknowledge the inherent authoritarian structure of presenting, in which the speaker serves as commander and the audience as subordinates receiving the instruction. However, the manner in which the speaker approaches this relationship ultimately impacts the course and effectiveness of the presentation. In and of itself, a presentation simply delivers information; however, an effective presentation goes above and beyond to inspire and empower the audience receiving the message. The late tech titan Steve Jobs, cofounder and former chief executive officer of Apple, Inc., was known for delivering dynamic presentations that ultimately reinforced the success of the company and its products. Though many linked the quality of his presentations to his charisma, Jobs consciously incorporated effective presentation skills throughout his lectures, as described in the book Presentation Secrets of Steve Jobs , 1 many of which are translatable to medical education and highlighted in this article.
Kosslyn et al. conducted an empirical analysis of the psychological principles that underlie presentation flaws and failures, finding that communication principles were violated to a similar extent across different fields. 2 Furthermore, Garner and Alley, 3 and others, 4 , 5 have found that how a presentation is designed has the power to inhibit or support its effectiveness. Nonetheless, there is no recent research that examines the quality and effectiveness of presentations used in the field of medicine. Existing studies shed light on single presentation components, such as color themes or fonts, 6 , 7 but this research does not provide comprehensive guidance to help medical researchers and health care providers develop quality medical presentations.
A poorly constructed presentation detracts from its value. In this article, our goal is to identify strategies for creating effective scientific presentations for medical school lectures, resident lectures, surgical rounds, and medical conferences. We will provide examples specific to plastic surgery to better guide researchers and medical educators in the specialty in developing presentations. The strategies discussed come from the current literature on effective presentation strategies and the experiences of our research team. We aim to establish a comprehensive list to aid in creating a methodical approach for presenters to evaluate their own presentations to ensure a standard of quality and effectiveness.
PREPARATION
Constructing a story.
Creating an effective presentation is like taking a road trip, thus the first step is to create a clear map to your destination—and identify the landmarks you and your audience will pass along the way. A presenter must give clear instructions to the audience, which can be in the format of an outline or a story. Ultimately, one needs to know why this road trip will be worthwhile; in other words, the purpose and impact of the presentation should be clearly expressed.
Simple stories, whether in the form of a metaphor or case presentation, create an organizational framework that makes it easier for the audience to follow along. Creating a narrative—for surgeons, perhaps a story of a challenging case or difficult situation—will help the audience associate new information with preexisting mental representations. Graesser et al. examined whether text genre (i.e., narrative or expository prose) influenced recall of the information presented. 8 The authors found that information presented in the context of a narrative improves memory, as stories were remembered better than expository passages. A study by Wolfe and Mienko examined the effect of prior knowledge as a function of memory and learning in a narrative or expository text genre. 9 They found that prior knowledge related to greater recall of expository texts but not for narrative genre. Subjects with more prior knowledge had better recall of the expository text information and vice versa. 9 In other words, people with a preexisting level of understanding of a topic will remember a presentation better than someone without. Creating associations between a familiar narrative and a complex concept helps the audience learn, independent of their prior level of knowledge.
Identify the “So, What?”
It is necessary for presenters to build on a persuasive argument. The presenter has a duty to explain why the topic matters and why the learner should care. Adult audiences are more stimulated when the “why” is explicit and pertinent to them. An effective means of accomplishing this is to share a “passion statement.” A moment of being vulnerable and sharing the origin of your passion for a topic builds rapport with the audience while striving to inspire them to care about the topic as well. For example, in a presentation focused on global surgical efforts, the presenter may share some of his or her most rewarding and challenging experiences as well as the impact the operations have had on the children treated. Another way to build a persuasive argument is to frame it in a problem-solution model, in which the problem should relate to the audience for the information to be relevant and the presentation should offer a solution. For example, a medical school presentation on carpal tunnel syndrome may focus on teaching students about the pathophysiology and treatment that their parents or grandparents may experience. On the other hand, a presentation at a medical conference may focus on innovative surgical techniques and strategies to improve postoperative outcomes and averting complications. Identifying why the topic is pertinent to the audience early in the talk is one of the first steps in preparing an effective presentation.
CHARACTERISTICS OF AN EFFECTIVE PRESENTATION
Once preparation for a presentation is complete, the next step is to create it. We will focus on identifying strategies for an effective presentation for an audience; however, the skills mentioned can be translated to many other models of information sharing. Table 1 summarizes the various strategies that can be used to create an effective presentation. Microsoft PowerPoint (Microsoft Corp., Redmond, Wash.) is the most commonly used software to create presentations.
| Skill | Description | Example(s) |
|---|---|---|
| Outline | Create an outline or another resource to organize the presentation. Include an outline of the talk within the presentation. | A Microsoft Word outline describing the main objectives. |
| Story | Construct a fluid, narrative-like structure to the presentation if possible. | An analogy or metaphor to the complex topic. |
| Identify the “so, what?” | Clearly define the purpose and impact of the presentation. | “This presentation is about global hand surgery. It is important because 30% of the global burden of disease is from surgical conditions.” |
| Headline | Include a headline on each slide that conveys the main message. Each headline should be less than 140 characters and in “subject-verb-object” format when possible. | “Sharing the Stage”; “Substantial Benefit for Surgical Interventions.” |
| Consistency | Use the same font, font size, font color, bullet style, and background color across slides. | The font, icons, and diagrams are the same color theme. |
| Four main points | Only discuss up to four main points on each slide. Stay within 1 to 4 bullet points per slide. | When introducing a study, briefly discuss the author(s), background, methods, and findings. If needed, expand further on the next slide. |
| Word choice | Use simple, clear, concise wording. Aim for fewer words per sentence. | “Improved quality” (simple) versus “discoverability of the richness” (confusing). |
| Relevancy in numbers | Explain the significance and contextualize any numerical value presented within a main point. | Cost-benefit analysis of global plastic and reconstructive surgical efforts: approximately 1720 DALYs averted is equal to a $12,957 benefit per patient. |
| 10-Minute rule | Add a refreshing element (i.e., new topic, guest speaker, video, demonstration) to maintain the audience’s attention every 10 minutes. | Ask a knowledge-checking question at the end of a section. |
| Demonstrations/props | Incorporate a demonstration or prototype when possible. | Three-dimensional virtual models with an augmented reality application. |
| Video clips | Imbed <2-minute video clips into the presentation as a tool to explain complex topics (surgical procedure, testimonial, and so on). | A video of a new surgical technique. |
| Share the spotlight | Introduce, highlight, or show gratitude to others during the presentation (i.e., team members, guest speakers, patient testimonial). | Invite a special guest to a virtual meeting presentation. |
| Rehearsal | Practice, record, time, and refine the presentation with the script in your pocket. | Rehearse with a mock audience without reading off the script and double-check the sound/audio of all the embedded videos. |
| Costume | Dress professionally. |
The presentation should include an outline at the introduction of the presentation. Throughout the presentation, the speaker should reference the outline to remind the audience where they are in the presentation narrative. For example, when presenting on a clinical research study, provide a recurrent slide that presents whether you are discussing the background of the project, methods, results, or conclusions. An outline of the presentation describes the general objectives of the talk while serving as a structure on which to build throughout the presentation.
Each presentation slide should have a headline that describes the topic discussed. A headline decreases the cognitive load placed on the audience by identifying the main point. Alley et al. compared the effects of a short phrase headline to a succinct sentence-structured headline on audience retention of a presentation. 10 The authors found that the average score for students viewing the succinct sentence-structured headline was significantly higher. 10 Specifically, a headline should be in a “subject-verb-object” structure using fewer than 140 characters. When presenting a graph or a table that contains a complex topic, the slide’s headline should summarize the take-home point. For example, when presenting a graph on the economic benefit of plastic and reconstructive global surgical trips, the headline could read “Substantial Economic Benefit for Global Surgery Interventions.” The actual economics may be a complex topic for the average audience if they are not economists themselves, but the main point resides in the simple headline.
Consistency
There should be consistency of formatting throughout the presentation and among the different mediums used to present the same information (e.g., slideshow, poster, oral presentation). One simple font should be used throughout the presentation. In addition, the presenter should keep the font size consistent across all headlines, bullet points, diagrams, and tables. Furthermore, background color and design elements, such as the color of the diagrams, should be the same throughout. 11 Color palettes found online can be used to create a theme in the design of the presentation. Margins to the slides should also be aesthetically consistent, as demonstrated in Figure 1 . If the titles or headlines are of varying sizes, an example of inconsistency, the reader may not recognize that sections are related or exhaust time connecting the key points. Consistency decreases distraction and polishes the delivery of the information.

Visual Appeal
Aspects that influence a presentation’s appeal include font, background color, contrast between color of content and background, symmetry, consistency, and more. Goodhand et al. studied the value of posters at medical meetings and found that audience perception of scientific merit correlates with visual appeal. 12 They found that factors increasing visual appeal included their scientific content, pictures/graphs, and limited use of words. 12 Visual appeal consists of many different aspects, which makes it difficult to discuss specifically each detail. Complex concepts can be simplified by creating visual representations, flow charts, and vector diagrams. Resources to consider may be graphics available in Microsoft Word (Microsoft Corp.), The Noun Project (The Noun Project, Inc., Los Angeles, Calif.), Lucidchart (Lucid Software, Inc., South Jordan, Utah), or FlatIcon (Freepik Company, Malaga, Spain). Figure 2 demonstrates the use of a SmartArt graphic in Microsoft Word to organize information. However, cartoons or videos could distract the audience from the main purpose of the slide and should be weighed carefully. Spending extra time on aesthetic details such as font, background, symmetry, and consistency will improve the slideshow’s visual appeal and professional tone.

Four Main Points
A presenter should limit each major concept to no more than four main ideas. In 2001, Cowan studied the mental storage capacity for short-term memory and found that humans are able to remember approximately four main points. 13 If there are more than four key ideas, the presenter should separate the information, so it is not all included on the same slides. For example, when introducing a research study, the four main points may consist of briefly naming the author(s), methods, findings, and the study’s impact on the current topic. Other noteworthy aspects of the study could be expanded upon in the next slide(s). Keeping within four main points aims to maximize the efficiency and overall effectiveness of each slide for the presenter and audience.
CONSTRUCTION AND DELIVERY
Word choice.
Word choice is the specific vocabulary used by the speaker to convey a message. Text in the presentation should be kept simple, using as few words as possible. Using complicated, lofty words increases lexical density and inflicts a strain on the audience to decipher the meaning of the message while requiring additional work to follow along. Sainsbury examined the effect of lexical density and visual clarity of slides on presentation interpretations. 14 The study found that the presentations with less lexical density, despite worse visual clarity, led to greater audience fluency. 14 Considering word choice and using less dense language is a strategy to improve audience comprehension.
In 2007, Todd Bishop, a reporter for the Seattle Post Intelligencer , compared word choice between Apple’s Steve Jobs and Microsoft’s Bill Gates by running their presentation transcripts through UsingEnglish.com, a language analyzer. 15 The tool examines the average number of words per sentence, lexical density, average number of words with more than three syllables, and the level of education theoretically needed to understand the text. It was found that across all four categories, Jobs scored better than Gates. 15 He spoke more simply, was less abstract, and used fewer words per sentence. For example, where Jobs would say “improved quality,” Gates would say “discoverability of the richness.” If a message is confusing, abstract, or convoluted, the presenter will lose an opportunity to share his or her knowledge. Similar language analyzers are offered online and through Microsoft Word. Specifically, Microsoft Word will provide readability statistics, a feature found within its Spelling and Grammar tool. Based on readability statistics, a presenter can adjust his or her language to ensure it resonates better with the audience.
Relevancy in Numbers
Effective scientific presentations show the topic’s relevance to the audience. In surgical and medical education, numbers are often used to describe the efficacy of a treatment or epidemiology of a condition. In breaking down the meaning of data and placing it into a familiar context, greater meaning is provided to the audience. For example, when conducting an economic analysis of plastic and reconstructive surgical efforts in the developing world, Nasser et al. found that the lose of approximately 1720 disability-adjusted life years was averted. 16 However, they went further to explain that 1720 disability-adjusted life years were equal to a total economic benefit of $9,795,384, the same as $12,957 per patient. 16 As a listener, it may be difficult to comprehend the impact of 1720 disability-adjusted life years without further context, but each audience member can visualize what an extra $13,000 could amount to in their own lives. People are more familiar with the concept of currency than disability-adjusted life years; therefore, placing the numbers in a tangible context enhances understanding and creates a greater impact on the audience.
10-Minute Rule
The 10-Minute Rule states that after 10 minutes, the audience will begin to mentally “check out” or naturally lose focus and interest. Thus, every 10 minutes the presenter should change the pace, welcome questions, or add an energizing moment. This can be in the form of sharing a joke or anecdote (these should be relevant, brief, and appropriate), posing a question to the audience, playing a video (which should always be embedded within the presentation to avoid wasting time and creating distractions), or introducing a demonstration. Tanveer et al. studied how narrative trajectories influence audience perception by analyzing the transcripts of more than 2000 TED talks. 17 They found that variations in the narratives were important to hold the motivation and attention of the audience, and presentations without variations were more likely to receive lower ratings. 17 It is common for a presenter to begin and end a presentation without a break or change in pace, but the 10-minute rule is an objective marker presenters can use to avoid delivering a monologue presentation.
Demonstrations/Props
Using demonstrations and props, such as sharing a video of an operative technique, using an anatomical model to discuss specific physiology, or bringing a tool or technology relevant to the topic, is a way to increase engagement in a presentation. For example, Atherton et al. described the use of the Aurasma application, formerly available in the iTunes App Store and Google Play Store, which connected anyone with the app to three-dimensional medical models via QR code. 18 The presenter could create a demonstration of a surgical technique via Aurasma, and the audience was able to view the demonstration from a presentation on their personal smart devices. 18 Demonstrations and props are strategies to keep in mind for the 10-minute rule. Scientific presentations rely heavily on auditory and visual learning, so props offer an alternative way of learning, kinesthetic learning. Although it may be difficult to incorporate props into every presentation, especially as online-based presentations become more popular, apps such as Aurasma may be a useful tool.
Video Clips
Procedures in surgical education can be described through text and pictures, but utilizing a short video clip to demonstrate a procedure enhances the presentation and further reinforces the prior information. Vara et al. described their experiences using the GoPro HERO systems (GoPro, Inc., San Mateo, Calif.) to record video of hand and upper extremity procedures as a technique to capture, analyze, and share surgical experiences. 19 Video clips incorporate motion into a presentation and may help convey complex visual-spatial topics while offering the presenter a moment to share the spotlight and an opportunity to take a break. Nonetheless, it is important to ensure that videos are of reasonable length, as this can influence likability of a video or presentation. 20 Embedding the video into your presentation, rather than switching applications, may save time and make the transition more comfortable for the audience.
Sharing the Spotlight
Sharing the spotlight means incorporating others into a presentation rather than a speaker delivering a monologue. Sharing the spotlight can take the form of simply acknowledging and thanking other team members, or presenters may include guest speakers or specialists in a lecture to share their knowledge. Steve Jobs would often share the spotlight by inviting famous people, such as musician John Mayer, or even a doppelgänger to lead a demonstration. 1 A benefit of online meeting platforms, such as Zoom (Zoom Video Communications, San Jose, Calif.) or Webex (Cisco Systems, Inc., Milpitas, Calif.), is that they make it is easier for special guest speakers to join remotely for a portion of the talk. In addition, testimonials from experts or patients are a way of sharing the spotlight in scientific presentations and offer an engaging opportunity to create a memorable moment.
REFINING THE PRESENTATION
After the presentation has been physically created, rehearsal is critical. As in a theatre rehearsal, there should be a script, costume, and many practices. A script should direct the presenter in how to discuss the information on the slide. Ultimately, with practice, the presenter should not rely on the script during the presentation but should keep a copy in a pocket only to use as a last resort. The comfort of having this security blanket invariably puts the speaker at rest. A presenter should not read every single word on the slide verbatim, but rather explain and verbally bring the information to life. It is essential that the presenter practice the entire presentation, preferably recording the rehearsal to assess body language, verbal fillers, and subconscious nervous habits. Feelings of nervousness and anxiety about public speaking are common.
Hansen et al. provide information on techniques for delivering effective lectures to ensure that surgeons speak as well as they operate. 21 The authors describe the importance of understanding and acknowledging that everyone experiences a level of anxiety when presenting. 21 Physicians are taught to anticipate complications related to a procedure or condition, thus an effective presenter will also learn to anticipate certain traits, such as speaking too fast, anxiety, and nervousness. Acknowledging the humanity in those emotions and practicing using the techniques described will decrease nervousness, boost confidence, and enhance the effectiveness of the presentation.
The presenter should dress to match the expected professional role he or she is representing. Some say dress for success, but perhaps a better takeaway is to never be underdressed. This is not to say that every presenter should wear the most formal attire, but rather to consider the conscious and subconscious effect a speaker’s outfit may have on the audience’s perception of the presenter. As in scientific posters, those who look sharp are taken more seriously. Feeling confident in an outfit may also translate to greater self-assuredness on the stage. Ruetzler et al. performed a conjoint analysis of personal presentation attributes and found that grooming and professional attire were most notable in shaping favorable perceptions. 22 Furthermore, Keegan and Bannister studied the effect of color-coordinated attire with poster presentation popularity. 23 They found a significantly higher number of visitors for posters of presenters with coordinated rather than clashing attire. 23 The two studies suggest that there are benefits to dressing professionally, and that attire does affect how the presentation is received.
CONCLUSIONS
After the hard work of preparing, constructing, and refining a presentation, the final ingredient for delivering an effective presentation is personality: sprinkle in jokes and anecdotes while demonstrating both confidence and humility throughout to make the presentation representative of the presenter. Creating the presentation should be fun; if the presenter does not enjoy the presentation, there is no way the audience will either. Humor and stories should be kept professional relative to the level of the presentation but should still aim to keep the audience engaged with light and relatable moments. The skills highlighted in this article will help presenters create effective scientific presentations. Furthermore, future research identifying the strengths and weaknesses in plastic surgery presentations can help improve the quality of the presentations in the field.
- Cited Here |
- Google Scholar
- + Favorites
- View in Gallery
Readers Of this Article Also Read
Finding meaning in life, dealing with difficult people and why it matters, tips and tricks for facial toxin injections with illustrated anatomy, the art of procrastination, acute burn care.
- Enterprise Custom Courses
- Build Your Own Courses
- Help Center
- Clinical Trial Recruitment
- Pharmaceutical Marketing
- Health Department Resources
- Patient Education
- Research Presentation
- Remote Monitoring
- Health Literacy & SciComm
- Student Education & Higher Ed
- Individual Learning
- Member Directory
- Community Chats on Slack
- SciComm Program
- The Story-Driven Method
- The Instructional Method
How to Create an Engaging Science Presentation: A Quick Guide
We’ve all been there – rushing to put slides together for an upcoming talk, filling them with bullet points and text that we want to remember to cover. We aren’t sure exactly what the audience will want to know or how much detail to include, so we default to putting ALL the details in that might be needed. But such efforts often result in presentations that are too long, too confusing, and difficult for both ourselves and our audiences to navigate.
Today I gave a workshop to public health graduate students about how to create more engaging science presentations and talks. I’ve summarized the main takeaways below. I hope this quick guide will be useful to you as you prepare for your next science talk or presentation!

The best science talks start with a process of simplifying – peeling back the layers of information and detail to get at the one core idea that you want to communicate. Over the course of your talk, you may present 2-3 key messages that relate to, demonstrate, provide examples of or underpin this idea. (Three is a nice round number of messages or takeaways that your audience will be able to remember!) But stick to one big idea. Trying to communicate too much in a presentation or talk will overwhelm your audience, and they may walk away without a good memory of any of the ideas you presented.
Once you’ve settled on your one big idea, you can develop a theme that will pervade every aspect of your talk. This theme might be a defining element of your big idea and something that can tie all of your data or talking points together. Your theme should inform the examples, anecdotes and analogies that you use to make the science concepts you present more accessible. It should also inform your slides’ very design – the colors, visuals, layout and content flow.
If you have trouble identifying your big idea and your theme, you can try using what scientist and science author Randy Olson calls the “Dobzhansky Template.” Fill in the blanks of this statement: “ Nothing in [your talk topic, research topic or big idea] makes sense, except in the light of [your theme!] .”
Here’s an example for you: “Nothing in the creation of engaging science talks makes sense except in the light of people’s need for personal connection .” With this statement, I’m identifying a key aspect, a unifying theme, for my talk (or blog post) on how to create engaging science talks. We all crave personal connection. Yes, even to the speakers of science talks we listen to! What does this mean in terms of what we want or expect from these speakers? It means we want storytelling . We want to hear their stories, know their background, hear about their struggles and triumphs! We want to be able to step into their shoes and see what they saw. We want to interact with them.
")
Tell a Story
Narratives engage more than facts. By telling a story , using suspense and characters to pull people through your presentation, you will capture and keep their attention for longer. People also remember information presented in a story format better than they do information presented as disparate facts or bullet points.
“Story is a pull strategy. If your story is good enough, people—of their own free will—come to the conclusion they can trust you and the message you bring.” – Annette Simmons
Storytelling is a powerful science communication tool. In storytelling, both the storyteller and the listener or reader contribute to the story’s meaning through their interpretations, feelings and emotions. Liz Neeley, former executive director of The Story Collider, once said: “Science communicators frequently fail to understand that a feeling is almost never conquered with a fact.”
Stories are exciting. They elicit emotions. They help foster a personal connection between the storyteller and the listener, and a connection between the listener and the topic, characters or ideas presented in the story.
But what IS a story? As humans, we excel at recognizing a story when we hear one, but defining a story’s key characteristics is more difficult than you might think. If you ask anyone to explain what makes for a good story, they likely will have a hard time explaining it.
In her fantastic book Wired for Story , Lisa Cron starts by explaining what a story is NOT.
It is not plot – that is just what happens in the story.
It is not characters , although characters are critical components of storytelling, even if they are not human or even alive. Cells and molecules could be the characters of your next science talk!
It is not suspense or conflict , although these elements get us closer to what defines a good story. But just because your talk builds suspense does not necessarily make it an engaging story. What if we don’t identify with your characters?
The truth is that the key defining element of story is internal change . Think of how every Aesop’s fable communicates a moral or lesson that the main character learned from some journey. As Lisa Cron writes, “A story is how what happens affects someone who is trying to achieve what turns out to be a difficult goal, and how he or she changes as a result.” The key here is the part about “how he or she changes.” A great story calls characters to a great adventure, but the adventure doesn’t leave them just as they were before. The adventure – like a scientific discovery that took years of experimentation (and failure) in the lab – leads to an internal change, in perspective or knowledge or behavior, as a result of conflicts overcome.
This is the secret of storytelling. A story asks characters to change and grow, and so the scientists in our stories must change and grow, discover new things about themselves and overcome challenges that force them to adopt new perspectives. So if you are giving a science talk about your own research, this might look like telling stories about your own struggles, growths and changes in perspective as you made your journey to discovery!
How can you bring a story of internal change to your next science presentation or talk?
What is one of the most common mistakes people make when creating slides to accompany a science talk? They use WAY too much text, and they use visuals as an afterthought. Worse yet, they use visuals that are copyrighted without attribution. They use stock imagery that reinforces stereotypes. They use visuals pasted from a Google search that don’t help the viewer understand or interpret what is said or written on the slides.
Visuals can be a powerful tool to advance audience learning or engagement during your science talks. You can use visuals to provide concrete examples of concepts you are talking about. You can use imagery that sparks thought or emotion. You can use visuals that reinforce your BIG idea or the theme of your talk, in a way that will make your talk more memorable for them. Yes, you might need to use a scientific figure, graph, chart or data visualization here and there if you are giving a more technical scientific talk, and that’s ok as long as you also talk the audience through this visual. Don’t assume they can listen to you talk about something different while also taking the time to interpret the message in this graphic or visualization – they can’t.
The same goes for text. You are demanding way too much brainpower of your audience to expect them to listen to you while also reading your slides. And if you are saying the same things as are written on your slides, they will grow bored. Simple visual aids used the right way, however, can delight your audience and help them better understand what you are saying.
Consider working with a professional artist or designer to create visuals for the slides of your next science talk! They excel at creating visuals that capture people’s attention, curiosity and emotions. And if you do this, your visuals will perfectly match what you are trying to communicate in words, boosting learning and understanding.
Foster Interaction
A good science talk or presentation gives the audience opportunities to interact with you! This could be through questions, activities, discussions or thought experiments. Let the audience explore your data or interpretations with you. They will be more engaged and likely trust you more as a result, because they felt heard .
")
Personalize!
Most great science speakers make themselves vulnerable in a way – they tell personal stories of struggles, growth and discovery. Personal stories are engaging. They also help the audience care about what the speaker has to say.
It can be scary to talk about yourself, especially for a scientist who has been trained to focus solely on the data. But the humans listening to your talk or presentation crave human connection. They will also grab hold of anything that helps them better relate to you. Give them that in the form of personal stories of obstacles overcome, of personal lessons learned, of work-life balance, of your fears and passions. Better yet, tell personal stories that reinforce your theme and show the power of your big idea!
")
Do you have other strategies for how you make your science talks and presentations more engaging? Let me know in the comments below!
Share This Story, Choose Your Platform!
About the author: paige jarreau.

Related Posts

Una actividad práctica para ayudarte a comunicar la ciencia de forma culturalmente relevante

The Power of SciComm in Combatting Mental Health Stigma
Make your scicomm more culturally relevant: a practice activity.

Communicating About Postpartum Depression

Science Communication and Genetic Counselling

Creating Analogies: Elevate Your Science with a Lifeology Course

An official website of the United States government
The .gov means it’s official. Federal government websites often end in .gov or .mil. Before sharing sensitive information, make sure you’re on a federal government site.
The site is secure. The https:// ensures that you are connecting to the official website and that any information you provide is encrypted and transmitted securely.
- Publications
- Account settings
Preview improvements coming to the PMC website in October 2024. Learn More or Try it out now .
- Advanced Search
- Journal List
- PLoS Comput Biol
- v.17(12); 2021 Dec
Ten simple rules for effective presentation slides
Kristen m. naegle.
Biomedical Engineering and the Center for Public Health Genomics, University of Virginia, Charlottesville, Virginia, United States of America
Introduction
The “presentation slide” is the building block of all academic presentations, whether they are journal clubs, thesis committee meetings, short conference talks, or hour-long seminars. A slide is a single page projected on a screen, usually built on the premise of a title, body, and figures or tables and includes both what is shown and what is spoken about that slide. Multiple slides are strung together to tell the larger story of the presentation. While there have been excellent 10 simple rules on giving entire presentations [ 1 , 2 ], there was an absence in the fine details of how to design a slide for optimal effect—such as the design elements that allow slides to convey meaningful information, to keep the audience engaged and informed, and to deliver the information intended and in the time frame allowed. As all research presentations seek to teach, effective slide design borrows from the same principles as effective teaching, including the consideration of cognitive processing your audience is relying on to organize, process, and retain information. This is written for anyone who needs to prepare slides from any length scale and for most purposes of conveying research to broad audiences. The rules are broken into 3 primary areas. Rules 1 to 5 are about optimizing the scope of each slide. Rules 6 to 8 are about principles around designing elements of the slide. Rules 9 to 10 are about preparing for your presentation, with the slides as the central focus of that preparation.
Rule 1: Include only one idea per slide
Each slide should have one central objective to deliver—the main idea or question [ 3 – 5 ]. Often, this means breaking complex ideas down into manageable pieces (see Fig 1 , where “background” information has been split into 2 key concepts). In another example, if you are presenting a complex computational approach in a large flow diagram, introduce it in smaller units, building it up until you finish with the entire diagram. The progressive buildup of complex information means that audiences are prepared to understand the whole picture, once you have dedicated time to each of the parts. You can accomplish the buildup of components in several ways—for example, using presentation software to cover/uncover information. Personally, I choose to create separate slides for each piece of information content I introduce—where the final slide has the entire diagram, and I use cropping or a cover on duplicated slides that come before to hide what I’m not yet ready to include. I use this method in order to ensure that each slide in my deck truly presents one specific idea (the new content) and the amount of the new information on that slide can be described in 1 minute (Rule 2), but it comes with the trade-off—a change to the format of one of the slides in the series often means changes to all slides.

Top left: A background slide that describes the background material on a project from my lab. The slide was created using a PowerPoint Design Template, which had to be modified to increase default text sizes for this figure (i.e., the default text sizes are even worse than shown here). Bottom row: The 2 new slides that break up the content into 2 explicit ideas about the background, using a central graphic. In the first slide, the graphic is an explicit example of the SH2 domain of PI3-kinase interacting with a phosphorylation site (Y754) on the PDGFR to describe the important details of what an SH2 domain and phosphotyrosine ligand are and how they interact. I use that same graphic in the second slide to generalize all binding events and include redundant text to drive home the central message (a lot of possible interactions might occur in the human proteome, more than we can currently measure). Top right highlights which rules were used to move from the original slide to the new slide. Specific changes as highlighted by Rule 7 include increasing contrast by changing the background color, increasing font size, changing to sans serif fonts, and removing all capital text and underlining (using bold to draw attention). PDGFR, platelet-derived growth factor receptor.
Rule 2: Spend only 1 minute per slide
When you present your slide in the talk, it should take 1 minute or less to discuss. This rule is really helpful for planning purposes—a 20-minute presentation should have somewhere around 20 slides. Also, frequently giving your audience new information to feast on helps keep them engaged. During practice, if you find yourself spending more than a minute on a slide, there’s too much for that one slide—it’s time to break up the content into multiple slides or even remove information that is not wholly central to the story you are trying to tell. Reduce, reduce, reduce, until you get to a single message, clearly described, which takes less than 1 minute to present.
Rule 3: Make use of your heading
When each slide conveys only one message, use the heading of that slide to write exactly the message you are trying to deliver. Instead of titling the slide “Results,” try “CTNND1 is central to metastasis” or “False-positive rates are highly sample specific.” Use this landmark signpost to ensure that all the content on that slide is related exactly to the heading and only the heading. Think of the slide heading as the introductory or concluding sentence of a paragraph and the slide content the rest of the paragraph that supports the main point of the paragraph. An audience member should be able to follow along with you in the “paragraph” and come to the same conclusion sentence as your header at the end of the slide.
Rule 4: Include only essential points
While you are speaking, audience members’ eyes and minds will be wandering over your slide. If you have a comment, detail, or figure on a slide, have a plan to explicitly identify and talk about it. If you don’t think it’s important enough to spend time on, then don’t have it on your slide. This is especially important when faculty are present. I often tell students that thesis committee members are like cats: If you put a shiny bauble in front of them, they’ll go after it. Be sure to only put the shiny baubles on slides that you want them to focus on. Putting together a thesis meeting for only faculty is really an exercise in herding cats (if you have cats, you know this is no easy feat). Clear and concise slide design will go a long way in helping you corral those easily distracted faculty members.
Rule 5: Give credit, where credit is due
An exception to Rule 4 is to include proper citations or references to work on your slide. When adding citations, names of other researchers, or other types of credit, use a consistent style and method for adding this information to your slides. Your audience will then be able to easily partition this information from the other content. A common mistake people make is to think “I’ll add that reference later,” but I highly recommend you put the proper reference on the slide at the time you make it, before you forget where it came from. Finally, in certain kinds of presentations, credits can make it clear who did the work. For the faculty members heading labs, it is an effective way to connect your audience with the personnel in the lab who did the work, which is a great career booster for that person. For graduate students, it is an effective way to delineate your contribution to the work, especially in meetings where the goal is to establish your credentials for meeting the rigors of a PhD checkpoint.
Rule 6: Use graphics effectively
As a rule, you should almost never have slides that only contain text. Build your slides around good visualizations. It is a visual presentation after all, and as they say, a picture is worth a thousand words. However, on the flip side, don’t muddy the point of the slide by putting too many complex graphics on a single slide. A multipanel figure that you might include in a manuscript should often be broken into 1 panel per slide (see Rule 1 ). One way to ensure that you use the graphics effectively is to make a point to introduce the figure and its elements to the audience verbally, especially for data figures. For example, you might say the following: “This graph here shows the measured false-positive rate for an experiment and each point is a replicate of the experiment, the graph demonstrates …” If you have put too much on one slide to present in 1 minute (see Rule 2 ), then the complexity or number of the visualizations is too much for just one slide.
Rule 7: Design to avoid cognitive overload
The type of slide elements, the number of them, and how you present them all impact the ability for the audience to intake, organize, and remember the content. For example, a frequent mistake in slide design is to include full sentences, but reading and verbal processing use the same cognitive channels—therefore, an audience member can either read the slide, listen to you, or do some part of both (each poorly), as a result of cognitive overload [ 4 ]. The visual channel is separate, allowing images/videos to be processed with auditory information without cognitive overload [ 6 ] (Rule 6). As presentations are an exercise in listening, and not reading, do what you can to optimize the ability of the audience to listen. Use words sparingly as “guide posts” to you and the audience about major points of the slide. In fact, you can add short text fragments, redundant with the verbal component of the presentation, which has been shown to improve retention [ 7 ] (see Fig 1 for an example of redundant text that avoids cognitive overload). Be careful in the selection of a slide template to minimize accidentally adding elements that the audience must process, but are unimportant. David JP Phillips argues (and effectively demonstrates in his TEDx talk [ 5 ]) that the human brain can easily interpret 6 elements and more than that requires a 500% increase in human cognition load—so keep the total number of elements on the slide to 6 or less. Finally, in addition to the use of short text, white space, and the effective use of graphics/images, you can improve ease of cognitive processing further by considering color choices and font type and size. Here are a few suggestions for improving the experience for your audience, highlighting the importance of these elements for some specific groups:
- Use high contrast colors and simple backgrounds with low to no color—for persons with dyslexia or visual impairment.
- Use sans serif fonts and large font sizes (including figure legends), avoid italics, underlining (use bold font instead for emphasis), and all capital letters—for persons with dyslexia or visual impairment [ 8 ].
- Use color combinations and palettes that can be understood by those with different forms of color blindness [ 9 ]. There are excellent tools available to identify colors to use and ways to simulate your presentation or figures as they might be seen by a person with color blindness (easily found by a web search).
- In this increasing world of virtual presentation tools, consider practicing your talk with a closed captioning system capture your words. Use this to identify how to improve your speaking pace, volume, and annunciation to improve understanding by all members of your audience, but especially those with a hearing impairment.
Rule 8: Design the slide so that a distracted person gets the main takeaway
It is very difficult to stay focused on a presentation, especially if it is long or if it is part of a longer series of talks at a conference. Audience members may get distracted by an important email, or they may start dreaming of lunch. So, it’s important to look at your slide and ask “If they heard nothing I said, will they understand the key concept of this slide?” The other rules are set up to help with this, including clarity of the single point of the slide (Rule 1), titling it with a major conclusion (Rule 3), and the use of figures (Rule 6) and short text redundant to your verbal description (Rule 7). However, with each slide, step back and ask whether its main conclusion is conveyed, even if someone didn’t hear your accompanying dialog. Importantly, ask if the information on the slide is at the right level of abstraction. For example, do you have too many details about the experiment, which hides the conclusion of the experiment (i.e., breaking Rule 1)? If you are worried about not having enough details, keep a slide at the end of your slide deck (after your conclusions and acknowledgments) with the more detailed information that you can refer to during a question and answer period.
Rule 9: Iteratively improve slide design through practice
Well-designed slides that follow the first 8 rules are intended to help you deliver the message you intend and in the amount of time you intend to deliver it in. The best way to ensure that you nailed slide design for your presentation is to practice, typically a lot. The most important aspects of practicing a new presentation, with an eye toward slide design, are the following 2 key points: (1) practice to ensure that you hit, each time through, the most important points (for example, the text guide posts you left yourself and the title of the slide); and (2) practice to ensure that as you conclude the end of one slide, it leads directly to the next slide. Slide transitions, what you say as you end one slide and begin the next, are important to keeping the flow of the “story.” Practice is when I discover that the order of my presentation is poor or that I left myself too few guideposts to remember what was coming next. Additionally, during practice, the most frequent things I have to improve relate to Rule 2 (the slide takes too long to present, usually because I broke Rule 1, and I’m delivering too much information for one slide), Rule 4 (I have a nonessential detail on the slide), and Rule 5 (I forgot to give a key reference). The very best type of practice is in front of an audience (for example, your lab or peers), where, with fresh perspectives, they can help you identify places for improving slide content, design, and connections across the entirety of your talk.
Rule 10: Design to mitigate the impact of technical disasters
The real presentation almost never goes as we planned in our heads or during our practice. Maybe the speaker before you went over time and now you need to adjust. Maybe the computer the organizer is having you use won’t show your video. Maybe your internet is poor on the day you are giving a virtual presentation at a conference. Technical problems are routinely part of the practice of sharing your work through presentations. Hence, you can design your slides to limit the impact certain kinds of technical disasters create and also prepare alternate approaches. Here are just a few examples of the preparation you can do that will take you a long way toward avoiding a complete fiasco:
- Save your presentation as a PDF—if the version of Keynote or PowerPoint on a host computer cause issues, you still have a functional copy that has a higher guarantee of compatibility.
- In using videos, create a backup slide with screen shots of key results. For example, if I have a video of cell migration, I’ll be sure to have a copy of the start and end of the video, in case the video doesn’t play. Even if the video worked, you can pause on this backup slide and take the time to highlight the key results in words if someone could not see or understand the video.
- Avoid animations, such as figures or text that flash/fly-in/etc. Surveys suggest that no one likes movement in presentations [ 3 , 4 ]. There is likely a cognitive underpinning to the almost universal distaste of pointless animations that relates to the idea proposed by Kosslyn and colleagues that animations are salient perceptual units that captures direct attention [ 4 ]. Although perceptual salience can be used to draw attention to and improve retention of specific points, if you use this approach for unnecessary/unimportant things (like animation of your bullet point text, fly-ins of figures, etc.), then you will distract your audience from the important content. Finally, animations cause additional processing burdens for people with visual impairments [ 10 ] and create opportunities for technical disasters if the software on the host system is not compatible with your planned animation.
Conclusions
These rules are just a start in creating more engaging presentations that increase audience retention of your material. However, there are wonderful resources on continuing on the journey of becoming an amazing public speaker, which includes understanding the psychology and neuroscience behind human perception and learning. For example, as highlighted in Rule 7, David JP Phillips has a wonderful TEDx talk on the subject [ 5 ], and “PowerPoint presentation flaws and failures: A psychological analysis,” by Kosslyn and colleagues is deeply detailed about a number of aspects of human cognition and presentation style [ 4 ]. There are many books on the topic, including the popular “Presentation Zen” by Garr Reynolds [ 11 ]. Finally, although briefly touched on here, the visualization of data is an entire topic of its own that is worth perfecting for both written and oral presentations of work, with fantastic resources like Edward Tufte’s “The Visual Display of Quantitative Information” [ 12 ] or the article “Visualization of Biomedical Data” by O’Donoghue and colleagues [ 13 ].
Acknowledgments
I would like to thank the countless presenters, colleagues, students, and mentors from which I have learned a great deal from on effective presentations. Also, a thank you to the wonderful resources published by organizations on how to increase inclusivity. A special thanks to Dr. Jason Papin and Dr. Michael Guertin on early feedback of this editorial.
Funding Statement
The author received no specific funding for this work.
| The term ‘scientific presentation’ used in this course refers to talks that scientists make in order to report their work to the scientific community: how this particular scientist found an important question and discovered a possible answer to that question. Through making such presentations scientists aspire to receive a variety of different feedback –advice, constructive criticism, grant support, job, etc. – to advance their research further. In the first week, we will discuss how scientific presentation differs from other types of presentation. We will watch videos of two presentations that deal with the same content, but differ in presentation style and strategy. We will discuss what are the essential elements that distinguish scientific presentations from other presentations. By learning strategies to present effectively you will be able to achieve the major goal of giving a scientific presentation: sell your work, sell yourself, and ultimately make your own science even better. |
Get in touch
555-555-5555

Limited time offer: 20% off all templates ➞

Scientific Presentation Guide: How to Create an Engaging Research Talk
Creating an effective scientific presentation requires developing clear talking points and slide designs that highlight your most important research results..
Scientific presentations are detailed talks that showcase a research project or analysis results. This comprehensive guide reviews everything you need to know to give an engaging presentation for scientific conferences, lab meetings, and PhD thesis talks. From creating your presentation outline to designing effective slides, the tips in this article will give you the tools you need to impress your scientific peers and superiors.

Step 1. Create a Presentation Outline
The first step to giving a good scientific talk is to create a presentation outline that engages the audience at the start of the talk, highlights only 3-5 main points of your research, and then ends with a clear take-home message. Creating an outline ensures that the overall talk storyline is clear and will save you time when you start to design your slides.
Engage Your Audience
The first part of your presentation outline should contain slide ideas that will gain your audience's attention. Below are a few recommendations for slides that engage your audience at the start of the talk:
- Create a slide that makes connects your data or presentation information to a shared purpose, such as relevance to solving a medical problem or fundamental question in your field of research
- Create slides that ask and invite questions
- Use humor or entertainment

Identify Clear Main Points
After writing down your engagement ideas, the next step is to list the main points that will become the outline slide for your presentation. A great way to accomplish this is to set a timer for five minutes and write down all of the main points and results or your research that you want to discuss in the talk. When the time is up, review the points and select no more than three to five main points that create your talk outline. Limiting the amount of information you share goes a long way in maintaining audience engagement and understanding.

Create a Take-Home Message
And finally, you should brainstorm a single take-home message that makes the most important main point stand out. This is the one idea that you want people to remember or to take action on after your talk. This can be your core research discovery or the next steps that will move the project forward.
Step 2. Choose a Professional Slide Theme
After you have a good presentation outline, the next step is to choose your slide colors and create a theme. Good slide themes use between two to four main colors that are accessible to people with color vision deficiencies. Read this article to learn more about choosing the best scientific color palettes .
You can also choose templates that already have an accessible color scheme. However, be aware that many PowerPoint templates that are available online are too cheesy for a scientific audience. Below options to download professional scientific slide templates that are designed specifically for academic conferences, research talks, and graduate thesis defenses.

Step 3. Design Your Slides
Designing good slides is essential to maintaining audience interest during your scientific talk. Follow these four best practices for designing your slides:
- Keep it simple: limit the amount of information you show on each slide
- Use images and illustrations that clearly show the main points with very little text.
- Read this article to see research slide example designs for inspiration
- When you are using text, try to reduce the scientific jargon that is unnecessary. Text on research talk slides needs to be much more simple than the text used in scientific publications (see example below).
- Use appear/disappear animations to break up the details into smaller digestible bites
- Sign up for the free presentation design course to learn PowerPoint animation tricks

Scientific Presentation Design Summary
All of the examples and tips described in this article will help you create impressive scientific presentations. Below is the summary of how to give an engaging talk that will earn respect from your scientific community.
Step 1. Draft Presentation Outline. Create a presentation outline that clearly highlights the main point of your research. Make sure to start your talk outline with ideas to engage your audience and end your talk with a clear take-home message.
Step 2. Choose Slide Theme. Use a slide template or theme that looks professional, best represents your data, and matches your audience's expectations. Do not use slides that are too plain or too cheesy.
Step 3. Design Engaging Slides. Effective presentation slide designs use clear data visualizations and limits the amount of information that is added to each slide.
And a final tip is to practice your presentation so that you can refine your talking points. This way you will also know how long it will take you to cover the most essential information on your slides. Thank you for choosing Simplified Science Publishing as your science communication resource and good luck with your presentations!
Interested in free design templates and training?
Explore scientific illustration templates and courses by creating a Simplified Science Publishing Log In. Whether you are new to data visualization design or have some experience, these resources will improve your ability to use both basic and advanced design tools.
Interested in reading more articles on scientific design? Learn more below:

Data Storytelling Techniques: How to Tell a Great Data Story in 4 Steps

Best Science PowerPoint Templates and Slide Design Examples

Free Research Poster Templates and Tutorials
Content is protected by Copyright license. Website visitors are welcome to share images and articles, however they must include the Simplified Science Publishing URL source link when shared. Thank you!
Online Courses
Stay up-to-date for new simplified science courses, subscribe to our newsletter.
Thank you for signing up!
You have been added to the emailing list and will only recieve updates when there are new courses or templates added to the website.
We use cookies on this site to enhance your user experience and we do not sell data. By using this website, you are giving your consent for us to set cookies: View Privacy Policy
Simplified Science Publishing, LLC
Home Blog Education How to Prepare Your Scientific Presentation
How to Prepare Your Scientific Presentation

Since the dawn of time, humans were eager to find explanations for the world around them. At first, our scientific method was very simplistic and somewhat naive. We observed and reflected. But with the progressive evolution of research methods and thinking paradigms, we arrived into the modern era of enlightenment and science. So what represents the modern scientific method and how can you accurately share and present your research findings to others? These are the two fundamental questions we attempt to answer in this post.
What is the Scientific Method?
To better understand the concept, let’s start with this scientific method definition from the International Encyclopedia of Human Geography :
The scientific method is a way of conducting research, based on theory construction, the generation of testable hypotheses, their empirical testing, and the revision of theory if the hypothesis is rejected.
Essentially, a scientific method is a cumulative term, used to describe the process any scientist uses to objectively interpret the world (and specific phenomenon) around them.
The scientific method is the opposite of beliefs and cognitive biases — mostly irrational, often unconscious, interpretations of different occurrences that we lean on as a mental shortcut.
The scientific method in research, on the contrary, forces the thinker to holistically assess and test our approaches to interpreting data. So that they could gain consistent and non-arbitrary results.

The common scientific method examples are:
- Systematic observation
- Experimentation
- Inductive and deductive reasoning
- Formation and testing of hypotheses and theories
All of the above are used by both scientists and businesses to make better sense of the data and/or phenomenon at hand.
The Evolution of the Scientific Method
According to the Stanford Encyclopedia of Philosophy , ancient thinkers such as Plato and Aristotle are believed to be the forefathers of the scientific method. They were among the first to try to justify and refine their thought process using the scientific method experiments and deductive reasoning.
Both developed specific systems for knowledge acquisition and processing. For example, the Platonic way of knowledge emphasized reasoning as the main method for learning but downplayed the importance of observation. The Aristotelian corpus of knowledge, on the contrary, said that we must carefully observe the natural world to discover its fundamental principles.
In medieval times, thinkers such as Thomas Aquinas, Roger Bacon, and Andreas Vesalius among many others worked on further clarifying how we can obtain proven knowledge through observation and induction.
The 16th–18th centuries are believed to have given the greatest advances in terms of scientific method application. We, humans, learned to better interpret the world around us from mechanical, biological, economic, political, and medical perspectives. Thinkers such as Galileo Galilei, Francis Bacon, and their followers also increasingly switched to a tradition of explaining everything through mathematics, geometry, and numbers.
Up till today, mathematical and mechanical explanations remain the core parts of the scientific method.
Why is the Scientific Method Important Today?
Because our ancestors didn’t have as much data as we do. We now live in the era of paramount data accessibility and connectivity, where over 2.5 quintillions of data are produced each day. This has tremendously accelerated knowledge creation.
But, at the same time, such overwhelming exposure to data made us more prone to external influences, biases, and false beliefs. These can jeopardize the objectivity of any research you are conducting.
Scientific findings need to remain objective, verifiable, accurate, and consistent. Diligent usage of scientific methods in modern business and science helps ensure proper data interpretation, results replication, and undisputable validity.
6 Steps of the Scientific Method
Over the course of history, the scientific method underwent many interactions. Yet, it still carries some of the integral steps our ancestors used to analyze the world such as observation and inductive reasoning. However, the modern scientific method steps differ a bit.

1. Make an Observation
An observation serves as a baseline for your research. There are two important characteristics for a good research observation:
- It must be objective, not subjective.
- It must be verifiable, meaning others can say it’s true or false with this.
For example, This apple is red (objective/verifiable observation). This apple is delicious (subjective, harder-to-verify observation).
2. Develop a Hypothesis
Observations tell us about the present or past. But the goal of science is to glean in the future. A scientific hypothesis is based on prior knowledge and produced through reasoning as an attempt to descriptive a future event.
Here are characteristics of a good scientific hypothesis:
- General and tentative idea
- Agrees with all available observations
- Testable and potentially falsifiable
Remember: If we state our hypothesis to indicate there is no effect, our hypothesis is a cause-and-effect relationship . A hypothesis, which asserts no effect, is called a null hypothesis.
3. Make a Prediction
A hypothesis is a mental “launchpad” for predicting the existence of other phenomena or quantitative results of new observations.
Going back to an earlier example here’s how to turn it into a hypothesis and a potential prediction for proving it. For example: If this apple is red, other apples of this type should be red too.
Your goal is then to decide which variables can help you prove or disprove your hypothesis and prepare to test these.
4. Perform an Experiment
Collect all the information around variables that will help you prove or disprove your prediction. According to the scientific method, a hypothesis has to be discarded or modified if its predictions are clearly and repeatedly incompatible with experimental results.

Yes, you may come up with an elegant theory. However, if your hypothetical predictions cannot be backed by experimental results, you cannot use them as a valid explanation of the phenomenon.
5. Analyze the Results of the Experiment
To come up with proof for your hypothesis, use different statistical analysis methods to interpret the meaning behind your data.
Remember to stay objective and emotionally unattached to your results. If 95 apples turned red, but 5 were yellow, does it disprove your hypothesis? Not entirely. It may mean that you didn’t account for all variables and must adapt the parameters of your experiment.
Here are some common data analysis techniques, used as a part of a scientific method:
- Statistical analysis
- Cause and effect analysis (see cause and effect analysis slides )
- Regression analysis
- Factor analysis
- Cluster analysis
- Time series analysis
- Diagnostic analysis
- Root cause analysis (see root cause analysis slides )
6. Draw a Conclusion
Every experiment has two possible outcomes:
- The results correspond to the prediction
- The results disprove the prediction
If that’s the latter, as a scientist you must discard the prediction then and most likely also rework the hypothesis based on it.
How to Give a Scientific Presentation to Showcase Your Methods
Whether you are doing a poster session, conference talk, or follow-up presentation on a recently published journal article, most of your peers need to know how you’ve arrived at the presented conclusions.
In other words, they will probe your scientific method for gaps to ensure that your results are fair and possible to replicate. So that they could incorporate your theories in their research too. Thus your scientific presentation must be sharp, on-point, and focus clearly on your research approaches.
Below we propose a quick framework for creating a compelling scientific presentation in PowerPoint (+ some helpful templates!).
1. Open with a Research Question
Here’s how to start a scientific presentation with ease: share your research question. On the first slide, briefly recap how your thought process went. Briefly state what was the underlying aim of your research: Share your main hypothesis, mention if you could prove or disprove them.
It might be tempting to pack a lot of ideas into your first slide but don’t. Keep the opening of your presentation short to pique the audience’s initial interest and set the stage for the follow-up narrative.

2. Disclose Your Methods
Whether you are doing a science poster presentation or conference talk, many audience members would be curious to understand how you arrived at your results. Deliver this information at the beginning of your presentation to avoid any ambiguities.
Here’s how to organize your science methods on a presentation:
- Do not use bullet points or full sentences. Use diagrams and structured images to list the methods
- Use visuals and iconography to use metaphors where possible.
- Organize your methods by groups e.g. quantifiable and non-quantifiable
Finally, when you work on visuals for your presentation — charts, graphs, illustrations, etc. — think from the perspective of a subject novice. Does the image really convey the key information around the subject? Does it help break down complex ideas?

3. Spotlight the Results
Obviously, the research results will be your biggest bragging right. However, don’t over-pack your presentation with a long-winded discussion of your findings and how revolutionary these may be for the community.
Rather than writing a wall of text, do this instead:
- Use graphs with large axis values/numbers to showcase the findings in great detail
- Prioritize formats that are known to everybody (e.g. odds ratios, Kaplan Meier curves, etc.)
- Do not include more than 5 lines of plain text per slide
Overall, when you feel that the results slide gets too cramped, it’s best to move the data to a new one.
Also, as you work on organizing data on your scientific presentation PowerPoint template , think if there are obvious limitations and gaps. If yes, make sure you acknowledge them during your speech.
4. Mention Study Limitations
The scientific method mandates objectivity. That’s why every researcher must clearly state what was excluded from their study. Remember: no piece of scientific research is truly universal and has certain boundaries. However, when you fail to personally state those, others might struggle to draw the line themselves and replicate your results. Then, if they fail to do so, they’d question the viability of your research.
5. Conclude with a Memorable Takeaway Message
Every experienced speaker will tell you that the audience best retains the information they hear first and last. Most people will attend more than one scientific presentation during the day.
So if you want the audience to better remember your talk, brainstorm a take-home message for the last slide of your presentation. Think of your last slide texts as an elevator pitch — a short, concluding message, summarizing your research.
To Conclude
Today we have no shortage of research and scientific methods for testing and proving our hypothesis. However, unlike our ancestors, most scientists experience deeper scrutiny when it comes to presenting and explaining their findings to others. That’s why it’s important to ensure that your scientific presentation clearly relays the aim, vector, and thought process behind your research.
Like this article? Please share
Education, Presentation Ideas, Presentation Skills, Presentation Tips Filed under Education
Related Articles

Filed under Google Slides Tutorials • September 9th, 2024
How to Convert Canva to Google Slides
Need to switch from Canva to Google Slides? Follow this guide to easily convert your Canva designs into Google Slides in minutes.

Filed under Presentation Ideas • August 29th, 2024
How to Make a Presentation Longer: 7 Strategies to Master
Extend your talk in style. Join us to discover how to make a presentation longer while providing a high-end experience to your audience.

Filed under Google Slides Tutorials • August 29th, 2024
How to Insert an Equation in Google Slides
Make your math-related slides stand out by learning the different methods for how to insert an equation in Google Slides.
Leave a Reply
- Search Menu
Sign in through your institution
- Browse content in Arts and Humanities
- Browse content in Archaeology
- Anglo-Saxon and Medieval Archaeology
- Archaeological Methodology and Techniques
- Archaeology by Region
- Archaeology of Religion
- Archaeology of Trade and Exchange
- Biblical Archaeology
- Contemporary and Public Archaeology
- Environmental Archaeology
- Historical Archaeology
- History and Theory of Archaeology
- Industrial Archaeology
- Landscape Archaeology
- Mortuary Archaeology
- Prehistoric Archaeology
- Underwater Archaeology
- Zooarchaeology
- Browse content in Architecture
- Architectural Structure and Design
- History of Architecture
- Residential and Domestic Buildings
- Theory of Architecture
- Browse content in Art
- Art Subjects and Themes
- History of Art
- Industrial and Commercial Art
- Theory of Art
- Biographical Studies
- Byzantine Studies
- Browse content in Classical Studies
- Classical History
- Classical Philosophy
- Classical Mythology
- Classical Numismatics
- Classical Literature
- Classical Reception
- Classical Art and Architecture
- Classical Oratory and Rhetoric
- Greek and Roman Epigraphy
- Greek and Roman Law
- Greek and Roman Papyrology
- Greek and Roman Archaeology
- Late Antiquity
- Religion in the Ancient World
- Social History
- Digital Humanities
- Browse content in History
- Colonialism and Imperialism
- Diplomatic History
- Environmental History
- Genealogy, Heraldry, Names, and Honours
- Genocide and Ethnic Cleansing
- Historical Geography
- History by Period
- History of Emotions
- History of Agriculture
- History of Education
- History of Gender and Sexuality
- Industrial History
- Intellectual History
- International History
- Labour History
- Legal and Constitutional History
- Local and Family History
- Maritime History
- Military History
- National Liberation and Post-Colonialism
- Oral History
- Political History
- Public History
- Regional and National History
- Revolutions and Rebellions
- Slavery and Abolition of Slavery
- Social and Cultural History
- Theory, Methods, and Historiography
- Urban History
- World History
- Browse content in Language Teaching and Learning
- Language Learning (Specific Skills)
- Language Teaching Theory and Methods
- Browse content in Linguistics
- Applied Linguistics
- Cognitive Linguistics
- Computational Linguistics
- Forensic Linguistics
- Grammar, Syntax and Morphology
- Historical and Diachronic Linguistics
- History of English
- Language Acquisition
- Language Evolution
- Language Reference
- Language Variation
- Language Families
- Lexicography
- Linguistic Anthropology
- Linguistic Theories
- Linguistic Typology
- Phonetics and Phonology
- Psycholinguistics
- Sociolinguistics
- Translation and Interpretation
- Writing Systems
- Browse content in Literature
- Bibliography
- Children's Literature Studies
- Literary Studies (Asian)
- Literary Studies (European)
- Literary Studies (Eco-criticism)
- Literary Studies (Romanticism)
- Literary Studies (American)
- Literary Studies (Modernism)
- Literary Studies - World
- Literary Studies (1500 to 1800)
- Literary Studies (19th Century)
- Literary Studies (20th Century onwards)
- Literary Studies (African American Literature)
- Literary Studies (British and Irish)
- Literary Studies (Early and Medieval)
- Literary Studies (Fiction, Novelists, and Prose Writers)
- Literary Studies (Gender Studies)
- Literary Studies (Graphic Novels)
- Literary Studies (History of the Book)
- Literary Studies (Plays and Playwrights)
- Literary Studies (Poetry and Poets)
- Literary Studies (Postcolonial Literature)
- Literary Studies (Queer Studies)
- Literary Studies (Science Fiction)
- Literary Studies (Travel Literature)
- Literary Studies (War Literature)
- Literary Studies (Women's Writing)
- Literary Theory and Cultural Studies
- Mythology and Folklore
- Shakespeare Studies and Criticism
- Browse content in Media Studies
- Browse content in Music
- Applied Music
- Dance and Music
- Ethics in Music
- Ethnomusicology
- Gender and Sexuality in Music
- Medicine and Music
- Music Cultures
- Music and Religion
- Music and Media
- Music and Culture
- Music Education and Pedagogy
- Music Theory and Analysis
- Musical Scores, Lyrics, and Libretti
- Musical Structures, Styles, and Techniques
- Musicology and Music History
- Performance Practice and Studies
- Race and Ethnicity in Music
- Sound Studies
- Browse content in Performing Arts
- Browse content in Philosophy
- Aesthetics and Philosophy of Art
- Epistemology
- Feminist Philosophy
- History of Western Philosophy
- Metaphysics
- Moral Philosophy
- Non-Western Philosophy
- Philosophy of Science
- Philosophy of Language
- Philosophy of Mind
- Philosophy of Perception
- Philosophy of Action
- Philosophy of Law
- Philosophy of Religion
- Philosophy of Mathematics and Logic
- Practical Ethics
- Social and Political Philosophy
- Browse content in Religion
- Biblical Studies
- Christianity
- East Asian Religions
- History of Religion
- Judaism and Jewish Studies
- Qumran Studies
- Religion and Education
- Religion and Health
- Religion and Politics
- Religion and Science
- Religion and Law
- Religion and Art, Literature, and Music
- Religious Studies
- Browse content in Society and Culture
- Cookery, Food, and Drink
- Cultural Studies
- Customs and Traditions
- Ethical Issues and Debates
- Hobbies, Games, Arts and Crafts
- Natural world, Country Life, and Pets
- Popular Beliefs and Controversial Knowledge
- Sports and Outdoor Recreation
- Technology and Society
- Travel and Holiday
- Visual Culture
- Browse content in Law
- Arbitration
- Browse content in Company and Commercial Law
- Commercial Law
- Company Law
- Browse content in Comparative Law
- Systems of Law
- Competition Law
- Browse content in Constitutional and Administrative Law
- Government Powers
- Judicial Review
- Local Government Law
- Military and Defence Law
- Parliamentary and Legislative Practice
- Construction Law
- Contract Law
- Browse content in Criminal Law
- Criminal Procedure
- Criminal Evidence Law
- Sentencing and Punishment
- Employment and Labour Law
- Environment and Energy Law
- Browse content in Financial Law
- Banking Law
- Insolvency Law
- History of Law
- Human Rights and Immigration
- Intellectual Property Law
- Browse content in International Law
- Private International Law and Conflict of Laws
- Public International Law
- IT and Communications Law
- Jurisprudence and Philosophy of Law
- Law and Politics
- Law and Society
- Browse content in Legal System and Practice
- Courts and Procedure
- Legal Skills and Practice
- Legal System - Costs and Funding
- Primary Sources of Law
- Regulation of Legal Profession
- Medical and Healthcare Law
- Browse content in Policing
- Criminal Investigation and Detection
- Police and Security Services
- Police Procedure and Law
- Police Regional Planning
- Browse content in Property Law
- Personal Property Law
- Restitution
- Study and Revision
- Terrorism and National Security Law
- Browse content in Trusts Law
- Wills and Probate or Succession
- Browse content in Medicine and Health
- Browse content in Allied Health Professions
- Arts Therapies
- Clinical Science
- Dietetics and Nutrition
- Occupational Therapy
- Operating Department Practice
- Physiotherapy
- Radiography
- Speech and Language Therapy
- Browse content in Anaesthetics
- General Anaesthesia
- Browse content in Clinical Medicine
- Acute Medicine
- Cardiovascular Medicine
- Clinical Genetics
- Clinical Pharmacology and Therapeutics
- Dermatology
- Endocrinology and Diabetes
- Gastroenterology
- Genito-urinary Medicine
- Geriatric Medicine
- Infectious Diseases
- Medical Toxicology
- Medical Oncology
- Pain Medicine
- Palliative Medicine
- Rehabilitation Medicine
- Respiratory Medicine and Pulmonology
- Rheumatology
- Sleep Medicine
- Sports and Exercise Medicine
- Clinical Neuroscience
- Community Medical Services
- Critical Care
- Emergency Medicine
- Forensic Medicine
- Haematology
- History of Medicine
- Browse content in Medical Dentistry
- Oral and Maxillofacial Surgery
- Paediatric Dentistry
- Restorative Dentistry and Orthodontics
- Surgical Dentistry
- Browse content in Medical Skills
- Clinical Skills
- Communication Skills
- Nursing Skills
- Surgical Skills
- Medical Ethics
- Medical Statistics and Methodology
- Browse content in Neurology
- Clinical Neurophysiology
- Neuropathology
- Nursing Studies
- Browse content in Obstetrics and Gynaecology
- Gynaecology
- Occupational Medicine
- Ophthalmology
- Otolaryngology (ENT)
- Browse content in Paediatrics
- Neonatology
- Browse content in Pathology
- Chemical Pathology
- Clinical Cytogenetics and Molecular Genetics
- Histopathology
- Medical Microbiology and Virology
- Patient Education and Information
- Browse content in Pharmacology
- Psychopharmacology
- Browse content in Popular Health
- Caring for Others
- Complementary and Alternative Medicine
- Self-help and Personal Development
- Browse content in Preclinical Medicine
- Cell Biology
- Molecular Biology and Genetics
- Reproduction, Growth and Development
- Primary Care
- Professional Development in Medicine
- Browse content in Psychiatry
- Addiction Medicine
- Child and Adolescent Psychiatry
- Forensic Psychiatry
- Learning Disabilities
- Old Age Psychiatry
- Psychotherapy
- Browse content in Public Health and Epidemiology
- Epidemiology
- Public Health
- Browse content in Radiology
- Clinical Radiology
- Interventional Radiology
- Nuclear Medicine
- Radiation Oncology
- Reproductive Medicine
- Browse content in Surgery
- Cardiothoracic Surgery
- Gastro-intestinal and Colorectal Surgery
- General Surgery
- Neurosurgery
- Paediatric Surgery
- Peri-operative Care
- Plastic and Reconstructive Surgery
- Surgical Oncology
- Transplant Surgery
- Trauma and Orthopaedic Surgery
- Vascular Surgery
- Browse content in Science and Mathematics
- Browse content in Biological Sciences
- Aquatic Biology
- Biochemistry
- Bioinformatics and Computational Biology
- Developmental Biology
- Ecology and Conservation
- Evolutionary Biology
- Genetics and Genomics
- Microbiology
- Molecular and Cell Biology
- Natural History
- Plant Sciences and Forestry
- Research Methods in Life Sciences
- Structural Biology
- Systems Biology
- Zoology and Animal Sciences
- Browse content in Chemistry
- Analytical Chemistry
- Computational Chemistry
- Crystallography
- Environmental Chemistry
- Industrial Chemistry
- Inorganic Chemistry
- Materials Chemistry
- Medicinal Chemistry
- Mineralogy and Gems
- Organic Chemistry
- Physical Chemistry
- Polymer Chemistry
- Study and Communication Skills in Chemistry
- Theoretical Chemistry
- Browse content in Computer Science
- Artificial Intelligence
- Computer Architecture and Logic Design
- Game Studies
- Human-Computer Interaction
- Mathematical Theory of Computation
- Programming Languages
- Software Engineering
- Systems Analysis and Design
- Virtual Reality
- Browse content in Computing
- Business Applications
- Computer Security
- Computer Games
- Computer Networking and Communications
- Digital Lifestyle
- Graphical and Digital Media Applications
- Operating Systems
- Browse content in Earth Sciences and Geography
- Atmospheric Sciences
- Environmental Geography
- Geology and the Lithosphere
- Maps and Map-making
- Meteorology and Climatology
- Oceanography and Hydrology
- Palaeontology
- Physical Geography and Topography
- Regional Geography
- Soil Science
- Urban Geography
- Browse content in Engineering and Technology
- Agriculture and Farming
- Biological Engineering
- Civil Engineering, Surveying, and Building
- Electronics and Communications Engineering
- Energy Technology
- Engineering (General)
- Environmental Science, Engineering, and Technology
- History of Engineering and Technology
- Mechanical Engineering and Materials
- Technology of Industrial Chemistry
- Transport Technology and Trades
- Browse content in Environmental Science
- Applied Ecology (Environmental Science)
- Conservation of the Environment (Environmental Science)
- Environmental Sustainability
- Environmentalist Thought and Ideology (Environmental Science)
- Management of Land and Natural Resources (Environmental Science)
- Natural Disasters (Environmental Science)
- Nuclear Issues (Environmental Science)
- Pollution and Threats to the Environment (Environmental Science)
- Social Impact of Environmental Issues (Environmental Science)
- History of Science and Technology
- Browse content in Materials Science
- Ceramics and Glasses
- Composite Materials
- Metals, Alloying, and Corrosion
- Nanotechnology
- Browse content in Mathematics
- Applied Mathematics
- Biomathematics and Statistics
- History of Mathematics
- Mathematical Education
- Mathematical Finance
- Mathematical Analysis
- Numerical and Computational Mathematics
- Probability and Statistics
- Pure Mathematics
- Browse content in Neuroscience
- Cognition and Behavioural Neuroscience
- Development of the Nervous System
- Disorders of the Nervous System
- History of Neuroscience
- Invertebrate Neurobiology
- Molecular and Cellular Systems
- Neuroendocrinology and Autonomic Nervous System
- Neuroscientific Techniques
- Sensory and Motor Systems
- Browse content in Physics
- Astronomy and Astrophysics
- Atomic, Molecular, and Optical Physics
- Biological and Medical Physics
- Classical Mechanics
- Computational Physics
- Condensed Matter Physics
- Electromagnetism, Optics, and Acoustics
- History of Physics
- Mathematical and Statistical Physics
- Measurement Science
- Nuclear Physics
- Particles and Fields
- Plasma Physics
- Quantum Physics
- Relativity and Gravitation
- Semiconductor and Mesoscopic Physics
- Browse content in Psychology
- Affective Sciences
- Clinical Psychology
- Cognitive Psychology
- Cognitive Neuroscience
- Criminal and Forensic Psychology
- Developmental Psychology
- Educational Psychology
- Evolutionary Psychology
- Health Psychology
- History and Systems in Psychology
- Music Psychology
- Neuropsychology
- Organizational Psychology
- Psychological Assessment and Testing
- Psychology of Human-Technology Interaction
- Psychology Professional Development and Training
- Research Methods in Psychology
- Social Psychology
- Browse content in Social Sciences
- Browse content in Anthropology
- Anthropology of Religion
- Human Evolution
- Medical Anthropology
- Physical Anthropology
- Regional Anthropology
- Social and Cultural Anthropology
- Theory and Practice of Anthropology
- Browse content in Business and Management
- Business Strategy
- Business Ethics
- Business History
- Business and Government
- Business and Technology
- Business and the Environment
- Comparative Management
- Corporate Governance
- Corporate Social Responsibility
- Entrepreneurship
- Health Management
- Human Resource Management
- Industrial and Employment Relations
- Industry Studies
- Information and Communication Technologies
- International Business
- Knowledge Management
- Management and Management Techniques
- Operations Management
- Organizational Theory and Behaviour
- Pensions and Pension Management
- Public and Nonprofit Management
- Social Issues in Business and Management
- Strategic Management
- Supply Chain Management
- Browse content in Criminology and Criminal Justice
- Criminal Justice
- Criminology
- Forms of Crime
- International and Comparative Criminology
- Youth Violence and Juvenile Justice
- Development Studies
- Browse content in Economics
- Agricultural, Environmental, and Natural Resource Economics
- Asian Economics
- Behavioural Finance
- Behavioural Economics and Neuroeconomics
- Econometrics and Mathematical Economics
- Economic Systems
- Economic History
- Economic Methodology
- Economic Development and Growth
- Financial Markets
- Financial Institutions and Services
- General Economics and Teaching
- Health, Education, and Welfare
- History of Economic Thought
- International Economics
- Labour and Demographic Economics
- Law and Economics
- Macroeconomics and Monetary Economics
- Microeconomics
- Public Economics
- Urban, Rural, and Regional Economics
- Welfare Economics
- Browse content in Education
- Adult Education and Continuous Learning
- Care and Counselling of Students
- Early Childhood and Elementary Education
- Educational Equipment and Technology
- Educational Strategies and Policy
- Higher and Further Education
- Organization and Management of Education
- Philosophy and Theory of Education
- Schools Studies
- Secondary Education
- Teaching of a Specific Subject
- Teaching of Specific Groups and Special Educational Needs
- Teaching Skills and Techniques
- Browse content in Environment
- Applied Ecology (Social Science)
- Climate Change
- Conservation of the Environment (Social Science)
- Environmentalist Thought and Ideology (Social Science)
- Management of Land and Natural Resources (Social Science)
- Natural Disasters (Environment)
- Pollution and Threats to the Environment (Social Science)
- Social Impact of Environmental Issues (Social Science)
- Sustainability
- Browse content in Human Geography
- Cultural Geography
- Economic Geography
- Political Geography
- Browse content in Interdisciplinary Studies
- Communication Studies
- Museums, Libraries, and Information Sciences
- Browse content in Politics
- African Politics
- Asian Politics
- Chinese Politics
- Comparative Politics
- Conflict Politics
- Elections and Electoral Studies
- Environmental Politics
- Ethnic Politics
- European Union
- Foreign Policy
- Gender and Politics
- Human Rights and Politics
- Indian Politics
- International Relations
- International Organization (Politics)
- Irish Politics
- Latin American Politics
- Middle Eastern Politics
- Political Methodology
- Political Communication
- Political Philosophy
- Political Sociology
- Political Behaviour
- Political Economy
- Political Institutions
- Political Theory
- Politics and Law
- Politics of Development
- Public Administration
- Public Policy
- Qualitative Political Methodology
- Quantitative Political Methodology
- Regional Political Studies
- Russian Politics
- Security Studies
- State and Local Government
- UK Politics
- US Politics
- Browse content in Regional and Area Studies
- African Studies
- Asian Studies
- East Asian Studies
- Japanese Studies
- Latin American Studies
- Middle Eastern Studies
- Native American Studies
- Scottish Studies
- Browse content in Research and Information
- Research Methods
- Browse content in Social Work
- Addictions and Substance Misuse
- Adoption and Fostering
- Care of the Elderly
- Child and Adolescent Social Work
- Couple and Family Social Work
- Direct Practice and Clinical Social Work
- Emergency Services
- Human Behaviour and the Social Environment
- International and Global Issues in Social Work
- Mental and Behavioural Health
- Social Justice and Human Rights
- Social Policy and Advocacy
- Social Work and Crime and Justice
- Social Work Macro Practice
- Social Work Practice Settings
- Social Work Research and Evidence-based Practice
- Welfare and Benefit Systems
- Browse content in Sociology
- Childhood Studies
- Community Development
- Comparative and Historical Sociology
- Disability Studies
- Economic Sociology
- Gender and Sexuality
- Gerontology and Ageing
- Health, Illness, and Medicine
- Marriage and the Family
- Migration Studies
- Occupations, Professions, and Work
- Organizations
- Population and Demography
- Race and Ethnicity
- Social Theory
- Social Movements and Social Change
- Social Research and Statistics
- Social Stratification, Inequality, and Mobility
- Sociology of Religion
- Sociology of Education
- Sport and Leisure
- Urban and Rural Studies
- Browse content in Warfare and Defence
- Defence Strategy, Planning, and Research
- Land Forces and Warfare
- Military Administration
- Military Life and Institutions
- Naval Forces and Warfare
- Other Warfare and Defence Issues
- Peace Studies and Conflict Resolution
- Weapons and Equipment

- < Previous chapter
- Next chapter >
254 Identifying the Context of the Presentation
- Published: December 2009
- Cite Icon Cite
- Permissions Icon Permissions
The context of a presentation determines, or should determine, how you approach its preparation. The context includes many things, the audience, the purpose of the presentation, the occasion, what precedes the presentation and what follows from it. It will define what you expect from the audience, and will influence how you prepare yourself for the talk. A simple example. Suppose that you have been invited to give a series of lectures at a summer school. What more do you need to know, other than the topic? Here are a few of the questions that you need to have answered before you can start planning the course. 1. Is it an introductory course aimed at graduate students in their first year, or is it an advanced course more suited to graduates in their final year and young postdoctoral researchers? 2. Are the participants expected to ask questions during the lecture, or wait until the end? 3. Will there be any problem classes or discussion sessions? 4. Will lecture notes be handed out to participants before or after the lecture? 5. Will the proceedings be published, and if so, when? 6. What are the other lecture courses going to cover? 7. Will the basic theory already have been covered, or are they expected to know it already, or should you spend half of the first lecture going over it, just in case some have not seen it before? 8. If it is your job to give the basic introductory lectures, should you follow the standard approach in the usual text books, or should you assume that they have already covered that ground and try to give them more insight into the subject? 9. Will any of the lectures that come later in the school make any assumptions about what they have learned in your lectures? 10. Is there a social programme? If so, are you expected to participate in the activities and discuss the subject informally with the participants (which, from our experience, is always much appreciated), or can you spend most of the time in your room writing the next lecture?
Personal account
- Sign in with email/username & password
- Get email alerts
- Save searches
- Purchase content
- Activate your purchase/trial code
- Add your ORCID iD
Institutional access
Sign in with a library card.
- Sign in with username/password
- Recommend to your librarian
- Institutional account management
- Get help with access
Access to content on Oxford Academic is often provided through institutional subscriptions and purchases. If you are a member of an institution with an active account, you may be able to access content in one of the following ways:
IP based access
Typically, access is provided across an institutional network to a range of IP addresses. This authentication occurs automatically, and it is not possible to sign out of an IP authenticated account.
Choose this option to get remote access when outside your institution. Shibboleth/Open Athens technology is used to provide single sign-on between your institution’s website and Oxford Academic.
- Click Sign in through your institution.
- Select your institution from the list provided, which will take you to your institution's website to sign in.
- When on the institution site, please use the credentials provided by your institution. Do not use an Oxford Academic personal account.
- Following successful sign in, you will be returned to Oxford Academic.
If your institution is not listed or you cannot sign in to your institution’s website, please contact your librarian or administrator.
Enter your library card number to sign in. If you cannot sign in, please contact your librarian.
Society Members
Society member access to a journal is achieved in one of the following ways:
Sign in through society site
Many societies offer single sign-on between the society website and Oxford Academic. If you see ‘Sign in through society site’ in the sign in pane within a journal:
- Click Sign in through society site.
- When on the society site, please use the credentials provided by that society. Do not use an Oxford Academic personal account.
If you do not have a society account or have forgotten your username or password, please contact your society.
Sign in using a personal account
Some societies use Oxford Academic personal accounts to provide access to their members. See below.
A personal account can be used to get email alerts, save searches, purchase content, and activate subscriptions.
Some societies use Oxford Academic personal accounts to provide access to their members.
Viewing your signed in accounts
Click the account icon in the top right to:
- View your signed in personal account and access account management features.
- View the institutional accounts that are providing access.
Signed in but can't access content
Oxford Academic is home to a wide variety of products. The institutional subscription may not cover the content that you are trying to access. If you believe you should have access to that content, please contact your librarian.
For librarians and administrators, your personal account also provides access to institutional account management. Here you will find options to view and activate subscriptions, manage institutional settings and access options, access usage statistics, and more.
Our books are available by subscription or purchase to libraries and institutions.
| Month: | Total Views: |
|---|---|
| October 2022 | 3 |
| November 2022 | 2 |
| January 2023 | 1 |
| March 2023 | 2 |
| May 2023 | 2 |
| August 2023 | 4 |
| September 2023 | 1 |
| October 2023 | 2 |
| November 2023 | 4 |
| December 2023 | 1 |
| January 2024 | 1 |
| February 2024 | 1 |
| March 2024 | 4 |
| April 2024 | 2 |
| May 2024 | 2 |
| June 2024 | 1 |
| July 2024 | 1 |
| August 2024 | 7 |
- About Oxford Academic
- Publish journals with us
- University press partners
- What we publish
- New features
- Open access
- Rights and permissions
- Accessibility
- Advertising
- Media enquiries
- Oxford University Press
- Oxford Languages
- University of Oxford
Oxford University Press is a department of the University of Oxford. It furthers the University's objective of excellence in research, scholarship, and education by publishing worldwide
- Copyright © 2024 Oxford University Press
- Cookie settings
- Cookie policy
- Privacy policy
- Legal notice
This Feature Is Available To Subscribers Only
Sign In or Create an Account
This PDF is available to Subscribers Only
For full access to this pdf, sign in to an existing account, or purchase an annual subscription.
- Skip to primary navigation
- Skip to main content
- Skip to primary sidebar
- Skip to footer
- SCIENCE COMMUNICATION LAB
- IBIOLOGY LECTURES
- IBIOLOGY COURSES
Bringing the World's Best Biology to You
Rethinking Scientific Presentations: Slide Design and Delivery
Part 1: rethinking scientific presentations: the assertion-evidence approach.
- Duration: 00:25:56
00:00:08.13 As a research scientist, 00:00:11.03 think about how little time you spend presenting 00:00:16.20 against how much time you spend 00:00:19.11 working in the lab or on your computations. 00:00:24.08 You might give one presentation at a conference 00:00:29.18 for 20 minutes, 00:00:31.22 or you might give a colloquium at your institution 00:00:34.13 for 50 minutes. 00:00:37.28 The question comes: 00:00:40.03 how do you make that time as effective as possible 00:00:44.04 to represent all the work that you've done? 00:00:47.25 This film focuses on that question. 00:00:51.08 And in particular, this film pays a lot of attention 00:00:55.09 to the slides that you create for that presentation. 00:01:00.09 Now, you might ask, why? 00:01:02.02 And one thing that I have found 00:01:05.14 in my 30 years of researching scientific presentations 00:01:10.14 is that slides make more of a difference for the success 00:01:14.20 -- and I would say more often the downfall -- 00:01:18.10 of scientific presentations 00:01:21.11 than people realize. 00:01:23.08 First, when you're creating slides, 00:01:25.26 you make important decisions: 00:01:28.02 what information you're going to include, 00:01:30.23 and equally important, 00:01:33.22 what information you're going to leave out. 00:01:36.07 And of that information that you include, 00:01:38.07 you also make decisions... 00:01:40.16 what am I going to emphasize, 00:01:42.19 perhaps by putting on the slide, 00:01:44.13 and what am I going to de-emphasize 00:01:47.25 by folding into your speech? 00:01:50.20 A second way that slides affect a presentation's success 00:01:56.04 occurs in the delivery. 00:01:58.18 Sadly, many presenters use PowerPoint's defaults 00:02:05.14 and spend so much of their delivery 00:02:09.01 turning, reading or paraphrasing a bullet on the slide, 00:02:13.24 turning back to the audience, 00:02:16.12 then turning, reading or paraphrasing, 00:02:19.06 then turning back. 00:02:21.03 And that rhythm 00:02:24.05 -- what a lot of people call a death by PowerPoint rhythm -- 00:02:26.27 pulls down a presentation. 00:02:28.20 The best presenters, however... 00:02:30.24 they speak from what they know, 00:02:34.03 and their visual aids are in fact aids for the audience 00:02:39.13 rather than notes for them. 00:02:42.15 Yet a third way that slides 00:02:45.05 affect a presentation's success 00:02:47.05 occurs with how much the audience 00:02:50.20 understands from them. 00:02:52.20 Our research has found 00:02:55.28 that challenging PowerPoint's defaults 00:02:58.08 and using a different approach, 00:03:00.14 such as what you're gonna learn in this film, 00:03:04.01 actually increases the amount of comprehension by the audience 00:03:11.05 in a statistically significant way. 00:03:16.05 So, I've had a number of people 00:03:18.20 who have used this approach. 00:03:20.15 The woman in the upper left, Katie Kirsch... 00:03:24.10 while she was getting her PhD, 00:03:28.25 she used this approach in all her conference presentations, 00:03:31.04 and she won best presentation at the conference 00:03:35.01 three times. 00:03:37.22 The gentlemen at the bottom, 00:03:40.01 professor Are Magnus Bruaset from Simula Research Laboratory 00:03:43.26 and University of Oslo in Norway... 00:03:47.04 he uses this approach, and his colleagues use this approach, 00:03:51.12 in all their presentations 00:03:54.14 that they make to industry to present their research. 00:03:57.27 And the woman... scientist in the upper right, 00:04:01.24 Dr. Barbara Bekins from the US Geological Survey... 00:04:06.06 she had to give a lecture 00:04:09.08 to 40 different places across the country, 00:04:11.27 and she decided to use this approach 00:04:16.03 for that lecture 00:04:18.01 because so many people 00:04:21.01 were going to see her work presented in that fashion. 00:04:25.24 We've had research groups 00:04:28.16 use the assertion-evidence approach, 00:04:30.10 and what you see here on the screen 00:04:32.13 is a large gas turbine research group 00:04:35.20 at Penn State. 00:04:37.02 We've had courses adopt the approach, 00:04:40.08 and here you see a law design course 00:04:43.19 at Penn State. 00:04:45.21 And this... and the approach was used by both the professors 00:04:48.11 who taught the class 00:04:50.15 and by the students who reported on their designs. 00:04:53.20 We've even had one national organization, 00:04:57.05 the Engineering Ambassadors Network, 00:04:59.27 adopt the approach for all the presentations 00:05:02.22 that they use in high school 00:05:05.03 to recruit STEM students. 00:05:08.18 Now, one assumption that I'm going to make 00:05:12.10 in this presentation 00:05:15.04 is that the goals for your research presentations 00:05:17.26 are that they are understood, 00:05:21.04 that your presentations are remembered, 00:05:23.10 and that your presentations are believed. 00:05:27.00 I'm also gonna have another assumption 00:05:28.28 that on a personal level 00:05:31.09 you have a goal of wanting to feel 00:05:36.09 and project more confidence. 00:05:38.03 So, where do we start? 00:05:41.12 Where I would like to start is 00:05:44.08 I would like you to think about 00:05:47.00 when you watch scientific presentations 00:05:49.18 and you see the slides, 00:05:51.24 what are the biggest problems that you see with those slides? 00:05:56.05 I've asked this question 00:05:59.00 to hundreds of scientists and engineers around the world, 00:06:03.05 and the number one answer 00:06:05.12 -- and it's not even close -- 00:06:07.15 is too many words. 00:06:09.14 And no doubt, 00:06:11.27 you see many examples of that weekly 00:06:15.27 in presentations that are given at conferences, in seminars, 00:06:20.26 in classrooms that are... 00:06:24.17 that include slides. 00:06:26.01 And you... and that particular problem 00:06:29.11 is not one that actually is so surprising. 00:06:34.20 In the mid-1980s, some research came out, 00:06:39.06 and that research points to why 00:06:43.00 having too many words is a problem. 00:06:47.09 So, let's say you have a speaker and you have an audience. 00:06:49.09 Now, we've known forever 00:06:51.25 that the speaker's spoken words... 00:06:54.19 those are gonna be taken in through the ears. 00:06:57.06 And if the speaker has any written words, 00:07:00.13 those are gonna be taken in through the eyes. 00:07:03.05 But it wasn't until the mid-1980s 00:07:07.16 that a Canadian psychology researcher 00:07:10.02 by the name of Allan Paivio 00:07:12.13 found that those written words and spoken words 00:07:17.26 are processed in the same part of the brain. 00:07:20.26 And another researcher, 00:07:24.12 this one from Australia, John Sweller... 00:07:27.14 he thought about Paivio's research 00:07:30.11 and he asked this question: 00:07:32.02 if written words and spoken words 00:07:34.02 are processed in the same part of the brain, 00:07:36.06 could that part of the brain become overloaded, 00:07:39.27 much as a central processing unit 00:07:43.00 can become overloaded 00:07:45.17 when it tries to do too many tasks? 00:07:47.14 And so Sweller... he did experiments. 00:07:49.11 He had one room where people just read, 00:07:51.23 one room where people just listened, 00:07:53.20 and another room where people read and listened. 00:07:57.29 And when there weren't too many words, 00:08:00.04 in the comprehension tests that he gave after those presentations, 00:08:04.16 the room where they read and listened, 00:08:09.01 they did the best. 00:08:10.28 But what he found is... 00:08:13.00 that when there were too many words projected, 00:08:16.12 that what happened is that room 00:08:20.04 that was both reading and listening 00:08:23.08 went from first to worst. 00:08:25.28 And so, Sweller came up with this theory 00:08:28.26 that if audiences try to process 00:08:31.08 too many words, 00:08:33.12 this cognitive overload occurs, 00:08:37.04 and that is what happens in many presentations. 00:08:41.19 Now, scientists and engineers 00:08:43.16 will also talk about a couple of other problems. 00:08:46.10 I mean, they'll actually talk about a lot of problems, 00:08:48.28 but there are three that stand out. 00:08:51.08 So, too many words is number one. 00:08:53.00 A second one is that the slides are cluttered. 00:08:57.21 And by cluttered, they mean that the... 00:09:01.00 that the audience isn't sure where to look. 00:09:03.22 And so, you have a slide, 00:09:05.28 and maybe what you want to do is you want to look at a graph on the slide 00:09:09.05 because you think the graph contains the most important things... 00:09:12.06 but there's text and arrows 00:09:16.13 and other things that are impinging on that graph, 00:09:19.00 and your eye gets pulled away. 00:09:22.05 A third problem is that many people 00:09:26.07 find that much of the text on slides is not readable. 00:09:29.17 And you can see in this graph 00:09:33.17 that even though maybe you can see the curves, 00:09:36.09 what you cannot read are the axes. 00:09:38.05 And if you can't read the axis of a... 00:09:40.23 axes of a graph, 00:09:43.08 then the value of that graph plummets. 00:09:47.03 A big takeaway is that 00:09:51.08 because so many people -- something like 95% -- 00:09:55.05 use PowerPoint, 00:09:58.19 that then PowerPoint's defaults become important. 00:10:02.00 And what we realize is PowerPoint 00:10:06.20 came out about the same time that Paivio 00:10:09.00 was coming out with his research. 00:10:11.07 And the two gentlemen who created that program, 00:10:15.26 Robert Gaskins, who was an entrepreneur, 00:10:18.00 and Dennis Austin, who was a computer scientist... 00:10:21.22 they were not aware of Paivio's research. 00:10:25.00 Now, they ended up, I think, doing the best they could 00:10:28.24 with the computer architecture of the day. 00:10:31.01 But a problem is that the defaults 00:10:35.09 were not based on any research. 00:10:38.18 Worse yet, and maybe the big tragedy, 00:10:42.08 is that PowerPoint's defaults have not changed significantly. 00:10:46.08 Yeah, in 2003 they changed from Times New Roman to Arial, 00:10:50.03 and in 2007 they changed from Arial typeface to Calibri, 00:10:53.22 and they threw in Microsoft's little artistic insert... 00:11:01.23 but... but nothing actually changed here. 00:11:04.27 So, one thing that I want you to realize 00:11:11.16 is that PowerPoint's defaults run counter to how people learn. 00:11:15.11 That text box in the body 00:11:18.12 that has all those nested bullets... 00:11:20.12 that leads people to create too many written words. 00:11:25.07 As John Sweller says, 00:11:27.02 it is a disaster how many words 00:11:31.04 people will put on slides. 00:11:33.01 That textbox also consumes valuable space 00:11:35.13 that could be used for images, 00:11:38.20 which makes the slides cluttered. 00:11:41.22 And then one last thing, 00:11:43.15 and something that I've been paying a lot of attention to, 00:11:45.15 is that that headline 00:11:50.09 leads scientists and engineers to write phrase headlines. 00:11:54.23 On the surface, that sounds like a good idea, 00:11:57.27 but a problem is that a phrase headline 00:12:00.15 does not filter noise. 00:12:03.06 And as you can remember 00:12:05.09 from when we first talked about why slides are important, 00:12:09.01 it's important for us to have a filter 00:12:13.18 on what to include and what not to include. 00:12:16.01 I'm gonna give you one quotation, 00:12:20.05 because we can do better. 00:12:21.24 I'm gonna give you one quotation... 00:12:23.19 and I could have chosen a lot, 00:12:25.17 but I'm gonna choose this one. 00:12:27.08 "The real mystery to me 00:12:29.29 is why PowerPoint's default style has been adopted so widely. 00:12:34.11 Why do medical researchers use the PowerPoint style 00:12:38.23 at academic conferences? 00:12:40.23 Why do engineers use the PowerPoint style 00:12:42.29 for technical discussions? 00:12:45.24 And the reason I like this quotation 00:12:48.28 as a criticism of PowerPoint 00:12:51.11 is that it was said by none other than Robert Gaskins, 00:12:57.15 the creator of PowerPoint. 00:12:59.18 I mean, if Gaskins himself 00:13:03.14 challenges the defaults, 00:13:05.08 then you should as well. 00:13:07.05 So, the question comes, what should we do? 00:13:09.09 But before we do that, 00:13:11.08 I have yet another assumption I want you to have. 00:13:12.26 And that is, 00:13:14.25 you should not have slides 00:13:18.01 if slides do not support the presentation. 00:13:22.24 In other words, if sl... 00:13:25.03 if slides do not help the audience 00:13:28.14 understand, remember, or believe the content. 00:13:31.28 And someone who was very astute 00:13:34.29 at that particular point, 00:13:36.28 and did not include slides if they weren't needed, 00:13:40.16 was Steve Jobs. 00:13:43.04 Steve Jobs thought about his presentations, 00:13:45.19 in a sense, as a story, 00:13:47.22 and then each slide or blank screen... 00:13:50.05 that was a scene. 00:13:52.09 And so, if you don't need a slide, 00:13:55.02 press the B on the control panel of your... 00:13:59.09 of your computer, 00:14:01.10 or use your advancer to blank the screen, 00:14:04.23 or better yet, insert a black slide 00:14:07.23 so that then the audience knows to focus on you. 00:14:13.23 And while that focus might seem frightening at first, 00:14:18.24 that focus is important 00:14:21.14 because, as Faraday said, 00:14:23.18 for your presentation to be a success, 00:14:25.21 the audience has to believe in you. 00:14:29.08 You have to show ownership of the information. 00:14:32.23 Now, maybe you won't have a blank screen 00:14:35.05 at a conference presentation 00:14:37.20 because those are so compressed. 00:14:39.12 But in a symposium that's 50 minutes, 00:14:41.20 think about having at least one scene 00:14:43.22 where there is no slide 00:14:46.04 and you move to a part of the room 00:14:48.26 where no one typically stands. 00:14:51.27 That will command attention. 00:14:53.15 Okay, now we're ready. 00:14:55.16 So then, what should we do? 00:14:57.26 And my first piece of advice to you is, 00:15:01.04 build your talk on messages, not on topics. 00:15:06.15 Most scientists and engineers in research 00:15:09.11 build their presentations on topics: 00:15:12.22 introduction, methods, results, discussion. 00:15:16.04 You can do better than that. 00:15:19.19 So, what often happens is... 00:15:21.21 let's say you're putting together a presentation, 00:15:23.29 and you're at a particular scene 00:15:26.17 and you decide... mmm... electron acceptors, 00:15:29.07 that's what I'm gonna be talking about here. 00:15:31.07 And so you write "electron acceptors" 00:15:34.00 in your biggest typeface up at the top, 00:15:36.06 and then you write down all the things you want to say... 00:15:40.02 you write those down below. 00:15:42.00 And then, if... and you put those in this bulleted list. 00:15:44.20 And then, if there's any room, 00:15:46.24 then you include an image. 00:15:50.02 What I'm telling you here is 00:15:53.02 go back to step one and stop there. 00:15:56.00 You can do better. 00:15:58.01 Build your talk on messages. 00:16:00.08 And so, Dr. Barbara Bekins, 00:16:02.01 when she was putting together her presentation 00:16:05.08 on the effect of hydrology 00:16:10.04 on the 25-year degradation of a crude oil spill... 00:16:18.01 on this particular scene, 00:16:20.23 she thought deeply about what she wanted the audience 00:16:24.01 to walk out the door with. 00:16:26.04 And then she wrote this sentence: 00:16:28.17 a succession of electron acceptors occurs 00:16:31.17 when an aquifer becomes contaminated with oil. 00:16:36.14 And then, she took that sentence, 00:16:39.28 tightened it as much as she could, 00:16:41.29 and put that at the top of a slide. 00:16:44.11 And once she had that, 00:16:46.19 then she had a filter. 00:16:48.17 And then she created visual evidence 00:16:51.00 to support that. 00:16:53.00 And so, when you've got an oil spill 00:16:56.18 that occurs in an aerobic aquifer, 00:17:01.09 what depletes first is the oxygen. 00:17:07.27 And so, what you see here is that this oxygen... 00:17:12.13 this becomes depleted in this outer band of the plume. 00:17:16.18 And once that is depleted, 00:17:19.08 then you get these bands of other types of depletions. 00:17:25.20 You get a reduction of nitrate and manganese, 00:17:29.10 and then you get a reduction of iron, 00:17:32.14 and then there's a reduction of sulfate. 00:17:36.29 So, what she has done 00:17:40.24 is she has stated her assertion up at the top 00:17:43.08 and then supported that assertion visually. 00:17:47.22 That's principle number one. 00:17:51.14 Principle number two 00:17:54.04 is to support your messages with visual evidence 00:17:57.04 -- not a bullet list. 00:18:00.00 It could be photographs, drawings, 00:18:03.05 diagrams, graphs. 00:18:05.17 It could be an equation. It could be a film. It could be a short table. 00:18:10.07 And then what you are to do is... 00:18:14.18 by creating that, you allow the audience 00:18:19.27 to focus on the visual evidence 00:18:23.14 and then what it is you're saying. 00:18:25.07 You avoid that cognitive overload. 00:18:27.29 So, let's go back to Paivio. 00:18:30.05 And if you remember, 00:18:32.27 Paivio found that written words and spoken words... 00:18:35.16 they're processed in the same part of the brain. 00:18:38.10 But his research also found 00:18:42.09 that images are processed in a different part of the brain. 00:18:46.01 And another researcher, professor Richard Mayer 00:18:49.19 from UC Santa Barbara... 00:18:52.05 what he did is he really ran with the question of, 00:18:55.27 what is the effect of using images in a presentation? 00:19:00.25 What is the effect on the learning 00:19:04.23 that the audience has? 00:19:06.20 And so, he's done a number of experiments, 00:19:08.22 and what his big takeaway 00:19:12.06 is that people learn much more deeply 00:19:14.05 from words and relevant images 00:19:17.10 than from words alone. 00:19:19.28 So, let's take a look at an example, 00:19:22.07 and I'm gonna choose a PhD graduate student, Jacob Snyder, 00:19:25.02 who's presenting a scene from 00:19:29.00 one of his conference presentations and from his PhD defense. 00:19:32.20 And so, in this scene 00:19:36.05 he's talking about the effect of using additive manufacturing, 00:19:40.18 or 3D printing, 00:19:42.25 on some really small channels. 00:19:47.09 And so, he begins the scene 00:19:51.04 by showing a channel that is built in the vertical direction, 00:19:55.10 much as a smokestack is. 00:19:57.09 And what you can see 00:19:59.18 -- and what he points out -- 00:20:01.26 is the variation that occurs in that 3D printed channel. 00:20:05.27 And then, once he has set that up, 00:20:09.14 then what he does is he shows a channel 00:20:12.24 that was built as a pipeline. 00:20:15.10 And what you see is that there's much more variation 00:20:20.12 in that particular channel, 00:20:22.19 that parts of it actually almost cave in. 00:20:26.11 And so, you might think, ohh, well, it's obvious 00:20:30.02 -- we would go with the vertical one. 00:20:32.10 Except that these channels... they are... 00:20:36.09 serve to produce heat transfer of these very hot gases. 00:20:40.22 And so, as it turns out, 00:20:43.03 having that roughness can be an asset. 00:20:47.03 And then he went on to show another channel 00:20:51.12 -- this one at 45 degrees -- 00:20:53.20 and he made the point that manufacturers 00:20:57.10 could choose different angles 00:21:01.24 to balance having the overall shape that they want 00:21:04.18 with increased roughness. 00:21:07.17 Now, we've looked at an assertion-evidence slide here. 00:21:12.01 Let's take it apart. 00:21:14.15 And the slide began with the assertion headline. 00:21:18.11 Now, some of you might say, 00:21:20.23 you know, I... I bet if I had seen Jacob Snyder give that talk, 00:21:25.28 I would understand exactly what was going on 00:21:29.05 and I would not have read that sentence. 00:21:31.15 And what I would say is, fantastic. 00:21:33.28 You were on your game as a listener 00:21:36.06 and then Jacob was on his game as a speaker. 00:21:40.09 But that sentence at a conference or in a symposium... 00:21:44.15 that sentence serves as a safety rope for the audience 00:21:50.04 in case they zone out, they get tired, 00:21:53.21 they receive a text, or whatever... 00:21:56.07 that allows them to stay in the presentation. 00:22:02.06 A couple of other things about the sentence headline: 00:22:05.10 keep it to one or two lines. 00:22:07.26 If it goes more than two lines, 00:22:09.22 our focus groups find that people won't read it... 00:22:12.28 perhaps it's just too much time away from the speaker. 00:22:16.13 Capitalize it the way you would a sentence. 00:22:19.09 It's just easier for people to read a sentence 00:22:22.08 that's capitalized as a sentence. 00:22:24.10 Also, don't center it; left justify it. 00:22:27.12 It's an easier read for the audience. 00:22:32.09 And the period... do you need a period? 00:22:36.14 Because it's a standalone sentence, 00:22:38.21 a period isn't required. 00:22:40.17 However, if you hear the voice of your fifth grade teacher 00:22:43.29 to put a period there and it haunts you at night, 00:22:47.22 put the period. 00:22:49.16 It's not that big of a deal. 00:22:52.16 So, that's the sentence. 00:22:54.12 What about the visual evidence? 00:22:56.11 With the visual evidence, I'd say the big thing is to avoid clutter. 00:22:59.07 In other words, try to have the slide breathe. 00:23:01.19 And I think Jacob Snyder did a really good job here 00:23:04.10 with the positioning of the three contour plots 00:23:08.20 and not allowing them to crowd the headline. 00:23:15.08 Leave some space there -- very nice. 00:23:17.17 And one last thing is, think about how you're gonna tell the story of the scene. 00:23:22.29 So, in this case, Jacob Snyder 00:23:25.28 discussed the one contour plot 00:23:28.13 and then animated in the second one, 00:23:30.23 when he was ready and when the audience was ready, 00:23:33.16 and then animated in the third, 00:23:36.22 again when the audience was ready. 00:23:39.13 So, we've talked about two of the principles 00:23:43.05 of the assertion-evidence approach: 00:23:45.28 build your talk on messages, not on topics, 00:23:48.01 and support those messages with visual evidence 00:23:51.01 not bullet lists. 00:23:53.15 The third principle of the assertion-evidence approach 00:23:56.15 is that when you present that visual evidence 00:24:00.04 fashion sentences on the spot. 00:24:02.18 In other words, show that you own the information. 00:24:06.20 Now, many of you might be 00:24:09.14 afraid of this particular principle. 00:24:11.25 You think, oh, I don't think I can do it. 00:24:14.01 I need those bullet lists for me to know what to say. 00:24:16.20 And what I would say is, you don't. 00:24:19.16 It is your research. 00:24:21.29 If you choose visual evidence 00:24:25.10 that is from your work, 00:24:28.05 you can present it. 00:24:29.29 You don't need those bullet lists. 00:24:32.14 As a research scientist or a research engineer, 00:24:35.04 be an experimentalist. 00:24:37.02 Try this approach. 00:24:39.19 And in trying this approach, 00:24:42.02 rather than starting with PowerPoint's defaults, 00:24:44.06 go to our website -- www.assertion-evidence.com -- 00:24:47.07 and download one of our PowerPoint templates. 00:24:50.00 They're free. It doesn't cost you anything. 00:24:53.02 But it's gonna save you a lot of time. 00:24:55.02 You'll also find some example presentations 00:24:57.13 by people such as Jacob Snyder and Katie Kirsch, 00:25:01.13 whom I had mentioned earlier. 00:25:04.08 So, what we've done here is that 00:25:10.04 I have shown you a different approach 00:25:12.23 to give a scientific research presentation. 00:25:16.05 And I hope that you'll be an experimentalist 00:25:18.23 and try this approach. 00:25:21.13 In a second film that's coming up, 00:25:23.22 we're going to walk through 00:25:27.11 a research presentation 00:25:30.03 -- title slide, mapping slide, the body slides, conclusion slide -- 00:25:33.16 to show some best examples on what it is that you can do. 00:25:38.00 Thank you.
Part 2: Assertion-Evidence Slides for a Research Talk
- Duration: 00:27:42
00:00:08.07 This film is a second part 00:00:11.24 in a three-part series for iBiology 00:00:15.18 on creating effective scientific research presentations. 00:00:22.05 Now, in the first part, 00:00:25.12 I introduced the assertion-evidence approach. 00:00:28.23 And the assertion-evidence approach has three main principles: 00:00:33.06 number one, build your talk on messages not on topics; 00:00:37.27 number two, support those messages with visual evidence not bullet lists; 00:00:42.13 and then number three is, when explaining that visual evidence, 00:00:46.18 fashion sentences on the spot. 00:00:50.14 Whereas you might have just one sentence written on the slide, 00:00:54.26 you will say six, seven, eight, or nine sentences 00:01:00.14 in your talk. 00:01:03.01 This second film does two things. 00:01:06.15 This first is this film 00:01:10.27 presents evidence showing that the assertion-evidence approach 00:01:14.14 is more effective. 00:01:16.21 After all, this approach requires quite a bit more work. 00:01:20.16 You have to think deeply about what those message headlines are. 00:01:23.19 You have to create that visual evidence. 00:01:26.13 And then you have to practice enough 00:01:29.08 that you can fashion sentences on the spot. 00:01:32.15 The second part of the talk 00:01:36.02 is to walk through a research presentation 00:01:38.07 and show you what I consider some of my greatest hits: 00:01:42.09 slides that students have created 00:01:45.14 for various research talks. 00:01:48.20 So, why the assertion-evidence approach? 00:01:52.20 Why should we use it? 00:01:54.27 At Penn State, we've done some tests 00:01:58.09 in which we've found that the assertion-evidence approach 00:02:02.14 is more effective than a typical presentation slide, 00:02:07.13 such as what you see on the screen. 00:02:10.00 So, we created a presentation... 00:02:12.16 this one happens to be on magnetic resonance imaging... 00:02:15.23 and we first created it as a typical traditional talk 00:02:22.29 that follows PowerPoint's defaults. 00:02:25.12 In fact, we looked at a lot of presentations 00:02:29.17 that were on magnetic resonance imaging, 00:02:32.06 and we patterned it after that. 00:02:34.20 Then we created a set of slides 00:02:38.01 for the exact same words that would be spoken, 00:02:42.26 but then followed the assertion-evidence approach. 00:02:45.22 So, we've got 50-60 participants in a room. 00:02:51.10 They see slides that follow the traditional approach. 00:02:56.14 Then we've got 50-60 students in another room. 00:03:00.07 They see slides that follow the assertion-evidence approach. 00:03:05.00 And after the presentation, 00:03:08.00 both sets of participants... 00:03:10.08 they essentially tried to explain, 00:03:13.26 how does magnetic resonance imaging work? 00:03:16.21 And then we had scorers who scored each of those attempts. 00:03:22.09 But the scorers, or the raters, 00:03:25.09 they didn't know from which group that they came. 00:03:29.02 But what the raters found is... 00:03:32.18 they found that the traditional approach... 00:03:35.14 they scored on average about 42% 00:03:38.05 in terms of how much they understood. 00:03:41.23 Whereas the people who viewed the assertion-evidence approach, 00:03:45.28 they found 50... 00:03:48.21 they scored that 59%. 00:03:51.01 And the statistical difference between those two 00:03:53.21 -- at these levels, 50-60 participants -- 00:03:57.16 is about... less than 0.01. 00:04:02.08 And so, what we were left to conclude 00:04:04.26 is the assertion-evidence slides 00:04:07.17 led to better comprehension and recall of information, 00:04:12.19 and that increase in comprehension and recall 00:04:16.29 is statistically significant. 00:04:19.14 One thing that we also found 00:04:23.13 is that the misconceptions that participants had 00:04:27.12 in the traditional approach, 00:04:29.27 with traditional PowerPoint slides, 00:04:32.22 is about 10 times higher 00:04:36.06 than for the assertion-evidence group -- ten times. 00:04:39.18 And what we think is happening there 00:04:42.13 is that the participants... 00:04:45.13 they're reading a bullet or something 00:04:49.23 while the speaker is talking about something else. 00:04:52.24 Those are two reasons 00:04:57.11 for you to think about using these slides 00:05:00.01 to present your research: 00:05:02.18 to increase comprehension and recall, 00:05:04.29 and to reduce number of misconceptions 00:05:08.21 that people have about your work. 00:05:11.08 So, that's a reason for doing the assertion-evidence approach. 00:05:14.14 How do you... how do you apply it 00:05:18.02 in a research presentation? 00:05:20.14 And so, what I'd like to do is walk through some common scenes, 00:05:23.18 sometimes talking about what's typically done, 00:05:27.08 and then show you what's done in the assertion-evidence approach. 00:05:30.17 Okay. So, here we go. 00:05:31.29 The first scene is typically a title slide. 00:05:34.29 And at so many research conferences, 00:05:38.10 or at symposiums and seminars, 00:05:41.00 you'll see people have a slide such as the following. 00:05:44.14 Hello. My name is Stuart Apple. 00:05:46.20 I'm workin' with Kerry Cho and Dale Gray, 00:05:49.03 and we are from the Environmental Science Department 00:05:52.14 at such and such a university. 00:05:54.19 And what we are going to present today is 00:05:58.02 Atmospheric Mercury Depletion Events 00:06:00.18 in Polar Regions During Arctic Spring. 00:06:03.25 And then that slide is gone. 00:06:06.05 And in those few nanoseconds 00:06:09.04 between that slide and the next slide, 00:06:11.27 think about how you're feeling as an audience member. 00:06:15.14 Are you... are you confident 00:06:18.09 that you're gonna learn a lot in this talk? 00:06:20.19 Do you feel as if the train has left the station, 00:06:22.27 and yet you're not really clear on what the talk is about 00:06:28.29 or what the title means? 00:06:33.27 I think that's what many people have... 00:06:35.09 or, the state that they're in in a research talk. 00:06:37.27 We can do better than that. 00:06:40.05 And now, you kind of look at this slide 00:06:42.21 and you wonder... gosh, I see a lot of slides like that. 00:06:45.17 Maybe they've got different decoration. 00:06:47.23 But why? 00:06:49.28 Why do so many slides have this title on the top, 00:06:52.05 and then just the name and the affiliation beneath, 00:06:55.05 and maybe just some decoration? 00:06:57.19 And you know why. 00:07:00.02 I mean, the reason is that people are just following PowerPoint's defaults. 00:07:03.05 PowerPoint tells them to do that. 00:07:05.10 And so, they'll put their title and then they'll put their affiliation. 00:07:08.07 And what we're saying is, 00:07:10.03 you can do better than that. 00:07:12.01 You can do better than that. 00:07:14.10 So, what can we do? 00:07:16.27 So, I'd like to look at... actually, this research 00:07:20.06 was done by a young researcher at the University of Oslo, 00:07:25.02 a chemistry student by the name of Katrine Aspmo. 00:07:27.24 And she was gonna give her first research presentation. 00:07:31.18 And she was a little nervous about that. 00:07:34.18 Moreover, the presentation was gonna occur in Portland, Oregon, 00:07:38.21 and so the people were gonna be speaking in English 00:07:43.14 -- not her native Norwegian. 00:07:45.27 But her English is good. 00:07:48.02 Still, that's just one more thing for her to consider. 00:07:50.25 But before this talk, 00:07:53.20 she went to her advisor and she asked her advisor, 00:07:57.22 how many people will be in the audience? 00:07:59.23 And her advisor said, well, it'll be about 50. 00:08:02.07 She said, whoa. 00:08:04.19 And then she said, how many of them know 00:08:05.20 what an atmospheric mercury depletion event is? 00:08:08.21 And her advisor said, hmm... I'd say five. 00:08:11.15 You're one. I'm another one. 00:08:14.20 Our collaborator, Grethe -- she's a third. 00:08:17.08 And so, that kind of gave her this idea that... 00:08:20.23 whoa... you know... 00:08:23.11 for her to orient that audience, 00:08:25.20 she's gonna have to spend some time on that initial scene. 00:08:29.05 And so, here's what she came up with. 00:08:33.12 Hello, my name is Katrine Aspmo, 00:08:36.00 and I'm working with Torunn Berg 00:08:38.21 at the Norwegian Institute of Air Research, 00:08:40.22 and I'm also working with Professor Grethe Wibetoe 00:08:42.23 from the Department of Chemistry at the University of Oslo. 00:08:46.00 And what we're trying to determine 00:08:48.20 is where atmospheric mercury goes 00:08:54.03 when it depletes or falls out of the atmosphere. 00:08:59.03 Now, one thing you may not realize 00:09:02.08 is that in this atmosphere -- in this room right here -- 00:09:03.29 there's a certain amount of mercury. 00:09:06.16 It's not much. It's about 1.5 nanograms per liter. 00:09:09.16 And here, in this room, 00:09:11.16 it remains in the atmosphere. 00:09:13.15 Even when we breathe it in, we breathe it out. 00:09:15.24 It still stays in that gaseous state. 00:09:18.19 But for some reason 00:09:21.09 -- and scientists aren't exactly sure why -- 00:09:24.14 in the polar regions of the world, 00:09:26.24 such as this beautiful Ny-Alesund region, 00:09:29.00 that you see here of Norway, 00:09:32.04 there are these events where that level of mercury 00:09:36.23 will drop to zero. 00:09:39.20 And the question comes... 00:09:41.27 where does that mercury go? 00:09:43.28 So, these events... they've got this fancy name, 00:09:47.10 atmospheric mercury depletion events. 00:09:49.16 But where does that mercury go? 00:09:51.20 Now, while you may not have realized 00:09:53.21 that mercury is in the atmosphere, 00:09:55.14 I think everyone in the room knows 00:09:58.03 that mercury is toxic. 00:09:59.29 And at high enough levels, 00:10:02.07 it can cause paralysis and even death for mammals. 00:10:04.29 And so, for the polar bears in the region, 00:10:08.01 for the arctic foxes, 00:10:10.01 for the stray Norwegians who wander through there, 00:10:14.23 how... where is that mercury? 00:10:17.03 What and... and... and how does... 00:10:20.03 how does it get to that particular spot? 00:10:22.19 That is, a... you know, a research question. 00:10:26.17 And so, what we did is... you may not be able to see, 00:10:29.02 but in this one corner here is a cabin. 00:10:32.27 And we stayed in that cabin for two months. 00:10:37.00 And what we did is 00:10:39.20 we made simultaneous measurements of the amount of mercury 00:10:42.29 that's in the atmosphere 00:10:44.24 with the amount of mercury that's in the surface snow 00:10:47.06 to test our hypothesis. 00:10:49.21 That is in fact where that mercury goes. 00:10:54.15 Wow. I remember seeing this talk at... 00:10:57.19 seeing the beginning of this talk 00:11:00.03 at the University of Oslo in 2004. 00:11:02.03 And I thought to myself, you know, 00:11:04.15 I'm not an environmental scientist, 00:11:06.17 but I am lucky. 00:11:08.18 I am lucky to be here 00:11:10.26 because I'm gonna learn something in this talk. 00:11:12.20 I have already learned something in this talk. 00:11:14.20 And that's something that I would suggest to you: 00:11:17.08 in that first scene, give the audience something. 00:11:21.02 You know at the beginning of a scientific presentation, 00:11:23.28 there are certain things 00:11:26.27 that you want to accomplish before you get to the middle. 00:11:29.05 One thing is you want to show the importance of the research. 00:11:31.15 You want to present background 00:11:33.15 that the audience needs. 00:11:35.11 You also want to present background 00:11:37.20 about yourself to build credibility. 00:11:39.09 And you want to give your research question. 00:11:41.14 Katrine did all of those... 00:11:44.13 all of those on that title slide. 00:11:47.07 Wow -- that's effective. 00:11:49.11 So, we've talked about one scene here. 00:11:54.18 Another scene that often occurs 00:11:58.24 also happens at the beginning, before you get to the middle, 00:12:00.14 and it's something people call an outline slide. 00:12:02.10 I like to call it kind of a mapping slide. 00:12:04.17 Sadly, many people's slide looks like the following. 00:12:08.18 You've got this detailed list 00:12:10.24 of every single thing they're gonna do 00:12:13.00 -- things they've already done, actually, 00:12:14.27 in the talk by the time they give it -- 00:12:16.24 and then things that you already know were gonna come. 00:12:19.06 And then they will dutifully read through that list. 00:12:21.20 You know, they'll get to... you know, 00:12:23.29 almost all the way through, 00:12:25.24 and then they'll realize they misspelled a word like acknowledgments, 00:12:28.06 and they'll apologize for it... 00:12:30.14 and then they will finish, 00:12:32.05 and then they will move on. 00:12:34.00 And when they move on, 00:12:35.25 then the audience is, to themselves, 00:12:38.08 thinking, well, he gave me all these things, 00:12:41.14 or she gave me all these things, 00:12:43.13 and I've forgotten them already. 00:12:45.11 You can do better than that. 00:12:47.20 One thing is, remember, 00:12:51.04 people feel comfortable with lists of two's, three's, and four's. 00:12:54.01 So, a list, here, of eleven is not very good. 00:12:57.19 Another thing is you don't need to give them some things: 00:13:00.01 introduction -- they know the talk has an introduction; 00:13:02.08 background -- you've already given the background 00:13:04.05 before you do this mapping; 00:13:06.04 conclusions; acknowledgments; questions. 00:13:08.02 They know that's happening. 00:13:09.28 It's the stuff in the middle. 00:13:11.24 And you don't have to give the sub-levels. 00:13:13.22 I mean, that's not what's so important. 00:13:15.13 It's the main things that you need to give. 00:13:17.16 So, let's look at what Katrine Aspmo did. 00:13:19.20 I thought she did an excellent job. 00:13:22.00 So, in her talk, she divided it into three parts. 00:13:25.22 One is this theory for mercury cycling. 00:13:28.21 And then she talked ab... 00:13:30.18 mentioned that she was gonna, you know, talk about that. 00:13:33.06 And then she had another part, 00:13:35.16 where she had those measurements from that station... 00:13:37.29 actually, on those two types of mercury measurements: 00:13:41.24 in the atmosphere and then in the surface snow. 00:13:46.03 And then, her third part of the talk 00:13:49.00 was environmental implications, 00:13:51.05 and she showed this particular picture. 00:13:53.00 And the polar bear is not there in a gratuitous fashion. 00:13:55.18 Actually, a lot of the data 00:13:58.05 on the effects of these mercury depletion events 00:14:00.08 occurs through studying polar bear carcasses, 00:14:04.02 and so that is what she went over. 00:14:06.20 But whoa... what a great mapping scene. 00:14:09.20 And I have seen people sometimes take those images 00:14:12.20 and put those as icons in the corners of all the slides 00:14:17.05 that were from that particular section. 00:14:19.05 That's just another thing, here, 00:14:21.05 that you could do that doesn't clutter a slide 00:14:24.04 or take up too much space 00:14:25.29 or too much time for the audience's attention. 00:14:28.15 Yeah. 00:14:30.07 But that's the kind of mapping that you want to do. 00:14:32.19 Let's try... let's think about literature review. 00:14:35.02 So, literature view... oh my gosh. 00:14:36.27 This is often one of the most boring parts. 00:14:38.13 People walk through all the... 00:14:40.08 all the major work that's been done. 00:14:42.15 You'll get a bullet list slide, 00:14:44.06 and they'll talk about everything that they've done. 00:14:46.07 And I'd like you to rethink that. 00:14:48.29 You know, what are you doing in the literature review? 00:14:51.11 You're trying to show that there's a gap in the work, 00:14:56.04 and that... and that your research question... 00:14:58.21 your research hypothesis... 00:15:00.06 your research fills that gap. 00:15:03.12 And so, you're trying to show that gap exists. 00:15:05.14 So, here's one that Jacob Snyder did on his. 00:15:09.23 And so, what he did is... 00:15:12.01 he wanted to make it clear 00:15:14.23 that there are a number of people 00:15:17.09 -- not a lot of people, but a number of people -- 00:15:19.09 who have tried to use additive manufacturing 00:15:22.18 to create these heat transfer devices 00:15:25.24 for these gas turbine engines. 00:15:27.28 And so, he showed a couple of images 00:15:30.21 right at the beginning: 00:15:32.06 one from the work of Kirsch and Thole, 00:15:34.03 another one from the work Collins. 00:15:35.24 Then it talked a little bit about what they had done. 00:15:38.14 Then he brought in the work of Ferster 00:15:40.26 and the work of somebody else. 00:15:42.17 Then he brought in the work of Siemens, 00:15:44.17 that they... and he talked about what they had done. 00:15:46.21 But then he made it clear that there was a gap 00:15:50.24 between what they've done and what still could be done. 00:15:53.04 Wow. 00:15:54.26 That's something that people can follow. 00:15:56.29 Really, really nice. 00:15:58.18 And it's thinking about what details are essential 00:16:00.29 and then what details are secondary. 00:16:06.20 So, we've looked at a literature review. 00:16:08.26 Let's talk a little bit about methods. 00:16:11.00 So, with methods... 00:16:13.07 I'll show you one that's more from an experimental talk. 00:16:17.19 And so, here, rather than having, again, 00:16:21.19 a bullet list with all these details, 00:16:23.09 what Nick Cardwell did in this one is 00:16:26.13 he started with an image of his experiment. 00:16:29.08 So, he's got this recirculating wind tunnel. 00:16:31.19 And then he shows this one particular part 00:16:34.28 of that wind tunnel 00:16:36.19 where they split the flow. 00:16:38.26 And so, the flow there splits. 00:16:42.02 You see some of it goes in the blue part 00:16:44.08 and some of it goes in that white part. 00:16:46.04 And then, in that... in that center part, or that white part, 00:16:48.17 what happens is they heat some of that flow. 00:16:51.00 So, you've got... now, you've got two flows: 00:16:53.14 the secondary flow in the flu... in the blue part, 00:16:58.00 and then the primary flow, but the primary flow is heated. 00:17:01.00 And then they bring that secondary flow 00:17:03.22 back in to try to cool the surfaces after... 00:17:09.20 after the heated flow has occurred. 00:17:11.12 And so, they're simulating what goes on in a jet engine, 00:17:14.08 where they try to cool the parts 00:17:16.28 downstream of the combustor. 00:17:18.23 But... really nice. 00:17:21.01 Now, Nick Cardwell... he knows a lot of the numbers 00:17:24.03 on flow rates and temperatures, 00:17:25.29 and so he was just able to say those. 00:17:27.27 What you could do, if you're... 00:17:30.21 don't have the confidence you could remember those, 00:17:33.23 you could animate them into that white space, 00:17:36.02 but then I would animate them out 00:17:38.08 when they're not needed. 00:17:40.02 Don't let those clutter the slide. 00:17:42.14 But remember, the audience will have your paper. 00:17:45.20 They can go back and refer to what things are. 00:17:49.16 You definitely want to have those details, 00:17:51.19 and you want to know them 00:17:53.12 and be able to respond to questions, 00:17:55.08 but you don't need to put everything on the slide 00:17:58.13 as so many people do. 00:18:02.07 Let's look at a second method slide. 00:18:04.06 And on this one, 00:18:07.08 the speaker didn't have images 00:18:09.19 such as the last one had. 00:18:11.26 So, let's see how he handled it. 00:18:14.19 So, this particular work was done by Jimmy Webber. 00:18:18.06 And in a sense, 00:18:20.03 what he's trying to do in this part of the methods section 00:18:22.27 is just talk about how he is going 00:18:27.14 to characterize this pollution of 53 streams 00:18:30.15 in the Northeast. 00:18:32.08 And so, he introduces these six criteria 00:18:34.21 that he will use to characterize that pollution. 00:18:39.19 And then the second thing that he does 00:18:42.15 is he says, as a reference, 00:18:44.06 he's gonna compare the pollution of those streams 00:18:47.03 versus the pollution 00:18:49.15 -- or those same criteria -- 00:18:51.09 of 12 reference streams. 00:18:54.03 And then he gives a teaser 00:18:58.16 on a couple of results from his work, 00:19:01.19 and I thought that was interesting that he did so. 00:19:03.29 And what he did is he showed 00:19:06.19 that the sulfate levels were beyond that reference point, 00:19:11.10 on average, for the 53 streams. 00:19:14.20 Not to a place where it's dangerous 00:19:16.26 for the plants or wildlife, 00:19:18.26 but certainly beyond the reference. 00:19:21.12 And then he also showed that the chloride levels... 00:19:24.28 those were in fact at the impaired level. 00:19:29.13 I love this scene. 00:19:31.02 I love how he tells this part of his methods 00:19:36.09 as a story. 00:19:38.06 And I love the imagination. 00:19:40.09 Somebody else would have just had a bulleted list, 00:19:42.27 and we would have slept through it. 00:19:44.25 But here, he has essentially told us a story 00:19:49.08 that we can remember. 00:19:52.10 And that is so important. 00:19:54.15 It's not just that people understand our work; 00:19:56.19 we want them to remember our work. 00:19:59.20 So, here... this part of the talk 00:20:01.26 is where you have to... 00:20:03.16 you're making some of your best arguments. 00:20:07.12 And I just want to show an example, here, 00:20:10.23 that comes from some work 00:20:14.11 that's being done in Norway 00:20:17.11 by this... Siri Larsen. 00:20:19.12 And so, what Siri is doing is 00:20:24.26 she's looking at satellite images 00:20:27.00 and kind of looking at them in interesting ways, 00:20:28.26 with different filters, 00:20:30.23 to extract some valuable information. 00:20:32.20 And so, these images 00:20:36.08 happen to come from parts of Norway 00:20:38.10 where there might be avalanches. 00:20:40.18 And that's important because 00:20:42.27 if you have an avalanche... 00:20:44.24 you know... or if... 00:20:46.25 if a place is susceptible to one avalanche, 00:20:49.23 then more could occur, 00:20:51.20 and you want to keep people away 00:20:54.22 from that particular area. 00:20:56.12 But the problem is when you look at the satellite images, 00:20:58.23 sometimes it's hard to distinguish 00:21:01.16 an avalanche from a sparse forest. And so, what she has done is 00:21:08.01 she's applied these filters 00:21:10.11 that kind of helped her make that distinguishing. 00:21:12.23 And so, one of the filters is this aspect direction, 00:21:15.18 and she would talk about how she applied that 00:21:18.24 and what she would find. 00:21:20.08 Another one, then, is of the vertical direction 00:21:22.27 -- how she applied that and what they have found. 00:21:25.19 But I like, again, 00:21:28.08 how she tells that scene, tells it as a story. 00:21:31.12 So, that's an example of results that has images. 00:21:35.24 Another kind of result would be a graph, 00:21:38.06 and so here's... here's a graph that Steve Weaver 00:21:40.26 put together in one of his talks. 00:21:43.24 And so, in this particular graph, 00:21:47.02 what he is doing is he's trying 00:21:51.20 to examine the roughness in this heat transfer channel. 00:21:55.20 And so, one way to determine that 00:21:59.14 is by this particular graph, 00:22:02.20 where you graph friction factor, f, 00:22:06.00 on the y axis 00:22:07.24 versus Reynolds number on the x axis. 00:22:10.08 And so, the first thing that Weaver did 00:22:15.06 is he has that straight line. 00:22:17.06 And so, that would be a perfectly smooth pipe. 00:22:19.23 That would be the theoretical explanation, 00:22:23.12 so... from Blasius in 1894. 00:22:25.10 And then, here... then, the dots... 00:22:29.23 those are his experiments showing that 00:22:34.23 within experimental error he matches the curve of Blasius. 00:22:36.28 But then he's gonna roughen up these surfaces, 00:22:40.07 and so he roughened them up in different ways, 00:22:42.09 and so... different colors... 00:22:44.08 red is not as rough as blue, 00:22:46.05 which is not as rough as green. 00:22:48.05 So, what's the effect of roughening the surface? 00:22:50.27 What effect does it have on the friction factor? 00:22:53.08 And then he animates in what that effect is, 00:22:57.18 and then he shows that it's actually... 00:22:59.12 it increases that friction factor in all of those cases. 00:23:04.03 A couple of things here that I liked... 00:23:06.18 one is I liked that he told things as a story. 00:23:08.24 Another thing I liked is that, here, 00:23:13.04 he was giving his most important result, 00:23:15.24 and he didn't start with the assertion at the beginning 00:23:18.06 because he knew there would be some people 00:23:20.20 who would be skeptical about that result, 00:23:23.12 and he knew there would be others that, 00:23:25.08 if he gave that assertion at the beginning, 00:23:27.07 it would be too much for them 00:23:29.20 -- they would be... they would be overwhelmed. 00:23:31.19 So, he started with a question that they understood. 00:23:34.23 And then, when he was ready, 00:23:36.20 then he brought in his assertion. 00:23:40.01 And so, in a way, I think of this kind of scene 00:23:43.27 as evidence-assertion. 00:23:45.09 Evidence comes first, and then, 00:23:47.08 when the audience is ready, 00:23:49.05 then you bring the assertion. 00:23:51.06 And in real persuasive types of situations, 00:23:53.06 that's a good thing to do. 00:23:55.14 So, let's move on to our last scene. 00:23:59.08 And our last scene is the scene that you show at the end. 00:24:02.09 And interestingly, the most common scene that I see people show 00:24:08.13 as their last slide is something that looks like that. 00:24:11.01 Oh my gosh. 00:24:13.04 Let's think about this. 00:24:14.19 Let's just think about this scene for just a second. 00:24:16.01 What are we trying to do here? 00:24:18.01 What we're trying to do here is... 00:24:19.11 we have presented our work to the world 00:24:21.28 and now we want the world's response. 00:24:24.04 And so, people are seeing our research, here, 00:24:28.19 for the first time. 00:24:30.18 And so that... maybe they're spending a minute and a half 00:24:34.15 or two minutes on a graph, 00:24:36.05 but now they're trying to formulate questions. 00:24:38.09 How does this slide help them formulate questions 00:24:40.19 about research that they've never seen before? 00:24:44.10 And the fact is it doesn't. 00:24:46.08 This is a terrible scene. 00:24:48.04 You can do so much better. 00:24:49.28 Don't do that -- please. 00:24:51.27 I mean think about it. 00:24:53.18 Think about it from the audience's perspective. 00:24:56.01 Your best scene to end with 00:24:58.22 is a scene that shows your conclusion, 00:25:01.28 that shows really what your main takeaways are. 00:25:05.16 And that's what Danielle Lesso 00:25:08.02 did in this particular scene. 00:25:09.22 So, she had three main points 00:25:12.09 that she had made in her talk 00:25:14.26 to show that Miscanthus 00:25:17.14 could be a promising fuel crop 00:25:20.10 for the northeastern part of the United States. 00:25:22.20 And the first one is that Miscanthus 00:25:25.06 is able to have a cold tolerance 00:25:29.00 down to 6 degrees Celsius, 00:25:30.24 which is important in the Northeast. 00:25:32.15 Another thing is that the root depth 00:25:35.10 goes down to 2 meters, 00:25:37.21 which is important because a lot of the Northeast, 00:25:39.25 as she pointed out in her talk, 00:25:41.18 is on hilly surfaces, 00:25:43.15 and so the plant could be washed away 00:25:45.19 if it doesn't have sufficient root depth. 00:25:48.14 And then in the third part, she showed this energy ratio, 00:25:52.02 which the National Academy of Sciences had found, 00:25:55.00 that for every BTU of energy that you put in to 00:26:02.08 planting, fertilizing, harvesting, and transporting Miscanthus, 00:26:07.11 you get 6 BTUs out of energy 00:26:10.00 -- a ratio was 6 to 1. 00:26:13.21 And at this point, she gave her closure to her talk. 00:26:17.04 And then, when she was ready, 00:26:19.28 then she asked for questions. 00:26:22.08 Now, the audience has something 00:26:25.06 in which they can ask. 00:26:28.01 They've got words up here to help them formulate questions. 00:26:33.25 So, what have we done today? 00:26:36.14 We've talked about why the assertion-evidence approach... 00:26:39.01 why it is worth 00:26:42.27 at least an experiment on your part, 00:26:44.27 for you to try the gains 00:26:48.09 that we have in audience comprehension. 00:26:50.23 And then we walked through various scenes 00:26:53.00 to give you ideas 00:26:55.09 on how you might design your title slide, 00:26:57.18 a mapping slide, 00:27:00.02 a slide on your literature review, 00:27:01.12 talk about your methods, your results, 00:27:03.19 and then finally your conclusion. 00:27:07.04 So, this particular talk has focused 00:27:09.26 on how we might design slides for a research talk. 00:27:14.13 The third part of the series talks 00:27:17.28 about how you would deliver those slides 00:27:19.24 and, in particular, 00:27:22.11 how you would deliver those slides with confidence.
Part 3: Attaining Confidence in Your Scientific Presentations
- Duration: 00:20:40
00:00:08.02 This film is the third of a three-part series for iBiology 00:00:14.17 on improving your scientific presentations. 00:00:17.14 The first two films introduced a different approach, 00:00:20.28 the assertion-evidence approach, 00:00:23.04 for presentations, 00:00:25.24 what it is, why to use it, 00:00:28.19 and then how to incorporate it 00:00:31.17 into a research presentation. 00:00:33.17 This third film focuses on an important aspect of presentations, 00:00:39.15 and that is delivery. 00:00:41.07 And in particular, 00:00:43.22 how do you exude confidence in your delivery? 00:00:49.10 Now, I have had the fortune of teaching scientific presentations 00:00:54.13 over the past 30 years 00:00:58.10 on 4 continents, 17 countries, 00:01:02.17 and more than 100 institutions -- 00:01:08.00 laboratories, companies, universities, and agencies. 00:01:12.28 And by far, the number one question 00:01:16.05 that young scientists and engineers asked me is, 00:01:21.09 how do I handle nervousness? 00:01:24.08 Now, they don't ask this question in front of the big crowd. 00:01:27.11 Rather, they catch me in the hallway and they ask. 00:01:31.01 And to that question, I have the same answer. 00:01:35.00 In the days before the presentation, 00:01:38.14 think positively. 00:01:40.13 Just as a professional tennis player 00:01:43.00 will imagine a shot going in a certain spot, 00:01:46.15 you too, in your presentations, 00:01:49.25 should imagine success -- 00:01:53.22 the audience understanding your results, for instance. 00:01:57.19 On that day of the presentation, 00:02:00.27 arrive early. 00:02:04.10 I cannot tell you how many times arriving early 00:02:08.08 has saved me from embarrassment. 00:02:12.03 Learning that my computer 00:02:15.09 doesn't hook up with their particular projector, 00:02:18.19 finding that chairs are not where they should be... 00:02:22.27 arrive early. 00:02:25.11 That way, you can remove one of the biggest sources of nervousness, 00:02:29.23 and that is that your presentation slides will not work. 00:02:36.11 And then, just before you speak, 00:02:40.28 think about some advice that Mark Twain 00:02:43.24 shared with a nervous presenter backstage. 00:02:47.20 Don't worry -- they're not expecting much. 00:02:51.15 So, those are the three things 00:02:54.10 that I generally tell people 00:02:57.01 on how to handle nervousness 00:02:59.12 before a scientific presentation. 00:03:01.09 And I have to say, I've chosen those three 00:03:03.28 because those three things have helped me. 00:03:06.14 But what I would also say is "how do I handle nervousness?" 00:03:11.04 is not your best question. 00:03:13.24 The better question to ask is, 00:03:16.07 how do I attain confidence when I present? 00:03:20.13 And I'm talking about the confidence of the neuroscientist Jill Bolte Taylor 00:03:25.03 or the physicist Brian Cox. 00:03:29.19 So, this question's a little bit different. 00:03:31.23 And if you think about confidence, 00:03:35.19 there are really two types of confidence. 00:03:38.09 There's that confidence that you feel inside, 00:03:41.03 the internal confidence. 00:03:44.17 And then there's that confidence 00:03:47.20 that you project to the audience. 00:03:50.02 Even though inside you might be hurting, 00:03:52.16 to the audience you can still project 00:03:55.18 that you at least seem confident. 00:03:58.28 So, I'd like to talk about those two. 00:04:01.21 And I'll start first with the internal confidence. 00:04:05.15 And I'd like to draw upon my interviews 00:04:08.29 with a number of scientists and engineers 00:04:12.21 who've given excellent presentations 00:04:15.02 to large audiences, 00:04:16.29 such as Jill Bolte Taylor or Brian Cox. 00:04:23.01 And one of the key ingredients for that internal confidence 00:04:29.09 is having strong content. 00:04:32.15 If you have tested or vetted that content of yours 00:04:37.24 before audiences whom you respect, 00:04:41.12 and that content has withstood those audiences, 00:04:45.20 and in fact received positive responses 00:04:49.16 from those audiences, 00:04:51.16 that will help you with your internal confidence. 00:04:57.00 A second ingredient comes from a short interview 00:05:02.01 I had with Jane Goodall. 00:05:04.18 I happened to meet her at an airport, 00:05:06.27 and I didn't have much time to speak with her, 00:05:10.21 but I mentioned that I have this opportunity 00:05:14.08 to talk about presentations 00:05:16.25 to many young scientists and engineers 00:05:20.00 around the world, 00:05:22.05 and what piece of advice would she give them? 00:05:25.22 And her demeanor changed. 00:05:29.22 She kind of took on a harsh demeanor, 00:05:31.26 and she said, 00:05:34.00 well, it certainly wouldn't be the same piece of advice 00:05:37.09 that someone gave me. 00:05:39.26 And I had this sense that 00:05:43.05 I had just ripped the Band-Aid off an old wound. 00:05:45.13 She said that before her first presentation 00:05:49.13 someone had told her to just go up there. 00:05:52.16 You're the expert. 00:05:54.18 And she said that was horrible advice. 00:05:57.17 And then she went on to tell me 00:05:59.29 that she was here touring the United States, 00:06:02.14 and she was giving essentially 00:06:06.12 the same talk at ten different places. 00:06:09.12 And at each of those places, 00:06:13.26 before the talk, 00:06:16.25 she insisted on having 45 minutes by herself 00:06:21.00 so that she could walk through that talk 00:06:24.02 and imagine herself giving it to the crowd. 00:06:28.20 And I thought to myself, my gosh. 00:06:31.24 Someone who is that seasoned... 00:06:34.05 if she still needs that amount of preparation, 00:06:40.01 what about the rest of us? 00:06:43.11 Preparation -- that I would say is the second ingredient. 00:06:47.28 And then the third ingredient came from the world health statistician 00:06:52.29 Hans Rosling. 00:06:55.03 And Hans Rosling told me that, for him, 00:07:01.02 an important part of internal confidence was focus. 00:07:09.20 What Rosling said is before an important talk 00:07:12.07 he didn't want to... 00:07:15.12 in the minutes before, he didn't want to really speak to anybody. 00:07:17.27 He just wanted to be by himself. 00:07:21.11 And his best analogy for it 00:07:24.20 was to be like a downhill slalom skier 00:07:28.17 up at the top, just before you take off. 00:07:33.11 And a downhill slalom speak... 00:07:35.16 skier thinks about going here, going here, 00:07:39.03 going here, or going here. 00:07:42.01 And he said, for him, that was the same thing, 00:07:45.14 that he wanted to think about exactly 00:07:47.27 where he was going to go. 00:07:51.06 This idea of focus was also one 00:07:55.06 that a young presenter communicated to me -- 00:07:59.13 Sheila Patek, before one of her first presentations, 00:08:04.16 which was to more than 800 people. 00:08:08.16 And what she said is... 00:08:12.05 she said, if I had thought about the 800+ people 00:08:16.07 in the room that day, 00:08:18.19 I never could have done it. 00:08:21.05 Instead, I thought about the science 00:08:23.23 and my passion for the ideas, 00:08:25.28 and I let that carry me. 00:08:30.18 Strong content, preparation, focus. 00:08:36.23 If you will work on those three things, 00:08:39.22 you will bolster your internal confidence. 00:08:44.12 Now, I'm not saying that before a talk 00:08:47.23 you're not going to feel nervous. 00:08:50.29 There will be audiences and there will be situations 00:08:55.07 in which you will. 00:08:57.24 But... and I think something to realize 00:09:01.23 is that the internal confidence 00:09:04.12 is not an on/off switch. 00:09:06.29 A better analogy is that it's a bucket. 00:09:10.20 And the more that you work on those three, 00:09:13.18 the more fluid that is in that bucket. 00:09:18.00 And that... the nervousness that you will have 00:09:23.13 is not as much as if you had not done the strong content, 00:09:29.06 the preparation, 00:09:31.03 the focus. 00:09:33.21 So, that was a little bit about internal confidence. 00:09:37.01 How about projected confidence? 00:09:40.26 One thing that has amazed me 00:09:43.28 is that I have had students 00:09:46.19 who have given a presentation 00:09:49.09 -- former students -- 00:09:51.12 and I have watched them, 00:09:53.08 and I have thought, oh my gosh, 00:09:56.06 these students are doing great. 00:09:58.10 And then I think to myself, 00:10:00.24 I must be a really good teacher, 00:10:03.12 that my former students are presenting so well. 00:10:07.07 But then afterwards, I will talk to these students, 00:10:11.11 and they will tell me how nervous they were. 00:10:14.17 And I will think to myself, 00:10:16.21 I must not be a very good teacher, 00:10:19.07 because I couldn't see their nervousness. 00:10:22.22 But one thing that I've realized is that 00:10:27.07 even though inside you are hurting, 00:10:30.16 you can mask that discomfort 00:10:36.28 in certain ways and with certain steps that you can take. 00:10:40.04 And so, I'd like to come back to Twain 00:10:43.20 and talk about another quotation that he has. 00:10:45.23 And for the moment, disregard the religious implications 00:10:48.22 of this quotation. 00:10:50.24 But Twain talked about 00:10:54.04 the calm confidence of a Christian with four aces. 00:10:58.04 And I think as a presenter, 00:11:01.09 there are four aces that you can play in a presentation 00:11:05.02 to project more confidence. 00:11:07.27 The ace of spades: start strong. 00:11:13.06 On the day of the presentation, arrive early. 00:11:17.04 Make sure that all the equipment is working. 00:11:21.20 And not just your computer and projector, 00:11:25.08 but make sure that the clicker is working 00:11:27.27 so that you are ready to go. 00:11:31.03 One thing that is important to realize is that 00:11:36.10 different rooms have different ghosts. 00:11:38.05 And crazy things that will happen in one room 00:11:41.12 will not happen in another. 00:11:43.16 But in that other room, 00:11:46.05 something else crazy could happen. 00:11:48.17 Be prepared -- arrive early. 00:11:50.27 And then, when you've gotten everything ready to go, 00:11:54.28 don't hide out in the bathroom. 00:11:56.25 Rather, meet your audience. 00:12:00.21 Try to find out something from them 00:12:03.07 that you can incorporate into your talk. 00:12:06.29 I see speakers do that. 00:12:09.13 And even though I know exactly what it is that they're doing, 00:12:13.25 I'm always amazed at that particular move 00:12:17.21 that they make. 00:12:20.03 Just meet your audience, 00:12:22.20 try to find out something about them. 00:12:24.14 Even if you don't incorporate it, 00:12:27.01 you have strengthened your hand 00:12:29.18 by meeting that person, 00:12:31.23 becoming in a sense that person's friend 00:12:35.01 or that person becoming your ally. 00:12:38.18 And then, when it's time for you to go up, 00:12:43.18 move up to the stage, stand tall. 00:12:47.09 I like to feel the muscles in the backs of my calves and thighs. 00:12:50.28 I like to feel myself stand as tall as I can 00:12:55.11 in front of the audience. 00:12:57.23 Don't necessarily say anything for a moment. 00:13:00.29 Smile. 00:13:03.04 Smiling is a great thing to do 00:13:06.10 because what happens is the audience will smile back, 00:13:08.29 and that's a good feedback loop for you. 00:13:12.17 And then, when you're ready to speak, 00:13:15.11 make sure that the first syllable that you say 00:13:20.08 is not uh. 00:13:22.12 Oh my gosh, I can't tell you how many times 00:13:26.01 people have undercut such a wonderful moment 00:13:28.19 with an uh or um. 00:13:32.16 Know what you're going to say first. 00:13:35.24 I don't memorize much, 00:13:38.18 but I often have the first sentence committed to memory. 00:13:42.15 And when I say it, 00:13:45.00 I will pause somewhere in the middle at a natural place. 00:13:49.22 And when you pause 00:13:52.06 -- and this might sound odd -- 00:13:54.11 listen for the HVAC sound in the room 00:13:57.21 -- the heating, ventilation, and cooling sound of the room -- 00:14:00.29 and love that sound. 00:14:04.01 00:14:06.05 Embrace that sound. Feel comfortable with that sound 00:14:08.22 so that you don't have this urge 00:14:12.03 to fill that sound with uh or um. 00:14:16.25 And then, when you show that first slide, 00:14:19.28 know that first slide. 00:14:22.09 Don't turn to the slide 00:14:24.20 and read what the title is. 00:14:29.16 And for heaven's sake, 00:14:32.04 don't turn to the slide 00:14:35.24 when you say your name. 00:14:37.25 You ought to know your name. 00:14:39.18 Know that first slide. 00:14:41.22 Now, on that slide, you should have some kind of image 00:14:45.13 or a sequence of images 00:14:47.25 that orient the audience. 00:14:50.03 And turning to that image... 00:14:52.14 that's a natural turn, 00:14:54.19 because you want the audience to turn toward that image. 00:14:59.12 Ace of spades -- start strong. 00:15:03.07 Ace of hearts -- reduce the text on slides. 00:15:08.21 And so, don't follow PowerPoint's defaults 00:15:11.23 and have all these bullets. 00:15:14.09 Rather, use an approach 00:15:16.22 such as the assertion-evidence approach 00:15:19.03 that tries to minimize the text on slides 00:15:21.24 to just the essence of the argument 00:15:24.14 that you are giving. 00:15:26.22 Build your talk on messages, 00:15:28.25 not on topics. 00:15:31.01 Support your messages with visual evidence, 00:15:33.14 not bullet lists. 00:15:35.17 And that visual evidence could be photographs, drawings, 00:15:40.00 diagrams, graphs. 00:15:42.18 It could be a film, could be an equation, 00:15:44.25 could be a short table. 00:15:47.00 But reduce that text on slides 00:15:49.09 so that when you are speaking, 00:15:52.03 the words clearly come from you. 00:15:57.22 You show ownership of your research. 00:16:02.16 Ace of hearts -- reduce the text on slides. 00:16:06.16 Ace of diamonds -- know what comes next. 00:16:10.09 Now, for me, when I'm at a conference 00:16:15.17 that I'm the second speaker or third speaker 00:16:18.28 in a session, 00:16:20.26 I really don't have the confidence 00:16:23.18 to listen to the previous speakers 00:16:25.21 and to ask them questions. 00:16:28.03 I'm always amazed at those people who do. 00:16:30.16 But for me, I am sitting here 00:16:34.02 thinking about my own presentation. 00:16:36.11 And one thing that I like to do 00:16:38.22 -- and it's similar to what Rosling said -- 00:16:41.24 is that I like to think about each scene. 00:16:45.11 And so, I'll often take a blank sheet of paper 00:16:48.05 and I will sketch thumbnails of the slides, 00:16:52.14 and then the next slide, and then the next slide, 00:16:56.14 and the slide after that, 00:16:58.21 so that I know what comes next. 00:17:01.08 Because if I know what comes next 00:17:04.03 before I click to that slide, 00:17:07.01 I can make a transition to that scene. 00:17:11.26 And that making of a transition... 00:17:15.11 that projects confidence. 00:17:18.21 Ace of diamonds -- know what comes next. 00:17:22.28 Ace of clubs -- finish strong. 00:17:26.04 When you're at the end of your talk, 00:17:29.10 have a strong scene on which to end, 00:17:32.25 one that states your main conclusions 00:17:36.01 and then has images of your main arguments 00:17:41.15 to support that conclusion. 00:17:43.29 And then go through those arguments 00:17:48.00 in an efficient manner. 00:17:50.06 And when you get to the end of those arguments 00:17:53.18 and then you may your closure 00:17:55.27 to end the talk, pause. 00:18:01.08 And before you ask for questions, 00:18:05.29 say the word thank you. 00:18:10.23 Or if you're in Germany, danke schön. 00:18:13.23 Or if you're in China, xièxiè. 00:18:16.02 But give that audience 00:18:19.11 an opportunity to clap. 00:18:22.00 I find that in conference presentations 00:18:25.16 and research symposiums, 00:18:27.16 it's a coin flip. 00:18:29.10 The speaker might give the audience 00:18:31.17 a chance to clap. 00:18:33.25 But a lot of times, the speaker will just rush 00:18:36.08 and ask for questions. 00:18:38.12 And then the audience doesn't know what to do -- 00:18:41.01 do I clap, or do I ask a question? 00:18:43.02 And so, what you end up with is 00:18:46.25 you end up with some tepid applause as well as then 00:18:49.08 some people may be trying to voice a question. 00:18:52.22 Don't go there. 00:18:54.21 You want to receive the applause. 00:18:56.26 And in fact, I think it's important 00:18:59.10 that those people who are 00:19:03.14 perhaps not in your field 00:19:05.18 see the experts in your field... 00:19:07.22 see them applaud. 00:19:09.24 Say thank you. 00:19:11.19 And then, when that applause is dying down, 00:19:15.27 that's when you want to ask for questions. 00:19:19.14 And when you receive questions, 00:19:21.23 know that there are gonna be some questions 00:19:24.27 that you cannot fully answer. 00:19:27.21 And so, a lot of young scientists and engineers... 00:19:31.17 they will rush that answer 00:19:34.08 and say what it is that they know. 00:19:37.13 But then they'll have a big but. 00:19:41.10 And then they'll end that answer 00:19:44.15 with some negative news. 00:19:46.25 A better way to handle it is to pause 00:19:49.18 and start your answer with although. 00:19:53.04 Although I cannot answer everything 00:19:55.28 about the question that you asked, 00:19:57.22 I can say... 00:20:01.00 and then finish strong with what it is you do know. 00:20:05.07 Ace of clubs -- finish strong. 00:20:10.26 If you'll play those four aces in your presentation, 00:20:16.01 you will project confidence. 00:20:21.19 Thank you.

- Educators of H. School / Intro Undergrad
- Educators of Adv. Undergrad / Grad

Talk Overview
Michael Alley has been teaching scientists and engineers how to design presentation slides and deliver effective scientific talks for over three decades. In this three-part lecture, you will learn (a) how to design your PowerPoint or Keynote slides, (b) how to organize your talk, and (c) how to confidently deliver your research seminar. This series will help trainees and research scientists alike improve their presentation skills.
Speaker Bio
Michael alley.

Michael Alley holds a master of science in electrical engineering from Texas Tech University and a master of fine arts in writing from the University of Alabama. Alley is a teaching professor of Engineering Communication at Pennsylvania State University. He is the author of three popular textbooks: The Craft of Scientific Presentations (2013), The Craft… Continue Reading
Playlist: Tips for Science Trainees

Related Resources
Michael P Alley, 2013, The Craft of Scientific Presentations, Springer-Verlag, New York, NY, USA, pp. 286
J K Garner and Michael P Alley, 2016, Slide structure can influence the presenter’s understanding of the presentation’s content , International Journal of Engineering Education, 32, (1A), pp. 39-54
J K Garner and Michael P Alley, 2013, How the design of presentation slides affects audience comprehension: A case for the assertion-evidence approach , International Journal of Engineering Education 26 (6), pp. 1564-1579
PowerPoint templates for Assertion-evidence slides
Reader Interactions
Itizaz says
September 25, 2020 at 12:18 pm
Thank you sir i was really looking for this information…keep it up
Rick Salatino says
May 11, 2021 at 3:39 pm
In the early 2010s, I was a scientific training manager, a molecular biologist and learning professional, for a medium-sized biotechnology company. I tried to influence and train our R&D scientists to use Michael Alley’s Assertion-Evidence approach to improve slide design for better knowledge acquisition and retention. While scientists theoretically accepted the approach, they practically rejected it. Powerpoint defaults were the comfortable default for most scientific research presentations and, I suspect, they still are today.
Craig Hadden says
April 17, 2024 at 5:23 am
Thanks for sharing these videos, which offer a great way to improve the standard of fact-based presentations!
If you’re interested, I’ve summarised this approach in a short post – including a 5-minute video. (The post also discusses “hacking” the assertion-evidence approach, to make your slides more varied.)
Leave a Reply Cancel reply
Your email address will not be published. Required fields are marked *

iBiology and iBiology Courses are part of the Science Communication Lab (SCL). Our mission remains the same, to connect people to science. However, our focus has shifted to producing and evaluating cinematic films for education and the public, which you can find on the Science Communication Lab website. Please visit us there for new content and videos!
Find a Video
- Search Videos
- All Playlists
- All Speakers
- YouTube Channel
- Other Languages
- Biochemistry
- Bioengineering
- Cell Biology
- CRISPR-Cas Technology
- Development & Stem Cells
- Genetics & Gene Regulation
- Human Disease
- Microbiology
- Neuroscience
- Plant Biology
- Science and Society
For Educators
- New! SCL Films for Education
- New! SCL Educator Newsletter
- iBiology Educator Resources
- iBiology Flipped Courses
- iBiology Courses Resources
- Recommended Playlists
- View All Educator Resources
Educators Recommend
- Cells of the Immune System
- Discovering Cell Cycle Regulators
- Genome Engineering with CRISPR-Cas9
- Hardy-Weinberg Equilibrium
- Next Generation Sequencing
- Semi-Conservative Replication of DNA
- Toll-Like Receptors in Adaptive Immunity
- Learn Microscopy
- Intro to Microscopy
- Bioimage Analysis
- Intro to Flow Cytometry
- View All Techniques
Free Courses
- Free Online Courses
- Launch iBiology Courses
- Cell Biology Flipped Course
- Engineering Life Flipped Course
- Evolution Flipped Course
- Immunology Flipped Course
Career Development
- Career Development Courses
- Career Development Videos
- Career Exploration Videos
- Biomedical Resources
- Biomedical Workforce
- View All Career Development
Our Favorites
- Short Films & Stories
- Feature Documentaries
- Famous Discoveries
- Improving Diversity in Science
- Share Your Research Series
Connect with Us
- iBiology’s Mission
- Contact iBiology
- Video Usage & Licensing
- Sign Up for Our Newsletter
- Subscribe to YouTube Channel
- Go to the Science Communication Lab
Want to create or adapt books like this? Learn more about how Pressbooks supports open publishing practices.
Introduction
Scientific posters as scholarly works.
- Posters are scholarly publications that scientists use to communicate findings and discoveries to an audience.
- Communication between a scientist and their audience can be interactive or self-contained.
- Posters allow for brief and efficient communication.
- Poster events are often featured at professional conferences.
- Poster presentations function to foster collaborations, generate interest, educate and prompt further research.
Purpose of Scientific Posters
A scientific poster is an illustrated summary of research and a type of scholarly publication that scientists use to share their findings and discoveries with the public. In contrast to books and journal articles, which provide lengthy and comprehensive examinations of a subject, posters provide an efficient, quick, high-level summary of a research project. Most academic conferences and many professional events host poster sessions as an opportunity for interested parties to succinctly learn about a wide range of research projects and to make professional connections with other scientists. The brief exposure afforded by a poster can serve to improve a scholar’s basic understanding of a field of research, help to identify connections that might otherwise have been obscured by details, or serve as the starting-point for learning more about a subject they might not have otherwise known about. Many productive collaborations have begun with a brief conversation between scientists in front of a poster.
This book will introduce you to the scholarly practice of poster presentations. You may have taken part in science fairs or similar events earlier in your education. A professional poster event is fundamentally similar to those events, but the discourse that takes place at the professional-level is a bit different because professional poster events function primarily to create new collaborations between research groups, critically evaluate experimental results and learn about new techniques and approaches that can be used in future experiments.
Before delving into the details of what scientific posters contain, it is worth describing when, why, and how poster presentations are used by scientists to communicate with others. Posters are an act of communication, and as with any communication, it is important to know your audience, the situation, your goals, and the process by which audience members will read, hear and understand your poster presentation.
It is also important to remember that scientific posters have evolved over many decades and through the experience of millions of individual experiences. The advice contained in this book describes the best practices that have emerged to be standard practice because they consistently produce the most efficient and effective communication. For example, scientific posters contain several distinct parts, which appear in order and include: Title, Abstract, Introduction, Materials & Methods, Results, Discussion and References. This standard mode of organization helps ensure effective communication between presenter and audience not only because it has been found to work, but because audiences have learned to expect it. Adhering to the standards described in this book will make it easier for your audience to understand your poster because they will know where to look to find the information they need.
Understand your Audience
Scientific posters must provide audiences with a clear, accurate understanding of scientifically valid findings. They serve to provide an efficient and succinct form of communication. But their brevity must not come at the cost of misrepresentation, whether in the form of meaningful omission, exaggeration, or other distortion. A person who reads a scientific poster should come away with the same essential understanding they would have if they had read an essay-length account of the same research, with the only difference being a quantitative difference of detail. Other goals that posters often serve include prompting further questions, creating professional connections and generating interest.
Scientific posters are primarily directed to peers or colleagues, people who have equivalent training as yourself but who may know less about the specific subject you are addressing. However, posters are also often used to communicate research findings to non-experts, members of the general public who are interested in the subject but may lack the training or experience required to assess the research in its full depth. Which audience your poster should address will depend on the venue where your poster will be presented.
Above all, you should think of your audience as someone like yourself in this sense: as a critical consumer of information, you should constantly subject any claim you encounter to a rigorous
process of examination before allowing it to become part of your memory. Once you commit something to memory, it is exceedingly difficult to excise it, so it is crucial that you pay close attention to what you allow in, especially when the person offering that information seems trustworthy and authoritative. Thus, you should design your poster to provide audiences not only with the information you want them to remember, but also all the details they need in order to assess the validity and reliability of that information.
Communicating your Research
People encounter scientific posters two main ways: stand-alone viewings and interactive presentations. A given poster may be presented in multiple situations, so it is important to design posters that audiences can make sense of without further guidance and that can also serve as a useful tool for illustrating speech.
Stand-Alone Posters – Often posters are made available to audiences without their authors being present. Sometimes a poster gallery is left standing throughout the length of a conference, so that attendees can peruse them at their convenience. Increasingly, digital versions of posters are made available through the internet, so that audiences may encounter them months after their original creation.
Interactive Poster Presentations – In interactive situations, one (or more) of a poster’s authors stands next to the poster and guides the audience through the process of understanding the research the poster presents. Normally, a poster presenter is prepared to present a brief summary (e.g., 5 minutes) of the poster’s contents, refined to make its findings as clear as possible. They are also ready to answer any questions an audience member might have about the research contained in the poster. Sometimes poster presentations are made in a formal organized event. Poster events are lively, loud and energetic. Attendees will walk around the event (e.g., inside a convention center) and talk with presenters whose posters they find interesting or relevant to their own work. Poster events will typically last a few hours so that attendees have enough time to visit and interact with many posters and poster presenters. This is a good time for scientists to learn from one another and start new research collaborations that could one day lead to new discoveries.
Designing Posters for a Diverse Audience – Because posters have traditionally been presented as part of in-person events, they should be designed with an audience in mind. Thus, they should be easy for a person to read and comprehend in the midst of a crowded environment and from a few feet away (e.g., 3-5 feet distance). This means that the most important elements should be printed in large, clear type, and even the secondary elements should be legible from the same distance. The size of figures and tables should be large enough to read from several feet away. The content of the poster should also make sense as quickly as possible, thus your writing and images should be as simple to comprehend as possible. In some situations, such as online galleries, audiences may be able to zoom in or spend lots of time reading a poster, but that should be a secondary consideration. It is necessary that your poster be clear to a rushed audience at a distance as well as provide considerable information for audiences who can pay closer attention.
Poster Presentation
While a poster accelerates the time it takes to communicate research with an audience, their reception of your poster nevertheless unfolds over time. A scientific poster is organized in sections so that its Title appears first, followed by Abstract, Introduction, Materials & Methods, Results, Discussion and References appears last. However, audiences rarely read posters in the order that they appear on the poster. Audiences see some elements of the poster before others, and the order in which they “read” your poster will determine what they take away from your poster presentation. Further, not every audience member will go through the full process of viewing your poster, so it is worth anticipating the points at which people might find most important or the point at which they quit reading. This way you can help ensure that each audience member will, at the very least, walk away from your poster understanding the most significant findings of your research.
In general, the ordered process that an audience member will likely use to view a scientific poster will go something like this:
1. Title, Author & Institutions – An audience’s first impression of your poster will be very quick (i.e., 5-30 seconds) and focus on your title and who did the research. It is very important that the content of your poster grab their attention and that your poster looks professional. This brief interaction will determine if the audience reads your poster further or if they move on to another poster. Questions that they will consider:
Is this poster worth the time it will take me to process in full? Do I want to stop and talk to the person who is presenting this poster? What is this poster likely to tell me? Do I care about this subject? Is this poster likely to tell me something I do not know? Can I learn something new that I can apply to my own research?
2. Abstract – If your poster passes these first few questions, the audience will proceed to reading the poster’s abstract, so as to confirm or dispel their belief that this poster will be worth their time. They will spend 1-4 minutes reading the abstract.
Did I read that title correctly? What questions did they ask? How did they try to answer those questions? What did they find? Does that seem plausible?
If all goes well, and the abstract piques further interest, they will then delve into the other parts of the poster with questions like:
How did they come to their conclusion? How did they conduct their research? Where might they have gone wrong? Did they frame their research correctly? What did they really find? What information from this poster is safe to transfer into my long-term memory?
3. Figures and Tables – Most audience members will skip ahead to the raw data (or its closest approximation). They will look at your figures, graphs, maps, tables, images, diagrams in order to gauge the reliability of the data from which you are deriving the information you would like them to leave with. An experienced researcher will extrapolate from what they know about the practices and limits of research to make a preliminary decision about whether it is plausible that your research is based on acceptable data. Misrepresentations in this part of your poster (e.g., non-proportional graphs, emotionally manipulative pictures, poorly planned experiments) will only serve to lose your audience at this point.
4. Introduction and Discussion – Once they have generated a basic understanding of your research, audiences will generally turn to the detailed text of your poster both to test their understanding and to assess your methods in more detail.
Did I understand the framing and goals of this research correctly? What exactly were they trying to prove? Were there limitations of scope or focus that might alter my understanding of the meaning or importance of this research? And what did they find? Does this detailed account align with what they wrote in the abstract or did they leave important parts out? Where might this go next? Is this research that I could contribute to? Is this something or someone I should keep paying attention to because they are planning to do future research that might answer questions I care about? Could I collaborate with this person?
5. Materials & Methods and Results – If everything else makes sense, audiences will delve into the details of how you conducted experiments, obtained data and how you interpreted it. By this point, they are invested in your work and will want to know more. Scientists are inherently critical and they will be looking intently at your work for reasons to dispute your findings, methods and experiments.
6. References and Acknowledgements – If they are particularly interested in your research, audiences will sometimes read your references and acknowledgements. This is usually because they are doing similar work, and they want to benefit by following in your footsteps or even collaborating with you in future research. If they get this far, congratulations you made a lasting and impactful impression with your poster.
Most poster events consist of numerous individual poster presentations (e.g., professional conferences typically have hundreds of posters displayed simultaneously). Due to the large volume of people and time constraints at such events, most presenter-audience interactions will not get as far as a poster’s list of references and acknowledgements. However, this does not mean that your presentation was ineffective. While you may never know the full impact of your poster on an audience, your poster still serves a very important role within the scientific community, which is to inform, educate and disseminate scholarly findings, discoveries and results to the public.
Scientific Posters: A Learner's Guide Copyright © 2020 by Ella Weaver; Kylienne A. Shaul; Henry Griffy; and Brian H. Lower is licensed under a Creative Commons Attribution-NonCommercial 4.0 International License , except where otherwise noted.
Share This Book
What is a Presentation? Objectives, Elements, Important skills, Four Ps
- Post last modified: 4 June 2023
- Reading time: 19 mins read
- Post category: Business Communication

What is a Presentation?
A presentation communicates a message, an idea or information to a group. It is similar to a report, but with a key difference–the human element. A presentation conveys the speaker’s personality and enables immediate interaction among all participants.
Table of Content
- 1 What is a Presentation?
- 2.1 To Inform
- 2.2 To Train
- 2.3 To Persuade
- 2.4 To Motivate
- 2.5 To Entertain
- 3 Main Elements of Presentation
- 4.1 Analytical ability
- 4.2 Effective communication ability
- 4.3 Creative ability
- 4.4 Good interpersonal skill
- 4.5 Sound time management
- 4.6 Problem-solving ability
- 4.7 A sense of humour
- 5 Evaluation Wheel
- 6.1 Prepare
- 6.2 Practice
- 6.3 Present
- 7.1 Know Yourself
- 7.2 Know Your Material
- 7.3 Know Your Purpose
- 7.4 Know Your Audience
Objectives of Presentation
The main objectives of a presentation are:
To Persuade
To motivate, to entertain.
A presentation is created to convey some information to a group of people. For example, a presentation may display an organisation’s quarterly performance.
Most training programmes in organisations are done through the presentation mode. Such instructional presentations convey a lot of information and are created with instructional design principles to keep the audience engaged for a long period.
Some presentations are used to convince a group of people to accept a particular idea and/or make a certain choice.
The growing popularity of TED Talks indicates how a presentation can be a powerful motivation tool. These presentations trigger emotions and inspire people to act.
Presentations can also be used to celebrate an event. For example, a farewell presentation of a colleague can be used to narrate the story of his/her overall tenure, experiences and achievement in the organisation.
Main Elements of Presentation
A presentation is said to be effective if it has three main elements, which are as follows:
- Specific content : This refers to the information that a presentation will comprise. The information must be conveyed effectively so that it is absorbed by the audience in one sitting. It should be relevant and meaningful to them.
- Audience : A presentation should be targeted for a specific group of audience who share the same purpose and have a similar level of pre-knowledge.
- Presenter: The presenter should act as the advocate of the information. If his/her conviction and passion in the message are clearly articulated, the audience will also pay attention to the subject.
Important Presentation Skills
In today’s business environment, presentation skills are requisite in almost every professional arena. Employees are often required to give presentations on the targets achieved by them. A presentation can be effective if it is carefully planned and prepared.
However, delivering presentations is not always easy for every individual. Some people take presenting as a probable opportunity to showcase skills, while others find it a challenging task. To provide an effective presentation, a presenter must possess some abilities.
Some of them are explained as follows:
Analytical ability
Effective communication ability, creative ability, good interpersonal skill, sound time management, problem-solving ability, a sense of humour.
It refers to a calibre which empowers an individual to collect, organise, visualise and comprehend data. Such skills enable a person to look at related patterns, draw conclusions and find solutions to problems. In addition, sound analytical skills also enable an individual to forecast future trends using various techniques such as brainstorming, forecasting, data mining and metrics interpretation.
Communication entails much more than mere talking to the audience. To communicate effectively during a presentation, one ought to showcase information lucidly. During a presentation, a person should not just have a good set of slides together; rather he needs to engage and strike a chord with the audience to transmit the intended message.
It refers to the ability to present things in a creative way that have not been explored earlier. Creative skills in presentation enable an individual to invent or develop something path-breaking, such as a new concept, unique way out from a problem, a method, a work of art or new machinery, etc.
It encompasses how an individual portrays or presents himself to the audience and builds a rapport with the audience. During a presentation, sound interpersonal skills empower a speaker to interact, communicate and collaborate with the audience effectively.
Interpersonal skills are prevalent across all personal and professional interactions between people. Interpersonal skills entail empathy, active listening and emotional intelligence.
While delivering a presentation, a person should manage time effectively, set a presentation schedule and end a presentation within a stipulated time. If a presentation is long, there are chances the audience may lose interest and the message may not be delivered.
A speaker cannot expect audience to actively listen to the presentation for hours. At the start of presentation, a speaker should aim to grab audience’s attention and allocate time for questions and answers at the end.
Problem-solving is a requisite skill for a presentation. During a presentation, the audience may ask the speaker any kind of questions. On the other hand, it is important for the speaker to provide an appropriate answer to the audience to make the presentation successful.
A sense of humour is crucial to deliver a quality presentation to make the environment light and engaging. Appropriate usage of light jokes relieves stress and holds the attention of an audience, which makes the presentation a memorable experience for both the speaker and the audience.
Evaluation Wheel
Evaluation wheel is a creative and effective tool that accumulates information on outcomes in a simple and accessible manner. A presenter can opt for the evaluation wheel tool to show the outcomes of the research or reports. This tool is used to provide various types of information and journeys of change within the organisation.
It offers a visual representation of progression and results in the form of a spider diagram. The evaluation wheel measures the exact outcomes for a programme at the start and end. It also helps educators, designers to comprehend information systematically. Figure shows an example of evaluation wheel:
Figure states the scale questionnaire in a circle form wherein respondents will analyse the instances from their discretion and experience and give rating on a scale of 1 to 5.
For instance, service users are appropriately involved. In this case, if the respondent strongly agrees, he/she will give 5 rating and if he/she does not agree, he/she will give 1 rating. The centre of the circle is for 1 and as the respondent agrees, they reach out to edge for 5 rating.
Ps of Presentation
Even the most powerful presentation may fail if the presenter comes unprepared. A presentation is both a mental and a physical effort. There are Ps of presentation that provide a checklist to the presenter for ensuring that the presentation is well-constructed and clear so that the audience gets the message. These four Ps are explained as follows:
A thoroughly prepared presentation captivates the interests of the audience. The topic or content of the presentation must be thoroughly researched. No one would develop interest in a vague or equivocal presentation. A speaker can make use of stories or relatable examples and quote references to give more depth to the presentation and make it intriguing.
Apart from that, it should be ensured that only important points are highlighted in bullets or using other graphical elements. Providing too much of theory or full sentences can create boredom for the audience.
While preparing for a presentation, the presenter should include the following sections:
- Introduction : This section includes the name of the topic and the purpose of the presentation.
- Body : This section contains the main content of the presentation; thus, it must be prepared in a well-organised manner.
- Summary : It provides a recap of the content of the presentation. It outlines the most important points of the presentation to ensure the key message is retained by the audience.
Practice will make a man perfect is an adage that is appropriate across all spheres of life. It helps a speaker become familiar with his/her own voice, words and phrases and adjust accordingly. By practising thoroughly, a speaker can explore how to fit different pieces of information together and practise transition.
Also, a speaker should make notes wherever required as a part of presentation support. Using an index card is a common form of note-taking that provides a quick glimpse of important points.
While delivering a presentation, the speaker needs to demonstrate confidence in front of the audience. The speaker must be polite, but not apologetic in situations, such as if the session is running overtime or the microphone has stopped working.
Instead he/she should expect and ask for discipline and attention. It is important for a speaker to engage with the audience during the presentation in order to assure them that he/she is genuinely interested in talking to them. 4. Pace, pitch and pause: A presenter should deliver the presentation in an easy-to-follow pace and try changing the pace to enliven the presentation.
For example, pauses can be taken intentionally between main points to reinforce them. Along with pace, pitch is equally important. Just as pace varies in normal conversations, it should be used effectively during presentations too. For example, when asking a question, the presenter can raise the pitch and can lower it down when explaining a point.
Four Cornerstones of Making Memorable Presentations
The most crucial aspect of delivering an effective presentation is that the speaker should appear confident and the speech should look effortless. Presentations are a source of anxiety for many individuals. However, getting well-prepared before delivering a presentation can reduce this feeling considerably and ease apprehension.
There are a number of ways to overcome feelings of anxiety, stress and stage fright before the presentation in order to appear confident in front of the audience. The four cornerstones of making a memorable presentation are provided in the upcoming sections.
Know Yourself
Know your material, know your purpose, know your audience.
A presenter should acknowledge his/her strengths and weaknesses. Accordingly, he/she should decide the style of delivering a presentation. For instance, if a presenter has a great sense of humour and can use it comfortably in the speech, he/she can make the presentation more engaging and interesting.
On the other hand, if the speaker who is an introvert and prefers to talk or engage less, he/she can add visuals in the presentation. Therefore, the trick is whosoever is delivering the presentation should feel comfortable.
Knowing the topic thoroughly is the most important step in preparing and delivering a presentation. A presenter with well-versed knowledge of the topic is bound to feel more confident. One should perform extensive research of the topic using credible websites and surveys.
A presenter with minimal information about the topic will not be able to deliver a memorable presentation; rather, it would create a negative image in front of the audience. A good presentation is one that is centred around the main theme, presents relevant information and stimulates thought.
It is crucial to know the purpose of the presentation. A presenter should be aware of whether the purpose is to create awareness or to build new skills or to change attitudes. For instance, professional firms or businesses use presentations for various purposes such as to create awareness, educate, motivate and persuade internal and external audiences.
Therefore, to prepare a presentation, identify its objective/purpose, determine the method of delivery, formulate a structure, include visual aids and rehearse.
One should know the type of audience and what is their purpose of attending the presentation. For instance, whether they are there for gaining knowledge or learning new skills, etc. The age, culture and knowledge base of the audience help a presenter in designing and delivering his/her presentation effectively and in a manner in which audience can easily understand and relate to.
A well-designed presentation uses visual aids effectively to reinforce the main points and enhance the audience’s level of understanding.
Business Communication Notes
( Click on Topic to Read )
- What is Business Communication?
- What is Communication?
- Types of Communication
- 7 C of Communication
Barriers To Business Communication
- Oral Communication
- Types Of Non Verbal Communication
- What is Written Communication?
- What are Soft Skills?
- Interpersonal vs Intrapersonal communication
- Barriers to Communication
- Importance of Communication Skills
- Listening in Communication
- Causes of Miscommunication
- What is Johari Window?
- What is Presentation?
- Communication Styles
Channels of Communication
- Hofstede’s Dimensions of Cultural Differences and Benett’s Stages of Intercultural Sensitivity
- Organisational Communication
- Horizontal C ommunication
- Grapevine Communication
- Downward Communication
- Verbal Communication Skills
- Upward Communication
- Flow of Communication
- What is Emotional Intelligence?
- What is Public Speaking?
- Upward vs Downward Communication
- Internal vs External Communication
- What is Group Discussion?
- What is Interview?
- What is Negotiation?
- What is Digital Communication?
- What is Letter Writing?
- Resume and Covering Letter
- What is Report Writing?
- What is Business Meeting?
- What is Public Relations?
- What Is Market Segmentation?
- What Is Marketing Mix?
- Marketing Concept
- Marketing Management Process
- What Is Marketing Environment?
- What Is Consumer Behaviour?
- Business Buyer Behaviour
- Demand Forecasting
- 7 Stages Of New Product Development
- Methods Of Pricing
- What Is Public Relations?
- What Is Marketing Management?
- What Is Sales Promotion?
- Types Of Sales Promotion
- Techniques Of Sales Promotion
- What Is Personal Selling?
- What Is Advertising?
- Market Entry Strategy
- What Is Marketing Planning?
- Segmentation Targeting And Positioning
- Brand Building Process
- Kotler Five Product Level Model
- Classification Of Products
- Types Of Logistics
- What Is Consumer Research?
- What Is DAGMAR?
- Consumer Behaviour Models
- What Is Green Marketing?
- What Is Electronic Commerce?
- Agricultural Cooperative Marketing
- What Is Marketing Control?
- What Is Marketing Communication?
- What Is Pricing?
- Models Of Communication
- What is Sales Management?
- Objectives of Sales Management
- Responsibilities and Skills of Sales Manager
- Theories of Personal Selling
- What is Sales Forecasting?
- Methods of Sales Forecasting
- Purpose of Sales Budgeting
- Methods of Sales Budgeting
- Types of Sales Budgeting
- Sales Budgeting Process
- What is Sales Quotas?
- What is Selling by Objectives (SBO) ?
- What is Sales Organisation?
- Types of Sales Force Structure
- Recruiting and Selecting Sales Personnel
- Training and Development of Salesforce
- Compensating the Sales Force
- Time and Territory Management
- What Is Logistics?
- What Is Logistics System?
- Technologies in Logistics
- What Is Distribution Management?
- What Is Marketing Intermediaries?
- Conventional Distribution System
- Functions of Distribution Channels
- What is Channel Design?
- Types of Wholesalers and Retailers
- What is Vertical Marketing Systems?
- What i s Marketing?
- What i s A BCG Matrix?
- 5 M’S Of Advertising
- What i s Direct Marketing?
- Marketing Mix For Services
- What Market Intelligence System?
- What i s Trade Union?
- What Is International Marketing?
- World Trade Organization (WTO)
- What i s International Marketing Research?
- What is Exporting?
- What is Licensing?
- What is Franchising?
- What is Joint Venture?
- What is Turnkey Projects?
- What is Management Contracts?
- What is Foreign Direct Investment?
- Factors That Influence Entry Mode Choice In Foreign Markets
- What is Price Escalations?
- What is Transfer Pricing?
- Integrated Marketing Communication (IMC)
- What is Promotion Mix?
- Factors Affecting Promotion Mix
- Functions & Role Of Advertising
- What is Database Marketing?
- What is Advertising Budget?
- What is Advertising Agency?
- What is Market Intelligence?
- What is Industrial Marketing?
- What is Customer Value
- What is Consumer Behaviour?
- What Is Personality?
- What Is Perception?
- What Is Learning?
- What Is Attitude?
- What Is Motivation?
- Consumer Imagery
- Consumer Attitude Formation
- What Is Culture?
- Consumer Decision Making Process
- Applications of Consumer Behaviour in Marketing
- Motivational Research
- Theoretical Approaches to Study of Consumer Behaviour
- Consumer Involvement
- Consumer Lifestyle
- Theories of Personality
- Outlet Selection
- Organizational Buying Behaviour
- Reference Groups
- Consumer Protection Act, 1986
- Diffusion of Innovation
- Opinion Leaders
- What is Business Law?
- Indian Contract Act 1872
- Essential Elements of a Valid Contract
- Types of Contract
- What is Discharge of Contract?
- Performance of Contract
- Sales of Goods Act 1930
- Goods & Price: Contract of Sale
- Conditions and Warranties
- Doctrine of Caveat Emptor
- Transfer of Property
- Rights of Unpaid Seller
- Negotiable Instruments Act 1881
- Types of Negotiable Instruments
- Types of Endorsement
- What is Promissory Note?
- What is Cheque?
- What is Crossing of Cheque?
- What is Bill of Exchange?
- What is Offer?
- Limited Liability Partnership Act 2008
- Memorandum of Association
- Articles of Association
- What is Director?
- Trade Unions Act, 1926
- Industrial Disputes Act 1947
- Employee State Insurance Act 1948
- Payment of Wages Act 1936
- Payment of Bonus Act 1965
- Labour Law in India
- What is Brand Management?
- 4 Steps of Strategic Brand Management Process
- Customer Based Brand Equity
- What is Brand Equity?
You Might Also Like

What is Public Relations? Definition, Tools, Function, Advantages, Process

What is Downward Communication? Advantages, Disadvantages

What is Public Speaking? Characteristics, Techniques, Importance, Modes, Checklist

What are Soft Skills? Types, Importance, How to Develop

Barriers to Communication: Types, How to Overcome

What is Oral Communication? Advantages, Disadvantages, Imp

10 Verbal Communication Skills Worth Mastering

Emotional Intelligence
Importance of education and proper training for medical professionals, what is negotiation importance, process, strategic model, learning skills.

Leave a Reply Cancel reply
You must be logged in to post a comment.
World's Best Online Courses at One Place
We’ve spent the time in finding, so you can spend your time in learning
Digital Marketing
Personal Growth

Development
- History & Society
- Science & Tech
- Biographies
- Animals & Nature
- Geography & Travel
- Arts & Culture
- Games & Quizzes
- On This Day
- One Good Fact
- New Articles
- Lifestyles & Social Issues
- Philosophy & Religion
- Politics, Law & Government
- World History
- Health & Medicine
- Browse Biographies
- Birds, Reptiles & Other Vertebrates
- Bugs, Mollusks & Other Invertebrates
- Environment
- Fossils & Geologic Time
- Entertainment & Pop Culture
- Sports & Recreation
- Visual Arts
- Demystified
- Image Galleries
- Infographics
- Top Questions
- Britannica Kids
- Saving Earth
- Space Next 50
- Student Center

When did science begin?
Where was science invented.
- Who was Emanuel Swedenborg?
- Why did Emanuel Swedenborg study theology?
- What did Aristotle do?

Our editors will review what you’ve submitted and determine whether to revise the article.
- World History Encyclopedia - Science
- Social Sci LibreTexts - How do social workers know what to do?
- LiveScience - What Is Science?
- Digital Commons at Trinity University - Jagadish Chandra Bose and Vedantic Science
- Internet Encyclopedia of Philosophy - Science and Ideology
- Stanford Encyclopedia of Philosophy - Science and Pseudo-Science
- science - Children's Encyclopedia (Ages 8-11)
- science - Student Encyclopedia (Ages 11 and up)
Observing the natural world and paying attention to its patterns has been part of human history from the very beginning. However, studying nature to understand it purely for its own sake seems to have had its start among the pre-Socratic philosophers of the 6th century BCE, such as Thales and Anaximander .
How is science related to math?
Science uses mathematics extensively as a powerful tool in the further understanding of phenomena. Sometimes scientific discoveries have inspired mathematicians, and at other times scientists have realized that forms of mathematics that were developed without any regard for their usefulness could be applied to understanding the physical world.
All peoples have studied the natural world, but most ancient peoples studied it for practical purposes, such as paying attention to natural cycles to know when to plant crops. It does not seem to have been until the 6th century BCE that the pre-Socratic philosophers (who lived in what is now Turkey and Greece) began seeking to understand nature as an end in itself.
Recent News

science , any system of knowledge that is concerned with the physical world and its phenomena and that entails unbiased observations and systematic experimentation. In general, a science involves a pursuit of knowledge covering general truths or the operations of fundamental laws.
Science can be divided into different branches based on the subject of study. The physical sciences study the inorganic world and comprise the fields of astronomy , physics , chemistry , and the Earth sciences . The biological sciences such as biology and medicine study the organic world of life and its processes. Social sciences like anthropology and economics study the social and cultural aspects of human behaviour .

Science is further treated in a number of articles. For the history of Western and Eastern science, see science, history of . For the conceptualization of science and its interrelationships with culture , see science, philosophy of . For the basic aspects of the scientific approach, see physical science, principles of ; and scientific method .
- Presentation Skills
- Skills & Tools
Presentation skills can be defined as a set of abilities that enable an individual to: interact with the audience; transmit the messages with clarity; engage the audience in the presentation; and interpret and understand the mindsets of the listeners. These skills refine the way you put forward your messages and enhance your persuasive powers.
The present era places great emphasis on good presentation skills. This is because they play an important role in convincing the clients and customers. Internally, management with good presentation skills is better able to communicate the mission and vision of the organization to the employees.
Importance of Presentation Skills
Interaction with others is a routine job of businesses in today’s world. The importance of good presentation skills is established on the basis of following points:
- They help an individual in enhancing his own growth opportunities. In addition, it also grooms the personality of the presenter and elevates his levels of confidence.
- In case of striking deals and gaining clients, it is essential for the business professionals to understand the audience. Good presentation skills enable an individual to mold his message according to the traits of the audience. This increases the probability of successful transmission of messages.
- Lastly, business professionals have to arrange seminars and give presentations almost every day. Having good presentation skills not only increases an individual’s chances of success, but also enable him to add greatly to the organization.
How to Improve Presentation Skills
Development of good presentation skills requires efforts and hard work. To improve your presentation skills, you must:
- Research the Audience before Presenting: This will enable you to better understand the traits of the audience. You can then develop messages that can be better understood by your target audience. For instance, in case of an analytical audience, you can add more facts and figures in your presentation.
- Structure your Presentation Effectively: The best way to do this is to start with telling the audience, in the introduction, what you are going to present. Follow this by presenting the idea, and finish off the presentation by repeating the main points.
- Do a lot of Practice: Rehearse but do not go for memorizing the presentation. Rehearsals reduce your anxiety and enable you to look confident on the presentation day. Make sure you practice out loud, as it enables you to identify and eliminate errors more efficiently. Do not memorize anything as it will make your presentation look mechanical. This can reduce the degree of audience engagement.
- Take a Workshop: Most medium and large businesses allow their employees to take employee development courses and workshops, as well-trained employees are essential to the success of any company. You can use that opportunity to take a workshop on professional presentation skills such as those offered by Langevin Learning Services , which are useful for all business professionals, from employees to business trainers and managers.
Job profiles that require this skill

Not yet a member? Sign Up
join cleverism
Find your dream job. Get on promotion fasstrack and increase tour lifetime salary.
Post your jobs & get access to millions of ambitious, well-educated talents that are going the extra mile.
First name*
Company name*
Company Website*
E-mail (work)*
Login or Register
Password reset instructions will be sent to your E-mail.
What is the Difference between a Presentation and a Slide?
By: Author Shrot Katewa

People often use the terms “Presentation” and “Slide” interchangeably. But, do these terms mean one and the same thing? If not, what exactly is the difference between a Presentation and a Slide?
The main difference between a presentation and a slide is that a slide is just a single page of a presentation document whereas a presentation is an actual process of sharing and presenting the information present on the slides.
There are several other similar terms that are used when referring to presentations. In this article, we’ll take a look at some of these terms and clear the confusion around it!
Difference between a Presentation and a Slide?
Hopefully, you have already understood the main difference between a presentation and a slide. Let’s look at the two in further detail, and understand the nuances.
What is a Slide?
A slide, as we may have already understood, is a single page of a presentation.

In the above image, as you may notice, all the individual pages that we get within a presentation is referred to as “ Slides “. You may even notice the numbers on the top left corner of each slide in the normal view much like the page numbers on a word document.
These numbers indicate the slide number within a particular presentation file. Even though they indicate the slide number, these are not visible when giving the presentation in the slide show mode (we’ll talk about slide show a bit later in the article).
In order to create a presentation file, you’ll be required to work on each individual slides.
However, many people tend to make this one big mistake! That is, creating slides by writing content as though they would on a page of a word document. One needs to keep in mind that creating a slide is not just about putting a bunch of words together, rather sharing it in a visually appealing and engaging manner with the audience.
Creating a beautiful slide is an art in itself, and it takes skills and an eye for design to create an aesthetically pleasing slide.
What is a Presentation?

A presentation is a means of communication. It is the process of sharing the information present on the slides! A presentation can also take the form of a demonstration of a product, design, or ideas!
A presentation differs from a slide from the fact that the person giving a presentation ideally uses the slide as a base to build upon the points he/she wants to communicate with the audience.
It is quite common to use slides while giving a presentation in today’s modern world. That said, a presentation goes beyond even having any slides! What I mean is that a presentation can be given even without having any slides.
While a single slide can also be construed as a presentation in a scenario when while giving the presentation, the presenter uses just 1 slide. Although, this is an extremely rare occurrence!
It is important to note that some people are really good at creating an aesthetically pleasing slide, while others are great at presenting or sharing the information present on a slide!
Both of the aforementioned activities require a different set of skills. It is quite common to hire or outsource the activity of creating the slides in order to deliver a successful presentation.
Difference between Slide and Slideshow?
Now that we’ve understood the difference between a slide and a presentation, let’s compare another term that people often get confused with – slide vs. slideshow
While a slide is a single page of the presentation document, a slide show is when multiple slides are put together for the purpose of supplementing the presentation to be delivered.
In a nutshell, when a series of slides, usually comprising of images, are displayed using an electronic display device such as a projector screen, it is known as a slide show.
A slide show can also have some background music (an example would be a slide show given at a friend’s wedding). A slide show may either be controlled (for example when giving a presentation), or it may run in a loop (for example in a company booth at a business conference).
Difference between a Slide and Slide Deck?
Another term that you may hear a lot is a “Slide Deck”. It may also be used in combination with other words such as “Pitch Deck” or a “Presentation Deck”. So, let’s understand what it means.
A slide deck is basically a group of slides together used for giving a presentation.
While this may feel similar in meaning to a slide show, the only major difference is its history!
The term slide deck evolved from the olden days when physical slides were used to give a presentation.
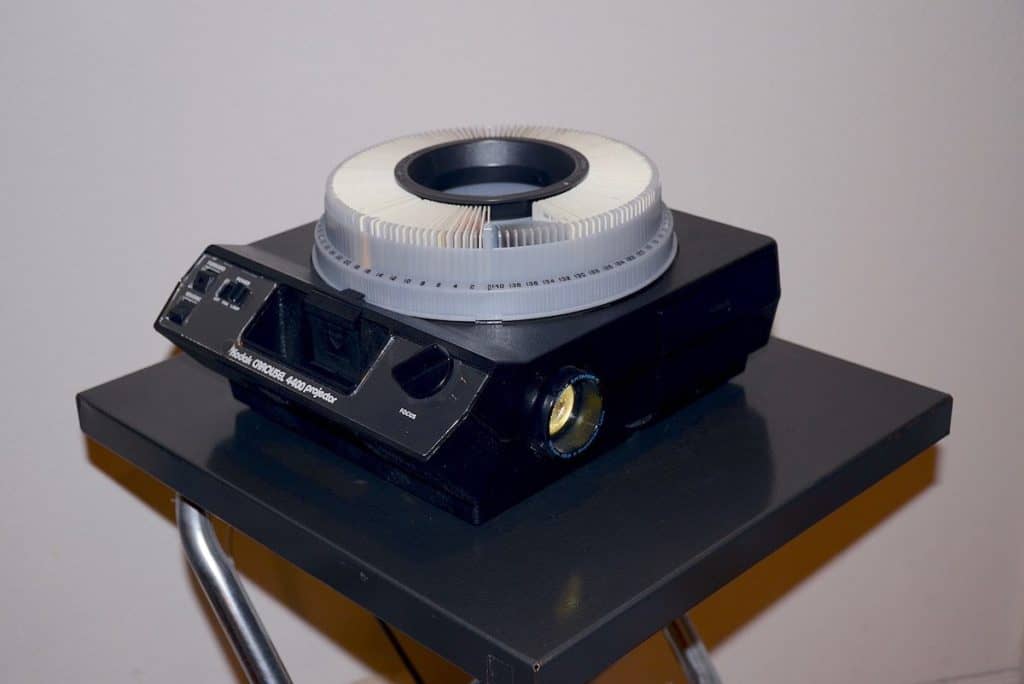
Each slide would have a particular piece of information (just as it does today), and all these slides were physically stacked together in the particular desired order to form a deck; much like a deck of cards.
This was done to ensure that the order of the slides doesn’t get changed. This made the term “Slide Deck” synonymous with a presentation.
Today, with the advent of technology, one cannot imaging using physical slides to give a presentation! Just like the technology for presentations, the terminology also changed from Slide Deck to Slide Show. However, the core principle remains the same.
Difference between PowerPoint and Presentation?
Another pair of terms that people highly used interchangeably is PowerPoint and Presentation. So far, we’ve already understood the terms slide, slide show, slide deck and presentation. So, how does the term PowerPoint fit in this?
PowerPoint is a presentation design software owned and provided by Microsoft to its customers as part of its Office Suite. There are several versions of Microsoft PowerPoint. The software is usually updated with new features in its newest release version.
PowerPoint was first launched by a software company “Forethought Inc.”. The software was initially designed to work only on Macintosh computers only. However, in it’s first major acquisition, Microsoft bought PowerPoint and was first brought to the market in 1990 for Windows.
The software became so popular with the users that a presentation is often referred to as “PowerPoint” or “PPT” (which is the file extension of the PowerPoint files).
So, the key difference between PowerPoint and Presentation is that PowerPoint is basically a tool or software to create digital presentations. A presentation can be given with or without a PowerPoint file.
By the way, the screenshot that you saw earlier in the article that showcases the meaning of slides is from a PowerPoint file.
PowerPoint is not the only presentation design software available to the users. In fact, there are literally hundreds of tools to design a presentation. But, PowerPoint by far is the most commonly used and most successful presentation design software.
How many Slides should a Presentation have?
This is a question that haunts most people who need to give a presentation and create the deck. Is there a good number that you should restrict your slides in a presentation to?
While there is no fixed “one size fits all” approach when it comes to creating presentations and limiting the number of slides in a presentation, ensuring that your presentation doesn’t go beyond 20 slides on average !
In a research published in the Marketing Education Review on the topic of Optimizing Learning by Examining the Use of Presentation Slides , it was cited that blank stares were visible amongst audience members when listeners were overwhelmed with too many slides are text-heavy slides.
Thus, it is important to restrict our presentation to no more than 20 slides. Consider the time available at hand when giving a presentation. A 20-slide presentation can be delivered in about 30 minutes.
According to Guy Kawasaki, an angel investor who reviewed several hundreds of pitch presentations every day, is a strong evangelist of the 10 slide rule (now popularly known as the 10/20/30 rule of PowerPoint)
However, a 10-slide PowerPoint presentation may work well for an investor pitch, it may not suffice for most of the other purposes.
How to Create an Attractive PowerPoint Presentation?
Everyone wants their presentation to look attractive. After all, we all understand the importance of a good first impression !
But, when you don’t necessarily have the required skills, how then can you create an attractive presentation?
Fortunately, we wrote a detailed post on how anyone could make their presentation attractive even if they are a complete beginner! Be sure to check out the article!
7 EASY tips that ALWAYS make your PPT presentation attractive (even for beginners)
The tips shared in that article are absolute GOLD! I’m not sure why people are not giving these such simple tips to others.
If you are not comfortable using even the tips mentioned in the article, and you feel like you need some time to gain the skills, then I would recommend hiring a good design agency who will ensure that your presentation turns out to be an attractive one!
Stack Exchange Network
Stack Exchange network consists of 183 Q&A communities including Stack Overflow , the largest, most trusted online community for developers to learn, share their knowledge, and build their careers.
Q&A for work
Connect and share knowledge within a single location that is structured and easy to search.
What is the significance of the overview slide in a presentation?
The first slide which follows the title page of my presentation is the overview slide. It has the title for each section to follow in the talk (thank you Latex!).
My question is how much time is to be spent on the Overview slide, given the talk lasts twenty minutes? Should I talk about each section's one-line-synopsis to let the audience mull it over? If the answer is no, how do I transition smoothly from the Paper Title Slide to the one on Motivation for the talk (For example : Why I love Science?).
- presentation
- 2 What do you mean exactly by "overview slide"? From your first paragraph, it looks like you mean a dry slide with the list of section names (which can be generated automatically by, e.g., Beamer's \tableofcontents ). @Jakebeal in his answer seems to understand it as a handwritten slide with an introduction/synopsis (which is maybe what you called "motivation slide"). Please edit and make it clearer. – Federico Poloni Commented Jan 27, 2015 at 10:11
7 Answers 7
I often skip the overview slide in short talks. Instead, after giving motivation I simply say what the talk it is about: This talk will introduce you to Nutella, analyze its deliciousness, and compare it to peanut butter. Finally, we will talk about Nutella extensions - chunky Nutella, with chopped hazelnut.
In general, the overview slide allows the listeners to pace themselves, and understand where in the presentation you are.
- 1 I have a sidebar to point out where I am in the presentation even though the Overview slide is long gone. In this context, I want to know how audience "would understand where in the presentation you are". – envy_intelligence Commented Jan 27, 2015 at 5:56
I think the overview slide is the most important slide in the talk.
I like to use my overview slide to encapsulate the whole talk in a single diagram. A heuristic that I find holds true is that in a good <1 hour talk, you can say one idea: that idea might have a lot of different elements and side points as part of its explanation, but it all really anchors down to one core statement if you want the talk to hang together tightly. And that's what's on my overview slide.
You can tell it to the audience straight, too. I like to say, "Here's my talk, summarized in a single slide" and then explain the ideas. It's also good to give people the "punchline" of your talk right up front too, and then promise that by the end of the talk they'll understand how it works / why it matters / whatever.
One important further thought: I strongly recommend that your overview slide be very diagram/image-driven. Have people listen to your words, rather than read them, and a diagram will stick with their minds much better.
Edited to add Per request, some examples of visual overview slides from talks that I have recently given:

- 1 Visual overviews are great. When possible, I like the overview slide to be based on some structure, e.g. an experiment flowchart. I also like to return to the overview when transitioning, highlighting the place we're going to; often, I'll put up a normal overview. Then after summarizing, switch to overview w/ 1st piece bold, remaining pieces faded. Subsequent transitions have 'finished' pieces normal, next piece bold, upcoming grey, to keep the audience grounded. – Michael Ekstrand Commented Jan 27, 2015 at 18:52
- Do you have an example of an image-driven overview slide? All that I can recall seeing in person are simple bullet lists. – Mike A. Commented Jan 28, 2015 at 14:31
- 1 @MikeA. Here you go! Three recent examples... – jakebeal Commented Jan 28, 2015 at 15:27
This may somewhat depend on the field and maybe I am a bit biased, but I have not seen a single overview slide (following the title) that was not a total waste of time so far. Eloquent Science agrees with me.
Essentially, there are two flavours of useless overview slides:
The overview slide and what the speaker says alongside it tell me that the talk has a more or less standard structure. To give an extreme example:
First, I will give an overview; then I will present my methods; then I will present my results; finally, I will draw my conclusions and give an outlook.
Nothing of the above helps anybody to follow the talk better or in any other way, as they already expect something along the lines of this to happen. If there are deviations in the detail, this is nothing they need to know at this point of your talk. Even, if your talk has some very unorthodox structure, e.g., if you start with the results and then have the methods follow, you can mention this when you start describing the results and do not need an overview slide for this.
The overview slide and the speaker tell me something about the actual content, such as
I first introduce the problem of banana transmogrification. Then I explain our latest progress on flux compensators. Finally, we will report on our results on transmogrifying bananas with flux compensators.
The problem here is that most people attending the talk know next to nothing about flux compensators or banana transmogrification and thus will have forgotten that flux compensators are going to appear in this talk halfway through your first slide on bananas. Sure, there will be one or two people in the room who read your recent paper on apple transmogrifications with flux compensators, but those are not the people who need your didactic attention – they would probably even understand the talk if you went through the slides backwards.
This does not mean that you shouldn’t explain that the reason why you are talking about flux compensators is that you want to use them for banana transmogrification, but that’s something you should do when you transition from banana transmogrification to flux compensators. In general, you have to remind the audience again and again why you are doing things, explain connections to what you have said before and guide them through your talk with this, but that’s something that happens during the talk, not in the beginning.
As already said, this may be somewhat field-dependent. So, you are probably best advised to think about what you are going to present on this overview slide and take the point of view of the audience to consider whether it really needs and understands this information at this point of the talk and is not better said later in a more fitting context.
Also, there are a few occasions where some general sort of overview slide can be a good idea. For example:
In a long talk that is separated into several large and seemingly unrelated chapters, you might give a brief overview after the introduction to the general topic.
If you address several aspects of something that are at first separate. For example, a colleague of mine once gave a talk where he “took a tour through the parameter space” of a system and regularly showed an overview diagram of the parameter space like a tour map, indicating what places were already visited and what came next.
If the answer is no, how do I transition smoothly from the Paper Title Slide to the one on Motivation for the talk (For example : Why I love Science?).
How would the transition from an overview slide to a motivation be more smooth than from a title slide to a motivation?
That being said, I do not think that this transition needs to be smooth at all. The transition from whatever happened before you started talking to you talking is very unsmooth already, and thus it won’t be any worse if you dive straight into the big important reason why you are doing what you do.
However, often something relevant to your motivation appears in your title and you can build a transition on this. For example:
As you probably guessed already, I spent some time on transmogrifying bananas and you probably wondered why anybody would want to transmogrify fruit in the first place.
(I intentionally ignored your example topic, as in this case the whole talk would be a motivation.)
- I couldn't agree more and would like to up-vote twice. – David Zwicker Commented Jan 28, 2015 at 4:53
It depends on what you mean by "Overview" slide. If it's an opener slide that introduces and communicates the core idea(s) to the audience, this is likely the most essential part of a talk; this is where you have to engage your listeners, it should motivate your whole talk.
If, however, the "Overview" slide is basically just a bunch of headlines ("Table of Contents"), I would consider this slide a waste of everybody's time. Instead of boring the hell out of your audience reciting headlines, your narrative should be easy to follow without ever presenting a ToC (in German, I would refer to that minding your "roter Faden"; I guess it's called "Golden Thread" in English?).
I never use "overview" or "agenda" slides.
They basically show what you will be talking about, which you will repeat afterwards anyway.
When you read a book, do you expect to have an overview of what will be happening? Or a movie? Or at a concerto would the pianist stand up and say "I will be playing the piano and the guy over here the trumpet" ?
- I have actually attended a concert where this happened – it wasn’t particularly good though. – Wrzlprmft ♦ Commented Jan 27, 2015 at 20:51
- 1 While it is not up to me to jugde anybody using an overview slide or not I still sustain the position that the analogy is flawed. Textbooks (and that's the closest thing to a scientific presentation) actually do have an overview of what they contain... and for a reason one might add. – Ghanima Commented Jan 27, 2015 at 22:52
- @Ghanima: you are not expected to read a textbook in 20 minutes or an hour. You also get to choose it based on the content. When you attend a presentation you do not leave after the first slide, when you have made up your mind. – WoJ Commented Jan 28, 2015 at 7:25
- @WoJ, while it might seem a little unpolite, it is very well possible to leave after the first slides. There are actually quite some cases where it would have been good to leave early. It happens now and then that the abstract or the announcement promises, uhm, well, "more" or something different than is actually presented. (And again it is not up to me to jugde your style of presentation, be it "overview" slides or a really big-ass kind of a motivational one. There is simply no right or wrong here.) – Ghanima Commented Jan 28, 2015 at 22:41
- @Ghanima: a propos leaving after a few slides: this reminds me of a mathematician (I forgot his name) who sent a proposal at a conference titled along the lines of "Proof for Fermat's Last Theorem". His presentation was about something completely different. When asked why he did not present about the submitted topic he answered that should his plane crash, history would remember him as the one who solved the problem, but died before having a chance to enlighten the world :) So yes, sometimes leaving is the right thing to do :) – WoJ Commented Jan 29, 2015 at 7:06
A good overview slide is part of a road map that allows the audience to know where they are in the presentation. The overview itself provides the initial road map, and then as you get to major sections, you should have signpost slides that indicate where in the road map you are.
This helps the audience in a number of ways.
- It gives them a good idea for what to look for in your presentation, particularly if they are only interested in part of it.
- It helps them understand the relevance of the earlier slides. This is particularly important if you have some earlier section that may not seem directly related to your point but is necessary to understand it; but even without that, the signpost slides combined with the overview can help put the different pieces together.
- It provides some structure, similar to how bulletpoints in this list make it more readable; with no signposts or road map it is like freeform text with no paragraphs.
Without that overview slide, the audience has to spend some effort figuring out how to put all of those bits together. Do the work for them, give them a road map, and let them spend their effort understanding your important points instead!
Including a sidebar is a far better option than using an outline slide (see example below). As noted in other answers, the audience already knows the order your talk will follow. A sidebar, however, is useful in that it gives the audience an indication of how far through your talk you are. (If I had a dollar for every time I wondered how much longer a talk would go for…)

- If you have to wonder how much longer the talk would go, you probably do not care much about the talk anyway. Also, there are simpler ways to indicate this. These sidebars are just a waste of space and steal focus. – Wrzlprmft ♦ Commented Dec 17, 2016 at 12:13
You must log in to answer this question.
Not the answer you're looking for browse other questions tagged conference presentation ..
- Featured on Meta
- Join Stack Overflow’s CEO and me for the first Stack IRL Community Event in...
- Bringing clarity to status tag usage on meta sites
Hot Network Questions
- Is there mathematical significance to the LaGuardia floor tiles?
- Did Queen (or Freddie Mercury) really not like Star Wars?
- I want to be a observational astronomer, but have no idea where to start
- Engaging students in the beauty of mathematics
- package accents seems to be incompatible with Unicode-math
- Why does each leg of my 240V outlet measure 125V to ground, but 217V across the hot wires?
- Guesstimate a multiple choice exam
- Correct anonymization of submission using Latex
- Who was the French detective mentioned in Hitchcock's "Shadow of a Doubt"?
- Is this map real?
- Electromagnetic Eigenvalue problem in FEM yielding spurious solutions
- jq - ip addr show in tabular format
- Key fob frequency filter design
- Somebody used recommendation by an in-law – should I report it?
- What do these expressions mean in NASA's Steve Stitch's brief Starliner undocking statement?
- Can you spell memento as mement?
- Consistency-proof of ZFC
- How much technological progress could a group of modern people make in a century?
- How resiliant is a private key passphase to brute force attacks?
- Please help me identify my Dad's bike collection (80's-2000's)
- Why does my Mac's system partition slowly fill up with msu-target-xxxxxxxxx folders in the /private/tmp folder?
- What is the working justification of this circuit?
- A probably Fantasy middle-length fiction about a probable vampire during the Blitz
- Defining a grid in tikz using setlength vs. explicitly setting a length parameter
Maintenance work is planned from 22:00 BST on Monday 16th September 2024 to 22:00 BST on Tuesday 17th September 2024.
During this time the performance of our website may be affected - searches may run slowly, some pages may be temporarily unavailable, and you may be unable to access content. If this happens, please try refreshing your web browser or try waiting two to three minutes before trying again.
We apologise for any inconvenience this might cause and thank you for your patience.

Chemical Science
Exploration, expansion and definition of the atropopeptide family of ribosomally synthesized and posttranslationally modified peptides.
Ribosomally synthesized and posttranslationally modified peptides (RiPPs) constitute a diverse class of natural products. Atropopeptides are a recent addition to the class. Here we developed AtropoFinder, a genome mining algorithm to chart the biosynthetic landscape of the atropopeptides. AtropoFinder identified more than 650 atropopeptide biosynthetic gene clusters (BGCs). We pinpointed crucial motifs and residues in leader and core peptide sequences, prompting a refined definition of the atropopeptide RiPP family. Our study revealed that a substantial subset of atropopeptide BGCs harbors multiple tailoring genes, thus suggesting a broader structural diversity than previously anticipated. To verify AtropoFinder, we heterologously expressed four atropopeptide BGCs, which resulted in the identification of novel atropopeptides with varying peptide lengths, number and type of modifications. Atropopeptides serve as a proof-of-principle for the versatile genome mining approach developed in this study that can be repurposed for the identification of RiPP and other BGCs that currently evade detection.
Supplementary files
- Supplementary information PDF (6434K)
- Supplementary information ZIP (17482K)
Transparent peer review
To support increased transparency, we offer authors the option to publish the peer review history alongside their article.
View this article’s peer review history
Article information
Download Citation
Permissions.
F. Biermann, B. Tan, M. Breitenbach, Y. Kakumu, P. Nanudorn, Y. Dimitrova, A. Walker, R. Ueoka and E. Helfrich, Chem. Sci. , 2024, Accepted Manuscript , DOI: 10.1039/D4SC03469D
This article is licensed under a Creative Commons Attribution 3.0 Unported Licence . You can use material from this article in other publications without requesting further permissions from the RSC, provided that the correct acknowledgement is given.
Read more about how to correctly acknowledge RSC content .
Social activity
Search articles by author.
This article has not yet been cited.
Advertisements
IMAGES
VIDEO
COMMENTS
Related Articles. This guide provides a 4-step process for making a good scientific presentation: outlining the scientific narrative, preparing slide outlines, constructing slides, and practicing the talk. We give advice on how to make effective slides, including tips for text, graphics, and equations, and how to use rehearsals of your talk to ...
Oral Presentation Structure. Like scientific papers, oral presentations at a conference or internal seminar are for sharing your research work with other scientists. They, too, must convince the ...
Word choice is the specific vocabulary used by the speaker to convey a message. Text in the presentation should be kept simple, using as few words as possible. Using complicated, lofty words increases lexical density and inflicts a strain on the audience to decipher the meaning of the message while requiring additional work to follow along.
The best science talks start with a process of simplifying - peeling back the layers of information and detail to get at the one core idea that you want to communicate. Over the course of your talk, you may present 2-3 key messages that relate to, demonstrate, provide examples of or underpin this idea. (Three is a nice round number of ...
The "presentation slide" is the building block of all academic presentations, whether they are journal clubs, thesis committee meetings, short conference talks, or hour-long seminars. A slide is a single page projected on a screen, usually built on the premise of a title, body, and figures or tables and includes both what is shown and what ...
Scientific Presentations. Presenting science to an audience of peers is among the most fundamental of job skills. Yet, few scientists receive training in how to present, beyond the occasional ad hoc critique during the weekly lab meeting, or the odd rehearsal leading up to a thesis defense.
Week 1: What is scientific presentation? The term 'scientific presentation' used in this course refers to talks that scientists make in order to report their work to the scientific community: how this particular scientist found an important question and discovered a possible answer to that question. Through making such presentations ...
Get prepared. The trick to giving a great presentation is to be prepared, know your stuff, and practice your talk until it feels completely natural to stand up in front of an audience. Perhaps your first presentation will be in an informal setting with other members of your lab during a weekly or monthly group meeting.
Below is the summary of how to give an engaging talk that will earn respect from your scientific community. Step 1. Draft Presentation Outline. Create a presentation outline that clearly highlights the main point of your research. Make sure to start your talk outline with ideas to engage your audience and end your talk with a clear take-home ...
1. Open with a Research Question. Here's how to start a scientific presentation with ease: share your research question. On the first slide, briefly recap how your thought process went. Briefly state what was the underlying aim of your research: Share your main hypothesis, mention if you could prove or disprove them.
Issever, Cigdem, and Ken Peach, 'Identifying the Context of the Presentation', Presenting Science: A practical guide to giving a good talk (Oxford, ... Getting this wrong can mean either most of the audience is bored for the first 20 minutes or half of the audience haven't the faintest idea of what you are talking about for the whole hour ...
Michael Alley has been teaching scientists and engineers how to design presentation slides and deliver effective scientific talks for over three decades. In this three-part lecture, you will learn (a) how to design your PowerPoint or Keynote slides, (b) how to organize your talk, and (c) how to confidently deliver your research seminar.
Science; Social Science Art Architecture Art History ... The definition or meaning of a formal presentation is a presentation that one has had time to prepare for. One has generally been asked in ...
Excellent Presentations are Simple. The presenter is the scientist or engineer who conducted the research. The presenter is an expert in that particular field and should be confident (but not arrogant) when presenting the research to their audience. The presenter should understand everything that is in their poster (e.g., issue, topic, figures, tables, references).
Poster presentations function to foster collaborations, generate interest, educate and prompt further research. Purpose of Scientific Posters A scientific poster is an illustrated summary of research and a type of scholarly publication that scientists use to share their findings and discoveries with the public.
owerful and reliable. It can be used to develop new technologies, treat diseases, and deal with many ot. r sorts of problems. Science is ongoing. Science is continually refining and expanding our knowledge of the universe, and as it does, it leads to new questions for. future investigation. Science will ne. r be "finished."Science is a.
A presentation can be effective if it is carefully planned and prepared. However, delivering presentations is not always easy for every individual. Some people take presenting as a probable opportunity to showcase skills, while others find it a challenging task. To provide an effective presentation, a presenter must possess some abilities.
Some definitions. "Science (from the Latin scientia, meaning „knowledge‟ or „knowing‟) is the effort to discover, and increase human understanding of how the physical world works." (from Wikipedia) "Any system of knowledge that is concerned with the physical world and its phenomena and that entails unbiased observations and ...
Science is a strict systematic discipline that builds and organises knowledge in the form of testable hypotheses and predictions about the world. [1] [2] Modern science is typically divided into three major branches: [3] the natural sciences (e.g., physics, chemistry, and biology), which study the physical world; the social sciences (e.g., economics, psychology, and sociology), which study ...
science, any system of knowledge that is concerned with the physical world and its phenomena and that entails unbiased observations and systematic experimentation. In general, a science involves a pursuit of knowledge covering general truths or the operations of fundamental laws. Science can be divided into different branches based on the ...
1. Presentation skills can be defined as a set of abilities that enable an individual to: interact with the audience; transmit the messages with clarity; engage the audience in the presentation; and interpret and understand the mindsets of the listeners. These skills refine the way you put forward your messages and enhance your persuasive powers.
Unpacking the Science of Reading and Structured Literacy The science of reading includes all the methods or approaches that have been found, through research, to give kids a learning advantage in reading. The term is often used in literacy education and, while phonics plays a key role, it is part of a comprehensive evidence-base that we draw from.
That said, a presentation goes beyond even having any slides! What I mean is that a presentation can be given even without having any slides. While a single slide can also be construed as a presentation in a scenario when while giving the presentation, the presenter uses just 1 slide. Although, this is an extremely rare occurrence!
What do you mean exactly by "overview slide"? From your first paragraph, it looks like you mean a dry slide with the list of section names (which can be generated automatically by, e.g., Beamer's \tableofcontents). @Jakebeal in his answer seems to understand it as a handwritten slide with an introduction/synopsis (which is maybe what you called ...
Bios. Bennett Brooks is president of Brooks Acoustics Corporation (BAC) an acoustical consulting firm comprising engineers and designers who specialize in sound for the built environment. Bennett is a graduate of the Massachusetts Institute of Technology (BSME), and the George Washington University (MS-Acoustics).
Cancer immunotherapies depend on the establishment of immune responses driven by tumor antigen-specific T lymphocytes ().T cells recognize the antigens presented on major histocompatibility complexes (MHC) of tumor cells and execute their effector function by production of inflammatory cytokines and tumor cell killing (2, 3).However, tumor cells often do not activate T cells due to down ...
Maintenance work is planned from 22:00 BST on Monday 16th September 2024 to 22:00 BST on Tuesday 17th September 2024. During this time the performance of our website may be affected - searches may run slowly, some pages may be temporarily unavailable, and you may be unable to access content.