- PRO Courses Guides New Tech Help Pro Expert Videos About wikiHow Pro Upgrade Sign In
- EDIT Edit this Article
- EXPLORE Tech Help Pro About Us Random Article Quizzes Request a New Article Community Dashboard This Or That Game Popular Categories Arts and Entertainment Artwork Books Movies Computers and Electronics Computers Phone Skills Technology Hacks Health Men's Health Mental Health Women's Health Relationships Dating Love Relationship Issues Hobbies and Crafts Crafts Drawing Games Education & Communication Communication Skills Personal Development Studying Personal Care and Style Fashion Hair Care Personal Hygiene Youth Personal Care School Stuff Dating All Categories Arts and Entertainment Finance and Business Home and Garden Relationship Quizzes Cars & Other Vehicles Food and Entertaining Personal Care and Style Sports and Fitness Computers and Electronics Health Pets and Animals Travel Education & Communication Hobbies and Crafts Philosophy and Religion Work World Family Life Holidays and Traditions Relationships Youth
- Browse Articles
- Learn Something New
- Quizzes Hot
- This Or That Game
- Train Your Brain
- Explore More
- Support wikiHow
- About wikiHow
- Log in / Sign up
- Arts and Entertainment
- Making Videos
- Video Editing

CapCut Video Editing Tutorial: Beginner to Advanced CapCut Skills
Last Updated: March 17, 2024 Fact Checked
This article was co-authored by wikiHow Staff . Our trained team of editors and researchers validate articles for accuracy and comprehensiveness. wikiHow's Content Management Team carefully monitors the work from our editorial staff to ensure that each article is backed by trusted research and meets our high quality standards. This article has been fact-checked, ensuring the accuracy of any cited facts and confirming the authority of its sources. This article has been viewed 465,193 times. Learn more...
Are you looking for a free video editing tool? This wikiHow will teach you how to edit videos using the free mobile app, CapCut. Many people use the app to edit videos for TikTok, but the opportunities are endless! We will outline most of the more popular and essential features. These range from basic editing tricks, including how to navigate the app, to more unique features such as adding background music and filters.
Getting Started with CapCut

- If using an Android with Google Play, tap on the top search bar labeled, ‘Google Play’ and type in ‘CapCut.’
- In your search results, tap on the app titled ‘CapCut - Video Editor.’

- You will only need to complete this step the first time you open the app!
Familiarizing Yourself With the Interface

- For now, you are just choosing one video clip. We’ll guide you through adding more clips in a later step.

Completing Basic Editing

- Trimming means that the part of your clip that used to be between the thick white line and the adjusted playhead will be completely cut out.
- To trim the end of your video, perform this step on the right side. Drag the timeline to the place you want the video to end (indicated by the playhead). Then tap on the clip and drag the thick white line on the right to meet the playhead.

- If you want to switch around the chronological order of your clips, simply press, hold, and drag a clip in the timeline and to your desired location (i.e. placing the new clip to the left of your old clip to make it play first).

- This can be helpful if you want to place a separate clip in the middle of one. Split the original clip where you want the other one to go, then use the Join tool to add a new video. Drag this new clip in between the split you just created!
Applying More Advanced Edits

- Something to keep in mind when slowing down a clip is that it may affect the quality of your video, depending on the frame rate of your original clip. We suggest making sure that your video is 60fps or higher to ensure a high-quality final result.

- Anything below 1.0x will slow it down, and anything above 1.0x will speed it up.

- To create a custom curve, tap on "Custom" and manipulate the yellow line by dragging each of the four dots up or down. Placing a dot higher (causing the curve to go up) will speed up that section of the clip, and placing it lower (guiding the curve down) will slow it down. Tap on the bottom right check mark when you're done.

- Don't be shy to test out lots of different options until you find the one that's just right!

- CapCut lets you move these effects around in the timeline to change their duration and placement. Simply tap on it in the timeline and manipulate it as you would a clip.

- To change the placement, tap on the text in the preview panel and drag it to your desired location.

- CapCut lets you change the placement and size of stickers. Tap on it in the preview panel, and then drag it around and/or pinch it with two fingers.

Community Q&A

You Might Also Like

- ↑ https://www.capcut.com/tools/video-editing-app
- ↑ https://www.alphr.com/capcut-how-to-use/
- ↑ https://www.tomsguide.com/how-to/how-to-use-capcut
- ↑ https://filme.imyfone.com/video-editing-tips/capcut-full-review/
- ↑ https://downloads.digitaltrends.com/capcut/ios
About This Article

- Send fan mail to authors
Is this article up to date?

Featured Articles

Trending Articles

Watch Articles

- Terms of Use
- Privacy Policy
- Do Not Sell or Share My Info
- Not Selling Info
wikiHow Tech Help Pro:
Level up your tech skills and stay ahead of the curve
CapCut Video Editing Tutorial: From Beginner to Advanced
Last Updated February 4, 2024
Anthony Gallo

CapCut is a free video editing app that allows you to create and edit videos in an incredibly intuitive and user-friendly environment.
In this guide, I'll show you the basic editing tools to get started in CapCut, we'll then look at a beginner CapCut video editing tutorial, followed by advanced techniques ensuring your next video has the best chance of connecting and going mega viral!
Let's do it. 👇
Getting to Know the CapCut Layout

CapCut is one of the most user-friendly and intuitive video editing platforms I have come across.
With that being said, if you've never used video editing software before following a guide like this can accelerate your progress as a total beginner.
In this section I'll outline the main tabs in CapCut so you know exactly where to find what you need.

In the top left hand corner of the CapCut Graphical User Interface (GUI) is the Media Tab.
The media tab in CapCut is where you'll import videos, images, and audio files. Alongside the media tab, there are 7 other tabs outlined below:
- Audio: The Audio tab is a specialized section in the CapCut app where you can explore and add various sound effects and background music clips from CapCut's library of free audio assets.
- Text: In the Text tab, you'll be able to access a wide range of fonts and styles to add words or captions to your video clip.
- Stickers: The Stickers tab offers a fun collection of animated and static trending images that can be overlayed onto video clips and TikTok videos, adding extra depth to your content.
- Effects: Through the Effects tab in the CapCut app, you can create dynamic visual modifications, from glitches to cinema-quality animations.
- Transitions: The Transitions tab in the CapCut app provides an array of completely free seamless transition effects that help in smoothly connecting different video clips.
- Filters: The Filters tab allows you to dramatically change the mood and aesthetic of your video clips by applying various color grading and effect filters available within CapCut's editing tools.
- Adjustment: Lastly, the Adjustment tab is where you can import video presets and LUTs into CapCut for color grading or just to add some extra visual flare to make incredible videos.

Now you've used the media panel to import videos into CapCut, let's take a look at the timeline.
The timeline is where you'll assemble and arrange all your footage and audio clips. To get started, drag and drop your clips and audio files from the media pool to the timeline.
Pro Tip: Click your files while they're still in the media pool, you'll see a box appear around the media which allows you to trim the media before bringing it to your timeline - very handy for longer files.
To timeline zoom in CapCut you can:
- Use the slider bar in the upper right corner of the timeline panel
- Hold CMD/Control + or - keys
- Hold CMD/Control and use your mouse scroll wheel (my personal favorite for zooming)
To trim videos in CapCut:
- Split: Move the playhead to where you want to cut and click the "Split" button in the upper left hand side of the timeline panel, OR simply press CMD/Ctrl+B on your keyboard.
- Delete Left: Move your playhead to your desired cut point and click "Delete Left" or simply press Q on your keyboard. This feature will delete all media to the left of your playhead.
- Delete Right: Move your playhead to your desired cut point and click "Delete Right" or simply press W on your keyboard. This feature will delete all media to the right of your playhead.
To Undo in CapCut use CMD/Ctrl + Z
To Redo in CapCut use CMD/Ctrl + Shift + Z
Don't forget to remove the watermarks in CapCut too, which can be done via trimming the timeline.
That just about covers the basics regarding the CapCut timeline, there's a few additional advanced features which we'll cover later in the advanced section.
Settings Panel

The settings panel, located in the top right of the CapCut GUI gives you a range of settings allowing you to adjust the size and scale, audio, speed, coloring and more of your video clip.
Click an item on the timeline to see the settings for that specific clip.
Here's a brief rundown of what you can do in each tab:
- Video : In the video tab, you can edit videos by altering their position, size, blend mode, opacity, and stabilize footage to add a professional touch to your video clip. You can also do green screening and auto cutouts here too.
- Audio : The audio section allows you to adjust audio clip, including the volume of your video clips or background music, fade ins/outs for smoother transitions, loudness normalization for consistent audio levels, and noise reduction to enhance the clarity of your audio clip.
- Speed : With the speed feature, you have the flexibility to speed up or slow down your video clips, adding dynamic video effects to your YouTube videos.
- Animation : The animation tab in CapCut video editing introduces animations, acting as transitions for single clips, where you can select in, out, or combo animations for engaging video effects.
- Adjustment : the adjustment tab serves as your color panel, letting you fine-tune the temperature, hue, saturation, brightness, etc., of your video clip, ensuring your video tutorial or any video project looks exactly how you envisioned.
Project Panel

The CapCut video project panel will show in place of the settings panel when no items on the timeline are selected.
Click the modify button in the bottom right of the project panel to modify the name, location, aspect ratio, resolution, frame rate, and color space of your project!
Player Window
The player window is fairly self explanatory but features a few useful settings worth talking about:
- Aspect Ratio: Set the aspect ratio for your video clip. You'll want 16:9 for YouTube videos and usually 9:16 for Reels, TikTok videos, and YouTube shorts.
- Preview Quality: In the top right of the Player window you'll see a 3 line hamburger icon, click this to modify the preview quality. Especially useful if you're experiencing poor playback performance.
- Export Still Frame: Useful feature when looking to export stills of your video content without having to fiddle around with a screen snip.
If you're using multiple monitors you can also undock the player panel by clicking and dragging the top bar.
How to Edit a Beginner Video in CapCut
Now that we're familiar with the CapCut layout, let's take a look at a beginner CapCut video editing tutorial.
In this section, I'll outline the basic steps to edit a talking head style video, add b-roll, add transitions, generate and edit captions, and how to add background music.
1. Cut & Trim Clips
When recording your talking head video, it's much easier and quicker to bullet point your script and narrate your videos in segments. This way, you don't have to memorize an entire script
The drawback in recording this way is that you will end up with a lot of dead space in your recording, so the first step is to clean up and cut out this dead space.
CapCut features some super handy keyboard shortcuts for this task:

For efficiency, I recommend using keyboard shortcuts for these functions. These procedures can help make your video more concise and watchable.
2. Adding B-Roll
Next, you'll want to add b-roll to your video.
B-roll refers to additional clips that supplement the main video footage (or the A-roll). Adding b-roll makes your video more dynamic and keeps your viewers interested. It just makes your overall product look more professional too.
You can either film your own b-roll relevant to your content, or you can use sites like Pexels to download free b-roll and add it to your content.
To add b-roll, drag and drop the desired b-roll clip onto a new layer in CapCut. Remember, top layers get priority playback, meaning that the top clips will be layered over the top of any clips below them in payback. So layer your clips accordingly!

Timing your b-roll to start or finish in-line with your cuts from section one is a great way to improve the flow of your clips and reduce choppiness.
3. Transitions & Effects
Adding transitions and effects can elevate your video to the next level but use them wisely! A classic beginner mistake I see quite often is the overuse of video transitions.
Adding transitions to your CapCut videos is super simple: Just click the Transitions button in the top left, search and select your desired transition, then drag and drop it onto your timeline between 2 clips.
Ensure your clips are on the same layer to add transitions.
My personal favorite transitions right now, which are popular amongst many creators are the Glare Transition, the Pull In, and Pull Out style transitions.
4. Auto Captions
Auto Captions in CapCut offer a fantastic way to make your videos more accessible and engaging.
To add Auto-Captions in CapCut click the Text button in the Media Tab and then the Auto Captions button.
You can easily change the font size, style, and other classic text editing features by selecting a caption block on the timeline and clicking on "basic" in the top right (Settings Panel).
Remember to check on "Apply to All" if you want your changes to apply to all the captions across your video.
Applying styles like stroke to increase the letter border width, rounding corners, or adding a drop shadow can significantly enhance the aesthetics of your captions.
Use the split tool to manually adjust caption segments, the currently trend is to only have a few words on the screen at a time. CapCut does this well automatically but you might need to change a few captions that get a bit long here and there.
Adding animations like Zoom in can add dynamism to your captions. Simply select the text layer, head into the animation sub tab in the text menu, and choose your desired animation.
Learn more about captions and CapCut's text-to-speech features .
5. Adding Music
Music can set the mood of your video and it's incredible how much impact choosing the right music can have on engagement and virality of your content.
You can use the built-in songs available in TikTok or Instagram, or import songs from external sources like Epidemic Sound , which has quality and diverse music options.
When adding music, adjust the volume (usually around -16DB) to ensure it doesn't overpower the other audio in your video.
Adding the right music track to your edit is one of the best band-for-buck things you can do!
6. Exporting
After completing all edits, export your finished video. You can title your video and choose where you want it to be exported by clicking away from any clips and making changes in the Project Panel.
Once everything is checked, click export and your video is ready to be posted online.
Learn more CapCut video editing tips to level up your content creation process!
Advanced Editing in CapCut: Create a Striking Intro
One of the most important things to get right when editing and releasing short form content in the intro.
In this advanced guide, learn how to animate and create advanced captions using keyframes, zoom and add dynamic effects to your video clips, and use the auto-cutout feature alongside a crumpled paper background to seriously level up your content! 📽️
Following this, I briefly touch on sound design, adding those finishing touches to make world classed short form content.
Wrapping Up
In this CapCut video editing tutorial we covered topics helping beginners edit videos and provided a taste of some advanced video editing techniques.
If you're brand new to CapCut use the first section of this article to familiarize yourself with the CapCut layout, then move on to the beginner tutorial.
If you're already familiar with CapCut and want to challenge yourself with some advanced video editing techniques, check out the YouTube video in the Advanced editing section to seriously level up your content!
Happy editing. 😎

Anthony Gallo is the cofounder of ContentCreator.com and lead educator in the online course 14 Day Filmmaker, that has taught over 100,000 aspiring creators how to shoot & edit professional video content with PRO and SMARTPHONE cameras.
Having created content in a variety of industries including commercial advertising, weddings, music videos, and hundreds of youtube videos, Anthony has amassed over 50 million views online and is constantly looking for new and engaging ways to create content and help others master this amazing craft.
CapCut Video Editing Tutorial – COMPLETE Guide!
Today, we’re going to step through exactly how to use CapCut to create awesome videos on both iPhone and Android.
CapCut is one of the most popular video editing apps for iPhone and Android right now. And while it is created by the company behind TikTok, it’s far more than just a TikTok video editor.
Important: When available, we use affiliate links and may earn a commission!
In fact, CapCut video editing is super powerful. You can easily create videos on your smartphone for any platform or use case. We’ll cover all the best features, tools and effects to streamline your video editing process.
Because there are SO many awesome features, we just won’t be able to get through every single one of them. Instead, we’ll focus on the key things that will help you get the most out of the app so that you can start getting awesome results as fast as possible.

CapCut is an awesome option if you’re looking for an Android video editor or an iPhone video editor
We’ll be running through this CapCut tutorial on an iPad but the process is exactly the same on iOS and Android. Feel free to follow along on your device of choice.
By the end of this tutorial, you’ll have everything you need to create awesome videos yourself in CapCut!
Here’s exactly what we’ll cover in our complete CapCut video editing tutorial for beginners:
How To Create A Project On CapCut
Capcut interface, how to edit footage on capcut, how to add b-roll on capcut, how to add titles on capcut, how to add transitions on capcut, how to add effects on capcut, how to remove background on capcut, how to adjust speed on capcut, how to stabilize clips on capcut, how to add audio on capcut, how to adjust audio on capcut, how to adjust music on capcut, how to color grade on capcut, how to export on capcut.
Plus we’ll share our top three tips to help you easily level up your videos in CapCut or ANY video editing software.
Let’s get started.
First, open the CapCut app. Tap on New Project , then select your primary video clip and press Add .
If you have multiple primary video clips, you can select multiple. But don’t upload any B-roll footage just yet – we’ll be adding that later.

The first step in this CapCut app tutorial is to create a New project
CapCut will automatically set the project format to the type of footage you uploaded. So if your primary footage is a widescreen video, CapCut will set your project type to a widescreen project.
If you want to change the project type, you can do this by going to Format in the bottom menu.
You’ll see a range of options to choose from. Maybe you’re making a portrait video for TikTok, a square video for Instagram or a widescreen video for YouTube. We’ll be using the 16:9 widescreen option to create a YouTube video.

You can easily change the format of your video at any time – even after you’ve finished editing & exporting!
One really cool feature is that you can come back later and save out different versions of your video in different formats. This is awesome for repurposing your content.
Now let’s get familiar with the CapCut interface before we start diving into the editing side of things.
In the top right corner is the 1080p button. This is where you can adjust the resolution and frame rate. The project defaults to 1080p and 30 frames per second. It’s a good idea to go with the defaults unless you have some specific requirements for your video.

You can adjust the resolution and frame rate by tapping the 1080P button in the top right corner
The other main aspects of the CapCut interface you’ll need to know are:
- The Export button in the top right corner is how you save and export the project
- The playback window in the middle is where you preview your video
- The undo, redo and maximize buttons are below the playback window
- The editing timeline is where you add all of your footage and clips
- All of the settings (audio, text, effects, etc.) are located in the bottom menu bar

The CapCut editing timeline is where you’ll create your video masterpiece
Now that you’re familiar with the interface, let’s start editing.
First thing’s first – you need to remove all the mistakes and bad footage that won’t be used in the video.

When splitting your footage, align the white bar where you’d like the split to occur
There are two ways you can remove footage: using the Split tool and using the handles.
To delete any bad takes using the Split tool, scrub forward through your footage until the white bar reaches the point where your video will start. Then bring up the editing tools by tapping on the clip – they will appear at the bottom of the screen.

The Split tool is incredibly useful for trimming and editing any footage
Tap the Split button. You’ll now have two clips that are split exactly where you placed the white bar. Now select the first clip with the mistakes and press Delete .

You can also drag the white side handles to trim and edit down the footage
To remove footage using the handles, tap the clip to select it. At the beginning of the clip you’ll see a white handle. Tap and hold the handle so you can drag it along until it reaches the start of your good footage.
Both methods are great options and you can even use a combination of both. For example, if you want to remove footage in the middle of a clip, tap the clip to bring up the menu and press Split . Then drag the handles to trim the footage.

Make sure you delete the end CapCut clip from your project
It’s also a good idea remove the short promotional clip CapCut inserts at the end of video at this point. Select the clip and press Delete .
PRO TIP: We always recommend editing backwards. It may seem like a strange concept but hear us out. When filming, you don’t move on until you’re happy with the sentence or paragraph you needed to say. This means the last take is usually the best. So editing from the end of your footage will save you heaps of time going through all the bad takes!

When filming, only move on when you’re happy with the take – then you can edit backwards to speed up the process
After you’ve finished editing out the mistakes and bad takes from your footage, the next step is to add B-roll.
Now to add B-roll to your video. Press Overlay and then Add overlay . From here you can choose any graphics, videos or photos that you’ve got saved on your device. Select the footage you’d like to include and press Add .

Tap the B-roll footage you’d like to use in your video and then press Add
It may take a minute to load and then you’ll see your B-roll on the timeline below the primary footage.
To change the location of the clip on your timeline, click and drag it to move. You can trim the B-roll footage in the same way you trimmed the primary footage.

To layer B-roll on top of each other, simply drag it down to the layer beneath the first B-roll
You can even layer B-roll on top of each other. To do this, drag the clip to the row beneath the first layer of B-roll. This way you can go from the primary footage, to one B-roll clip, to another B-roll clip and then back to the primary footage.
Add in any other B-roll footage you want to include in the video using this process.

After the B-roll has been compressed, you can access it by tapping the B-roll icon (this will expand it again)
Once you’re done, exit the Overlay section by pressing the Back arrow in the bottom left corner. You’ll notice that the footage has been compressed. To get back into the B-roll at any point, just tap one of the B-roll icons on your footage.
Now it’s time to add titles.
There are two main options when it comes to adding titles to your project.

To add titles and text to your video, tap the Text button on the bottom menu
You can add and customize basic text – there are lots of features in here that allow you to create something really good. Or you can use the text templates.
First up, let’s cover how to add a basic title. Press Text and then select Add text . Type in the text and then you’ll be able to customize the font, color, effects, stroke and background.

CapCut has heaps of text customization options so you can easily make your titles stand out!
Be sure to stay true to your branding when you’re customizing the text. Think about using similar colors and styles so that your videos are recognizably yours.
To move the text box, just tap and drag. You can adjust the size by pinching in and out.

You can make your title animated by selecting the text box and going to Animation
When you’re happy with the text, you can make it animated. Tap Animation and then you can decide whether you want it to animate In , Out or in Loop .
There are lots of animations to choose from so play around until you find one that suits your style.
Just like with any other clip, in the timeline you can move it around and adjust the length using the handles.

There are some awesome preset animated titles you can play around with in CapCut
To insert one of the text templates, press the Back arrow and select Text template . There are heaps of fancy titles and animations in here that will make your title pop! There are also timers, clocks, subtitles and symbols.
Simply tap any of these to add them to the project. You can change the text and adjust its length/location just like you did with the basic text titles.

After you leave the Text tab, any titles will appear as a red line above your footage on the editing timeline
Once you’ve added titles, press the Back arrow. You’ll see the footage has compressed again. Any titles will appear as a red line above the primary footage. If you want to come back to edit these later, just press the Text button again.
Add all of the titles you want in the video and then let’s add transitions.
There are a few ways that you can add transitions between clips in CapCut. You can apply the transitions to the B-roll footage, to the primary footage or using a zoom cut.
Adding Transitions To B-Roll Clips
Let’s start with the B-roll footage. Tap on one of the little B-roll icons coming off the primary footage. This will open up the B-roll clip.
Select the B-roll clip and tap the Animation button. You can choose between In , Out and Combo . Tap In and you’ll see all the traditional preset transitions and effects.

After you’ve chosen a transition and applied it to the footage, tap the Tick icon
Select Combo , and you’ll see presets that will add a whole new level of movement and polish to your video. If your B-roll clip is quite still or stagnant, adding one of these presets can make the B-roll a bit more exciting.
To change the length of the transition, adjust the Duration slider bar. Then select the Tick icon to save the transition.
Adding Transitions To Primary Footage
To add transitions to the primary footage, tap the White Square icon between two clips. Again, lots of different presets will appear. Simply tap one to apply it. You can adjust the duration by moving the slider.
With any of these transitions, be careful not to go overboard. It’s really easy to cheapen your video by adding hectic transitions.

Try not to use transitions that are too wild as this can cheapen your video
Especially if you’re transitioning between clips that look almost identical (i.e. one clip of you talking to another clip of you talking), it’s not a good idea to use these preset transitions. Instead, it’s best to add a zoom cut.
Adding Zoom Cuts As Transitions
Zoom cuts are pretty much what they sound like. It’s when you zoom in slightly on one of your shots so that it looks different to the previous shot. This makes it look like you’re using two different camera angles.
To do this, select the second shot on the timeline. Pinch the footage in the playback window to zoom in on it slightly. Adjust the placement of the clip so that it matches the framing in the previous shot.

To create a zoom cut transition, zoom in slightly on the second clip so that it looks slightly different to the first clip
Go back and play this through so you can see the subtle beauty of the zoom cut! It’s a simple way to change things up for the viewer and keep them engaged.
Now, go through and add present transitions or zoom cuts to your video. Then it’s time to add effects.
To add effects to the video, press Effects in the bottom menu.
This is another area where there are heaps of options you can choose from. We wouldn’t usually use these types of effects in our videos but this is something you can play around with.

At Primal Video, we don’t usually use these kind of effects. But if you’re doing something different like a TikTok video edit, these could be useful!
These Effect filters aren’t the only awesome effects inside CapCut.
There are effects that allow you to remove background, adjust speed and stabilize footage. Let’s go over how you use these effects.
This effect is seriously powerful. Select a clip and press Remove background . CapCut will then analyse the clip and take out the entire background.

CapCut’s background removal tool is a really impressive feature
It does a really good job of this! This is such an awesome effect that allows you to get really creative with your editing.
You can adjust the speed of a clip but selecting the clip and pressing Speed . There are two options here:
- Normal: You can adjust the slider bar to increase or decrease the playback speed
- Curve: This gives you more control over the speed adjustments as you go

If you want more control over the speed adjustments, select Curve and you’ll see lots of different options
This one’s another standout feature of CapCut. Select a clip and slide along the bottom menu until you see Stabilize .

If you ever find yourself with shaky footage, the Stabilize feature will sort it out!
This will remove any camera shake in your footage. Super handy if you didn’t have a tripod when filming or your footage is just a bit shaky for some reason!
Now that you’ve added in any effects, it’s time to add audio.
So let’s add in your audio or sound effects. Go to the start of your footage and you’ll see the + Add audio button.

To add background music to your video, tap the + Add audio button
Tap Sounds and you’ll be taken to the CapCut music library.
We prefer to use audio that we’ve purchased using sites like Artlist and Epidemic Sound. This is just so we know for certain that we’re covered for licensing.

You have the choice of using one of CapCut’s tracks or uploading your own audio
If, like us, you’re uploading your own audio track, press Your sounds and then From device .
If you’re using a track from CapCut’s library then pick a track and press the Download icon. Then press + to add it to the timeline.

You can adjust the audio clip just like any other clip on the timeline
The audio clip will appear below the primary footage. You can move, cut and adjust the audio clip just like any other clip.
Once you’ve added in the background music, you’ll need to adjust the audio levels of your video.
CapCut does a really good job of automatically adjusting the primary audio levels. If you find you do need to make adjustments, you can do this on a clip-by-clip basis.

If you need to adjust your primary audio, select Volume
Select the clip and press Volume . Adjust the slider bar to increase or decrease the volume level.
Again, this isn’t something we’ve ever needed to use. But if you want more control over your audio levels, select the clip and press Extract audio .
You’ll then have the audio clip from your primary audio on the timeline. You can make changes to this separate to your footage.

If you extract audio from your primary footage, it will appear as an individual clip on the timeline
Once the primary audio levels are set, you can make sure the music levels are at a good volume as well.
Select the music track and press Volume . For background music, we usually find between 27 and 30 is the optimal level. But use this as a starting point and make any adjustments from there.
You don’t want the music to be so loud that you can’t hear the primary audio. But you also don’t want it to be so quiet that you can’t hear the music.

Try starting your background music at 20 – 30 and then adjust as required
PRO TIP: Make any adjustments to the audio levels while using headphones. This way you know exactly what the audio will sound like without any outside influences.
If you want the audio to fade in, select the audio clip and press Fade . You can specify the Fade-in duration and the Fade-out duration . Then tap the Tick icon.

You can even make your background music fade in and out by selecting the Fade button
After the audio levels are set, the last step in the editing process is color grading.
When it comes to color grading in CapCut, you can apply a filter or you can manually adjust the look.

CapCut has lots of filters – you can apply them to either just one clip or to your entire project
To add a filter, make sure nothing is selected and press Filters . Think of these like Instagram filters. If there’s something that matches the look and feel that you’re after, tap a filter and press the Tick icon.
You’ll then have another clip on the timeline. Again, this clip can be adjusted just like any other clip. So it can be applied to just a small area or to the entire video.

To do the color grading process manually, go to Adjust in the bottom menu
To manually adjust the clip, make sure nothing is selected and tap Adjust . Here you’ll be able to make changes to the:
- Exposure: Make sure the shot is bright enough
- Shadows: Make adjustments to the dark areas of the shot
- Contrast: Increase the distinction between lighter and darker areas
- Color Temperature: Make the shot cooler or warmer
- Saturation: Increase to boost the colors (don’t go too far with this one)
Once you’re done, hit the Tick icon. Just like the filter, this will appear as a clip on the timeline. Make sure you drag the handles so that the effect stretches across the entire edit.

Once you’ve made color adjustments to your video, drag the clip so that it stretches along the entire project
If you’d rather make these changes to one specific clip, just make sure you have the clip selected before pressing Filters or Adjust .
When you’re finished color grading, the next step is to export!
In the top right corner press the Download icon. CapCut will then begin saving out the project using the optimal settings based on the primary footage you first imported.

Press the Download icon and your video will begin exporting
You can upload the video to Whatsapp, Facebook, Instagram or you can press Other . If you go to Other you’ll be able to press Save to Files or Save Video to save it onto your device.
Then press Done and you’ll be taken back to the homescreen.

You can upload straight to social media sites or you can download directly onto your device
After this process, make sure you playback the video. You’ll be able to pick up any mistakes and ensure you’re completely happy with the final product.
Top 3 Tips For Creating Awesome Videos
As promised, here are our top three tips to level up your CapCut video editing:
1. Use Stock Footage
Use sites like Storyblocks and Artgrid to find additional B-roll or footage. This additional B-roll allows you to keep viewers engaged and help them understand what you’re talking about. Best of all, you don’t need to go to the time and effort required to shoot the footage yourself.

Using stock footage means you can have awesome B-roll without needing to shoot all of it yourself
2. Use Animated Graphics
Animated graphics, titles and video intros make your videos look so much more professional. Our top recommended tool for this is Placeit – it allows you to create some awesome graphics really easily.

Using sites like Placeit to create animated video intros & titles for your videos makes them look more professional
3. Use Stock Music
Music is a super powerful storytelling tool that tells viewers what they should be feeling during your video. That’s why it’s so important to use the right tracks. Our favourite places to get stock music are Artlist and Epidemic Sound. They have massive audio libraries and make the whole copyright issue really straightforward.

Adding stock music to your video will do wonders for increasing your viewer engagement
Now You Know How To Use CapCut
In this CapCut video editing tutorial for beginners, you learnt how to edit videos from start to finish.
Hopefully you can see just how powerful CapCut is and why it’s such a popular video editing app for Android and iPhone. It allows you to create incredible videos on-the-go without having to sacrifice on quality.
We hope you enjoyed our new CapCut app tutorial. If you found it useful please feel free to give it a share on your favourite social media platform or shoot it through to someone who might want to learn more about this awesome Android & iPhone video editing app.
For more information on creating YouTube videos, check out the Primal Video YouTube Ranking Guide . You’ll learn about the latest tools and strategies for improving video rankings on both YouTube and Google – and it’s completely free!
Is CapCut owned by TikTok?
CapCut is owned by ByteDance, the same company that owns TikTok.
Is CapCut on PC yet?
Yes! CapCut is now also available on desktop.
Is CapCut free to download?
Absolutely, CapCut is completely free to download on iPhone, Android, Mac and Windows.
When available, we use affiliate links and may earn a commission!
Royalty-free stock video libraries for awesome B-roll and footage:
- Storyblocks
Easily create professional, branded effects & animations for your videos:
Royalty-free stock MUSIC to level up your videos:
Recommended Gear & Resources
Check out an up-to-date list of all the gear , software & tools we use and recommend right now at Primal Video on our resources page here !
Related Content
- How to Make an Animated Video Intro for Videos
- Best Royalty Free Music Sites for Video
- TOP Sites for Royalty Free Stock Footage!
Share this...
Hit the button below and we'll send you this post for later, plus subscribe you to our awesome (free!) Primal Video Insider updates!
Hit the button and we'll send you this post for later, plus subscribe you to our awesome (free!) Primal Video Insider updates!
More from Primal Video...

Ring Light Review: Why you SHOULDN’T use Diva Ring Lights for Video Lighting!

Insta360 Nano vs Samsung Gear 360 (Comparison!): Best 360 Camera?

Adobe Premiere Pro Tutorial for Beginners – COMPLETE Guide!

How To Make Facebook Reels (+ The Reels Settings You Need To Know!)

How To Rank YouTube Videos, Guaranteed: Is YouTube Search REALLY Dead..?

3 Reasons Your YouTube Channel is NOT Growing!

YouTube Stories Tutorial – Everything You Need To Know To Create AWESOME Stories!

Video Lighting: Softbox Light Tips and 2 Common Problems

How to Add YouTube Timestamp Links (YouTube Chapters Tutorial!)
Become a Primal Video Insider to stay in the loop.

If you get my best Blue Steel impression now, just imagine what's waiting for you on the inside...
- Exclusive guides, resources and templates;
- Access to exclusive Fast Track Workshops; &
- Tips, training, resources, products & offers to level up every area of your video creation & marketing delivered right to your inbox! (cancel anytime)
- PlayStation
- Entertainment
- Lethal Company
- Sponsored Content
- SteamWorld Build
- Warhammer: Age of Sigmar - Realms of Ruin
How to edit videos on CapCut
CapCut keeps leveling up its video editing tools. Don't miss your shot!

Published: 13 Feb 2024 4:47 PM +00:00 Updated: 13 Feb 2024 4:47 PM +00:00
CapCut has finally gathered the user base it deserves. If you're among them, you'll want to know how to edit videos in CapCut .
Editing videos used to be overwhelming, especially for those just starting. It wasn't until CapCut completely changed the game that it became far more user-friendly for beginners.
CapCut provides simple and convenient tools for editing videos. So, if you want to finish and finally export that video in your draft, keep reading.
CapCut video editing features
All it takes to get started is your preferred device and an internet connection. CapCut can be downloaded for free on various devices , such as iOS and Android smartphones, PCs, and laptops.
You can also access the website on your PC or laptop's web browser instead of downloading the app to save storage space.
Once you've installed the CapCut app on your chosen device, you'll find options to either sign up or sign in on your screen. If you don't have an account yet, create one. If you already have one, sign in.
The New Project option will be visible at the top of the screen in no time. Tap it, choose one or more video clips, and click the Add or Import button. You can start editing it and detail it as you see fit.
Here are the four key components of CapCut:

- The Preview Window will allow you to watch your videos, engage with them, and tweak them by dragging and pinching to zoom in on the clips to fill the canvas.
- Timeline is the area designated for modifying the features or tools you've used, such as effects, overlays, text, and so forth.
- The Main Toolbar is where you can spot all the necessary editing tools. To make sure, it won't appear if you select the clip on the timeline.
- Like the Main Toolbar, the Sub Toolbar is a handy feature for enhancing editing capabilities. Plus, it offers convenient options to refine your video editing, such as filters, animations, styles, and more.
How to edit videos with CapCut
As CapCut gains prominence in recent years, so too does its advancement. They upgrade the features to a whole new level that you can mainly use for free.
Here's a simple guide to help you start video editing with CapCut's beginner-friendly features doing most of the work for you.
Resize video in CapCut
You may want to modify the size of your videos depending on the platform you plan to post them on in order to improve your audience's viewing experience.
CapCut provides sizes optimized for various platforms like TikTok, YouTube, and more.
At the main toolbar, simply slide to the right and select the aspect ratio option. Choose the preferred size for your video clip.
Adding a background using CapCut
After resizing the video, there's a chance that certain areas will be cropped out or bordered by black bars.
In this case, you can add either images or a color background or make it blurry.
You can locate it once more on the main toolbar by sliding right and choosing the background option.
Trim video in CapCut
When you add a video clip, white frames enclose it. Hold and tap on these frames to easily drag them to shorten or lengthen the video as you like.
You can also drag from the opposite end to restore any trimmed segments if needed.
Split video in CapCut
Splitting is like trimming, but sometimes, we need to cut something from the middle of a video clip, which can't be done with trimming.
Start by tapping the video clip to ensure it's selected. Then, locate and press the Split icon positioned at the bottom of the screen.
This will divide the video and allow you to do various editing manoeuvres on the separate segments.
Mirror, rotate, and crop the video using CapCut
These three tools are as indispensable as the first tools. Simply tweaking their positions or adjusting the frame will improve the overall look of the video.
You can either rotate clockwise, flip horizontally, or remove distractions. Tap the edit icon, move right a little, and you'll see the transform option. Click it to view all three options.
Change the speed of the video in CapCut
Adjusting your video speed in Capcut gives you two options to pick from. The Normal option lets you change the video speed steadily. It can be 0.1x, 1x, 2x, and so on.
The Curve option, on the other hand, can adjust the speed of a clip using a curve or graph. If you're just starting, the normal option is the easier route to take.
Select the clip you want to change the speed of, then tap the speed icon to adjust it as you like.
Add transitions to the video in CapCut
You're likely intrigued by transitions because they're all the rage on TikTok. Transitions are like cool effects or animations that make your video clips switch smoothly or add some visual flair between scenes.
If you're excited to hop on the trend , the first thing to do is import two or more videos into your CapCut. You can also split one long video into two shorter ones.
Once you're done, click the white icon with a line between the clips. There, you'll see all the transitions categorized. There are trending, pro, overlay, camera, and others.
Add and edit the text to the video in CapCut
Text is arguably one of the most important things you can ever include in your videos, regardless of where you intend to use them.
You can use text to share info, emphasize key points, or level up the aesthetic appeal of your video.
Many people incorporate text into their videos for branding, establishing identity, or prompting a call to action.
Add an overlay to the video using CapCut
Overlays are graphics you can add on top of your video clips to give them extra flair.
You can add things like images, overlay video clips, GIFs, etc., to make your video pop and grab attention.
When you're on the main toolbar, you'll spot the overlay icon right away. Tap add, and then you can grab whatever catches your eye from your photos.
Add audio and adjust the volume of your video in CapCut
You can do so much with the audio option. Whether it be adding background music, audio effects, or voiceovers.
You can see the audio icon right next to the edit icon. After that, you'll see different categories, such as sounds, sound effects, extracts, and voiceovers.
There's also a copyright feature available if you're interested in running a copyright check.
If you want to change the volume of your video, make sure you've got the right video selected.
Move to the right, and you'll find the volume icon there. Just adjust the volume to your liking and hit play again until it sounds just right.
Export videos on CapCut
Congratulations on reaching this step. This is surely the most satisfying part, where your efforts finally pay off.
Exporting videos is meant for the drafts where you've already poured in your finest editing efforts and are now ready to share them with others.
At the top of your screen, you'll see an arrow icon. It will give you choices such as preferred quality, media format, and where you want to save them.
The very last thing you'll do is just tap save. CapCut automatically saves your project as a draft. You can pause editing and pick up right where you left off.
There you have it. After going through this guide, you should be pretty comfortable with editing videos in CapCut.
And those tips are just scratching the surface of what it can do. Continue using the guide above, and you'll become a CapCut expert in no time.
Explore new topics and discover content that's right for you!
- Video Editor
- Video Converter
VideoProc Vlogger
Best CapCut Desktop Alternative to Edit Videos
- • Edit videos for free on a bigger screen on PC/Mac
- • Unlimited tracks, 4K high quality export, no watermark
- • Trendy templates: transitions, text, effects, colors, VFX
- • Speed ramp curves, EQs, motion keyframes, beat markers, etc.

How to Use CapCut – The Complete Guide for Beginners
CapCut is a free video editor developed by the same company that create the TikTok app. After its global launch in April 2020, this easy-to-use video editing app soon take a large share in the editing market. After all, the large user base of TikTok contributes to the growth of the CapCut app.
So, how to use CapCut to create videos easily for sharing or just for fun? We compiled the complete guide to make good edits using CapCut, covering everything from creating a new project, applying basic edits, venturing for advanced features, to exporting the video.
How to Use CapCut App
Step 1. Install CapCut app and open it.
Note: CapCut also has a desktop version so that you can edit videos on a bigger screen more easily.
Step 2. Tap the " New Project " icon to create a project.
Step 3. Tap to select one or multiple video clips and hit Add .
Step 4. Start editing on the timeline.

1. CapCut will save the project draft automatically. You can pause and resume editing anytime.
2. For automatic quick editing, you can also use the ShortCut feature to create videos in 1-click.
Introducing the CapCut Interface

- Preview Window: You can playback video, or pinch, drag, rotate and interact with the clips directly in side the preview window.
- Timeline: You can assemble, arrange, and apply edits to video, audio, overlay, effects, and text tracks.
- Main Toolbar: All the tools you need can be found here. The Main Toolbar shows up when there is no clip selected on the timeline.
- Sub Toolbar: They are toolbars dedicated for different tracks and clips on the timeline. For instance, there are sub toolbars for videos clips, text, audio, overlays and so on.
You can also watch the video tutorial below.
How to Do Basic Editing in CapCut
How to trim videos in capcut.

After adding videos to the timeline, follow these steps to trim videos in CapCut:
- Tap the video clip, you shall see white frames around it.
- Tap and hold on the white edge, and drag it to trim the video.
- You can also drag the opposite position to retrieve trimmed parts.
When you are trimming videos by dragging the edges, the adjacent clips will move along. In this way, there won't be gaps (and hence black screens) in your project.
If you want to trim out a section in the middle, you need to split the footage, and delete the clip in the middle. Read below.
How to Split Clips in CapCut

To split a video clip in CapCut, follow these steps:
- Tap the video clip to make sure it is selected.
- Hit the Split icon at the bottom of CapCut.
By splitting the video, you can perform the following edits:
- Add transitions in between after creating the split;
- Remove unwanted parts by tapping the split clip, and hit the Delete icon at the bottom of the screen;
- Insert new clips in between two video clips.
How to Resize Videos in CapCut
When you are trying to share videos to certain social platforms, the original video you created for another platform may not fit. Resizing videos in CapCut can make your video best fit the social media, and offer better viewing experiences for your followers.
To resize videos in CapCut, follow these steps:
- Tap the video clip that you want to change size.
- Tap the Format icon at the bottom of the editor.
- Choose a different as aspect ratio.
For instance, if you want to change horizontal videos to vertical, so as to better fit TikTok, you can use the 9:16 dimension.

When resizing the video, it is inevitable that some parts may be cropped, or are surrounded by black bars. In such a case, you can use the Canvas feature to polish the video.

- After change format, tap the Canvas icon on the toolbar at the bottom screen.
- Tap the Color icon to change background color.
- Use the Background feature to add pictures as the video background.
Tips: For videos of low resolution, if you are editing on a desktop, you can use AI video upscaling tools to resize the footage. AI upscalers are trained with massive dataset to deliver natural and sharp image.
How to Mirror Video in CapCut
Mirror a video is a way to flip the video horizontally, or to create an interesting effect when two videos are put together side by side, while each one is mirrored to the other on the horizontal axis.

To mirror a video horizontally in CapCut, follow these steps:
- After importing the video clips into CapCut.
- You shall see the toolbar pop up at the bottom, tap the Edit menu.
- Here will be another Edit option right between the Extract Audio and Filters tool, tap it.
- Hit the Mirror tool inside the Edit option.
How to Rotate Video in CapCut
In CapCut, you can rotate the video to fix wrong orientations, or create the trendy rotation effects that features video zooming and rotating in animation.
Rotate Video in CapCut to Change Orientation

- Create a new project, add video clips from your camera roll, and Hit the Add button.
- Hit the first Edit button to go inside the video editing toolbar.
- Tap the second Edit button, and hit Rotate .
If you want to rotate part of the video instead of the entire video clip, tap on the footage and split it before using the rotate function.
Rotate Video in CapCut Using Keyframes to Create Motion Effects

If you are trying to create video rotating effects, like those trendy videos that rotate videos and selfies photos, follow the steps below:
- Import video clips or pictures to CapCut.
- Tap on the clip, and tap the Keyframe icon to add a Keyframe. The Keyframe icon sits under the preview window (see screenshots above), next to the Play button.
- Tap on the clip and swipe to the right to move to a new position, tap the Keyframe button again to add another Keyframe.
- While staying on the second Keyframe, put two fingers in the preview window to pinch and rotate the clip.
- Repeat step 3 to move forward and create the third Keyframe, and repeat step 4 to pinch and rotate the clip. You can rotate it to 360 degree, 180 degreen or any angle that you like.
Playback and you shall see the clip rotating in motion. You can also make adjustment accordingly until you are happy with the result.
A little explanation here if you are curious about how the Keyframe works: for the first Keyframe, it keeps the original state of the clip, without another rotation or zoom-in, then in the second Keyframe, we rotate the clip. Therefore, from Keyframe 1 to Keyframe 2, the video starts to animate from the original state to another state with different rotation angle and scale, thus resulting in animation.
How to Change Speed in CapCut
CapCut offers two modes to change speed: Normal or Curve .
The Normal option allows you to speed up or slow down the video at a constant speed, such as 2x, 4x, 8x, etc.; the Curve option opens up to more editing possibilities, with the speed changing non-linearly to create impactful speed ramping effects.

To use the constant speed modifier in CapCut, follow these steps:
- Tap the video clip on the timeline, and hit the Speed icon.
- Hit the Normal option to change the speed at the constant rate.
- Drag the slider the slow down video to 0.1x or speed up to 100x.
- You can toggle the Pitch option to decide whether to alter audio pitch when the video speed is changed.
To use the speed curves in CapCut, you can read the detailed guide to make velocity effects , including auto velocity effects.
To ease the speed when creating transitions, 3D zoom effects, or using keyframes, you can use the graphs feature in CapCut.
With the speed modifier in CapCut, you can make interesting Slomo video (Slow motion) to highlight a key moment, such as creating the bullet time effects.
How to Reverse a Video in CapCut
Reversing a video can create interesting effects, such as broken glasses restored or torn paper merged into one.

- Add video to the project in CapCut.
- Tap on the video clip, and swipe the toolbar at the bottom.
- Swipe all the way to the right until you see the Reverse icon.
- Tap on it to Reverse the Video.
How to Replace a Clip in CapCut
Replacing videos or pictures in CapCut is a handy feature. With it, you don't need to go through the hassle of trimming and adjusting the length of the newly add video clip to make it fit in, or re-apply effects again. The replaced video clip shares the same duration and effects of the original clip.

- Tap on the video clip that you want to replace. If you prefer to replace part of the footage, you can use the Split tool to cut up the footage, and tap the segment to swap.
- Tap and swipe the toolbar at the bottom, all the way to the right until you see the Replace icon.
- Tap Replace and find the video clip that you want to add.
The duration is set to be the same length to fill in the slot, still you can swipe the footage back and forth to make sure the parts you want are included in that settled duration.
How to Add Video Transitions in CapCut
Many trendy transitions in TikTok are 1-click templates in CapCut Video Editor. With these templates, you can create cool transitions without editing experience.

- Import two or more videos into CapCut project, or split a long video into two parts.
- Click the icon between two clips to enter the transition panel.
- Apply transition templates and playback to find one you love.
Note : you can tap the transition icon again to adjust or delete transitions.
- Drag the slider to adjust the transition timing.
- Tap the forbidden icon to stop applying any transition preset.
How to Use Overlays in CapCut
Using the overlay feature in CapCut, you can add videos, pictures and text on top of the main clip, thus creating Picture in Picture effect, special title effects, or use it in combination with green screen effects and more.
How to Add and Edit Overlays in CapCut
To add overlays to CapCut, follow these steps

- Import video or picture into the project as the main clip.
- Click the Overlay icon in the toolbar. If you cannot find the Overlay icon, make sure not to tap the main video clip.
- In the new window, Tap Add overlay .
- Browse the video or picture files and select one to add.
You can repeat the steps to add more overlays on the timeline.
To edit overlays in CapCut, follow these steps:

- Tap on the Overlay track, and you shall see the editing tools. You can split, trim, change volume, and so on in the same way you edit the main clip.
- Tap the double arrow icon once you finish editing the Overlay clip. It will take you back to the main timeline.
- To revisit the Overlay editing panel, click the waterdrop-shaped thumbnail.
- If your overlay is longer than the main clip, the rest the video will show black screens with only the overlays.
- You can tap the overlay clip and split or trim it.
- To change the position of the overlay clip on the timeline, you can tap and keep pressing on the overlay clip to move it.
How to Put Two Videos Side by Side in CapCut (or Create Split Screen Effect)
When you add two or more clips on different tracks in the timeline, and make they aligned on the timeline, these clips will show up in the preview window simultaneously in the same screen.
You can crop or use the split screen features to decide the parts to show and hide, or change the shapes of the split screen.
The video tutorial below is easy to follow.
To get started, add main video to the timeline, and tap Overlay to add overlay video.
- Tap the Mask icon at the bottom panel.
- Tap the Split icon, and move the split line in the preview window.
- You can also add more videos side by side by repeat steps above.
- Besides using the Split template, you can also use the Filmstrip template and so on.
How to Use Green Screen in CapCut

CapCut offers the Chroma Key feature to remove colors such as green screen.
- Import the main video to the project, and add overlays on top of the video.
- Find the Chroma Key icon in the overlay video's editing toolbar.
- Use the color picker to identify the color to remove.
You can read detailed tutorial on how to use Chroma Key in CapCut >>
How to Edit Text in CapCut
How to add text in capcut.

Adding text is easy and quick in CapCut:
- Create a New Project and import video, audio, pictures when needed.
- Tap the Text icon at the bottom toolbar.
- Type in the text as you like, and adjust its color, fonts, shadow, etc.
- After adding text to the timeline, you can drag its edge to make it longer or shorter, depending on how long you prefer it the stay on the screen.
Next to the Style tab for text, you can also apply Effects, Bubble, and Animation to the Text. Since they are presets, you don't need advanced editing skills to deal with the settings.
How to Make Text Transparent in CapCut

After adding text to the video in CapCut, you can adjust its transparency to create nice styles. For instance, it can be used as a way to add watermarks to the videos in CapCut .
- Tap Text icon, type in the text as you like, and hit the confirm button.
- In the style tab, drag the Opacity slider to change the transparency of the text and titles.
How to Use Text Tracking in CapCut
The text tracking feature in CapCut can automatically animate the text, in a way that the text follows an moving object in the video designated by you.
- Import video into CapCut project, and tap the Text icon.
- Add text to the video, and tap on that text clip.
- Swipe at the bottom toolbar until you see Tracking .
- Narrow down the area to track the object by dragging the arrow, and place the anchor on the central part of the moving object.
- Tap the green Tracking button to start auto-tracking.
When it's done, you shall see the text move along with the chosen object.
Note : You can ease out and ease in the tracking motion by applying the graphs feature.
How to Create the Text Behind Person Effect

When combining text editing with other features in CapCut, you can create trendy text effects as other creators. Placing the text behind a person is such an example.
- Add text to the video as you normally do, and export that video clip.
- Create a new project, and import that video as the main video track.
- Tap overlay to import the raw video (one without text) as the overlay track.
- Use the Move background feature to remove the background, and it's done.
For detailed guide, you can watch the video tutorial by Luka, shown below.
How to Edit Audio in CapCut
How to add audio in capcut.

You can add background music, sound effects and other audio to the video by using the stock audio library in CapCut. These stock media files are royalty free, meaning you can upload the video to YouTube and other social platforms without copyright infringement.
Besides using stock music, you can also use CapCut to extract music from your favorite videos. With this method, you might not be able to share the video to the public, but only for personal sharing.
- Add the footage to a new project, and tap the Audio icon at the toolbar.
- Hit Sounds to open up the stock library, and pick your favorite track to add.
- You can tap on the added audio clip to trim, split or change its speed.
How to Change Audio Volume in CapCut
To make video louder or mute it, you can use the volume option in audio editing.
- For background music and environment sound inside the video, you can tap on the video track, and hit the Volume icon to change the loudness.
- You can also tap on the video, hit Extract to separate that audio onto the dedicated audiotrack. Then you can tap the audio clip and use the Volume tool on it.
How to Use Auto Caption in CapCut

If you love the speech to text feature in TikTok , chances are you will also be needing the speech to text feature. Using CapCut, you can turn video sound to captions automatically, thus saving time as you won't need to manually add captions.
- Create a new project and add the video.
- Hit the Text icon from the toolbar. Do not tap on the video, otherwise, you will be directed to the video editing toolbar, where you won't see the Text icon.
- Hit Auto Captions . It sits in between the Text template and Stickers features.
- Choose to create auto captions from the original sound in the video, voiceover, or both.
- Wait for the app to finish analyzing and adding the text as captions.
You can playback and check if the caption is accurate. If you prefer to make adjustments, tap the Batch Edit icon to callout the keyboard, and correct the word when needed.
For audio effects, you can use the free AFX from Sonnis. See video tutorial below.
How to Apply Advanced Editing in CapCut
How to add effects in capcut.
CapCut has many ready-to-use effects to enhance your video easily. It includes both video effects to add enchanting FX and body effects to polish your skin, figure, and so on.

- Tap on a video clip and hit the star-shaped Effects icon.
- Tap Video Effects or Body Effects.
- Use the presets to polish the video clip. The effects will be shown as a purple clip underneath the main video.
Note: Once you go back to the main timeline, you won't see the purple clip, there is instead a colored line about the video clip, indicating that segment has effects applied. You can always revisit and edit or remove the effects by tapping the Star-shape Effects icon again.
How to Make a Picture Move in CapCut
To make a picture move in CapCut, you need to use the Keyframe features.
You can keyframe the position, scale, rotation angle, crop percentage and many other parameters in CapCut, so that the clip will transform from status 1 in Keyframe 1 to status 2 in Keyframe 2, thus creating the desired motion.
- After adding the picture as overlays on top of the video, tap on the picture clip.
- Swipe the clip to place the playhead at the point where you want the picture to start move.
- Hit the Keyframe icon under the preview window to add the first Keyframe.
- Move the picture to another position in the preview window, and hit the Keyframe icon again to add the second keyframe.
Playback the video, you shall see the picture move from position 1 to position 2.
Once you get the hang of CapCut editing, you can also up your game and learn how to add 3D Zoom in effects in CapCut . For quick editing and keep up with the trend, you can also use CapCut templates to have fun.
Will I Lose Everything If I Delete CapCut?
Yes, your projects and drafts will be deleted along with the app. If you are on iOS, you can choose to "offload" the app, which will delete the application itself, while keeping the documents and data inside it. However, it is not guaranteed that everything will be intact.
How to Export the Video from CapCut

After finish editing the video, you can click the Export button in the top right corner.
CapCut support exporting video up to 4K, here are the export settings to tweak with:
- Resolution: 480p, 720p, 1080p, 2K/4K
- Frame Rate: 24, 25, 30, 50, 60
- Smart HDR: Option to turn video into "smart" HDR video
Bonus Tip: Free CapCut Alternative for Desktop and Laptop
Editing video on-the-go using mobile phones or iPad is flexible, still, in some cases, we prefer editing on a larger screen. If you love the simple interface of CapCut, you will love VideoProc Vlogger which runs on Windows and Mac for beginner editors, content creators, vloggers, and GoPro/DJI owners.

VideoProc Vlogger - Free CapCut Alternative for Windows/Mac
- Free forever - No watermark. No in-app purchase. Up to 4K export.
- Edit 4K/1080p/HEVC and large videos easily, even on old computers.
- Trendy templates: transitions, color filters, text, effects, voice changer.
- Support keyframes, velocity curves, green screen, cut-to-the-beat, etc.

Besides fully-fledged features that can power up your video editing, VideoProc Vlogger also have an active and resourceful community to help users grow their editing skills and get inspired. Above is a screenshot of video tutorials on their YouTube channel .
CapCut Manual - PDF Free Download
For users who prefer CapCut tutorial in PDF format, I have also compiled the PDF version here. You can download the manual and print out to learn easily.
Download the CapCut Manual PDF here in MEGA Cloud Drive (PDF size: 1.3MB | 18 Pages | A4).
MEGA Cloud Drive is a secure and private cloud storage service. You can save the PDF directly without logging in, i.e., you don't need the MEGA account.

Note: This manual outlines my entire workflow for editing CapCut videos. I have attached the file here for the convenience of my readers. Note that this PDF is not an official tutorial from CapCut, and I am in no way affiliated with CapCut.
About The Author

Cecilia Hwung is the editor-in-chief of Digiarty VideoProc. With over a decade of experience, she specializes in delivering insightful content on AI trends, video/audio editing, conversion, troubleshooting, and software reviews. Her expertise makes her a trusted ally in enhancing users' digital experiences.
VideoProc is a primary branch of Digiarty Software that is a leading multimedia software company founded in 2006. It endeavors to provide easier hardware-accelerated video audio editing and conversion solutions. The installed base of the VideoProc product has reached 4.6 million units from 180 countries since its release 5 years ago.
Subscribe to VideoProc
Stay current with our latest updates, guides, and subscriber-only offer.
Choose Language
Copyright © 2024 Digiarty Software, Inc. All rights reserved.
License Agreement
Privacy Policy
Refund Policy
Any third-party product names and trademarks used on this website, including but not limited to Apple, are property of their respective owners.

How to Create a Video Slideshow With CapCut for Desktop
CapCut is a handy tool for creating video slideshows, and we'll show you how to use the tool to its maximum capabilities today.
Over the years, video editing tools have become less obtuse—allowing anyone who invests a minute or two to figure them an easy way to create truly amazing things to share with friends and family. Many people love creating slideshows showcasing their important moments, whether it's a birthday, graduation, wedding, or trip. And CapCut is one of those user-friendly video editing tools that you can use to put together a stunning slideshow.
If you don't want to use the mobile or web app, you can download CapCut on your computer and start creating slideshows easily. Here's how.
1. Download CapCut
CapCut is available on both Windows and macOS, and you can use it for free and still have access to a ton of awesome features. So, when you’re ready, download CapCut on your Windows or Mac computer . Once downloaded, launch it and follow along to create a slideshow.
2. Create a Project
To start your slideshow project, click New project . This will open the video editor, where you can now start adding media, effects, transitions, and more. And If you are a beginner, there are some essential tips to make good video edits to keep in mind.
3. Import Images, Videos, and Music Into CapCut
With the images, videos, and music you want to import into CapCut ready, select Media in the top menu and click Import .
Select all the images, videos, and music to include in your slideshow and click Open . You can also minimize CapCut and then drag and drop the files you want to use into the Media tab.
4. Add Images and Videos to the Timeline
The bottom panel in CapCut is your timeline, which is where you will arrange all your media, effects, and transitions, among other things, to create the slideshow. To add an image or video to it, hover over the media you want to add in the Media tab and click on the plus sign in its bottom right corner.
The image or video will now appear in the timeline, and you can drag its edges to adjust its length. If the media you're adding is a video, meaning it likely has sound, you can mute it by clicking on the speaker icon on the left.
You can also place media in the timeline by dragging and dropping it directly into it. And if you want to remove anything in the timeline, just click on it and hit the delete key on your keyboard. You can also rearrange the videos and images by dragging them to another part of the timeline.
Now, add as many images and videos as you want and adjust the lengths to create an awesome slideshow.
Don’t worry about saving. CapCut will autosave whenever you make a change.
You can end here and move on to step seven, where we show you how to export the slideshow for sharing. However, you can make it more interesting with effects, transitions, and, of course, some music.
5. Add Effects and Transitions
With your images and videos arranged into a slideshow, you can now add effects and transitions to spice things up. Click on Effects in the top menu and the effects should load up immediately in the panel below. You can expand the options in the left pane to view different types of effects.
You can preview the effects by selecting the media in the timeline and clicking on various effects in the Effects tab. You should then be able to see what the result will be in the preview pane.
If you like the effect, go to the Effects tab and click on the down arrow icon in its bottom right corner to download it. Afterward, the icon will become a plus sign , so click it to add it.
The effect will appear on the top of the image or video you selected in the timeline, and you can also drag its edges to adjust its length.
You can also add a transition the same way as you add an effect. Click on a Transition in the top menu, select a transition inside the panel, the media you want to add it to, and then click the plus sign in its bottom right corner.
The transition will appear between the current frame and the next one in the timeline. Again, you can drag it on the edges to adjust its length.
You can also add text, stickers, and filters in much the same way. So, we encourage you to experiment to find the best effects and transitions that will make your video more engaging.
6. Add Music
Your slideshow is almost complete. You just need to add an awesome soundtrack. As with the rest of the media, you can either click the plus sign on the music file in the Media tab or drag and drop it to add it to the timeline.
Another way to add music to your slideshow is to click Audio in the top menu. Then, expand the Music option on the left pane and choose the type of music you want to add. In the right pane, click the down arrow to download the music.
Afterward, the down arrow will become a plus sign . You can click it to add the music to the timeline, and you can also drag and drop the music into the timeline.
You can also drag the edges of the music file in the timeline to determine where the music starts (left edge) or stops (right edge).
7. Export the Slideshow
Now that you’re done creating your masterpiece, click Play in the preview pane to see how it looks. If you’re satisfied, click Export in the top right corner.
Give the slideshow a title, and then choose its resolution, format, and frame rate. When you’re done, click Export in the bottom right corner.
Once done, click the Open folder in the bottom left corner of the pop-up to go to where CapCut stored the slideshow.
You can then retrieve it and share it with friends, family, and social media from there.
If you're on the fence about using CapCut, consider checking out this guide to whether CapCut is safe to use .
Create Amazing Slideshows on CapCut
We have only just begun to scratch the surface of what you can do with CapCut here. However, with what you have learned here, you can further experiment with and explore CapCut to make your slideshows more interesting. With the tools at your disposal in CapCut, you're only limited by your imagination.
CapCut 101: How to use the popular video editing app

If you’re on TikTok, you’ve likely heard of CapCut. Or maybe you’ve seen the small rectangular box that shows up on some videos with its logo, encouraging you to try the template used. But if you’re not one of the 1 billion active users on TikTok every month, you may be wondering what CapCut even is.
In this post, we cover exactly what CapCut is, how to use it, and go over some editing basics that you can do in the app. Let’s jump in.
Table of contents
Using capcut for editing vs tiktok, how to use capcut, getting started, creating a new project and adding content, navigating the editor, how to add text, how to add music, how to zoom in, how to blur, how to reverse a video, how to use capcut templates, how to remove the capcut watermark, final thoughts, what is capcut.
CapCut is a short-form video editing app that’s owned by the same company as TikTok, Bytedance. It also has image design capabilities. But it’s more widely known for the wide array of pre-made video templates and advanced effects that users can easily use to hop on social media video trends .
If you create content for TikTok , you know that you can find a selection of video and photo templates, along with effects, within the app. Not to mention that TikTok’s video editor is fairly robust. So why use CapCut instead of what’s in the TikTok app already?
The best way to put it is that what TikTok makes available to you through the app is fairly simplistic compared to what you can do within CapCut. Some of CapCut’s notable features include one-click background removal from videos, a dizzying amount of video templates, and AI enhanced features. It’s a good free beginner video editing tool , especially for those who prefer to edit on their phone.
One other reason to use CapCut vs TikTok’s native options is the fact that TikTok’s editor is notorious for glitching or crashing. I’ve experienced it myself, and the feeling of seeing all your hard work disappear instantly is the worst. So using CapCut gives you some more stability comparatively.
CapCut is available in all mobile app stores, but it also has an online editor and an application on Windows or Mac as well. CapCut is free to download or access across all platforms. For this tutorial, we’ll be using the free mobile application.
It does also have an advanced version available, called CapCut Pro, which gives you more features, storage space, and more. CapCut Pro is typically priced at $13.99/month for monthly access, or $129.99 for a yearly subscription. But it seems as though it’s usually discounted, so if you’re seeing those full prices, wait for them to go on sale.
They also offer additional cloud space you can purchase to store your video or image projects.
How to edit in CapCut
Once you download the CapCut app, you’ll see a series of questions asking you about what you’re using the app for. Once you get through those, you’ll be brought to the main editing page. You can find a row of collapsible features up top, a large blue New Project button below that, and then your project list beneath that.

To dive into the editor, click the New Project button. Once you click that, a prompt to let CapCut access your photos and videos on your device pops up. Click Allow , and you’ll see your phone’s videos and videos have populated underneath the Albums tab. You’ll also see two other tabs, one that says (your username)’s space , where you can upload specific projects and materials, and another that says Library .

Under the library tab, you can search and browse through a wide variety of video clips, transitions, green screen animations, and more. Most of these are free to use, though some are marked with the Pro logo, which means you’ll need to upgrade to access them. To preview any of these, just tap on the clip.
To add them to your video, click on the circle displayed in the upper right hand corner. Once you do, that circle should turn blue and the content will appear next to any other clips or photos you’ve added in the row along the bottom of your app. When you’re done adding clips for your video, click the blue Add button in the bottom right corner.
Once you’re in the editor, you should see any clips you chose on the timeline. To add new content to your project, you can click the grey plus sign button located to the right of your timeline. Touch the black portion of your phone screen beneath the timeline and drag your finger to the left to scroll through your video. If you need to undo or redo any action, tap the curved arrows located on top of your timeline on the right hand side.

Along the bottom of the editor is where you’ll see all the tools you can use for creating your masterpiece. Tapping each of them brings up a number of options you can take, but we’ll start with adding text.
1. Tap the add text button
Tap on the Text button located in the tools along the bottom of your editor and you’ll see a few options shown, including Add text, Auto Captions, Stickers, Text template, and more. To just add basic text to your video, tap the Add text button.

2. Type in your text
Text will appear in the middle of your video and a text box will show where you can type in whatever text you want to add. To move your text to a different area in your video, just drag and let go of the text.

3. Customize your text
Beneath the text box, there are options for changing your text’s font or style, adding effects or animations, and more. Since the current version of my text is hard to read on my video, I’m going to navigate to the Styles > Background . I’ll add a black background to it and reduce the opacity so it’s not as harsh by moving the Opacity slider to the left.

There’s tons of ways you can customize your text, so play around with the settings until it looks exactly the way you want.
4. Finalize your text and adjust the duration
Once you’re done, click the grey check mark next to the right of your text box. You’ll see a new orange bar for your text appear underneath your video in the timeline. To change how long your text shows in your video, just tap the bar and drag the grey box at either end to shorten or lengthen it.

Once you click out of the text settings, the text bar will show as a thin orange line above your video in the timeline. But if you want to edit your text again, you can click back into the Text settings to make changes and the orange bar will appear again.
1. Tap the audio button
To add music to your project, tap the Audio button located in the tools along the bottom of your editor, then tap Sounds .
2. Browse and add music
From here, you can browse top TikTok sounds, search by different categories, or use the search bar to look for specific songs or artists.

To preview a song or sound, just tap on it. And to add it to your project, tap the blue plus sign to the right of the track.
Note: CapCut doesn’t have the same licensing as TikTok does, so you may not see a wide variety of music in their library. If you want to use the latest Taylor Swift song or anything from a popular artist, you’ll need to edit your video in CapCut without the music, then add your track once you port it over to TikTok or Instagram.
3. Finalize your audio
Once you’ve added your audio to your video, you’ll see it appear beneath your video in your editing timeline. To adjust the duration of it, tap on the audio bar and drag the grey boxes at the ends to lengthen or shorten it. You can also split your audio, adjust the volume, add a fade, delete it, and more by using the audio tools that appear at the bottom of your screen.

1. Navigate to Effects > Video effects
To add a zoom effect to your video, tap Effects in the bottom toolbar, then Video effects .

2. Search for zoom
Once you’re on the Video effects page, you’ll see trending effects shown. Type in zoom to the search bar, and you’ll see a number of different types of zoom effects you can choose from. Tap each one to add it to your video and see what it looks like. Remove any effect by tapping it again. With some effects, you’ll have the option to adjust the settings of the effect by tapping on it a second time.

3. Add your effect to your video
Once you’ve chosen an effect and adjusted the settings so you’re happy with it, tap Cancel next to the search bar to exit the search results. Then tap the check mark next to the search bar on the Video effects screen to return to your editing timeline.
To adjust the duration of your effect, you can tap on the effect bar shown underneath your video in the timeline and drag the grey boxes at either end. You’ll also see additional options for adjusting your effect, replacing it, duplicating it, and more shown on the tool bar at the bottom of your screen.

Adding a blur to your video follows the same process as above to add a zoom effect to your video.
To add a blur effect to your video, tap Effects in the bottom toolbar, then Video effects .
2. Search for blur
Once you’re on the Video effects page, you’ll see trending effects shown. Type in blur to the search bar, and you’ll see a number of different types of blur effects you can choose from. Tap each one to add it to your video and see what it looks like. Remove any effect by tapping it again. With some effects, you’ll have the option to adjust the settings of the effect by tapping on it a second time.

1. Tap on your video on your timeline
Reversing a video on CapCut is easy. Just tap your video on your timeline, then swipe to the left on the toolbar at the bottom of your screen until you find the Reverse button.

2. Add Reverse to your video
Tap on the Reverse button in your toolbar to start the reversal process. You’ll see a small window pop up that will tell you the percentage progress of reversing your video. It should take less than a minute, but how long it takes will vary based on how long your video is. Once it’s done, that’s it! You’ve successfully put your video in reverse.
CapCut templates are a great way to easily add cool effects, transitions, and more to your videos without having to put in a ton of time.
If you’re planning on using a template for your video in CapCut, it’s best to add it from the very start. Then add any other edits like text or effects in later. If you choose to add a template to a project that you’ve already started working on, adding a template will completely erase your work. I thankfully learned this working on a test project, but I’d hate for it to happen to someone who spent a lot of time on a video. You’ve been warned!
1. Navigate to Templates
To use a template for your video, it’s best to navigate to the Templates section of CapCut outside of the main editor. You can also access templates from inside the editor. But since it asks you to select what footage or images you want to use once you do select a template, it doesn’t make much sense to start a project before adding a template.
2. Search or Browse templates
Once you’re on the templates page, you can browse through specific categories like TikTok, Memes, Effects, and more. Or you can search for a specific template using the search bar. Once you’ve found a template you like, click on it and then click the blue Use template button.
3. Add your photos or videos
Some templates work with photos or videos, while some work best with one or the other. Choose depending on what works your specific template.
On your media selection screen, you’ll see how many photos or videos you need to select shown at the bottom. You should also see a preview of how long each one will be shown for. The template I’m using is asking me to select 39 items that will each be shown for 0.1 seconds (with 2 seconds for the last one), so I’m using photos for mine.

Once you select your video(s) and/or photo(s), click the blue Next button to add them to the template.
4. Preview your template and make any edits
On the next screen, you’ll be able to watch a preview of your template with all the media you just added. If you want to switch any photos or videos, you can tap on the specific photo or video and select Replace. Here, you’ll also see options to crop the photo and make other edits or adjustments.

You can also change out the audio or add/change the text in the template by tapping either of those options on the bottom when you have the main part of the template selected. Keep in mind that if you change the audio, some templates may not work as well as they were created to work with the beat of the audio that came with the template.
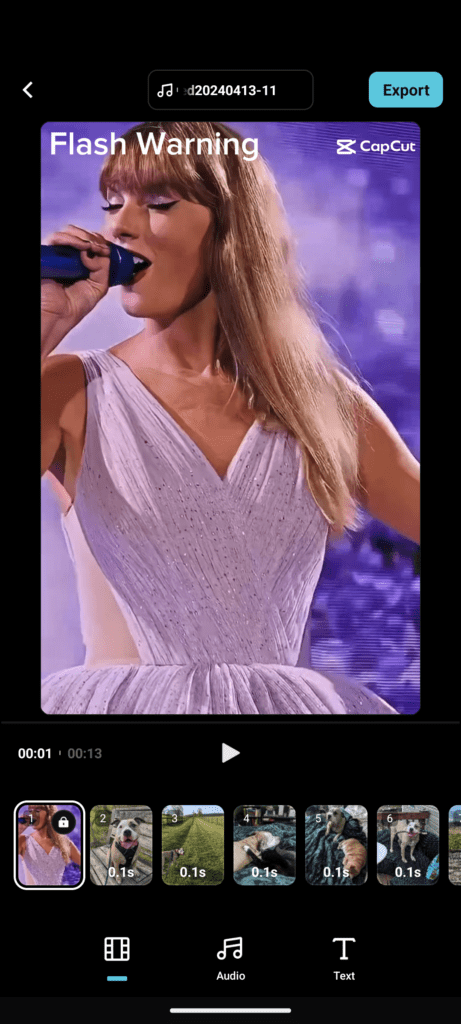
5. Export your video
Once you’re happy with how your final template is looking, click the blue Export button in the upper right hand corner. Here, you can adjust the resolution and choose whether you want to export to TikTok or just export to your phone storage.
Unless you’re exporting directly to TikTok or you’re using CapCut Pro, a CapCut watermark is added onto the exported version of your video. Unfortunately, there’s no way around it besides those two options.
As someone who typically edits anything they post to TikTok inside the native editor, I can see the benefits of using CapCut. The editing workflow seems way more streamlined and stable compared to TikTok’s editor. Not having access to most artists and songs is definitely one of the downsides to using CapCut, though you can always add them in once you bring it over to TikTok or another platform.
Overall, it’s a pretty robust editing tool for beginners or mobile-only users that has a lot of template options to choose from, including viral ones. If you’re editing on the go, it’s not a bad option at all. But if you’re using the desktop version of CapCut, there’s lots of better editors to choose from, including Premiere Pro , DaVinci Resolve , Final Cut Pro , and more. Though those have a steeper learning curve, you can do far more with these professional-quality editors compared to CapCut.
Recommended for you

How to Create a Green Screen Video on TikTok

How to create Pop Art in Photoshop

What are bumpers and stingers?
How to edit videos with CapCut | Tutorial for Beginners
CapCut is one of the most popular and effective video editing tools available out there. It offers some advanced video editing capabilities as well. Therefore, anyone who is looking for a video editor for Android or iOS may think about using CapCut. This app is developed by the company that created TikTok.

As you are about to get CapCut, you will also come across the need to figure out how to edit videos with it. From this article, we are looking forward to sharing some details with you on how to edit videos with CapCut.
How does the CapCut interface look like?
CapCut has a simple and a clutter-free interface. When you take a look at the top right hand corner, you will be able to see a button named 1080p. You can tap on this button to adjust the frame rate and resolution. Default resolution will be 1080p and frame rate will be 30 frames per second.
You can find an export button at the top right hand corner of the CapCut interface. By clicking on this button, you can save your CapCut project and export it. If you want to preview the video, you will need to tap on the playback window, which is located at the middle of the interface. You can find maximize, redo, and undo buttons, similar to most other video editing apps.
You will be doing all the edits in the editing timeline, which you can see on the bottom of the interface. Under the menu bar at the bottom, you can see other settings, such as text settings, audio settings, and special effects.
How to create your project on CapCut?
Every video editing task on CapCut will be a project. You will be doing changes to the video on a project. You will need to launch CapCut app and then tap on the button named New Project. Then you can pick the primary video clip that you want to edit and tap on Add button.
There can be multiple videos that you want to add as a primary video. This is where you can pick the “Multiple” button. You can also add B-roll footage into the app based on your preferences.
Once you launch a new project on CapCut, the app will set format to the project automatically. This varies depending on the nature of footage you upload. For example, if you upload a widescreen video as your primary video, your project will be a widescreen project. In case if there is a need to change the project type, you will need to hit on the “Format” button, which you can see at the bottom of your menu.
You will be able to find a large number of format options to select from. For example, if you are going to create a video for TikTok, you will need to do it in portrait mode. Widescreen format is more appropriate for YouTube. We encourage you to pick 16:9 aspect ratio to get best results on YouTube. You can also have many different versions of the same project in multiple format. This will provide a great assistance to you as you repurpose content on CapCut.
How to edit videos on CapCut?
At the time of editing a video, you will first need to get rid of all unwanted content on it. This is where you need to split and remove the mistakes. You can use the split tool to split your video into two. This has to be done at the beginning of the piece of video that you want to remove. Then you should split again at the end of the part that you plan to remove. Timeline and preview window will be helping you here, and you can make sure that you get the job done with ease. After splitting the part that you want to remove, you can tap on the Delete button.
You will also be able to remove unwanted footage on your videos with the help of handles. It is possible to see white colored handles at the start of every clip. You can drag the handles to the place where the beginning of unwanted footage starts. You can similarly drag handles from the end of your video as well. Once the handles are in position, you can hit on the split button. Likewise, you can easily drag handles and trim unwanted footage with ease.
As a tip, we encourage you to use CapCut and edit videos backwards. This will help you to get the edits done in thee easiest way.
How to include a B-roll into CapCut?
To add a B-roll into your video, you will need to tap on the Overlay button. After that, you can hit on the “Add Overlay” button. This is where you will be able to add any photos, videos, or graphics into the video. You just need to make sure that visual content is saved on your mobile device. By going through list of footage, you can pick anything that you want to include in the videos and then hit on add button.
It would take some time for the B-roll to load and add into the timeline. You can see it under the primary footage on your timeline. Then you can tap on the B-roll and drag it, so that you can change its position on the timeline as per your needs.
It is also possible for you to add one B-roll footage on top of another. You just need to add the new B-roll into the timeline under the first layer. After you exist from the Overlay button, CapCut will automatically compress content.
How to include titles on CapCut?
Two different methods are available for you to include titles on CapCut for the videos. First, you can add just basic text into the video. Or else, you can think about adding text into the video via a text template as well.
To add a simple text, you just need to tap on the Text button and select “Add Text”. You can now type and enter the text that you want to add. You can change the effects, color, font, background, stroke, and effects based on your preferences. You need to make sure that you don’t forget branding guidelines as you continue to add new text into the video. On top of that, you need to ensure that text is easily identifiable, regardless of the background. You can tap and then drag, so that you can move the text box to different places. You can easily adjust the overall size when you pinch in and pinch out.

After adding text to a video, you can animate it as well. This is where you need to tap on the Animation button. After that, you can decide if you want to loop in the video or loop out. You will also be able to find multiple animation effects to select from. It is possible to use the handles and move the animated text around your videos.
The next option to add text would be to use one of the text templates. To pick and add a text template, you will need to tap on the Back arrow button. Then you need to pick the option named “Text Template”. Under text template, you will be able to find a large number of animations and titles to add. You can simply go through those options and add anything you want. On top of that, you can find clocks, timers, symbols, and subtitles as well. You just need to pick anything that you want to add and insert into he project. After adding text, you can fine-tune and adjust the location and length, as you would do with other basic titles.
After adding text, you can hit on the back arrow button. Then you can see how the original video is getting compressed. All the titles would appear on top of the primary footage as a red colored line. You can edit them later by tapping on the text button. You can add titles as you prefer and then include transitions to them as well.
How to include transitions on the video with CapCut?
Few different methods are available for you to add transitions to CapCut. These transitions can help you to smoothen out the changes from one video to another. You will be able to apply transitions into B-roll footage and make things look great.

How to add transitions into B-roll clips
After adding B-roll clips, you will be able to see tap that available on top of primary footage. You may click on any of the B-roll icons and then open up the clip. After that, you will need to tap on the button named Animation. Then you can pick any of the options out of Combo, In, and Out. If you select In, you will be able to see the traditional effects and transitions. Likewise, you can pick Combo, and you will be provided with some new movements, which will surely assist you with polishing up the video. In case if the B-roll is pretty stagnant or quite, you may think about picking any of the available presets, so that you can make things look exciting. You can change the duration available in the sidebar, so that you can change the transition length. After adding a transition, you can pick the Tick icon, so that you will be able to save your transition.
How to add transitions into primary footage
If you want to add transitions to the primary footage, you will need to tap on the White colored square icon, which you can see in between the two different clips. After clicking on the white square, you will notice how many different presets will be visible on the screen. You can pick one of them to select. Then you can adjust the slider to move its duration.
One important thing to keep in here is not to go overboard with your transition. In case if there are hectic transitions, your video will look unappealing. Different transitions available in your video should be identical and complement each other. Then you can ensure consistency throughout the video.
How to add zoom cuts into your videos as transitions
Along with the help of zoom cuts, you will be slightly zooming in the shot, so that you can make it quite different from the previous shot. This will eventually assist you to make sure that your video looks like you have shot with two camera angles. In order to use zoom cuts, you will need to pick the second shot available in the timeline. Then you can pinch your footage that is available in the playback window, so that you can slightly zoom it in. After that, you can adjust its placement, so that the framing of it matches with the framing of earlier shot.
You can now get back to the video and play it. This is where you will be able to see the amazing effect that a zoom cut is adding to the video. This is a hassle-free and an effective method available to keep your audience engaged.
How to add different effects to your videos on CapCut?

If you want to add effects into your CapCut video, you will need to tap on the Effects button, which you can see at the bottom of your menu. Again, there are a ton of possibilities from which to choose in this area. These kinds of effects aren’t often used in our films, but you may experiment with them here. There are many more fantastic effects within CapCut apart from these Effect filters. You may use effects to eliminate the backdrop, change the pace, and stabilize video. Let’s discuss how to utilize these effects.
How can you remove background from a video in CapCut?

This impact is really potent. Choose a clip, then click Remove background. The backdrop will then be completely removed when CapCut analyzes the footage. It does a fantastic job at this! You may be incredibly inventive with your editing thanks to this fantastic effect.
How to change the video speed in CapCut?

By choosing the clip and tapping Speed, you may change the speed of the selected clip. Here, two choices are available. The first option is called normal, where you can modify the slider bar, so that you can increase your playback speed or decrease your playback speed. Then you can pick the curve option, which provides additional control over the adjustment of speeds.
How can you stabilize a video clip on CapCut?
A prominent feature that you can find in CapCut is the ability to stabilize the video clip. You will need to pick a video clip, and then slide under the bottom menu, so that you can see an option named “Stabilize”. By selecting this option, you will be able to effectively get rid of camera shake that is present in the footage. In case if you are not having a tripod to film the video, this feature will be quite useful.
How can you add audio into CapCut?
You can add any audio clip based on your preferences into the CapCut video. You will need to go near the beginning of your video footage. Then you can pick the option named “Add Audio”. After you click on this button, you will be directed to the music library available at CapCut. However, you have the freedom to pick and add your own preferred video as well. You can purchase audio from websites such as Epidemic Sound and Artist and add into the videos.

It is also possible to pick audio from your own mobile device and add them into the video. In case if you are going to add an audio track from the music library of CapCut, you will need to select a track and then hit on the Download icon button. After that, you can add it into the timeline.
After you add an audio clip, you will be able to see it under the primary footage. It is possible for you to move this, cut, and then adjust, so that you can get the audio clip on top of another clip. After adding audio, you can adjust its music level as well. This will help you with enabling audio as background music in the video as well.
How to color grade a video on CapCut?
CapCut provides you with multiple filters, which you can use to color grade any video. However, you may also find the feature to adjust the color grading of a video manually.
If you want to add a filter and color grade, you will need to tap on the option named Filters. These filters on CapCut are quite similar to Instagram filters. You just need to browse through available filters, pick the best fitting filter, and then hit on the Tick icon, so that you can add it. You will be able to add the filters manually to different videos that are available on the timeline.
As mentioned earlier, you can adjust the color grading of your video manually. This is where you need to hit on the button named Adjust. After that, you can change the shadows, exposure, color temperature, contrast, and saturation of a video. After making changes, you can click on the tick icon, so that you can get the changes to be visible on the timeline. You will be able to stretch the edit, so that you can get it extended upon the entire timeline.
Final words
Now you have a basic idea on how to edit a video on CapCut. Follow these steps, and you can easily edit any video of your choice on the app.
Leave a Comment Cancel reply
Save my name, email, and website in this browser for the next time I comment.
The leading authority in photography and camera gear.
Become a better photographer.
12.9 Million
Annual Readers
Newsletter Subscribers
Featured Photographers
Photography Guides & Gear Reviews

Want to learn all about Capcut and how to use it for your filmmaking? With its robust set of features, CapCut allows users to create professional-grade videos effortlessly.

CapCut is an intuitive and versatile video editing app designed to meet the diverse needs of photographers and filmmakers. This powerful tool offers a comprehensive suite of features that cater to both beginners and seasoned professionals, making it easier than ever to create stunning, professional-grade videos.
With CapCut, you can perform a wide range of editing tasks, from basic operations like trimming, cutting, and merging clips to more advanced techniques such as keyframe animations, multi-layer editing, and dynamic transitions. Its robust color grading tools allow you to enhance the visual aesthetics of your footage, while a vast library of filters and effects helps you achieve the perfect look for your project.
CapCut's user-friendly interface ensures a smooth editing experience, enabling you to navigate through its features effortlessly. The app also supports high-resolution exports, ensuring that your final product maintains the highest quality, whether you're sharing it on social media or showcasing it on the big screen.
For audio editing, CapCut provides an array of options, including background music, sound effects, and voice-over capabilities. The synchronization tools allow for precise audio-video alignment, ensuring that every element of your project is perfectly timed.
Designed to be both accessible and powerful, CapCut is the ideal solution for photographers and filmmakers who want to elevate their video editing capabilities. Whether you're crafting a cinematic masterpiece, a compelling documentary, or a visually stunning photo montage, CapCut empowers you to bring your creative vision to life with ease and precision.
IMAGES
VIDEO
COMMENTS
#CapCutHowsHow to add textHow to add soundsHow to add transitionHow to split and delete some parts of the videoHow to add voiceoverHow to add effectsHow to s...
Tap on the 'Search' icon in the lower right corner. Next, tap on the top search bar and type in 'CapCut.'. If using an Android with Google Play, tap on the top search bar labeled, 'Google Play' and type in 'CapCut.'. In your search results, tap on the app titled 'CapCut - Video Editor.'. 3.
Our video presentation maker makes it easy to create professional-quality videos that will take your social media presence to the next level. After creating your PPT with CapCut, you're able to export any material without watermarks. Also, sharing the PPT on TikTok and Facebook just needs a couple of clicks. Try for free.
Have you wanted to know how to edit like a pro content creator? With these easy steps to editing on CapCut, you will feel like a pro in no time! Want more tu...
💥 Download FREE Videos to Practice your Capcut Editing: https://kevin-stratvert.mykajabi.com/KCAMIn this step-by-step tutorial, learn the best 11 CapCut Edi...
To trim videos in CapCut: Split: Move the playhead to where you want to cut and click the "Split" button in the upper left hand side of the timeline panel, OR simply press CMD/Ctrl+B on your keyboard. Delete Left: Move your playhead to your desired cut point and click "Delete Left" or simply press Q on your keyboard.
In today's digital age, video presentations are the most effective ways to convey ideas, messages, and products. With CapCut Web, an online video editor, making a video presentation has never been easier. In this article, we will guide you on how to make a video presentation using CapCut Web. Step 1: Import Materials
Tap on the cursor and move it to the desired speed. Turn on 'Pitch' in the bottom left corner if you wish to change the pitch of the clip audio in sync with the video speed. Leave this unchecked, if you wish to use original audio. Once you are done, tap on the 'Check Mark' in the bottom right corner of your screen.
First, open the CapCut app. Tap on New Project, then select your primary video clip and press Add. If you have multiple primary video clips, you can select multiple. But don't upload any B-roll footage just yet - we'll be adding that later. The first step in this CapCut app tutorial is to create a New project.
Add audio and adjust the volume of your video in CapCut. You can do so much with the audio option. Whether it be adding background music, audio effects, or voiceovers. You can see the audio icon right next to the edit icon. After that, you'll see different categories, such as sounds, sound effects, extracts, and voiceovers.
To edit overlays in CapCut, follow these steps: Tap on the Overlay track, and you shall see the editing tools. You can split, trim, change volume, and so on in the same way you edit the main clip. Tap the double arrow icon once you finish editing the Overlay clip. It will take you back to the main timeline.
With the images, videos, and music you want to import into CapCut ready, select Media in the top menu and click Import . Select all the images, videos, and music to include in your slideshow and click Open. You can also minimize CapCut and then drag and drop the files you want to use into the Media tab. 4.
With CapCut's video templates, you can easily edit your videos and add professional-looking effects, transitions, and music. Whether you're a beginner or an experienced video editor, CapCut's intuitive interface makes it easy to create high-quality videos in just a few clicks. In this presentation, we will guide you through the process of ...
Learn how to edit stunning videos using CapCut with this comprehensive tutorial! Whether you're a beginner or looking to enhance your editing skills, this st...
If you want to use the latest Taylor Swift song or anything from a popular artist, you'll need to edit your video in CapCut without the music, then add your track once you port it over to TikTok or Instagram. 3. Finalize your audio. Once you've added your audio to your video, you'll see it appear beneath your video in your editing timeline.
CapCut, a versatile video editing software, provides a suite of advanced tools that cater to this need. Among its many features, the advanced layering and auto cutout tools stand out for their ...
⭐ Download CapCut For Free: https://capcut.onelink.me/2ltU/SA⭐ Download our FREE video editing software guide: http://bit.ly/editing-guide-ytIndex******0:00 ...
You will need to launch CapCut app and then tap on the button named New Project. Then you can pick the primary video clip that you want to edit and tap on Add button. There can be multiple videos that you want to add as a primary video. This is where you can pick the "Multiple" button.
With the how to edit a video presentation template, you can easily create engaging and eye-catching videos for your social media. Simply click the "Use template" button and start editing on our convenient web version. Don't miss the chance to elevate your videos with our how to edit a video presentation CapCut template. Start creating and ...
💥 Download FREE Videos to Practice your Capcut Editing: https://kevin-stratvert.mykajabi.com/kcc - Instant Download!In this step-by-step tutorial, learn how...
CapCut is an intuitive and versatile video editing app designed to meet the diverse needs of photographers and filmmakers. This powerful tool offers a comprehensive suite of features that cater to both beginners and seasoned professionals, making it easier than ever to create stunning, professional-grade videos.
To use this template, simply click the ""Use template"" button and you will be directed to the CapCut web with the template ready for editing. Don't miss out on the opportunity to enhance your videos with our how to edit presentation video in capcut CapCut template. Start creating on the web and easily export your videos today! Happy creating!
📱 Master CapCut Like a Pro! 🎬Ready to take your video editing skills to the next level? Join us for a comprehensive tutorial on CapCut, the ultimate mobile...
Check out MurdaB_FOREVER's template Look at me edit on CapCut. You may also like Went to a haunted by Horses Rule!🐴 and Dating myself rn by 🎧Charlie🎧... Look at me edit. #trend#viral#foryou #tiktoktrending🔥 #velocityedit ... 2020 cringe videos. 7. tôi yêu anh ấy nhưng anh ấy không yêu tôi. 8.
Try Epidemic Sound Free for 30 days: https://share.epidemicsound.com/CollinMichaelDEC22Chapters:0:00 Intro0:11 Why I Start With Music.0:43 Epidemic Sound.2:3...