
How to Use Canva Presentations
Make visually appealing presentations that'll stand out among others using Canva.

Canva, a graphic design platform, is gaining a lot of traction as a design tool. Its basic premise – it’s just as easy to use for non-designers. You don’t need to be an expert in graphic designing to use Canva, and that is one of the main reasons behind its popularity.
With design becoming one of the hottest commodities for just about every field, Canva makes it accessible to everyone. Whether you’re an entrepreneur, a marketer, influencer, or a blogger, you can use Canva to make fetching content for social media, posters, graphics, design your own business cards even. If you’ve got even a little eye for design, Canva can help you cut down on the costs of hiring professional designers.
But did you know you can also use it to make just as engaging and stimulating presentations? Whether you want to make presentations for a professional environment or personal use (like a birthday surprise), Canva Presentations have got you covered. Let’s dive right into it!
Getting Started
Canva offers a web app you can immediately start using on your desktop without having to download anything. Unfortunately, the web app is your only option as there is no desktop app. So you need an internet connection to work with Canva as it stores all your work on its servers.
Canva also has a mobile app for iPhone and Android, which you can use on the go. But when getting started, using the web app is the best course of action.
Go to canva.com and create a free account. Click the ‘Sign Up’ button to create a new account.

You can sign up with your Google account, Facebook account, or your email address.
Canva has a freemium structure, so you can use it for free with limited features or get a Pro or Enterprise subscription for complete access. It also offers a 30-day free trial to its Pro features, so you can try it out before deciding whether you want to convert to a paid user.
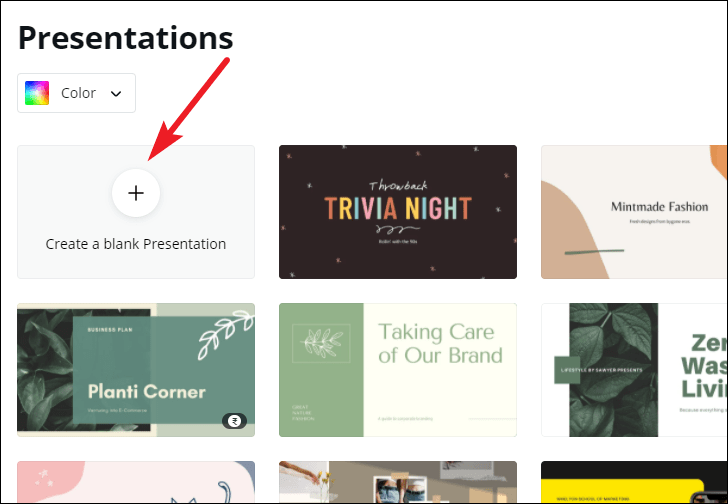
Now, from the Canva home page, click the ‘Presentations’ button under the Design anything banner. If you can’t find the option, you can also search for ‘Presentation’ from the search bar.

There are plenty of size options to choose from when creating a presentation. Let’s stick with the standard size ‘1920 x 1080 px’ here.

One of the things that makes Canva so easy to use for everyone is the sheer number of templates. The assortment of templates in existence ensures that you’ll find something to match your needs. But if not, you can also start with a blank slate and create your presentation from scratch.
For this guide, we are selecting a template for the presentation. Before selecting a template, you can see what it has to offer by clicking the three-dot menu and selecting ‘Preview this template’.

Click ‘Use this template’ to select the template if you like it or go back and select another.

Editing the Presentation
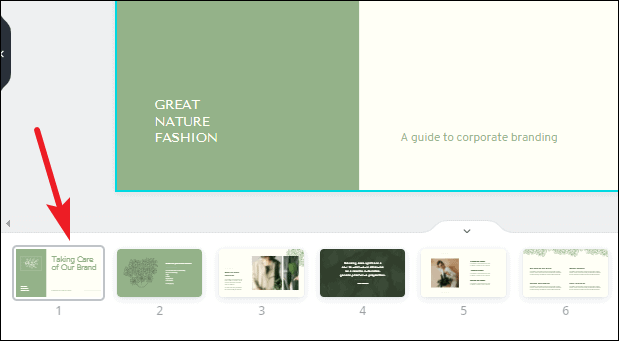
The template will load into the editing interface. Canva has an eerily easy editing interface. Let’s navigate the interface first. Below the slide is the thumbnail view where you can see all the slides in thumbnails side by side.
To turn off the thumbnail view, click the on/ off toggle (arrow).

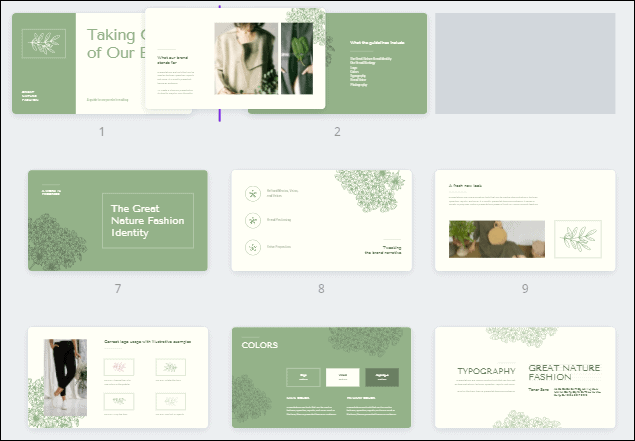
Click the grid view button to switch views.
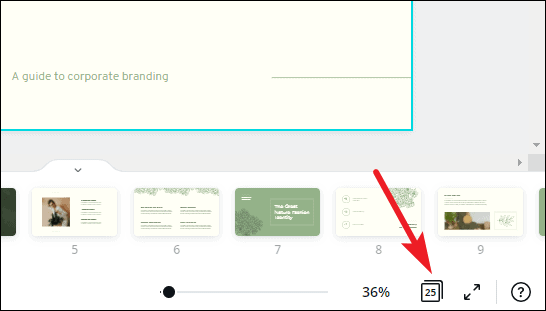
The grid view is helpful when there are a lot of slides in your presentation. Using grid view, you can get an overview of them all. You can also rearrange the slides by dragging and dropping slides into a new position. Click the ‘Grid View’ button again to switch back.
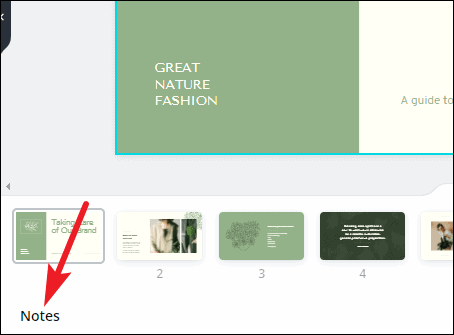
Click the ‘Notes’ option to add notes to the presentation that you can use for reference while presenting.
The name of the presentation can be edited from the top-most toolbar.
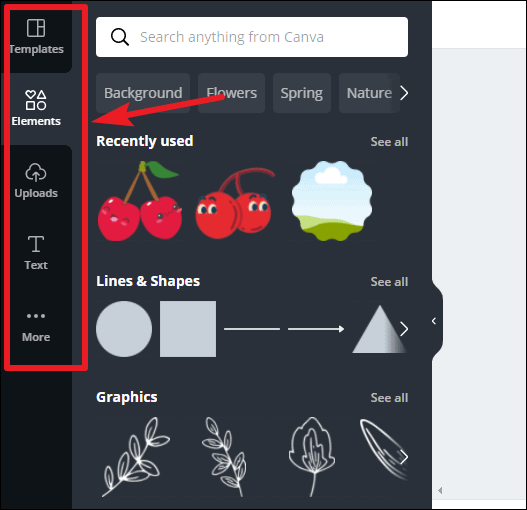
Now, on the left is the toolbar that houses all the tools for editing the design elements in the presentation.
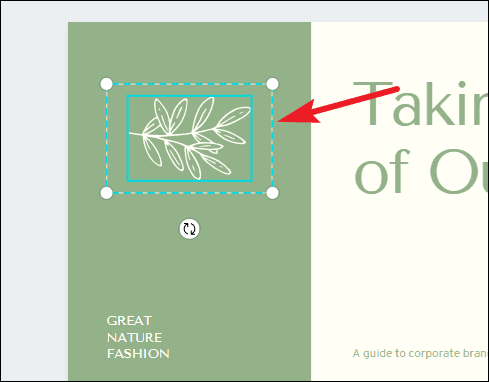
When you’re using a template, almost all of the elements can be selected and edited. You can delete an element, change color, font (for text). To select an element, hover over it. The part of that element will be highlighted in blue. Click it to select it.
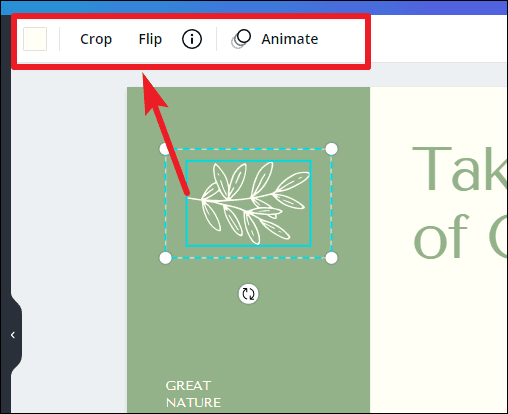
Another toolbar will appear above the slide with editing options specific to the element you have selected. Depending on the element, you can change it’s color, font, font size.
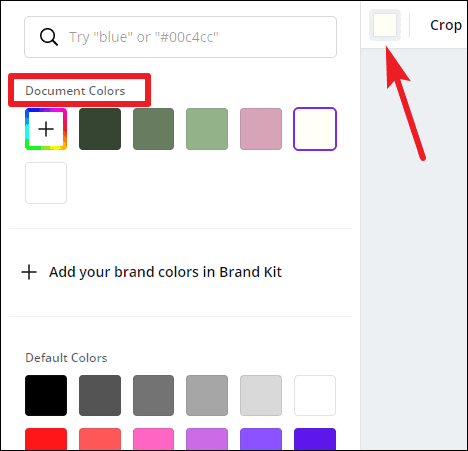
When you click the color option, a palette for document colors will appear above, followed by available default colors. For free users, only limited color options are available. If you have a Brand Kit (available only for Canva Pro users), that palette will also appear here.
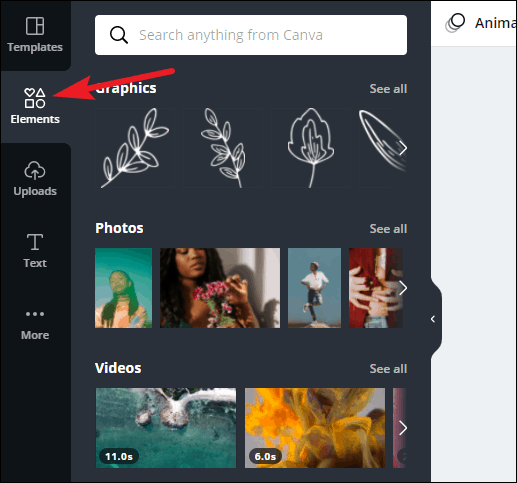
Click on the ‘Elements’ option on the left toolbar to add elements like photos, videos, graphics, audio, charts, etc. to your presentation.
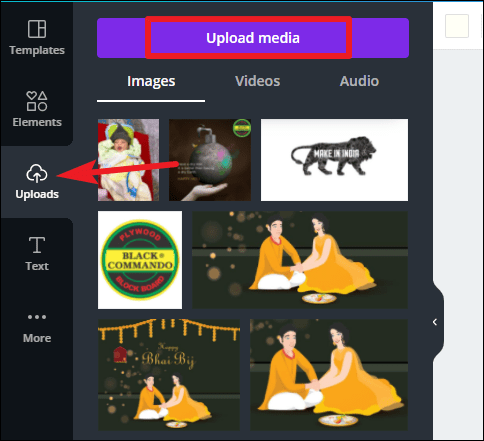
To add photos, videos, or audio from your computer, click the ‘Uploads’ button. Then, click the ‘Upload media’ button to select content. Any media you previously uploaded will also be available here.
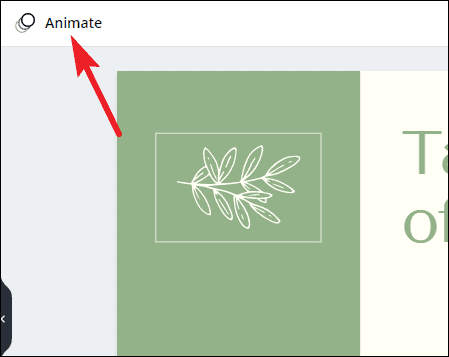
You can also add animations to individual elements or the entire page. Select an element and click the ‘Animate’ button.
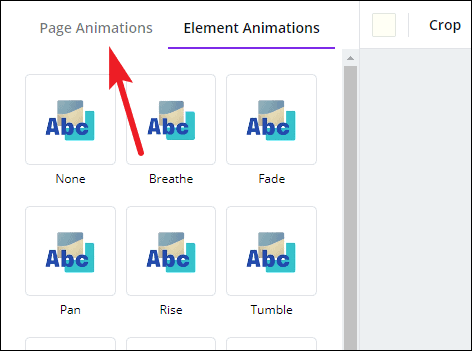
‘Element animations’ will open. To switch to page animations, click the ‘Page Animations’ tab.
Presenting your Presentation
Once your presentation is complete comes the main part – presenting it. Canva offers a lot of options for your finished presentation. You can present it right from Canva or publish or download it for various platforms.
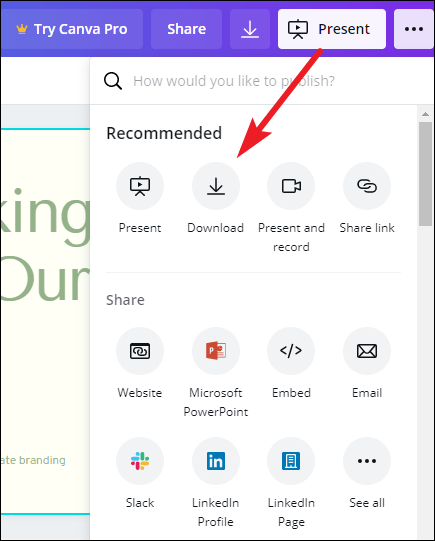
To publish it elsewhere or download it, click the ‘three-dot’ menu on the top-right corner.
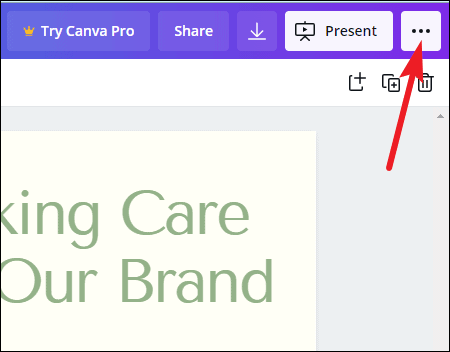
A list of options will appear. You can download it onto your computer, or as a PowerPoint presentation, share a link to the presentation, publish it as a website, embed it on your website, and much more. You can also record it while presenting with a voiceover.
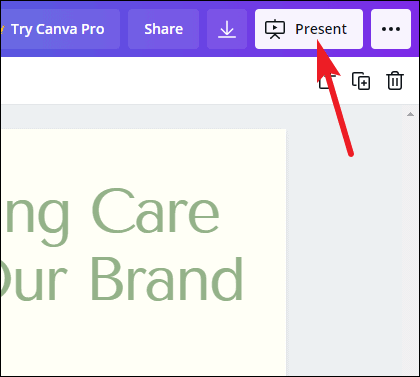
To present straight from Canva, click the ‘Present’ button.
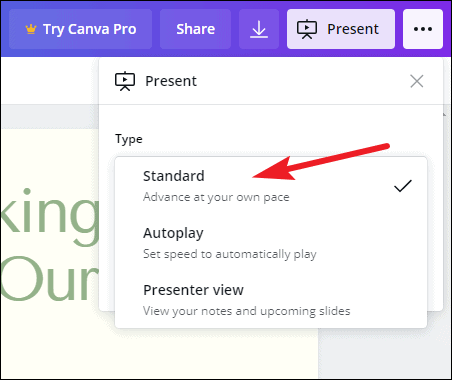
Click the drop-down menu below ‘Type’ and select how you want to present it.

There are three options to choose from: ‘Standard’ – where you present at your own pace, ‘Autoplay’ – where the presentation advances automatically, and ‘Presenter View’ – where you can view your notes and upcoming slides, but the rest of the people cannot. Presenter View is best used when you’re presenting on a projector.
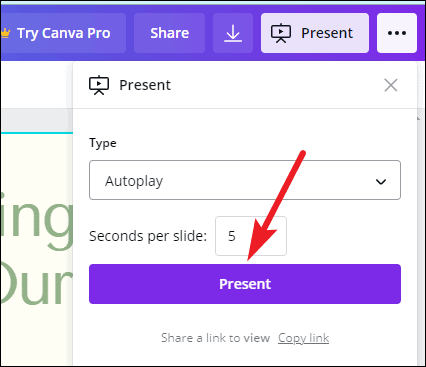
After selecting the type, click the ‘Present’ button.
Bonus Tips for your Presentation
While presenting the presentation on Canva, you can add special effects to enhance the performance with some keyboard shortcuts. All you need to do is press the associated key with each effect to bring it into action. Press the same key to stop it. You can also press multiple keys to add 2 or more special effects. With these effects, your presentation is bound to stand out to your audience and be memorable.
Drumroll : Add a drumroll before a slide by pressing the key ‘D’ before a big reveal.

Confetti : Add a shower of confetti to celebrate something with the key ‘C’ .

Countdown : Add a countdown from ‘1-9’ by pressing one of the keys.
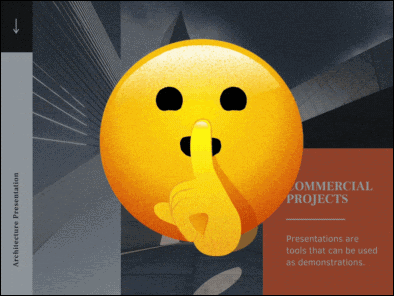
Quiet : Bring a 🤫 emoji to screen to hush your audience with the ‘Q’ key.
Bubbles : Press down the ‘O’ key to bring bubbles on the screen.

Blur : Build tension and add drama to the atmosphere by blurring the screen with the key ‘B’.

Presentations are a huge part of professional life, whether you’re presenting to your clients, doing a webinar, promoting your brand, to name a few. With Canva, you can make presentations that’ll leave a long-lasting impact but won’t take long to make.
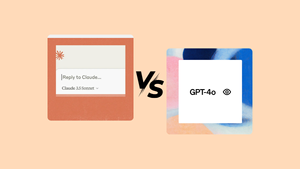
Claude Sonnet 3.5 vs. ChatGPT-4o: Which is better?

5 best AI Web Browsers in 2024

7 best AI search engines in 2024
Get all the latest posts delivered straight to your inbox., member discussion.

How to Fix "Premium Images Can't Be Exported On Their Own" Error in Canva

How to Use Magic Switch in Canva to Instantly Convert Your Designs

How to Use Soundraw AI Music Generator in Canva

How to Use Magic Studio in Canva to Transform Your Ideas into Videos

How to Make Artistic QR Code in Canva using Mojo AI
How to Create Presentations in Canva

Parth Shah is an evergreen freelance writer covering how-tos, app guides, comparisons, listicles, and troubleshooting guides on Android, iOS, Windows, Mac, and smart TV platforms. He has over five years of experience and has covered 1,500+ articles on GuidingTech and Android Police. In his free time, you will see him binge-watching Netflix shows, reading books, and traveling.
Canva recently introduced new tools to create docs, whiteboards, videos, websites, and presentations. As such, you no longer need to rely on traditional software solutions like Google Slides, PowerPoint, or Keynote to create an upcoming business presentation. You can easily create presentations in Canva using its familiar suite of editing tools.

Canva offers real-time collaboration, several export options, a present tool, AI add-ons, and much more to make a professional PPT. Canva also lets you make instant presentations with pre-filed slides. Without further ado, let’s get started.
Pick Up an Aspect Ratio and Template
Before you start, make sure to pick a relevant aspect ratio for your presentation. If it’s a traditional PPT, go with a 16:9 aspect ratio. If you plan to show your PPT on mobile, use the 9:16 aspect ratio.
Tablet users can start with a 4:3 aspect ratio. Canva also offers some ready-to-use templates to get started. We highly recommend starting with a template to save some time.

You can also filter templates via style, theme, feature, and color. For example, you can check company, marketing, corporate, marketing, school, and other templates. Most templates are free to use, while some may require a Canva Premium subscription.
Under templates, you also find an option to create instant presentations. You can enter a prompt and check Canva’s suggestions to get started.

Customize a Page With Editing Features
Once you pick up a template, you have the option to add all pages to your presentations. You can click ‘Apply all pages’ and check every slide at the bottom. You can always select a slide and hit delete to remove it from your presentation.

Canva lets you change every aspect of the template with different text styles, filters, and image editing tools. You can change color, tweak transparency, copy style, and more.

We suggest spending some time with editing tools to customize your Canva presentation and add some personal touches.
Add Graphics, Stickers, and Images
Your presentation will not seem as interesting without graphics, stickers, images, and videos. Unlike Google Slides or PowerPoint, you don’t need to import media files to Canva to complete your slides. You can easily add relevant elements from the sidebar.
Step 1: Open a slide in your Canva presentation.
Step 2: Select Elements from the sidebar. Add graphics, icons, stickers, tables, videos, and more.
Step 3: You can explore the AI image generator and turn your creative ideas into images and videos with a single click.

You can add simple descriptions and even turn generated images into videos. Canva also offers a long list of graphics packs in several categories. The possibilities are endless here. It’s up to you to make a compelling slide using useful tools.
Tweak Page Animation
Once you create a page, tweak its animation to make a smooth transition between pages.
Step 1: Select a slide in Canva.
Step 2: Click Animate at the top.
Step 3: Check basic, exaggerated, photo movement, and other animation types from the left sidebar.

You can also tweak the animation intensity, which is great.
Add Presenter Notes
Do you plan to present your Canva PPT on a video conference? You can add notes to each slide so they appear during the Presenter view (more on that later).
When you create a PPT, select a slide and hit Notes at the bottom. Enter your notes that you want to remember or talk about during a video meeting.

Collaborate and Edit in Real Time
Similar to Google Slides and Microsoft PowerPoint, Canva lets you share and edit a presentation in real time. You can take inputs from your colleagues and create a share-worthy presentation in no time.
Step 1: When you are done making changes to your presentation, click Share at the top.
Step 2: Enter people, groups, or your team. Expand the collaboration link menu and select Anyone with the link.
Step 3: Expand the permission menu and select Can edit.

You can also share a link with view or comment-only permission. Select the Copy link and share it with your co-workers.
Enable Presenter View
Presenter view is a thoughtful touch from Canva to give presentations over a Google Meet or Teams call.
You can open a presentation in Canva and select Present at the top. Click Presenter View and check two windows opening up on your computer.

One window shows your presentation with notes open on the sidebar. Another window displays the current slide you are sharing with others over a call.

Download and Share Your Presentation
As expected, Canva gives several options to share and export your presentation. When you complete your presentation, click Share in the top-right corner and expand Download.
You can convert a presentation to PDF, PPTX (Microsoft PowerPoint compatible), MP4, JPG, PNG and SVG formats. Check our dedicated post if you wish to print your Canva presentation .

Use Canva Like a Pro
Canva has done a solid job, granting users access to rich tools to create a convincing presentation. We can’t wait to see how the Australian startup enhances our PPT experience with AI features in the future. Speaking of which, we would love to see a feature similar to ‘Design Ideas from Microsoft PowerPoint’ on Canva. Do let us know if you use Canva for presentations in the comments below.
Was this helpful?
Last updated on 07 January, 2024
The above article may contain affiliate links which help support Guiding Tech. However, it does not affect our editorial integrity. The content remains unbiased and authentic.

The article above may contain affiliate links which help support Guiding Tech. The content remains unbiased and authentic and will never affect our editorial integrity.
DID YOU KNOW

More in Internet and Social

6 Free Tools to Remove Background Noise From Audio

How to Remove Extra Space Between Words in Microsoft Word
Join the newsletter.
Get Guiding Tech articles delivered to your inbox.
Yes To Tech
- Sep 17, 2020
Canva Presentation Tutorial: How To Make Presentation In Canva + How To Use Canva For Presentation

Want to easily create presentation slides but are tired of the options that PowerPoint provides? In this Canva presentation tutorial I'll show you how to create amazing presentations using Canva. Canva is my absolute favorite graphic design tool for non-designers and it comes with a number of presentation templates that you can customize.
If you've been wondering how you can create better presentations with Canva, stay tuned until the end of this video to learn how to use Canva to create a presentation, and to get a FREE cheat sheet with 9 amazing online business tools like Canva that you can use in your online business to save time and boost your productivity. Also, make sure to subscribe and hit the bell to be notified every time I post a new video. With that said let's go ahead and jump right in.
First off, if you don't have a Canva account yet, just click on the link in the description box below to create one for free .
After you've logged in to your Canva account, click on the search bar, and search for 'presentation'. Canva has a number of presentation templates that you can customize, which include all of the kinds of slides that you might need, or if you prefer, you can select a blank template to start from scratch.
To view the available slides within the presentation template, just click on the three little dots on the top-right of the presentation template, and click through the available slides at the bottom. Don't worry too much which presentation template you choose since you can always change it later.
Once you've selected a presentation design to customize, click on 'use this template' to edit it. Just like with any regular Canva template, you can click on any of the elements on the page to customize them, such as the background, image and text, or click on any of the options from the left-hand side panel to add new photos, elements or text into your design.
Using Canva to create a presentation is easy because it's super straightforward. To edit any of the existing elements on a presentation slide, all you have to do is click on it, and view the available options up top. For instance, you can change the color of this square to any other one of your choice, you can change what this text says by double clicking on it, and writing something new, you can change the appearance of this text by editing its font, size and color, and you can either add an effect to this image, or add a new one altogether by clicking on 'photos' from the left-hand side panel, searching for the photo of your choice, and then drag-and-dropping it right where this original photo is.
For more details on how to customize a Canva design, make sure to watch my video on ' how to use Canva '. I'll leave the link to it in the description box below.
As you can see, Canva has a number of slide options that you can customize for your presentation, such as cover, icons, outline or table of contents, photo and text, quote, step-by-step, comparison, numbers, three column, bar chart, text only with multiple headings, question or statement page, title for a section, video, photo and text again, big photo and text, and so on and so forth.
You can customize each of these slides, as well as add presenter notes to them, move them up or down to reorder your presentation slides, copy the page to duplicate this slide's design, delete it altogether, and add a new blank page.
To add an animation to any of your slides, select the page that you want to animate, and select one of the animation options available. You can either add a new animation to new slide, or choose 'apply to all pages' to add the same animation to all slides.
Once you're done customizing the presentation you created in Canva, rename your design up top, and then click on the downward pointing arrow on the far right of the screen . There are a number of options that you can choose from: present, where you can present these slides right now where you either advance at your own pace, set speed to automatically play or view your notes and upcoming slides, present and record, where you can record yourself while talking over a presentation, and then share the video on YouTube, as an evergreen webinar, or with specific people, download these slides as an image, PDF, video or GIF, share a link to this presentation with others, publish this presentation as a beautiful, responsive website, or download your presentation as a PowerPoint document.
Now you know how to use Canva to create a presentation so you can easily create your presentation slides. As promised, to get a FREE cheat sheet with 9 brilliant tools like Canva that you can use in your online business to save time and boost your productivity, just click on the link in the description box below.
So what will the presentation you create in Canva be about? I'd love to hear your answer and start a conversation in the comments below, and also make sure to click on the link in the description box below to get your free cheat sheet , as well as a free 30-day trial of Canva Pro .
If you're new around here, hi I'm Marina Lotaif from Yes To Tech, and I'd love for you to join the family. You can do so by hitting the subscribe button and if you're already subscribed, and want to be notified every Tuesday and Thursday at 9:45am Eastern, just click on the bell after you subscribe and you'll receive a notification every single time I post. I hope you're having a wonderful day wherever you are and I'll see you in my next video.
HOW TO USE CANVA TO CREATE A PRESENTATION: Create Better Presentations With Canva Pro. Want to easily create presentation slides but are tired of the options that PowerPoint provides? In this Canva presentation tutorial I'll show you how to create amazing presentations using Canva. Canva is my absolute favorite graphic design tool for non-designers and it comes with a number of presentation templates that you can customize. If you've been wondering how you can create better presentations with Canva, stay tuned until the end of this video to learn how to use Canva to create a presentation.
GET A FREE 30-DAY TRIAL OF CANVA PRO: https://canva.pxf.io/jA4Q5
CLICK TO TWEET: https://ctt.ac/ar4Zz
SUBSCRIBE FOR NEW VIDEOS EVERY TUESDAY & THURSDAY: http://bit.ly/youtubeyestotech
RESOURCES MENTIONED:
- FREE cheat sheet with 9 brilliant tools to run your online business: https://www.yestotech.com/onlinebusinesstools
- Get A FREE 30-day Trial Of Canva Pro: https://canva.pxf.io/jA4Q5
- How To Use Canva: https://Youtu.Be/Q0m7psfcl94
RELATED VIDEOS:
- How To Create A Facebook Cover In Canva: https://youtu.be/2tmOJOiG3Iw
- How To Remove Background In Canva: https://youtu.be/aGuUui8riyk
- How To Make Instagram Story Bingo Cards: https://youtu.be/FndNRDnoA7k
- How To Create Animated Instagram Stories With Canva: https://youtu.be/diWTo3ym4Jo
- How To Create A Scrolling Website Animation Without Photoshop: https://youtu.be/AnECTOo7M0M
DISCOUNT CODES & EXCLUSIVE OFFERS:
- ConvertKit (email marketing software): a 30-day free trial - https://convertkit.com/?lmref=7SUoRg
- Viraltag (social media marketing tool): a 14-day free trial and $15 off - https://viraltag.grsm.io/MarinaLotaif914
- Leadpages (landing page and website builder): a 14-day free trial - https://try.leadpages.com/yestotech
- Interact Quiz Maker (quiz, poll and giveaway maker): a 14-day free trial - https://www.tryinteract.com/#oid=59709_4020
- Hostinger (web hosting): 10% off with code YESTOTECH - https://www.hostinger.com/yestotech
- Wix (website builder): 50% off yearly premium packages (first time users only) with code EDU_Mar17411703 - http://bit.ly/wixforfree
- Canva Pro (graphic design tool): a 30-day free trial - https://canva.pxf.io/jA4Q5
- Visme (presentation, infographic and visual content creator): a free forever plan until you decide to upgrade - https://partner.visme.co/?ref=MarinaLotaif
- Teachable (online course platform): a free forever plan until you decide to upgrade - https://teachable.sjv.io/c/1134751/933427/12646
SHOP THE STORE:
- Brilliant Branding: https://mlotaif.lpages.co/brilliant-branding-evergreen/
- Wonder Website: https://mlotaif.lpages.co/wonder-website-evergreen
- Traffic Takeoff: https://mlotaif.lpages.co/traffic-takeoff-evergreen
- Webinar Sales Funnel Template: https://yestotech.teachable.com/p/webinar-sales-funnel-template
- Canva Crash Course: https://yestotech.teachable.com/p/canva-crash-course
- ConvertKit Tech Training Tutorials: https://yestotech.teachable.com/p/convertkit-tech-training-tutorials
- Power Productivity: https://yestotech.teachable.com/p/power-productivity-premium
SUBSCRIBE FOR MORE VIDEOS: http://bit.ly/youtubeyestotech
MY FAVORITE TECH, TOOLS, AND RESOURCES: https://www.yestotech.com/resources
JOIN THE CONVERSATION!
- Website: https://www.yestotech.com
- Facebook: https://www.facebook.com/yestotech
- Pinterest: https://www.pinterest.com/yestotech
- Instagram: https://www.instagram.com/yestotech
- Twitter: https://twitter.com/MarinaLotaif
Welcome to our YouTube channel! It's our mission at Yes To Tech to empower online entrepreneurs, bloggers, and small business owners like you to maximize your online presence - even if you're not tech savvy! Subscribe to our channel for tips and tricks on DIY website creation, social media marketing, e-mail marketing, branding, blogging, webinars, and video creation, for the tech needed when you're just getting started with your online business, and for step-by-step video tutorials created especially for the non-techie online entrepreneur's point of view.
DISCLAIMER: This video and description may contain affiliate links, which means that if you click on one of the product links, I’ll receive a small commission. This helps support the channel and allows me to continue to make videos like this. I only recommend products that I use and love. Thank you for your support!
WHAT YOU’LL LEARN IN THIS VIDEO:
How to use canva to create a presentation, create better presentations with canva, how to make a presentation in canva, how to use canva, create amazing presentations using canva tool, how to create a canva presentation with powerpoint, canva presentation tutorial, easily create presentation slides, canva tutorial
#canva #canvatutorial #presentation
https://youtu.be/zQUZdpKPhJw
Tags: how to use canva to create a presentation, create better presentations with canva, how to make a presentation in canva, how to use canva, create amazing presentations using canva tool, how to create a canva presentation with powerpoint, canva presentation tutorial, easily create presentation slides, canva tutorial, yes to tech
Recent Posts
Canva Text Effects: How To Make A Typewriter Effect With Canva | Canva Transition Effects
How To Remove Animation In Canva: Canva Animation Tutorial
How To Use Instagram On PC Like Phone: How To Use Instagram On Laptop
How to Use Canva to Create and Give Presentations
Canva makes it easy to edit text, make GIFs , and create content for social media like Instagram . But Canva also makes it easy to create presentations and if you are in a hurry and forgot your PC, Canva allows you to give that presentation using your smartphone. Here is how you can create and give presentations using Canva while on the move.
Table of Contents
Create Presentation Using Canva Templates
One of the things that make Canva so much easier to use is templates. They offer free and paid templates for almost all sorts of content that you may think of. We will be using a free template to create a presentation on Canva’s web app.
1. Open Canva in your browser and search for Presentation in the search bar.

2. You will be taken to the presentation templates page . You can filter by category or just scroll through until you find something that catches your eye or meets the criteria. You can also click on the empty frame with +sign to create a new presentation from scratch but that would be time-consuming.
Note: Templates with a golden crown icon are paid templates.

3. Click on any template and you will see a pop-up menu with more details about the template. Click on Customize this template to begin making your template. Click on the star icon to bookmark it for later perusal.

4. Now, in the left sidebar, you will find all the slides in the presentation. When you select a slide, you will be able to edit it on the right side. Each element can be edited or removed including text, image, and various elements. It is easy to add, edit, and format text .

5. You can choose from a variety of apps from the marketplace to make your work easier including AI apps like Dall-E. Simply click on Apps in the left sidebar and choose the one that you want to use.

6. You can also draw on slides or use stock images from sources like Pixabay and Pexels without having to leave Canva.

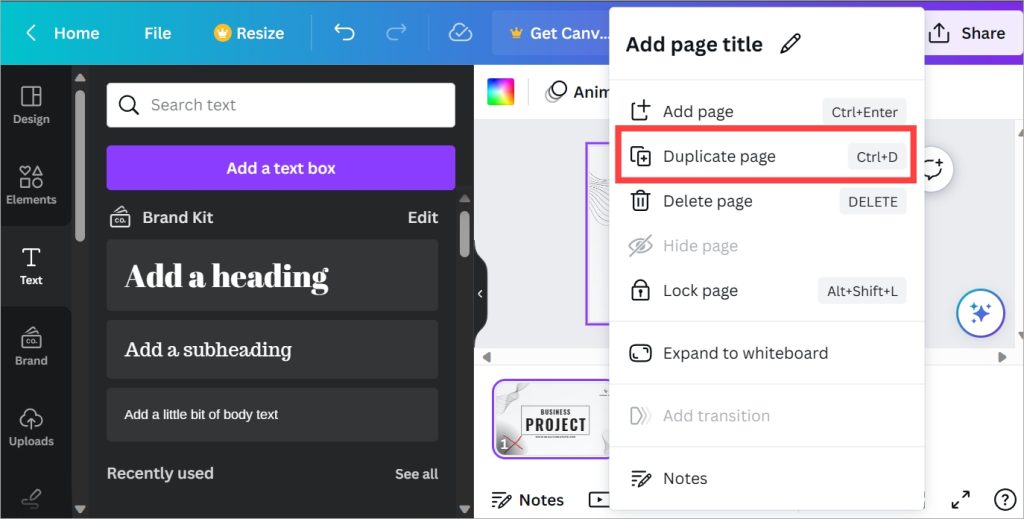
7. To add a slide, click on the plus icon at the bottom. You can also right-click on the existing slide and select Duplicate page to create an identical new slide that will retain the formatting and layout of the first slide. So all you have to do is change the text and some elements.
When you are happy with the presentation, you have a couple of options. Let’s have a look at them in the below sections.
Give a Presentation Using Canva
There are two ways to do it. You can present a presentation made in Canva using both the web app and the Android or iPhone app.
Give Canva Presentation on PC
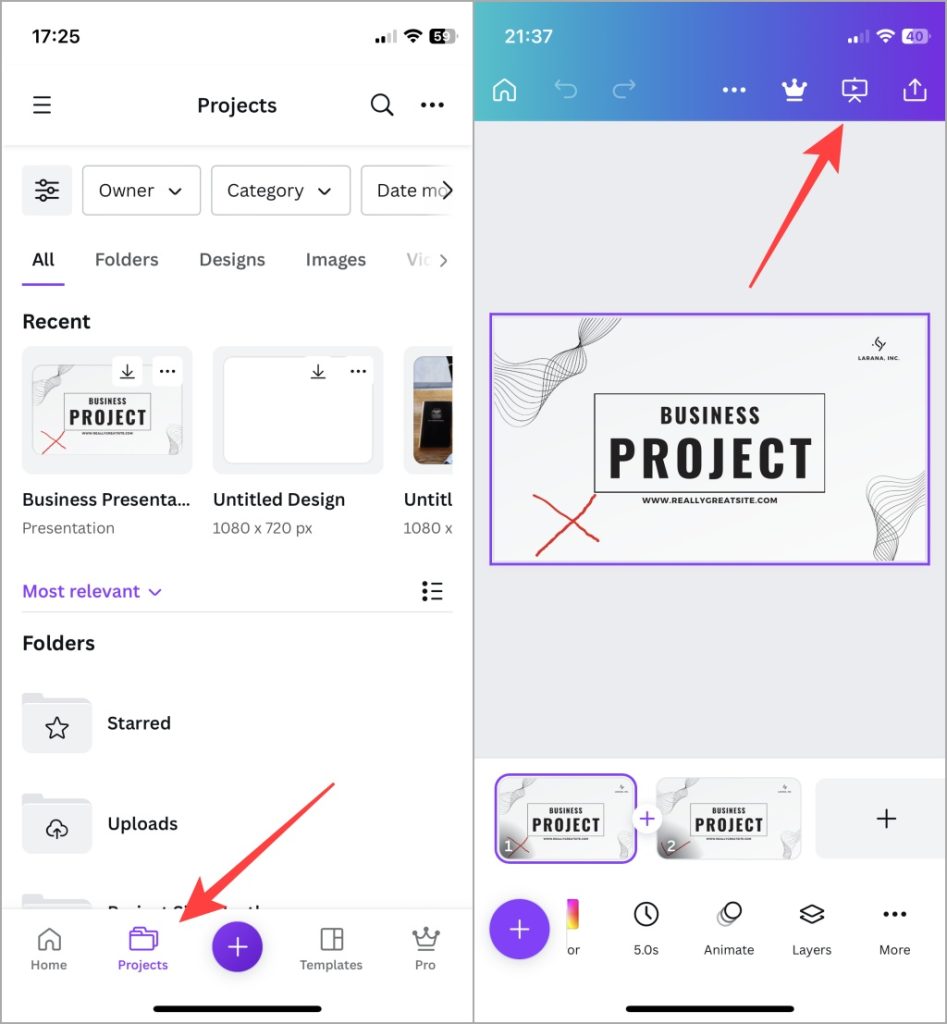
1. Go to Canva homepage and click on Projects in the left sidebar.

2. Click on the presentation that you want to give to open it.

3. Click on the Present button in the upper right corner. You will see three options to present.
- Present full screen – this will begin a full-screen presentation for everyone to see.
- Presenter view – this presents the slides that you have created along with notes that you may have.
- Autoplay – this will let you set a timer so that once you begin the presentation on Canva, slides will change after the chosen time (in seconds) automatically.

4. Once you selected a form of presentation, click on the Present button to begin.
Have you heard of Adobe Spark? We did an in-depth comparison between Canva and Spark . Find out who won and why.
Give Canva Presentation on Mobile
If you are working remotely or traveling and don’t have your laptop on you, Canva allows you to give presentations directly from mobile.
By Sharing Presentation Link
Open the Canva app and go to the Projects tab. Now open the presentation and then select the Presentation menu (TV icon).
If you are casting your mobile screen on a bigger screen, this will work beautifully.
Using Phone as Remote to Give Presentations
This is one neat trick up Canva’s sleeve. You would have noticed how presenters on stage have a small remote in their hands that they use to change slides. You don’t need anything but your smartphone to give presentations saved on Canva now. And it is quite easy.
1. Open the presentation on your web or mobile Canva app. Here we are using the web app. Click on the Present button to begin the presentation.
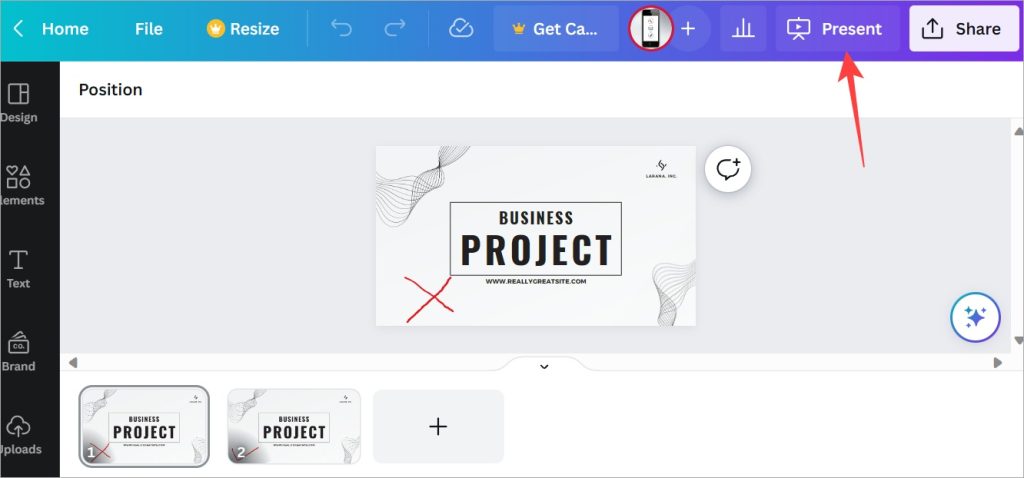
2. Select an option depending on how you want to present. We discussed the three options above. Now click on Present button.

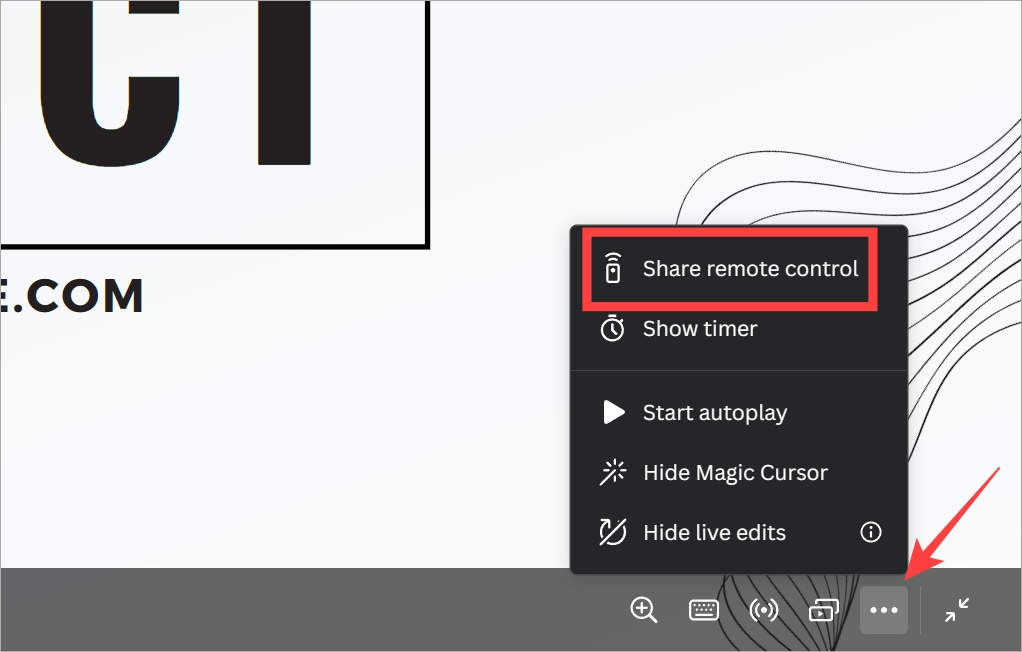
3. Once the presentation begins, click on the meatballs menu (three-dot icons) at the bottom right corner of the screen and select Share remote control option.
4. Either scan the QR code or Copy the link and paste it on your mobile browser. Any browser will do.
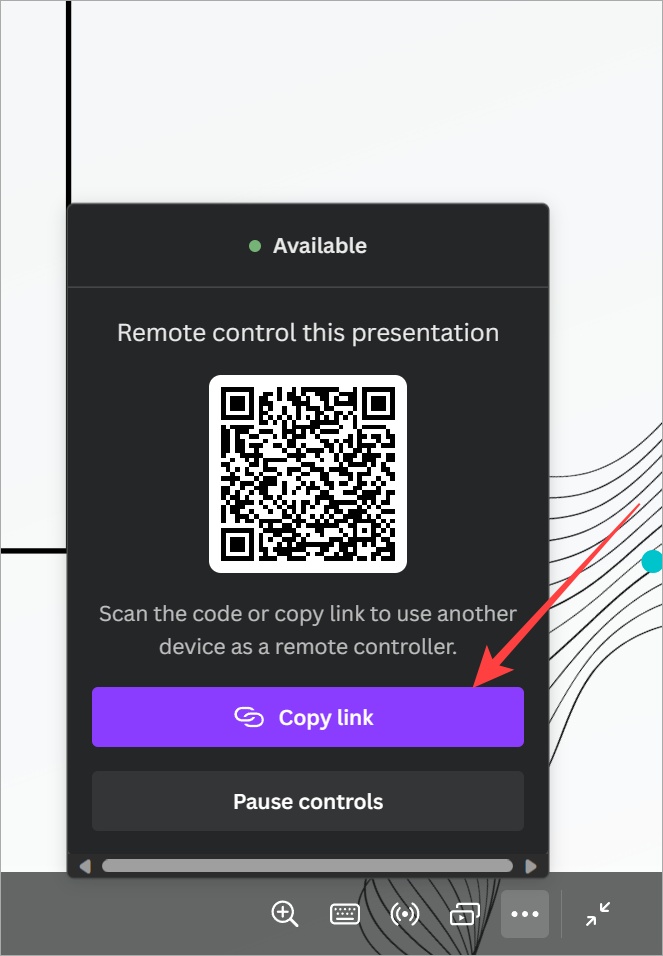
5. You can now control the presentation and slide movements right from your mobile browser. Here is how it looks. Tap on the left or right button to move slides.
Presenting, Canva!
Canva not only makes creating presentations easy thanks to the wide variety or free and paid templates, but it also offers intuitive ways to present your slides. But that’s not all that Canva can do. We use Canva to create featured images, resize images , make background transparent , and so much more.

Gaurav Bidasaria
Gaurav is an editor here at TechWiser but also contributes as a writer. He has more than 10 years of experience as a writer and has written how-to guides, comparisons, listicles, and in-depth explainers on Windows, Android, web, and cloud apps, and the Apple ecosystem. He loves tinkering with new gadgets and learning about new happenings in the tech world. He has previously worked on Guiding Tech, Make Tech Easier, and other prominent tech blogs and has over 1000+ articles that have been read over 50 million times.
You may also like
5 pixel 9 ai features i want on..., 6 reasons not to buy google pixel 9..., google pixel 9 pro fold vs pixel fold:..., tensor g4 vs tensor g3: still the same, google pixel 9 series: everything you need to..., here’s how to create a samsung/android phone and..., 2 ways to use any app on your..., how to disable gemini ai in google messages, samsung one ui 7: leaked features, eligible devices..., google pixel 9 series: everything we know so....
Canva Presentations: How to Create and Share Them
Canva may not be your first thought for creating a presentation. However, this popular web-based design tool offers a robust slideshow feature set. We’ll walk through how to create a Canva presentation, present it to your audience, and share it using a variety of methods.
Create a Canva Presentation
If you’ve never made a presentation with Canva, don’t worry. This online graphic design application goes beyond creating images and crafting infographics. Canva makes it super easy to create and set up a presentation for your audience.
On the Canva home page, select Presentations below the Search bar. Then, choose a slideshow size or Canva presentation template to get started.

Note : If you’re using Canva Docs , you can also convert your document to a presentation by selecting Convert at the top. Follow the prompts, and you’ll see your presentation open in the Canva editor.
Once in the Canva editor, use the menu on the left side to add slide elements. You can select or drag items like shapes, images, or text boxes onto your slides.

You can also edit or remove a slide element by selecting it and using the tools that display near the item or in the top toolbar. For example, you can change the style of text or transparency of an image.

Be sure to check out the full set of Canva presentation tools in the editor. You can add animations, insert slide transitions, use the grid view to rearrange presentation slides, and more.
Set Up the Presentation
After you tap your creativity to make an attractive and informative presentation, you can add notes, clock your speaking time, and adjust the slide durations.
Add Presenter Notes
To add presenter notes to a slide, select Notes in the bottom toolbar. Then, type your note in the panel that displays on the left. You can then move to your other slides and add notes the same way.

When you finish, deselect Notes in the toolbar.
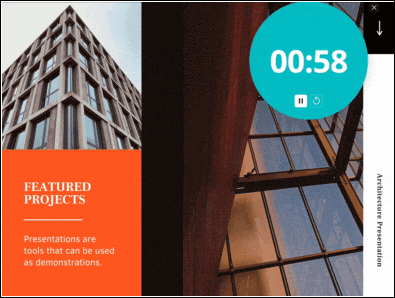
Use the Timer
If you’d like to time your presentation, you can use the built-in countdown Timer feature. Select Timer in the bottom toolbar to display the timer. By default, the timer is set for five minutes, but you can change this using the plus and minus buttons.

Press the Play button to start the countdown, the Pause button to temporarily stop the timer, and the Reset button to restart the timer.

To close the Timer, deselect Timer in the toolbar.
Set the Slide Duration
Maybe you’re using Autoplay (described below) and would like to display particular slides for a longer or shorter time. You can adjust the slide duration for each or all slides in two different ways in Canva.
Use the Duration Slider
Expand the bottom section by selecting the Show Pages arrow. Then, choose Duration on the left to see the default timing for each slide.

Select a slide thumbnail (page) and hover your cursor over the left or right side of it to display the duration slider. Then, drag the slider in or out to shorten or lengthen the duration.

When you finish, deselect Duration in the toolbar and optionally use the Hide Pages arrow to minimize the bottom section.
Use the Timing Feature
Another way to change the duration of a slide is by using the Timing option at the top of the editor. Select a slide to see its duration and choose the current timing to enter a new duration, or use the slider to adjust it.
You can also turn on the toggle to apply the new duration to all pages (slides) in the presentation.

To close the Timing tool, deselect it in the top toolbar.
Show a Canva Presentation
The great thing about creating a presentation in Canva is that you can present from it as well. If you prefer not to download and present using a different application, you have a few options to show your slideshow directly from Canva.
When you’re ready to present or practice your presentation, select Present on the top right. You’ll then see the options below.

Present in Full Screen Mode
Choose the Present full screen option to enter presentation mode. You’ll see your presentation consume your entire screen and have controls at the bottom.

Use the arrows on the left to move through the slides and the controls on the right to zoom, interact, use shortcuts, or exit full-screen mode.
Use Presenter View
To see your notes and controls on one screen with your presentation on another for your audience, choose Presenter view .

Your screen shows the time, a count-up timer, and other controls for a countdown, AutoPlay, and the font size for your notes.
You can drag the other screen wherever needed for your audience to view.

Present and Record
Maybe you want to incorporate your smiling face into your presentation. For this, pick the Present and record option to record yourself live as the presentation plays. You can then share the whole presentation as if you’re in the same room.
Note : This feature is currently only available when using the Google Chrome web browser.
You’ll see your face appear in a circle on the bottom left of the presentation. You can use the Pause and End recording buttons at the top to control the recording as well as see your presenter notes.

When you finish, you’ll see a link that you can copy and have the option to download the recorded presentation immediately.

Use Autoplay
Like Autoplay for a PowerPoint presentation, this is one more way to present a slideshow using Canva. With Autoplay, you can start the presentation and let it play on its own. This is ideal for kiosk presentations or when you are unable to present yourself.

When you choose Autoplay , the presentation begins and moves through each slide using the Durations you set (explained earlier). You can also manually control the presentation if needed using the same tools as the Present Full Screen option.
Share a Canva Presentation
Along with or instead of actually presenting a slideshow with Canva, you can share it in a variety of ways. Whether you want to collaborate with your team, download the file to your device, or pop the presentation up on social media, Canva has you covered.
Select Share in the top right corner and then choose one of the following ways to share.

Collaborate With Others
Maybe you want to work on the final presentation with a team member or coworker. You can grant access to others and provide them with a collaboration link.
Enter the people, groups, teams, or email addresses in the People with access field. Then, open the Collaboration link drop-down menu and pick Anyone with link to provide access.

Download a Presentation
If you’d like to save your presentation to your device or download it as a Microsoft PowerPoint file, this is easy too.
Select Download and use the File type drop-down to pick PDF, PPTX, GIF, PNG, or another format.
You can then choose to flatten the PDF, include notes, or download only certain pages (slides).

Share on Social Media
Want to post your presentation directly to Facebook, Instagram, or another social media network? Select Share on social , choose the location, and follow the subsequent prompts to sign in and set up the social media post.

More Sharing Options
If you don’t see the sharing avenue you want, don’t despair because there are even more. Select More at the bottom of the Share menu.
You’ll then see sections for Share, Social, Save, Messaging, Design, and More Options giving you a ton of sharing methods. As examples, you can obtain a public link, send it to your phone, get an embed code for your blog, upload it to Dropbox or Google Drive, send it to Slack or WhatsApp, and more.

Will You Create a Presentation in Canva?
Now that you know the basics, are you going to use Canva for your next presentation? If so, let us know what you think of the tools and features. For doing even more, check out how to blur a face in a photo using Canva .
Related Posts
- 11 Beautiful Canva Resume Templates for Any Profession
- How to Use Canva Docs to Create Documents Online
- How to Make a Vision Board on Canva
- How to Blur the Face in a Photo Using Canva
- Is Canva Pro Worth the Cost?

Sandy Writtenhouse is a freelance technology writer and former Project, Department, and Program Manager. She turned her education, job experience, and love of technology into a full-time writing career. With all sorts of gadgets in her home and her hands, she seeks to help others make life easier through technology. Read Sandy's Full Bio
How To Make A Professional Presentation on Canva
Creating a professional presentation requires an eye for detail. Capturing and retaining the attention of your audience can be a challenge. The secret is to make a clear, authoritative, and structured presentation. Let’s walk through the process of utilizing Canva to create a professional presentation. Our guide even offers some pro tips to get the best out of it.
Steps To Create A Canva Presentation
Step 1: open canva.
Sign into your Canva account, or create an account if you don’t have one.

Step 2: Choose a Presentation Template
Canva’s range of templates allows you to create professional presentations of any kind, whether it’s business, academic, or creative. To choose:
- Click on “Create a design” on the Canva dashboard, or the “+” sign down the middle if you’re on mobile.
- In the search bar, type “Presentation” to find a variety of presentation templates.
- Select a template that suits your theme or topic.

Creating custom templates can save time, especially if you have similar and recurrent presentations.
Step 3: Customize Your Presentation
When you have your content ready and outlined and your template chosen, you can go ahead to:
- Edit the text by clicking on the placeholder text boxes and entering your text.
- Click on the graphics in the template and replace them if needed. Images can be either uploaded from your library or chosen from Canva’s library.
- You can also add elements with the simple drag-and-drop feature. This streamlines your workflow and saves you some time and effort.
- Simplify your text, and space it appropriately. This helps your audience grasp key points quickly.
- Create a strong title slide. With a compelling title and a graphic or two, you’ll set the tone for the rest of the presentation.
- Stick to a theme. Consistent font and color create a professional look for your presentation.
Step 4: Organize Your Slides
Cluttered slides are not great to look at, and can confuse you when you have to present. Well-structured slides are key for every successful presentation.
- Use the left sidebar to navigate through your slides.
- Add or delete slides by clicking on either the “+” or “trash can” icons.
- Rearrange your slides as you see fit by clicking and dragging them into the desired sequence.
- Here you can also design your cover slide and choose transition styles for your slides.
- You can duplicate slides you like, so you can make adjustments to one without touching the other. You can do this with the Ctrl + D (Cmd + D on Mac) shortcut.
- Keep your presentation story-like, with a clear progression. This keeps your audience engaged.
Step 5: Elements, Icons and Multimedia
This is where Canva impresses. There’s a vast range of icons, graphics, and media you can choose from. These are of course optional. But, they play an understated role in keeping eyes on your presentation, especially when things are getting a bit clunky.
- Access the “Elements” tab on the left sidebar, and drag and drop the desired elements such as lines, shapes, and icons onto your slides.
- To add multimedia, Select “Videos” or “Audio”, then import multimedia files directly to your slides.

- Be generous with Elements and Graphics. They are great for representing tricky concepts and highlighting key points.
- High-quality images can give your content a real facelift. Canva has an always-ready library of the best stock photos that you can always access.
Step 6: Collaborate
- If you’re working on the group presentation with others, you can invite your co-members by clicking on the share button in the top-right corner.
- Collaborators can then make edits and suggestions in real time.

Step 7: Preview and Present
You should always preview your finished presentation. You’re more than likely to pick up on something you missed. It is also important to know what your presentation will look like to the viewer
- Before finalizing, click the “Present” button at the top right corner.
- Here you can review content and structure and make any necessary adjustments.
If at preview you notice maligned elements, Canva’s grid and snap features can help to automatically align them.
Step 8: Download or Share
- Once ready, click the “Download” button to save your presentation as a PDF, PPT, or your preferred format.
- You can also use the “Share” button to generate a link for easy online sharing or collaboration.
Canva Additional Features
Canva offers a healthy range of features that let users of varying experiences create top-shelf presentations.
Jumpstart your creative process by using professionally designed presentation templates. There are a lot of easy presets available for use. These templates are customizable, allowing you to change colors, fonts, and images. You can then match your preferences or branding as you see fit.

Images And Icons
Canva provides access to a library of relevant images, icons, illustrations, and other design elements. These assets can enhance the visual appeal of your presentations. You’re of course allowed to import your images and icons if you want a more personalized touch.
Charts and Graphs
Canvas’s range of effects and graphics is some of the very best available. Between simple things like font variety and color tweaks, and more complex stuff like animations and transitions, there’s no shortage of options for creating a dynamic and visually appealing presentation.
Collaboration Features
Canva allows for real-time collaboration between multiple users. This is rather useful with group presentations. This way, members of the presenting team can interact and make edits to their section. They can do this while working on the same presentation simultaneously.
With Canva, you can embed multimedia elements, such as videos and audio, directly into their presentations. This allows for a more interactive and fun experience.
Canva Third-Party Integrations
Canva’s strength lies in its flexibility. It offers integrations with key tools, enhancing your workflow and boosting audience engagement.
These include:
Interactive Integrations
- Canva slides can be easily integrated into the learning experiences through the platform Pear Deck. For example, a classroom presentation on the water cycle can be made via Canva. Through the Pear Deck integration, teachers can introduce quizzes, draggable elements, and prompts. Students can then interact with these and receive teacher feedback.
Learning Management Systems (LMS):
- Canva integrates seamlessly with various LMS platforms like Canvas, Schoology, and Google Classroom. With these, Educators can receive and review student Canva assignments directly.
Mentimeter:
- With Mentimeter, you can Integrate live polls and quizzes into your Canva presentations. These help you gather real-time audience feedback and insights.
Sharing And Publishing
- Canva presentations can be easily published on social media platforms.
- It also allows for direct liaison with video conferencing platforms like Zoom, Google Meet, and Microsoft Teams. This helps for easy remote presentations.
- With Canva you can export your presentation in PDF, PPT, or PNG format.
- You’re also allowed to upload these directly to cloud storage platforms for easy accessibility and teamwork.
- Canva provides an API that developers can use to integrate Canva into other applications. So if you have the skill and time, you can easily create integrations of your own.
Presentations Apps and Integrations
- Magic Design: This lets you generate slide designs automatically as you create them. It does so by applying designs based on your already curated content. This should help you save time and creativity.
- Presenter Mode: You can deliver presentations with confidence using Canva’s built-in presenter mode. This comes with speaker notes, slide timers, and annotation tools.
- Canva Live: This lets you hold live presentations hosted on Canva. Within, you can curate questions and reactions from your audience in real-time. This helps with fostering engagement and interactivity.
Stock Libraries:
- Canva has a bulk image license with Unsplash, Getty Images, and Shutterstock. These grant you access to premium stock photos and illustrations within the platform. Many of these are otherwise expensive or difficult to find.
To explore potential third-party integrations, visit Canva App Directory and Canva for Developers.
Canva Pricing
Canva offers a flexible pricing structure to cater to the needs of individuals and teams. There are three main packages:
- Canva Free: This typically provides access to all the features you may need for your presentation at no cost.
- Canva Pro: $14.99 a month or $119.99 per year
- Canva Teams: *$300 per year for 5 team members, with additional members costing $60 per year each.
Thanks to its friendly and intuitive interface, Canva is great for users of all skill levels. It allows them to craft presentations that truly stand out. In this guide, we’ve discussed how to create a professional presentation on Canva. We’ve also covered the features available for use and shared some practical tips to help you make the best presentation.
Q: Can you transfer Canva directly to Google Slides?
A : You can easily import your Google Slides to Canva for editing. All you need to do is to connect your Google Drive account to your Canva account, and import files when needed. Transferring presentations from Canva is less straightforward. You’ll have to download your Canva presentation as a PDF, then open the file within Google Slides.
Q: Can you make a slideshow on Canva?
A : Yes, you can. Canva supports the creation of slideshows. All you have to do is open Canva and choose a slideshow template.
Q: Can I present directly from Canva?
A : Yes, you can. Canva offers a presenter mode that lets you use notes, timers, and annotation tools as you present. You can, of course, download your presentation in any format to present offline if preferred.

- Terms of Use
- Privacy Policy
- How We Rate
- CCPA Privacy Notice
- Cookie Settings
Canva Presentation Tips: How to Create a Stunning Presentation Using Canva
Home » Blog » Canva Presentation Tips: How to Create a Stunning Presentation Using Canva

Founder of CanvaTemplates.com & Professional Graphic Designer
Jake Tucker
Canva Templates is reader supported. When you buy through links on our site, we may earn an affiliate commission. Learn more
If you’re looking to create a visually stunning presentation that captures your audience’s attention, then Canva is the perfect tool for you. Canva is a user-friendly graphic design platform that allows you to create professional-looking presentations with ease. With its intuitive interface and wide range of design elements, you can create a presentation that is both engaging and informative.
Whether you’re a seasoned presenter or a beginner, Canva offers a variety of presentation tips that can help take your presentations to the next level. From incorporating video and graphics to using consistent themes, Canva’s tips can help you create a presentation that is both visually appealing and informative. With Canva, you can create a presentation that is tailored to your audience and effectively communicates your message.
In this article, we’ll explore some of the best Canva presentation tips that can help you create a presentation that stands out. We’ll cover everything from design elements to delivery techniques, so you can create a presentation that is both visually stunning and engaging. Whether you’re presenting to a small group or a large audience, these tips will help you create a presentation that leaves a lasting impression.
Understanding Canva Presentations
What is canva.
Canva is a graphic design platform that allows users to create a wide range of visual content, including presentations, social media graphics, posters, and more. The platform offers a user-friendly interface, making it easy for even non-designers to create professional-looking designs.
Why use Canva for presentations?
Canva presentations offer a variety of benefits. First, they are easy to create, even for those without design experience. Second, Canva offers a wide range of templates, making it easy to create a cohesive and visually appealing presentation. Third, Canva presentations can be easily customized to match your brand’s colors and fonts. Finally, Canva presentations can be shared and accessed online, making them easy to distribute to your audience.
Canva Presentation Features
Canva presentations offer a variety of features to help you create a visually appealing and engaging presentation. Some of these features include:
- Templates for a variety of presentation types, including business, education, and personal
- A wide range of graphics and images to choose from
- Customizable colors, fonts, and backgrounds
- Ability to add videos and audio files
- Collaboration tools, allowing multiple people to work on the same presentation
Overall, Canva presentations offer a user-friendly and visually appealing way to create presentations for a variety of purposes. With a wide range of templates and customization options, Canva presentations can help you create a presentation that is both professional and engaging.
Creating Effective Canva Presentations
Choosing the right template.
When creating a presentation in Canva, choosing the right template is crucial. Canva provides a wide range of templates that cater to different types of presentations, including business, educational, and creative presentations. It is essential to choose a template that aligns with the purpose of your presentation and the audience you are presenting to.
Designing Visually Appealing Slides
Designing visually appealing slides is key to keeping your audience engaged. It is important to use high-quality images, graphics, and fonts that complement your presentation’s theme. Canva provides a variety of design elements that can be used to create visually appealing slides. However, it is important to be mindful of not overloading your slides with too many design elements, which can make your presentation look cluttered and unprofessional.
Using Canva’s Features to Enhance Presentations
Canva offers a range of features that can be used to enhance your presentation. These features include the ability to add animations, transitions, and audio to your presentation. Additionally, Canva provides the option to collaborate with others on your presentation, making it easier to work on a group project. It is important to use these features judiciously and only when they add value to your presentation. Overall, creating an effective Canva presentation requires careful planning and attention to detail. By choosing the right template, designing visually appealing slides, and using Canva’s features judiciously, you can create a presentation that is both engaging and informative.
Tips for Delivering Canva Presentations
Preparing for your presentation.
Before delivering your Canva presentation, it is important to prepare yourself and your materials. Here are some tips:
- Practice your presentation to ensure you are familiar with the content and timing.
- Test your equipment and internet connection to avoid any technical difficulties.
- Have a backup plan in case of technical difficulties.
- Make sure your presentation is easily accessible to your audience.
Engaging Your Audience
Engaging your audience during your Canva presentation is key to keeping their attention and making a lasting impression. Here are some ways to engage your audience:
- Use eye-catching visuals and graphics to enhance your presentation.
- Speak clearly and use a confident tone of voice.
- Ask questions or encourage participation to keep your audience engaged.
- Keep your presentation concise and to the point to avoid losing your audience’s attention.
Handling Q&A Sessions
Q&A sessions are a great opportunity to address any questions or concerns your audience may have. Here are some tips for handling Q&A sessions:
- Be prepared to answer questions related to your presentation.
- Listen carefully to each question and take the time to understand it before answering.
- Be honest if you don’t know the answer to a question and offer to follow up later.
- Thank your audience for their questions and participation.
By following these tips, you can deliver a successful Canva presentation that engages your audience and leaves a lasting impression.
Creating a visually appealing presentation that effectively conveys your message can be a daunting task. Fortunately, Canva provides a variety of tools and resources that can help you create stunning presentations with ease. By following the tips discussed in this article, you can become a pro at creating Canva presentations that are sure to impress your audience.
I hope you found this guide covering Canva presentation tips, useful! Be sure to check out our blog for more article covering the essential tips, tricks, and advice for Canva! Also, if you haven’t already tried CanvaPro, you can try it for free for 30 days !
Small Business Trends
How to create a canva presentation.

Can Canva be Used for Presentations?
Yes, Canva can be used for presentations by both individuals and small teams and any large business seeking an integrated tool to create high-quality visuals for their brand.
Why You Should be Making Presentations on Canva
How to create presentations on canva: a step by step guide.
Let’s get into how to create a presentation using Canva. Businesses usually include their own logo in their presentations to keep their brand consistent.
Step 1: Access Canva Through Your Computer
Step 2: select a template to customize, step 3: customize your presentation slides, step 4: add or remove text and modify fonts.
Click on any text you want to remove or modify. To delete text, simply click on backspace or delete on your keyboard.
Step 5: Add More Slides
Step 6: download your presentation, canva presentation templates, blue modern corporate presentation, beige brown abstract organic class syllabus blank presentation, tri-colored borders real estate listing presentation, blue and yellow simple human illustrative investing finance tips, blue white professional modern healthcare service proposal, how do you present a canva presentation, how to add video footage to a canva presentation, canva presentations vs. powerpoint presentations.
Unlike PowerPoint, which has been plagued by lackluster design and lack of creativity, Canva presentations are packed with stunning visuals and easy-to-use tools that allow you to create truly beautiful presentations.
Tips on Creating Canva Presentations
Can you convert a canva presentation to powerpoint.
The 5 Best Slideshow Template Resources I Trust for My Presentations

Your changes have been saved
Email is sent
Email has already been sent
Please verify your email address.
You’ve reached your account maximum for followed topics.
Why I Use LibreOffice Instead of Microsoft 365
The 7 best obsidian plugins for mobile, why everyone should use a gaming keyboard (even non-gamers), quick links.
- SlidesCarnival
- SlidesMania
Key Takeaways
- Canva offers user-friendly templates, drag-and-drop functionality, and real-time collaboration.
- SlidesCarnival has free templates, no need to sign in, and unlimited downloads.
- Visme provides interactive elements and multiple download formats in one central location.
With so many slideshow templates available, finding the best of the best can be a challenge. I usually rely on Slidesgo, but I’ve found some great alternatives after plenty of exploration. I’ve trusted these resources to create many presentations that elevate my slides to the next level.

Canva is an online design tool that I use to create content . This includes presentations, social media graphics, and more. Canva offers different plans, including Canva Free, Canva Pro, Canva Teams, and Canva Enterprise. There are more options tailored for K-12 and higher education.
Key Features of Canva’s Presentation Templates
These four key features have simplified the slideshow template process for me.
- Canva’s drag-and-drop feature simplifies the template customization process. This feature makes it easy to add and arrange elements (e.g. text and images) and streamline the creation process more efficiently.
- The real-time collaboration feature has been invaluable for group projects. This allowed me to easily share templates as editable files or finished designs. You can use this too, to make the collaboration and content process much smoother.
- The Resize and Magic Switch feature has been a great help. This feature helped me resize my creation for different social media platforms. This feature is available on Canva Pro, Canva Teams, Canva for Education, and Canva for Nonprofits.
- The Canva Design School resource page has been helpful in the creation process. It offers guidance on the tools and features available. It also allowed me to maximize the tool’s potential during editing. This helped to create polished and impactful designs.

SlideEgg is another top template resource that I trust for my presentation needs. It offers a vast collection of customizable templates to boost productivity and creativity. SlideEgg offers a free version. More pricing plans include the Unlimited Quarter, Unlimited Year, Annual Pass, and Lifetime.
Key Features on SlideEgg
These four key features on SlideEgg explain why this is a great template resource.
- SlideEgg offers regular updates. I love how it consistently keeps up with the latest trends and interests.
- I also love how SlideEgg’s high-quality graphics make presentations look professional and polished. This attention to detail significantly enhances the impact and appeal of each presentation.
- The Redesign Your Slides option takes four simple steps to quickly revamp presentations. With the help of SlideEgg experts, you can elevate your slides in a short time frame. If you prefer, you can also use the live chat in the bottom right corner for fast and reliable help.
- I found the SlideEgg site very easy to navigate for the free and paid versions. Each template comes with detailed descriptions of its theme and features. This helps to select a template based on its format options and the platform it is compatible with.
3 SlidesCarnival

SlidesCarnival is a great tool for crafting projects. Most templates are compatible with PowerPoint, Google Slides, and Canva. SlidesCarnival aims to elevate presentations for business meetings, marketing efforts, and creative projects.
Key Features of SlidesCarnival
Here are the three top features of SlidesCarnival while creating projects:
- SlidesCarnival is straightforward to use, with no paid plans or subscriptions. Just remember to keep the end credit slide for SlidesCarnival in your presentation.
- I was able to explore the site and download templates without creating a new account. This made it incredibly convenient to access the template I needed.
- I downloaded as many templates as I needed. There is no limit on the number of downloads for SlidesCarnival. This is particularly useful for the times you need to create several presentations.

Visme’s robust template collection is designed to help create visually engaging presentations. It quickly became a go-to resource for me. This option is great for built-in multimedia content, as well as seamless integration of images, videos, and charts.
Key Features of Visme
- Visme’s interactive features are worth exploring. You can try clickable pop-ups, embedded polls, and more. These elements boost engagement by adding interactive content that captures your audience's interest.
- With Visme, I could download my projects in various formats . For example, HTML5 was useful for downloading presentations with embedded audio and animations.
- Implementing interactive features was simple. Especially since I could create any infographics, surveys, and social media graphics, all in one central location.
5 SlidesMania

SlidesMania offers a wide selection of slideshow templates for PowerPoint and Google Slides. With their slides, you can add flair to your professional or personal presentations.
Key Features of SlidesMania
- All the templates are completely free on this site and I didn't have to create an account or register, which makes it an accessible resource.
- SlidesMania offers a variety of stylish templates. Their creative templates will help give your presentations a fresh and creative look.
- SlidesMania offers a Tips and Tricks for Google Slides feature. This was especially helpful when I was working with Google Slides . There are many guides, including how to add image placeholders or lock content to prevent accidental changes.
Each of these five slideshow template resources can add value to your presentations. I usually rely on Slidesgo . But these alternatives offer distinct features that are worth exploring to take your projects to new heights.
- Productivity
- Office Templates
How to Integrate AI Technologies in College Project Presentations
- Post author By John Mike
- Post date August 15, 2024

Image created with Microsoft Designer
Imagine impressing your classmates and professors with a cutting-edge college project presentation. Integrating AI technologies can make this vision a reality. With tools like Dall-E for eye-catching visuals, Suno for custom soundtracks, and SlidesAI to polish your slides, the future of presentations looks brighter than ever.
Stay ahead in academia by exploring how these innovations work together. We’ll navigate through practical examples, expert tips, and unique strategies that will elevate your next presentation from ordinary to extraordinary.
Enhancing Visual Appeal with AI Image Generators
AI image generators like Dall-E offer exciting opportunities for your college presentations. Imagine bringing the ancient world to life by creating vivid, custom visuals of historical events or long-lost architecture.
These tools can generate images that perfectly align with your project’s theme, making abstract ideas tangible. If you’re tackling a subject like ancient history, visualize cities as they were in their prime or reconstruct significant landmarks.
This capability adds a layer of engagement that static images can’t achieve. You have creative control to tweak these images for accuracy and artistic flair.
Use cases extend beyond history classes. In biology, illustrate cellular processes with dynamic visuals tailored to your explanation. For literature studies, create imaginative representations of classic texts’ settings or characters.
Moreover, integrating these visuals into SlidesAI transforms basic slides into compelling stories without overwhelming technical detail. Students leverage cutting-edge technology effectively when blending creativity and AI-generated content in educational contexts.
Designing Custom Soundtracks with Canva
Crafting a unique soundtrack for your project can elevate its impact, and Canva’s music capabilities make this easier than ever. Perhaps trying to set the right tone or evoke specific emotions? Start using AI for music within Canva’s expansive library.
Picture yourself presenting a psychology project. Analyzing emotional responses becomes vivid with subtle background scores that match various moods. For environmental science topics, natural soundscapes create immersive atmospheres, connecting audiences emotionally.
In art history presentations, consider blending classical tunes that align with the era being discussed. It’s about adding another dimension to learning experiences through auditory elements tailored precisely to your subject matter.
Tailoring your soundtrack to the theme of your presentation is key. Consider using the best streaming service to ensure an uninterrupted flow of music that complements your AI-generated visuals, enhancing the overall impact of your project.
You mix and match tracks seamlessly in Canva’s user-friendly interface while adjusting volume levels for balance and effect. So whether you’re emphasizing a point or transitioning between sections, customizing soundtracks enhances storytelling dynamics across diverse academic fields.
Structuring Your Presentation for Maximum Impact
Organizing your presentation effectively captures attention and delivers your message clearly. Start by outlining key points with AI tools like SlidesAI, which helps streamline content logically.
If you’re presenting on a topic such as climate change, breaking down complex information into digestible segments ensures better understanding. Begin with an engaging introduction to set the stage, followed by concise data-backed sections that support your thesis.
Include interactive elements, like quizzes or Q&A sessions, to maintain engagement throughout. Use AI-powered visuals to reinforce main ideas and keep slides visually appealing without cluttering them.
Transition smoothly between topics using well-designed slides that guide your audience seamlessly from one point to the next. The conclusion should recap critical insights while leaving room for thought-provoking questions or discussions.
Strategic structuring maximizes impact whether addressing peers in class or faculty at a seminar, combining clarity and engagement with intelligent design principles.
Insightful Practical Tips for Structuring Presentations
– Use Visual Cues
Incorporate diagrams, icons, and images to highlight key points. They help clarify complex ideas and keep your audience’s attention.
– Incorporate Storytelling
Weave narratives into your presentation to make data relatable. Real-world examples engage listeners emotionally and intellectually.
– Optimize Slide Content
Keep slides clean with minimal text. Use bullet points for clarity, ensuring visuals support rather than overshadow information.
– Practice Timing and Flow
Rehearse transitions between sections to maintain a natural rhythm. Proper pacing allows you to deliver content without rushing or dragging.
– Gather Audience Feedback
Use polls or feedback tools during or after presentations for insights on effectiveness. Adjust future presentations based on responses for continuous improvement.
Preparing for Tomorrow’s Academic Challenges with AI
AI technologies transform how students tackle academic challenges, offering innovative solutions for dynamic learning environments. By integrating tools like Dall-E and Canva into presentations, you not only elevate your current projects but also build essential skills for future academic endeavors.
Anticipating upcoming trends in AI means staying adaptable and ready to embrace new educational opportunities. With these insights, students are better equipped to face tomorrow’s evolving demands, harnessing technology as a powerful ally in their learning journey.
IMAGES
COMMENTS
I've made the switch! Presentations on Canva are SUPER EASY and convenient to put together. In this Canva tutorial video, I'll show you how to put a great lo...
Unlock your potential to create stunning visuals in this comprehensive guide to Canva Presentations. This tutorial will walk you through all the key features...
In this video Hadas will teach us how to create quick presentations in Canva. She will show us how to customize templates from the Canva library to quickly p...
Drumroll : Add a drumroll before a slide by pressing the key 'D' before a big reveal. Confetti : Add a shower of confetti to celebrate something with the key 'C'. Countdown : Add a countdown from '1-9' by pressing one of the keys. Quiet : Bring a 🤫 emoji to screen to hush your audience with the 'Q' key.
Once you create a page, tweak its animation to make a smooth transition between pages. Step 1: Select a slide in Canva. Step 2: Click Animate at the top. Step 3: Check basic, exaggerated, photo ...
To add an animation to any of your slides, select the page that you want to animate, and select one of the animation options available. You can either add a new animation to new slide, or choose 'apply to all pages' to add the same animation to all slides. Once you're done customizing the presentation you created in Canva, rename your design up ...
And it is quite easy. 1. Open the presentation on your web or mobile Canva app. Here we are using the web app. Click on the Present button to begin the presentation. 2. Select an option depending on how you want to present. We discussed the three options above. Now click on Present button. 3.
Presentation Tutorial: How To Make a Presentation in Canva (FREE & EASY) // In this video, I'm going to show you a simple presentation tutorial on how use (F...
Select Timer in the bottom toolbar to display the timer. By default, the timer is set for five minutes, but you can change this using the plus and minus buttons. Press the Play button to start the countdown, the Pause button to temporarily stop the timer, and the Reset button to restart the timer.
To create Canva presentation, select 'Presentation (16:9). Step 2 - Pick a Template to Set the Backgrounds for Your Slides. The first step to create Canva presentation design is to pick a template. Canva offers you about 250k templates on a free plan and 610k with Canva Pro.
Step 2: Choose a Presentation Template. Canva's range of templates allows you to create professional presentations of any kind, whether it's business, academic, or creative. To choose: Click on "Create a design" on the Canva dashboard, or the "+" sign down the middle if you're on mobile. In the search bar, type "Presentation ...
Third, Canva presentations can be easily customized to match your brand's colors and fonts. Finally, Canva presentations can be shared and accessed online, making them easy to distribute to your audience. Canva Presentation Features. Canva presentations offer a variety of features to help you create a visually appealing and engaging presentation.
Learn how to make a presentation using Canva so you can have beautiful, eye-catching slides - even if you have zero design skills, whatsoever. Get Canva Pro ...
Finding the "Videos" section. Click on "More" first, then click "Videos.". Add video. When you find the perfect video for your presentation, click on or drag and drop it onto one of your slides. Add text to video slide. To add text to your video slide, click "Text" and click one of the options.
Canva is an online design tool that I use to create content. This includes presentations, social media graphics, and more. Canva offers different plans, including Canva Free, Canva Pro, Canva Teams, and Canva Enterprise. There are more options tailored for K-12 and higher education. Key Features of Canva's Presentation Templates
Image created with Microsoft Designer Imagine impressing your classmates and professors with a cutting-edge college project presentation. Integrating AI technologies can make this vision a reality. With tools like Dall-E for eye-catching visuals, Suno for custom soundtracks, and SlidesAI to polish your slides, the future of presentations looks brighter than ever. Stay ahead in academia
Join Ronny to learn how to create awesome presentations with Canva. We'll explore actionable tips for creating impactful presentations and show you how to ...
Although you could visit make.powerapps.com to start a new blank canvas app and connect to SharePoint to build the app for you, you've now integrated this data into a SharePoint list. Open your track list. Select Integrate > Power Apps > Create an app (figure 5). Enter a name for your app, and then select Create. Creating an app.
Create better-looking PowerPoint presentations using these Canva hacks. 🎨NEED CANVA PRO? Use my link to receive a FREE 45-Day Trial of Canva Pro - https://l...