How to Create an Engaging 5-Minute Presentation
Published: September 15, 2023
A 5-minute speech can feel both incredibly short and infinitely long.

While this short format encourages audiences to pay more attention, presenters often struggle to fit everything into five minutes even as they navigate nervousness that seems to stretch out each second.
As a result, preparation is key for 5-minute speech success.
But how can you ensure your presentation accomplishes everything it needs to within just five short minutes? We’ve put together an (appropriately condensed) guide on five-minute presentations to help you get started.
![→ Free Download: 10 PowerPoint Presentation Templates [Access Now]](https://no-cache.hubspot.com/cta/default/53/2d0b5298-2daa-4812-b2d4-fa65cd354a8e.png "quick presentation format")

How many words are in a 5-minute presentation?
A five-minute presentation is approximately 700 words long. The average person speaks 120 to 160 words a minute, which means the average five-minute presentation is 600 to 800 words.
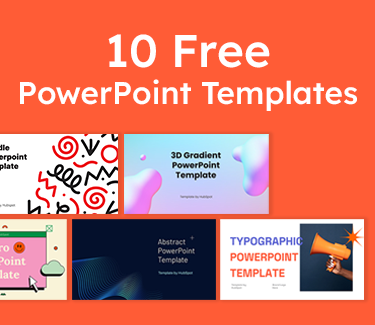
10 Free PowerPoint Templates
Download ten free PowerPoint templates for a better presentation.
- Creative templates.
- Data-driven templates.
- Professional templates.
You're all set!
Click this link to access this resource at any time.
To calculate your own personal speaking speed (words per minute, or WPM):
- Make an audio recording of yourself speaking for one minute.
- Use a free transcription service to generate a text version of your speech.
- The number of words you spoke in that minute is your personal WPM.
When constructing a longer presentation, you might be more concerned about transitions and keeping the audience engaged with more extensive narrative elements.
In a short presentation, everything you say should directly tie back to your central premise and further advance your main point.
Keeping a tight scope and using your words carefully ensures your time isn't wasted and the audience leaves with a clear, singular takeaway.
How many slides are in a 5-minute presentation?
Five or six slides, or about one per minute, is a good baseline for a 5-minute presentation. Depending on your subject matter, however, you might use up to 20 slides and spend about 10 or 15 seconds on each.
More important than your slide count is what each slide contains. It‘s a good rule of thumb to keep your slides simple and focused on visuals instead of text for a presentation of any length.
This becomes especially important when you’re dealing with a condensed presentation window.
Trying to cram in as much information as possible within a short time frame can be tempting. Resist the urge. Instead, focus on simple, clean visuals that all tie back to your central premise.
You can also use these free presentation templates to arrange your slides in a way that makes the most sense for your delivery and the content of your presentation.

Don't forget to share this post!
Related articles.
![17 PowerPoint Presentation Tips From Pro Presenters [+ Templates]](https://blog.hubspot.com/hubfs/powerpoint-design-tricks_7.webp "quick presentation format")
17 PowerPoint Presentation Tips From Pro Presenters [+ Templates]
![How to Write an Ecommerce Business Plan [Examples & Template]](https://blog.hubspot.com/hubfs/ecommerce%20business%20plan.png "quick presentation format")
How to Write an Ecommerce Business Plan [Examples & Template]
![How to Create an Infographic in Under an Hour — the 2024 Guide [+ Free Templates]](https://blog.hubspot.com/hubfs/Make-infographic-hero%20%28598%20%C3%97%20398%20px%29.jpg "quick presentation format")
How to Create an Infographic in Under an Hour — the 2024 Guide [+ Free Templates]
![20 Great Examples of PowerPoint Presentation Design [+ Templates]](https://blog.hubspot.com/hubfs/powerpoint-presentation-examples.webp "quick presentation format")
20 Great Examples of PowerPoint Presentation Design [+ Templates]

Get Buyers to Do What You Want: The Power of Temptation Bundling in Sales
![How to Start a Presentation [+ Examples]](https://blog.hubspot.com/hubfs/how-to-start-presenting.webp "quick presentation format")
How to Start a Presentation [+ Examples]

120 Presentation Topic Ideas Help You Hook Your Audience
![How to Create the Best PowerPoint Presentations [Examples & Templates]](https://blog.hubspot.com/hubfs/Powerpoint%20presentation.jpg "quick presentation format")
How to Create the Best PowerPoint Presentations [Examples & Templates]

The Presenter's Guide to Nailing Your Next PowerPoint
![How to Create a Stunning Presentation Cover Page [+ Examples]](https://blog.hubspot.com/hubfs/presentation-cover-page_3.webp "quick presentation format")
How to Create a Stunning Presentation Cover Page [+ Examples]
Marketing software that helps you drive revenue, save time and resources, and measure and optimize your investments — all on one easy-to-use platform
Short Presentation in PowerPoint: How to Win Your Audience over with a 5 Minute / 5 Slide Presentation! -Includes Examples
There are occasions when you only have limited time to give a PowerPoint presentation. This is where knowing how to create and deliver a short PowerPoint presentation is essential. Done right, you really only need a few minutes to deliver your presentation, get your ideas across and achieve your goals.
You may well be thinking, “No! How can I squash my ideas into that time? Only five minutes?” Actually, it’s easier than you think with the right structure . Here’s how!
Why give a short presentation?
So when might you only have a few minutes to give a presentation? When making the first steps in applying for a job, for example, or when presenting a product or business idea to potential prospects and investors.
The length does NOT have to be a disadvantage! A well-put-together short presentation, delivered smartly, can actually engage your audience more than a presentation lasting much longer.
Sure, you can go into more detail in a longer presentation, but it’s often more difficult for your audience to stay focused for the full duration. Scientific studies show that most listeners have trouble maintaining their concentration after just 20 minutes.
Haven’t you been there yourself? So why ask your audience to do something you find difficult, unless they’re already on board with your ideas?
Short presentations are actually a great way to present facts, ideas or concepts clearly in only a few minutes. However, take care not to overload them with too much information. It’s important to distill the content of your presentation down to the essentials and key messages.
The purpose of a short presentation is usually to draw your audience’s attention to either you or your product. You don’t get much time to do this, so you need to know how to focus on what’s important. The following tips may help.
Short PowerPoint presentation: set-up and structure
A short presentation should have a clear structure so that the audience can easily grasp and digest the information. So:
Introduction :
A brief explanation of what the presentation will be about.
Main body :
This is the actual content of the presentation. This is where to present the most important information.
Conclusion :
A brief summary of what you covered in the presentation.
Also, keep in mind the order of your slides. The first and last slides are the most important as studies have shown these are what people remember . So make sure that these two slides are particularly engaging and give the audience a good overview of your topic.
The order of the other slides is important too, but not as crucial as the first and last slides. Just play around with the order a bit and find what works best for you.
Make the presentation count
How you design your slides is important here. Create slides that are as clear and professional-looking as possible. Be careful not to put too much text on a slide, and make sure you use a font size that is large enough to be clearly seen by everyone.
If you try to put so much text on a slide that you need to make the font too small, you’ll lose your audience’s attention. For tips on choosing the right font, see our “ Fonts in PowerPoint ” post.
Try using pictures and graphics to make your slides more vivd . A picture, as they say, is worth a thousand words. Use images to illustrate and support your statements.
As well as adding visual interest to your slides, they arouse emotions in the audience, whether they know it or not, which makes you and your presentation topic seem more approachable. Be careful not to place too many images on one slide, though, as this can make it look messy.
Surefire ways to make your short presentation compelling:

- Present no more than three main points . More than this and you’ll lose your audience.
- Have a clear structure , so your audience always knows where you are and what’s coming next. Getting the structure of the presentation clear in advance really helps. Our article „Preparing a PowerPoint Presentation: 11 Tips” shows you how to make the best use of your presentation preparation time.
- Make it easy for the audience to follow you. Use clear and simple language and avoid jargon. Smart use of images and graphics will make your content more vivid.
- Stay positive and confident . Your audience should be reassured that you really know your stuff; how else are they going to take your ideas seriously? Try to avoid coming across as arrogant, though – that automatically puts people off.
- Maintain eye contact with the audience. This demonstrates interest and appreciation – both important factors in convincing people and thus gaining potential customers.
- Be ready for questions . At the end of your presentation, allow a few minutes for questions and discussion. This gives your audience the opportunity to go into further detail or address other aspects as well. We’ve set out a few tips for including Q&A sessions in our article „ Prepare for your Q&A in Presentations” .
Short PowerPoint Presentation Example #1: The Five-Minute / Five-Slide Presentation
A classic example here is the five-minute presentation . This is similar to a Pitch-Presentation , but structured slightly differently. Read on to see how.
What does a 5-minute / 5-slide presentation entail?
Imagine you have to present yourself, your company or your product in just a few minutes. You only ever need five slides for this . One way of structuring this, and creating a coherent storyline, would be:
- Overall idea (1st slide) A brief introduction. One slide showing your name might well suffice; you can then briefly describe your field of work or what you do within the company.
- Introduction (2nd slide) Start with a funny story, an anecdote or a quote to attract your audience’s attention. Then briefly address what you will be talking about. This slide can serve as a short introduction to the topic (company, product or service range).
- Main message (3rd slide) Try to illustrate the main point of your presentation with one or two simple graphics or diagrams. Photos related to your content or theme are also very useful here. PowerPoint is brilliant for this. Aim for as little text as possible, with the visuals doing the work for you.
- Main concepts (4th slide) Underline your main message with three to five essential arguments and present them on a single slide (animated one after the other, if needs be). Remember that people’s attention span drops off sharply after absorbing five ideas.
- Conclusion (5th slide) Keep your conclusion short and end your presentation with a summary of the content and key messages of your presentation. These are, of course, what you want your audience to remember.
TIP: When preparing your presentation, remember the main question in your audience’s mind: “ What’s in it for me? ” We’ve covered this in our post about customer benefits . The overriding principle is KISS (Keep It Simple, Stupid). Design and present everything as simply as possible!
Questions and discussion after the presentation:
If you have time, give your audience the opportunity to ask questions after the presentation, or actively try to spark a discussion and then moderate it. Allow about 5-10 minutes for this. If necessary, you can create back-up slides beforehand, to deepen certain sub-areas in case of specific questions.
Tips for your Q&A session can be found in our Q&A post .
Less is more
It’s sadly not uncommon to see slides stuffed with far too much information, whether text or images. The presenter certainly meant well, but failed to realise that their audience wouldn’t be able to process and absorb all that information at once. So try to stick to the following when putting your presentation together:
- Maximum one image per slide
- Only one topic per slide
- Minimal text
- Font size at least 18 point
- Maximum two fonts; sans serif fonts are more legible
- Display figures as graphs and diagrams
- No more than four colors per slide
In a five-minute presentation, you need to get to the point as quickly as possible . So skip the lengthy introductions and aim to grab your audience’s attention right at the start. Try to summarize your presentation as pithily as possible, too, to leave them wanting more.
While presenting, don’t forget to establish eye contact with the audience . Just standing there reading the text of a presentation from the slides is a common mistake, and one which quickly loses an audience’s attention.
Try to speak as fluently and freely as possible , so that you don’t look as though you’re just reading off your content (which can come across as a lack of competence or preparation). Invest enough time in preparing your presentation and practice it in front of an audience of acquaintances or, if needs be, in front of a mirror, until you’ve internalized the content and flow of your presentation.
Coming across as confident is just as important for the success of your presentation as its actual content. Don’t underestimate the influence that body language, speaking speed, gestures and facial expressions have on how the audience perceives your presentation. We go into this in detail in our “body language” post.
Keep your presentation lively by using figures of speech or catchy metaphors at appropriate points. We’ve gone into how (and why) to integrate rhetoric into your presentation in our „Public speeking skills” post.
Short Presentation PowerPoint Example #2: The Three-Minute Presentation

Imagine you only have three minutes. Three minutes in which to tell your audience everything they need to know about your idea, your product and your company. Well, it’s possible with a three-minute presentation! This is exactly what it sounds like: a coherent narrative, or story, in three minutes.
How to get your presentation to the point
The essence of this concept is to answer these three questions “ What’s it about?”, “How does it work?” and “What’s in it for me? ” in a few short paragraphs, a handful of slides and finally a short, pithy statement. A strong and compelling three-minute presentation will consist of roughly 25 sentences.
Write these down in advance so you have a clear outline in your head , making the presentation lively. Short and snappy is what you’re aiming for. You can get to the meat of your presentation in three minutes; try it! Even if you have longer to present, it’s a tremendously useful exercise.
“If I’d had more time, I would have written a shorter letter.” Blaise Pascal, mathematician and philosopher
The above quote is really on point. It takes time and effort to organize your thoughts into short, coherent sentences, but it’s so worth it. There’s a lot of excess verbiage about, the result of people just writing down whatever comes to mind, however disorganized it is. This has the effect of boring or confusing people, or both. It really pays to condense your thoughts smartly.
So you need to work out which are your most important points, weigh them against each other, and discard any excess. This is the only way to communicate clearly and concisely.
It’s really useful to have the essentials of what you want to communicate distilled into their bare bones when time is short. If you know exactly what you need to say, you can fit it into whatever time slot you’re given, even if the half hour you’d expected ends up being only five minutes.
This is also invaluable if your boss unexpectedly asks you what you’re working on, or if you’re talking to a client and they want a brief overview of your presentation.
Getting your presentation distilled down to three minutes is very advantageous , even if you plan on presenting for longer. Concentrating on the essentials not only shows creativity, but also organizational and communication skills. You’ll have a strong core to your message and won’t need to depend on your presentation slides and charts.
Storytelling or Elevator Pitch?
An elevator pitch gets to the heart of your ideas in just a few minutes, and is great for getting someone new to what you’re presenting to want to learn more.
The focus in an elevator pitch is on the positive aspects of your ideas , for example their uniqueness and utility. Of course, the pitch must be delivered persuasively enough for the conversation to continue in a follow-up meeting afterwards!
Storytelling focuses on the story , which pulls the power of emotions into your content, selling them better. So storytelling can also work for a three-minute presentation. Do keep it short and resist going off on tangents, though. We’ve covered all this in our “Storytelling” post.
When you don’t have enough time to present (all) your slides
Even if the time you’re allowed for a presentation is really short (say your customer or client arrives late, then has to leave for another appointment soon), you can still make a strong impression with a three-minute story. It means you always have a plan B up your sleeve.
If you know exactly what you want to communicate, it will be easy to spontaneously adapt it to whatever time limits you are given. This way, many of your slides, diagrams and graphics are an added extra, rather than being something you are lost without.
Short PowerPoint presentations: More examples
Short presentations are an effective way to engage your audience with your idea, offer or brand. They can also be used to draw attention to a specific aspect or trigger an action. Short presentations are often used as presentation teasers to capture the audience’s interest and make them want to learn more. Examples include:
- Presenting a new brand or product
- Presenting a current topic or trend
- Presenting your company’s successes or growth
- Presenting your company’s vision or mission statement
- An informational or educational presentation
- A scientific topic within your own discipline
- A research paper, a concept, an innovative project
- A hot social or political topic
- A presentation on climate change, migration, globalization, inflation, conflicts
- A topic from your private life such as a vacation, a special experience or a passion
- A historical event
- The history and development of a company you admire
- An artist whose work you find interesting
- Your favorite book/movie/musical/etc.
As you can see, the short presentation is ideal for a huge range of topics and occasions. Two examples are introducing a new product or a new service to potential customers. How to get those into the short presentation format?
Presenting a new product
When introducing a new product, first highlight its key features and benefits. Then explain the different applications of the product and provide examples of them. Finally, you can ask the audience to test the product and give feedback.
Introducing a new service
present this successfully, start by highlighting the added value and customer benefits. Then explain the different areas of application in more detail and show with concrete examples of where your service can be used meaningfully, and the advantages and results it has led to with your existing clientele.
To sum up: Short PowerPoint presentations – how to effectively use limited time to deliver your presentations in a target-oriented way

Short presentations are a great way to present and communicate topics to an audience. Why? Because they help the audience grasp the key message of the presentation in the shortest amount of time.
This is especially important when the audience is in the middle of a conference or workshop and has a limited attention span. Presentations are an important means of conveying information to an audience. So follow our tips to make your short presentation the best it can be and achieve your goals.
Got further questions about short PowerPoint presentations, or indeed general questions about PowerPoint? Please don’t hesitate to contact us! Feel free to email us your question at [email protected] . We’re always happy to help!
Looking for professionally designed slide templates to strengthen your short presentation? Have a look around our store! We have a huge range of slides on business topics. Get the best basis for your short presentation today! ► To the Store
You might also be interested in these articles:
- Pitch Presentations
- Speech techniques for Presentations
- Storytelling in Presentations
- Elevator Pitch
- Preparing Presentations: 11 Tips
- Body language in Presentations
- Customer Benefits for Your Presentations
- Q&A that’s how you manage it
Share this post
- share
- save

Design Thinking: Problem Solving with a Difference

Why Corporate Mission Statements Are So Important

7 Tips & Learnings from the Apple Keynote
Blog > How to structure a good PowerPoint Presentation
How to structure a good PowerPoint Presentation
08.09.21 • #powerpoint #tips.
When creating presentations, it is particularly important that they are well organized and have a consistent structure.
A logical structure helps the audience to follow you and to remember the core information as best as possible. It is also important for the presenter, as a good presentation structure helps to keep calm, to stay on the topic and to avoid awkward pauses.
But what does such a structure actually look like? Here we show you how to best organize your presentation and what a good structure looks like.
Plan your presentation
Before you start creating your presentation, you should always brainstorm. Think about the topic and write all your ideas down. Then think about the message you want to communicate, what your goal is and what you want your audience to remember at the end.
Think about who your audience is so that you can address them in the best possible way. One possibility is to start your presentation with a few polls to get to know your audience better. Based on the results, you can then adapt your presentation a little. Use the poll function of SlideLizard and have all the answers at a glance. SlideLizard makes it possible to integrate the polls directly into your PowerPoint presentation which helps you to avoid annoying switching between presentation and interaction tool. You can keep an eye on the results while the votes come in and then decide whether you want to share them or not.

- an informative
- an entertaining
- an inspiring
- or a persuasive presentation?
Typical Presentation Structure
The basic structure of a presentation is actually always the same and should consist of:
Introduction

Make sure that the structure of your presentation is not too complicated. The simpler it is, the better the audience can follow.
Personal Introduction
It is best to start your presentation by briefly introducing yourself which helps to build a connection with your audience right away.
Introduce the topic
Then introduce the topic, state the purpose of the presentation and provide a brief outline of the main points you will be addressing.
Mention the length
In the introduction, mention the approximate length of the talk and then also make sure you stick to it.
The introduction should be no longer than two slides and provide a good overview of the topic.
Icebreaker Polls
According to studies, people in the audience only have an average attention span of 10 minutes, which is why it is important to increase their attention right at the beginning and to arouse the audience's interest. You could make a good start with a few icebreaker polls for example. They lighten the mood right at the beginning and you can secure your audience's attention from the start.
For example, you could use SlideLizard to have all the answers at a glance and share them with your audience. In addition, the audience can try out how the polls work and already know how it works if you include more polls in the main part.

Get to know your audience
As mentioned earlier, it is always useful to think about who your audience actually is. Ask them questions at the beginning about how well they already know the topic of your presentation. Use SlideLizard for this so that you have a clear overview about the answers. You can use both single- and multiple-choice questions or also open questions and display their results as a WordCloud in your presentation, for example.
Include a quote
To make the beginning (or the end) of your presentation more exciting, it is always a good idea to include a quote. We have selected some powerful quotes for PowerPoint presentations for you.
Present your topic
The main part of a presentation should explain the topic well, state facts, justify them and give examples. Keep all the promises you made earlier in the introduction.
Length and Structure
The main part should make up about 70% of the presentation and also include a clear structure. Explain your ideas in detail and build them up logically. It should be organized chronologically, by priority or by topic. There should be a smooth transition between the individual issues. However, it is also important to use phrases that make it clear that a new topic is starting. We have listed some useful phrases for presentations here.
Visualize data and statistics and show pictures to underline facts. If you are still looking for good images, we have selected 5 sources of free images for you here.
Focus on the essentials
Focus on what is most important and summarize a bit. You don't have to say everything about a topic because your audience won’t remember everything either. Avoid complicated sentence structure, because if the audience does not understand something, they will not be able to read it again.
Make your presentation interactive
Make your presentation interactive to keep the attention of your audience. Use SlideLizard to include polls in your presentation, where your audience can vote directly from their smartphone and discuss the answers as soon as you received all votes. Here you can also find more tips for increasing audience engagement.

Repeat the main points
The conclusion should contain a summary of the most important key points. Repeat the main points you have made, summarize what the audience should have learned and explain how the new information can help in the future.
Include a Q&A part
Include a Q&A part at the end to make sure you don't leave any questions open. It's a good idea to use tools like SlideLizard for it. Your audience can ask anonymous questions and if there is not enough time, you can give them the answers afterwards. You can read more about the right way to do a question slide in PowerPoint here.
Get Feedback
It is also important to get feedback on your presentation at the end to keep improving. With SlideLizard you can ask your audience for anonymous feedback through star ratings, number ratings or open texts directly after your presentation. You can then export the responses and analyse them later in Excel.

Presentation style
Depending on the type of presentation you give, the structure will always be slightly different. We have selected a few different presentation styles and their structure for you.
Short Presentation

If you are one of many presenters on the day, you will only have a very limited time to present your idea and to convince your audience. It is very important to stand out with your presentation.
So you need to summarize your ideas as briefly as possible and probably should not need more than 3-5 slides.
Problem Solving Presentation

Start your presentation by explaining a problem and giving a short overview of it.
Then go into the problem a little more, providing both intellectual and emotional arguments for the seriousness of the problem. You should spend about the first 25% of your presentation on the problem.
After that, you should spend about 50% of your presentation proposing a solution and explaining it in detail.
In the last 25%, describe what benefits this solution will bring to your audience and ask them to take a simple but relevant action that relates to the problem being discussed.
Tell a Story

A great way to build an emotional connection with the audience is to structure a presentation like a story.
In the introduction, introduce a character who has to deal with a conflict. In the main part, tell how he tries to solve his problem but fails again and again. In the end, he manages to find a solution and wins.
Stories have the power to win customers, align colleagues and motivate employees. They’re the most compelling platform we have for managing imaginations. - Nancy Duarte / HBR Guide to Persuasive Presentations
Make a demonstration

Use the demonstration structure to show how a product works. First talk about a need or a problem that has to be solved.
Then explain how the product will help solve the problem and try to convince your audience of the need for your product.
Spend the end clarifying where and when the product can be purchased.
Chronological structure

When you have something historical to tell, it is always good to use a chronological structure. You always have to ask yourself what happens next.
To make it more interesting and exciting, it is a good idea to start by telling the end of something and after that you explain how you got there. This way you make the audience curious and you can gain their attention faster.
Nancy Duarte TED Talk
Nancy Duarte is a speaker and presentation design expert. She gives speeches all over the world, trying to improve the power of public presentations.
In her famous TED Talk "The Secret Structure of Great Talks" she dissects famous speeches such as Steve Jobs' iPhone launch speech and Martin Luther King's "I have a dream" speech. In doing so, she found out that each presentation is made up of 4 parts:
- What could be
- A moment to remember
- Promise of “New Bliss”
Related articles
About the author.

Helena Reitinger
Helena supports the SlideLizard team in marketing and design. She loves to express her creativity in texts and graphics.

Get 1 Month for free!
Do you want to make your presentations more interactive.
With SlideLizard you can engage your audience with live polls, questions and feedback . Directly within your PowerPoint Presentation. Learn more
Top blog articles More posts

6 Tips to turn your boring slides into stunning presentations

The History and Evolution of PowerPoint

Get started with Live Polls, Q&A and slides
for your PowerPoint Presentations
The big SlideLizard presentation glossary
Process questions.
Process questions are similar to recall questions but they need some deeper thoughts and maybe also analysis.
An e-lecture is a lecture that is held online. Many schools and universities offer e-lectures as technical opportunities improve.
Internal Communication
Internal communication is particularly important for corporate communication. It communicates important information from leadership to staff so that they can do their jobs in the best possible way and work processes run well.
Glossophobia
Glossophobia means the strong fear of public speaking.
Be the first to know!
The latest SlideLizard news, articles, and resources, sent straight to your inbox.
- or follow us on -
We use cookies to personalize content and analyze traffic to our website. You can choose to accept only cookies that are necessary for the website to function or to also allow tracking cookies. For more information, please see our privacy policy .
Cookie Settings
Necessary cookies are required for the proper functioning of the website. These cookies ensure basic functionalities and security features of the website.
Analytical cookies are used to understand how visitors interact with the website. These cookies help provide information about the number of visitors, etc.

Microsoft 365 Life Hacks > Presentations > How to Format Presentation Slides
How to Format Presentation Slides
Learn how to give your presentation slides a facelift so they captivate your audience.

Why is Presentation Design and Formatting Important?
A well-designed presentation can help you connect with your audience and gets your message across in an easily digestible manner. Great presentation design can impart a positive first impression and is more likely to draw in and engage an audience.
Pretend you’re attending a presentation and instead of formatted PowerPoint slides, each one is plain white with a lot of dark text that’s hard to read. And even though the background and text colors are the same, none of the text is lined up and multiple fonts are used. There are no transitions or title pages that help to differentiate between topics being discussed and you’re presented with slide after slide of confusing, jumbled text.

Tell your story with captivating presentations
Powerpoint empowers you to develop well-designed content across all your devices
Formatting slides in your presentation is what enhances the look of the slides and transforms them into something that complements the content and resonates with the audience.
What Else Should a Good Presentation Include?
While formatted slides can help to connect with the audience, a good presentation should also include:
- Well-written, concise content that clearly explains the problem that you’re trying to solve and the unique solution you’ve come up with.
- A great hook or emotionally compelling introduction.
- Visuals that support your message and aren’t too busy.
Most importantly, a good presentation should be efficient and engage with the audience. And that engagement can be found in the content as well as how the slides are formatted.
Tips for Creating & Formatting Presentation Slides
Before you start creating your PowerPoint presentation, make sure that your content is solid. Making an outline can help you keep information organized, clear, and concise before you put it into a presentation. The outline can also help you break down what information is shared on each slide to keep things from being overcrowded or wordy. Take a minute to consider your audience and the best ways to connect with them and present what you’re trying to share.
Once your content is finalized, you can get to work on creating and formatting your presentation slides.
How to Make a Slide
A PowerPoint presentation is sometimes known as a deck and is composed of different slides. When you’re putting your own deck together, you’ll certainly need to add slides and format them in different ways.
In order to make a new slide appear in your presentation, first select the slide that you’d like your new slide to follow. Then click Home and choose New Slide . From there, you can choose your desired layout , and start inputting content. The layout options in PowerPoint are great for keeping your text lined up and consistent through the deck. You can also rearrange, duplicate, and delete slides as necessary.
Formatting Your Presentation Slides
Once you’ve created your content or slides, it’s time to consider design and formatting. This is where you make choices about themes, templates, color schemes, and fonts.
If you don’t feel confident about your design abilities, you might want to try applying a template . This customizable option offers a variety of artistic skins that can give your deck a professional polish. There is even a range of downloadable templates available from Microsoft to suit any kind of presentation.
Don’t feel like you must use a template, though. Many users may prefer to use or create a theme to visually tie together their presentations. PowerPoint provides a variety of themes which include color schemes, backgrounds, fonts, and placeholder slides. In the Design tab, you can choose a theme that appeals to you or matches with your content. You can even try different color variations within the theme by selecting Variants . Each variant has built in options for colors, fonts, and background colors and styles that can help you format your slides and create a cohesive look throughout the deck.
There are a few things to keep in mind if you decide to eschew the suggestions made by PowerPoint:
- Consider the colors you’re using. There are definitely a few color combinations you should avoid .
- Choose fonts that are easy to read and make sure that your text isn’t too small to be read across a large room. You’ll also want to remember to keep the text on your slides relatively sparse, with no more than three bullet points per slide.
Using Visual Aids in Your Presentation
One way to break up the monotony of an all-text presentation is to use visual aids like charts, graphs, static images, gifs, and movies.
As with all other aspects of your deck, ensure that your visuals are easy to see and understand, and aren’t too wordy. Imagine trying to read a line graph with lots of muddy colors and small text from across a conference room. The goal of a visual aid is to make the presentation you’re giving more compelling and the information you’re sharing easier to understand.
Here are a few tips for adding visuals to your presentation:
- Make sure the images you use are of high quality and that they fit in your deck. They shouldn’t be distorted or pixelated, as this will distract from the content.
- All charts should be very easy to read and understand. If someone can’t immediately glean what information is presented, you may be trying to fit too much into a single chart.
- Don’t use more than one chart per slide unless it’s necessary. Keep it simple.
- If you’re including a brand or logo in your deck, make sure you’re adhering to that brand’s style guide .
A great way to get design ideas for slides in your presentation us to use the Designer feature in PowerPoint. It automatically generates design ideas for you to choose from based on the content of your slide. Designer detects when you’re using pictures, charts, and tables and gives you suggestions for arranging them on your slides in a cohesive layout that’s easy on the eyes. Designer can also help to format your lists and timelines into easy-to-read graphics and suggests relevant graphics to pair with keywords that it finds within your content.
Create a PowerPoint deck that stands out and resonates with your audience by formatting it in a professional manner. And don’t forget to prep for your presentation !
Get started with Microsoft 365
It’s the Office you know, plus the tools to help you work better together, so you can get more done—anytime, anywhere.
Topics in this article
More articles like this one.

How to create an educational presentation
Use PowerPoint to create dynamic and engaging presentations that foster effective learning.

Five tips for choosing the right PowerPoint template
Choose an appropriate PowerPoint template to elevate your presentation’s storytelling. Consider time length, audience and other presentation elements when selecting a template.

How you can use AI to help you make the perfect presentation handouts
Learn how AI can help you organize and create handouts for your next presentation.

How to use AI to help improve your presentations
Your PowerPoint presentations are about to get a boost when you use AI to improve a PowerPoint presentation.
Everything you need to achieve more in less time
Get powerful productivity and security apps with Microsoft 365

Explore Other Categories
We use essential cookies to make Venngage work. By clicking “Accept All Cookies”, you agree to the storing of cookies on your device to enhance site navigation, analyze site usage, and assist in our marketing efforts.
Manage Cookies
Cookies and similar technologies collect certain information about how you’re using our website. Some of them are essential, and without them you wouldn’t be able to use Venngage. But others are optional, and you get to choose whether we use them or not.
Strictly Necessary Cookies
These cookies are always on, as they’re essential for making Venngage work, and making it safe. Without these cookies, services you’ve asked for can’t be provided.
Show cookie providers
- Google Login
Functionality Cookies
These cookies help us provide enhanced functionality and personalisation, and remember your settings. They may be set by us or by third party providers.
Performance Cookies
These cookies help us analyze how many people are using Venngage, where they come from and how they're using it. If you opt out of these cookies, we can’t get feedback to make Venngage better for you and all our users.
- Google Analytics
Targeting Cookies
These cookies are set by our advertising partners to track your activity and show you relevant Venngage ads on other sites as you browse the internet.
- Google Tag Manager
- Infographics
- Daily Infographics
- Template Lists
- Graphic Design
- Graphs and Charts
- Data Visualization
- Human Resources
- Beginner Guides
Blog Beginner Guides
How To Make a Good Presentation [A Complete Guide]
By Krystle Wong , Jul 20, 2023

A top-notch presentation possesses the power to drive action. From winning stakeholders over and conveying a powerful message to securing funding — your secret weapon lies within the realm of creating an effective presentation .
Being an excellent presenter isn’t confined to the boardroom. Whether you’re delivering a presentation at work, pursuing an academic career, involved in a non-profit organization or even a student, nailing the presentation game is a game-changer.
In this article, I’ll cover the top qualities of compelling presentations and walk you through a step-by-step guide on how to give a good presentation. Here’s a little tip to kick things off: for a headstart, check out Venngage’s collection of free presentation templates . They are fully customizable, and the best part is you don’t need professional design skills to make them shine!
These valuable presentation tips cater to individuals from diverse professional backgrounds, encompassing business professionals, sales and marketing teams, educators, trainers, students, researchers, non-profit organizations, public speakers and presenters.
No matter your field or role, these tips for presenting will equip you with the skills to deliver effective presentations that leave a lasting impression on any audience.
Click to jump ahead:
What are the 10 qualities of a good presentation?
Step-by-step guide on how to prepare an effective presentation, 9 effective techniques to deliver a memorable presentation, faqs on making a good presentation, how to create a presentation with venngage in 5 steps.
When it comes to giving an engaging presentation that leaves a lasting impression, it’s not just about the content — it’s also about how you deliver it. Wondering what makes a good presentation? Well, the best presentations I’ve seen consistently exhibit these 10 qualities:
1. Clear structure
No one likes to get lost in a maze of information. Organize your thoughts into a logical flow, complete with an introduction, main points and a solid conclusion. A structured presentation helps your audience follow along effortlessly, leaving them with a sense of satisfaction at the end.
Regardless of your presentation style , a quality presentation starts with a clear roadmap. Browse through Venngage’s template library and select a presentation template that aligns with your content and presentation goals. Here’s a good presentation example template with a logical layout that includes sections for the introduction, main points, supporting information and a conclusion:

2. Engaging opening
Hook your audience right from the start with an attention-grabbing statement, a fascinating question or maybe even a captivating anecdote. Set the stage for a killer presentation!
The opening moments of your presentation hold immense power – check out these 15 ways to start a presentation to set the stage and captivate your audience.
3. Relevant content
Make sure your content aligns with their interests and needs. Your audience is there for a reason, and that’s to get valuable insights. Avoid fluff and get straight to the point, your audience will be genuinely excited.
4. Effective visual aids
Picture this: a slide with walls of text and tiny charts, yawn! Visual aids should be just that—aiding your presentation. Opt for clear and visually appealing slides, engaging images and informative charts that add value and help reinforce your message.
With Venngage, visualizing data takes no effort at all. You can import data from CSV or Google Sheets seamlessly and create stunning charts, graphs and icon stories effortlessly to showcase your data in a captivating and impactful way.

5. Clear and concise communication
Keep your language simple, and avoid jargon or complicated terms. Communicate your ideas clearly, so your audience can easily grasp and retain the information being conveyed. This can prevent confusion and enhance the overall effectiveness of the message.
6. Engaging delivery
Spice up your presentation with a sprinkle of enthusiasm! Maintain eye contact, use expressive gestures and vary your tone of voice to keep your audience glued to the edge of their seats. A touch of charisma goes a long way!
7. Interaction and audience engagement
Turn your presentation into an interactive experience — encourage questions, foster discussions and maybe even throw in a fun activity. Engaged audiences are more likely to remember and embrace your message.
Transform your slides into an interactive presentation with Venngage’s dynamic features like pop-ups, clickable icons and animated elements. Engage your audience with interactive content that lets them explore and interact with your presentation for a truly immersive experience.

8. Effective storytelling
Who doesn’t love a good story? Weaving relevant anecdotes, case studies or even a personal story into your presentation can captivate your audience and create a lasting impact. Stories build connections and make your message memorable.
A great presentation background is also essential as it sets the tone, creates visual interest and reinforces your message. Enhance the overall aesthetics of your presentation with these 15 presentation background examples and captivate your audience’s attention.
9. Well-timed pacing
Pace your presentation thoughtfully with well-designed presentation slides, neither rushing through nor dragging it out. Respect your audience’s time and ensure you cover all the essential points without losing their interest.
10. Strong conclusion
Last impressions linger! Summarize your main points and leave your audience with a clear takeaway. End your presentation with a bang , a call to action or an inspiring thought that resonates long after the conclusion.
In-person presentations aside, acing a virtual presentation is of paramount importance in today’s digital world. Check out this guide to learn how you can adapt your in-person presentations into virtual presentations .

Preparing an effective presentation starts with laying a strong foundation that goes beyond just creating slides and notes. One of the quickest and best ways to make a presentation would be with the help of a good presentation software .
Otherwise, let me walk you to how to prepare for a presentation step by step and unlock the secrets of crafting a professional presentation that sets you apart.
1. Understand the audience and their needs
Before you dive into preparing your masterpiece, take a moment to get to know your target audience. Tailor your presentation to meet their needs and expectations , and you’ll have them hooked from the start!
2. Conduct thorough research on the topic
Time to hit the books (or the internet)! Don’t skimp on the research with your presentation materials — dive deep into the subject matter and gather valuable insights . The more you know, the more confident you’ll feel in delivering your presentation.
3. Organize the content with a clear structure
No one wants to stumble through a chaotic mess of information. Outline your presentation with a clear and logical flow. Start with a captivating introduction, follow up with main points that build on each other and wrap it up with a powerful conclusion that leaves a lasting impression.
Delivering an effective business presentation hinges on captivating your audience, and Venngage’s professionally designed business presentation templates are tailor-made for this purpose. With thoughtfully structured layouts, these templates enhance your message’s clarity and coherence, ensuring a memorable and engaging experience for your audience members.
Don’t want to build your presentation layout from scratch? pick from these 5 foolproof presentation layout ideas that won’t go wrong.

4. Develop visually appealing and supportive visual aids
Spice up your presentation with eye-catching visuals! Create slides that complement your message, not overshadow it. Remember, a picture is worth a thousand words, but that doesn’t mean you need to overload your slides with text.
Well-chosen designs create a cohesive and professional look, capturing your audience’s attention and enhancing the overall effectiveness of your message. Here’s a list of carefully curated PowerPoint presentation templates and great background graphics that will significantly influence the visual appeal and engagement of your presentation.
5. Practice, practice and practice
Practice makes perfect — rehearse your presentation and arrive early to your presentation to help overcome stage fright. Familiarity with your material will boost your presentation skills and help you handle curveballs with ease.
6. Seek feedback and make necessary adjustments
Don’t be afraid to ask for help and seek feedback from friends and colleagues. Constructive criticism can help you identify blind spots and fine-tune your presentation to perfection.
With Venngage’s real-time collaboration feature , receiving feedback and editing your presentation is a seamless process. Group members can access and work on the presentation simultaneously and edit content side by side in real-time. Changes will be reflected immediately to the entire team, promoting seamless teamwork.

7. Prepare for potential technical or logistical issues
Prepare for the unexpected by checking your equipment, internet connection and any other potential hiccups. If you’re worried that you’ll miss out on any important points, you could always have note cards prepared. Remember to remain focused and rehearse potential answers to anticipated questions.
8. Fine-tune and polish your presentation
As the big day approaches, give your presentation one last shine. Review your talking points, practice how to present a presentation and make any final tweaks. Deep breaths — you’re on the brink of delivering a successful presentation!
In competitive environments, persuasive presentations set individuals and organizations apart. To brush up on your presentation skills, read these guides on how to make a persuasive presentation and tips to presenting effectively .

Whether you’re an experienced presenter or a novice, the right techniques will let your presentation skills soar to new heights!
From public speaking hacks to interactive elements and storytelling prowess, these 9 effective presentation techniques will empower you to leave a lasting impression on your audience and make your presentations unforgettable.
1. Confidence and positive body language
Positive body language instantly captivates your audience, making them believe in your message as much as you do. Strengthen your stage presence and own that stage like it’s your second home! Stand tall, shoulders back and exude confidence.
2. Eye contact with the audience
Break down that invisible barrier and connect with your audience through their eyes. Maintaining eye contact when giving a presentation builds trust and shows that you’re present and engaged with them.
3. Effective use of hand gestures and movement
A little movement goes a long way! Emphasize key points with purposeful gestures and don’t be afraid to walk around the stage. Your energy will be contagious!
4. Utilize storytelling techniques
Weave the magic of storytelling into your presentation. Share relatable anecdotes, inspiring success stories or even personal experiences that tug at the heartstrings of your audience. Adjust your pitch, pace and volume to match the emotions and intensity of the story. Varying your speaking voice adds depth and enhances your stage presence.

5. Incorporate multimedia elements
Spice up your presentation with a dash of visual pizzazz! Use slides, images and video clips to add depth and clarity to your message. Just remember, less is more—don’t overwhelm them with information overload.
Turn your presentations into an interactive party! Involve your audience with questions, polls or group activities. When they actively participate, they become invested in your presentation’s success. Bring your design to life with animated elements. Venngage allows you to apply animations to icons, images and text to create dynamic and engaging visual content.
6. Utilize humor strategically
Laughter is the best medicine—and a fantastic presentation enhancer! A well-placed joke or lighthearted moment can break the ice and create a warm atmosphere , making your audience more receptive to your message.
7. Practice active listening and respond to feedback
Be attentive to your audience’s reactions and feedback. If they have questions or concerns, address them with genuine interest and respect. Your responsiveness builds rapport and shows that you genuinely care about their experience.

8. Apply the 10-20-30 rule
Apply the 10-20-30 presentation rule and keep it short, sweet and impactful! Stick to ten slides, deliver your presentation within 20 minutes and use a 30-point font to ensure clarity and focus. Less is more, and your audience will thank you for it!
9. Implement the 5-5-5 rule
Simplicity is key. Limit each slide to five bullet points, with only five words per bullet point and allow each slide to remain visible for about five seconds. This rule keeps your presentation concise and prevents information overload.
Simple presentations are more engaging because they are easier to follow. Summarize your presentations and keep them simple with Venngage’s gallery of simple presentation templates and ensure that your message is delivered effectively across your audience.

1. How to start a presentation?
To kick off your presentation effectively, begin with an attention-grabbing statement or a powerful quote. Introduce yourself, establish credibility and clearly state the purpose and relevance of your presentation.
2. How to end a presentation?
For a strong conclusion, summarize your talking points and key takeaways. End with a compelling call to action or a thought-provoking question and remember to thank your audience and invite any final questions or interactions.
3. How to make a presentation interactive?
To make your presentation interactive, encourage questions and discussion throughout your talk. Utilize multimedia elements like videos or images and consider including polls, quizzes or group activities to actively involve your audience.
In need of inspiration for your next presentation? I’ve got your back! Pick from these 120+ presentation ideas, topics and examples to get started.
Creating a stunning presentation with Venngage is a breeze with our user-friendly drag-and-drop editor and professionally designed templates for all your communication needs.
Here’s how to make a presentation in just 5 simple steps with the help of Venngage:
Step 1: Sign up for Venngage for free using your email, Gmail or Facebook account or simply log in to access your account.
Step 2: Pick a design from our selection of free presentation templates (they’re all created by our expert in-house designers).
Step 3: Make the template your own by customizing it to fit your content and branding. With Venngage’s intuitive drag-and-drop editor, you can easily modify text, change colors and adjust the layout to create a unique and eye-catching design.
Step 4: Elevate your presentation by incorporating captivating visuals. You can upload your images or choose from Venngage’s vast library of high-quality photos, icons and illustrations.
Step 5: Upgrade to a premium or business account to export your presentation in PDF and print it for in-person presentations or share it digitally for free!
By following these five simple steps, you’ll have a professionally designed and visually engaging presentation ready in no time. With Venngage’s user-friendly platform, your presentation is sure to make a lasting impression. So, let your creativity flow and get ready to shine in your next presentation!
Basic tasks for creating a PowerPoint presentation
PowerPoint presentations work like slide shows. To convey a message or a story, you break it down into slides. Think of each slide as a blank canvas for the pictures and words that help you tell your story.
Choose a theme
When you open PowerPoint, you’ll see some built-in themes and templates . A theme is a slide design that contains matching colors, fonts, and special effects like shadows, reflections, and more.
On the File tab of the Ribbon, select New , and then choose a theme.
PowerPoint shows you a preview of the theme, with four color variations to choose from on the right side.
Click Create , or pick a color variation and then click Create .

Read more: Use or create themes in PowerPoint
Insert a new slide
On the Home tab, click the bottom half of New Slide , and pick a slide layout.

Read more: Add, rearrange, and delete slides .
Save your presentation
On the File tab, choose Save .
Pick or browse to a folder.
In the File name box, type a name for your presentation, and then choose Save .
Note: If you frequently save files to a certain folder, you can ‘pin’ the path so that it is always available (as shown below).

Tip: Save your work as you go. Press Ctrl+S often or save the file to OneDrive and let AutoSave take care of it for you.
Read more: Save your presentation file
Select a text placeholder, and begin typing.

Format your text
Select the text.
Under Drawing Tools , choose Format .

Do one of the following:
To change the color of your text, choose Text Fill , and then choose a color.
To change the outline color of your text, choose Text Outline , and then choose a color.
To apply a shadow, reflection, glow, bevel, 3-D rotation, a transform, choose Text Effects , and then choose the effect you want.
Change the fonts
Change the color of text on a slide
Add bullets or numbers to text
Format text as superscript or subscript
Add pictures
On the Insert tab, select Pictures , then do one of the following:
To insert a picture that is saved on your local drive or an internal server, choose This Device , browse for the picture, and then choose Insert .
(For Microsoft 365 subscribers) To insert a picture from our library, choose Stock Images , browse for a picture, select it and choose Insert .
To insert a picture from the web, choose Online Pictures , and use the search box to find a picture. Choose a picture, and then click Insert .

You can add shapes to illustrate your slide.
On the Insert tab, select Shapes , and then select a shape from the menu that appears.
In the slide area, click and drag to draw the shape.
Select the Format or Shape Format tab on the ribbon. Open the Shape Styles gallery to quickly add a color and style (including shading) to the selected shape.

Add speaker notes
Slides are best when you don’t cram in too much information. You can put helpful facts and notes in the speaker notes, and refer to them as you present.

Click inside the Notes pane below the slide, and begin typing your notes.

Add speaker notes to your slides
Print slides with or without speaker notes
Give your presentation
On the Slide Show tab, do one of the following:
To start the presentation at the first slide, in the Start Slide Show group, click From Beginning .

If you’re not at the first slide and want to start from where you are, click From Current Slide .
If you need to present to people who are not where you are, click Present Online to set up a presentation on the web, and then choose one of the following options:
Broadcast your PowerPoint presentation online to a remote audience
View your speaker notes as you deliver your slide show.
Get out of Slide Show view
To get out of Slide Show view at any time, on the keyboard, press Esc .
You can quickly apply a theme when you're starting a new presentation:
On the File tab, click New .
Select a theme.

Read more: Apply a design theme to your presentation
In the slide thumbnail pane on the left, select the slide that you want your new slide to follow.
On the Home tab, select the lower half of New Slide .
From the menu, select the layout that you want for your new slide.
Your new slide is inserted, and you can click inside a placeholder to begin adding content.
Learn more about slide layouts
Read more: Add, rearrange, and delete slides
PowerPoint for the web automatically saves your work to your OneDrive, in the cloud.
To change the name of the automatically saved file:
In the title bar, click the file name.
In the File Name box, enter the name you want to apply to the file.
If you want to change the cloud storage location, at the right end of the Location box, click the arrow symbol, then navigate to the folder you want, then select Move here .
On the Home tab, use the Font options:

Select from other formatting options such as Bold , Italic , Underline , Strikethrough , Subscript , and Superscript .
On the Insert tab, select Pictures .
From the menu, select where you want to insert the picture from:

Browse to the image you want, select it, then select Insert .
After the image is inserted on the slide, you can select it and drag to reposition it, and you can select and drag a corner handle to resize the image.
On the slide canvas, click and drag to draw the shape.
Select the Shape tab on the ribbon. Open the Shape Styles gallery to quickly add a color and style (including shading) to the selected shape.

A horizontal Notes pane appears at the bottom of the window, below the slide.
Click in the pane, then enter text.

On the Slide Show tab, select Play From Beginning .

To navigate through the slides, simply click the mouse or press the spacebar.
Tip: You can also use the forward and back arrow keys on your keyboard to navigate through the slide show.
Read more: Present your slide show
Stop a slide show
To get out of Slide Show view at any time, on the keyboard, press Esc.
The full-screen slide show will close, and you will be returned to the editing view of the file.
Tips for creating an effective presentation
Consider the following tips to keep your audience interested.
Minimize the number of slides
To maintain a clear message and to keep your audience attentive and interested, keep the number of slides in your presentation to a minimum.
Choose an audience-friendly font size
The audience must be able to read your slides from a distance. Generally speaking, a font size smaller than 30 might be too difficult for the audience to see.
Keep your slide text simple
You want your audience to listen to you present your information, instead of reading the screen. Use bullets or short sentences, and try to keep each item to one line.
Some projectors crop slides at the edges, so that long sentences might be cropped.
Use visuals to help express your message
Pictures, charts, graphs, and SmartArt graphics provide visual cues for your audience to remember. Add meaningful art to complement the text and messaging on your slides.
As with text, however, avoid including too many visual aids on your slide.
Make labels for charts and graphs understandable
Use only enough text to make label elements in a chart or graph comprehensible.
Apply subtle, consistent slide backgrounds
Choose an appealing, consistent template or theme that is not too eye-catching. You don't want the background or design to detract from your message.
However, you also want to provide a contrast between the background color and text color. The built-in themes in PowerPoint set the contrast between a light background with dark colored text or dark background with light colored text.
For more information about how to use themes, see Apply a theme to add color and style to your presentation .
Check the spelling and grammar
To earn and maintain the respect of your audience, always check the spelling and grammar in your presentation .
Top of Page

Need more help?
Want more options.
Explore subscription benefits, browse training courses, learn how to secure your device, and more.

Microsoft 365 subscription benefits

Microsoft 365 training

Microsoft security

Accessibility center
Communities help you ask and answer questions, give feedback, and hear from experts with rich knowledge.

Ask the Microsoft Community

Microsoft Tech Community

Windows Insiders
Microsoft 365 Insiders
Was this information helpful?
Thank you for your feedback.
Home Blog Business How to Make a Presentation: A Guide for Memorable Presentations
How to Make a Presentation: A Guide for Memorable Presentations

A presentation goes beyond the idea of crafting a catchy document to present in front of an audience. It is an art in which a person relies on communication skills to introduce a topic relevant to a group of people, regardless of its size. Different elements participate in this communication process, such as body language, presentation skills, visual tools, etc. and are key in delivering an effective presentation.
In this article, we shall present a detailed guide on how to make a presentation, intended both for newcomers in this subject but also for professional presenters who seek to improve the performance of their presentations. Let’s get started.
Table of Contents
What is a presentation?
What is a powerpoint presentation.
- The Importance of a good PowerPoint presentation
- Choosing a topic
Consider the audience & presentation goals
Gather data, references, and source.
- Define the storyline
- Define the outline
Using one idea per slide
Choose the presentation format, colors & styles, determine the use of metaphors and visual slides, proofreading and polishing process, prepare your speech, rehearse, rehearse and rehearse.
- How to give a memorable presentation
Start strong
Hook your audience, close your presentation.
- Selecting a PowerPoint template
- Add or delete slides in PowerPoint
- Adding images to slide templates
- Adding notes to your slides
- Adding animations to your slides
- Adding transitions to your slides
- Adding audio narration to your slides
- Ideal typeface and size
Color scheme
Printing your powerpoint presentation, powerpoint presentations tips, closing thoughts.
What is a presentation, and what is a PowerPoint presentation?
It is essential to highlight the difference between Presentation and PowerPoint Presentation, often interchangeable terms. One thing is a presentation, an audiovisual form of communication to present information. A PowerPoint presentation is a subset of a presentation. Since PowerPoint remains the leading tool in the market for creating presentations, the term was coined by both spectators and presenters. Let’s begin by checking the main differences between the two terms.
A presentation is any situation in which a person or group has to transmit a message in front of an audience. The format by which the audience attends can answer the following categories:
- Live crowd: A presentation in which the average number of spectators exceeds 100 people.
- Massive event: Similar to the format above, but we speak about thousands of spectators. This format has specific requirements regarding scenario setup and logistics, and the usual presenters are influencers in worldwide conferences or corporate events (like All-Hands meetings).
- Private event : A selected number of attendants can listen to the presenter. Coaching sessions are the leading kind of private event for presenters, but multiple other categories can fit into this format.
- Online event: Following the trends of remote working and what the pandemic has left us in terms of digital immersion, multiple events shifted their large attendance numbers in favor of online settings. This has the advantage of a narrowed setting, as the area in which the presenter has to stand is considerably reduced – with simpler A/V inputs. Attendees are given a link to the event and watch from their computers or mobile devices.
- Offline event: This medium is what we consume via YouTube videos. Behind each and every YouTube video is countless hours of content development, editing, rehearsing a presentation, and so forth. We call it offline because attendees can browse the content at any time, replaying as desired, unlike Online Events in which the attendees must be logged in to a specific platform. No interaction with the presenter.
- Hybrid event: This is a format coined by large tech companies, the automobile industry, and even fashion brands. The idea is to create an event where a selected number of attendees are allowed to participate (using the Private Event model). Still, at the same time, the event is streamed for users worldwide (Online Event) and/or available on the official social media networks of the brand (Offline Event).
Each one of these formats exposed above has specific requirements in terms of interaction with the audience. For example, in-company presentations will differ from common presentations that seek to capture the interest of new consumers. It is vital to establish the presentation’s intent from the very first moment and then narrow it down according to the topic to present, as well as the knowledge level of your target audience.
A presentation does not necessarily requires to create a slide deck . It is a tool presenters use to make the content more interesting for the audience and also memorable. However, it is well-known that influencer speakers such as Tony Robbins or Warren Buffet ignore PPT documents altogether, preferring to articulate their narrative on the go.
A PowerPoint presentation is a specific type of presentation, which involves the usage of a slide deck crafted with Microsoft PowerPoint. This kind of tool allows presenters to communicate a message through a vast range of mediums, such as images, graphs & charts, audio, and video for a better impact.

Creating a PowerPoint presentation is an easy process, and there are two routes for it: working from a blank slide or using PowerPoint templates .
Some of the advantages of building a PowerPoint presentation:
- Better information retention by the audience, thanks to visual cues.
- Improves the audience’s focus.
- Easy to create powerful graphics.
- Templates are editable, meaning you can repurpose the original designs to meet your standards.
- Saves time to create presentations thanks to its user-friendly UI.
- Encourages teaching and learning processes.
The Importance of a Good PowerPoint presentation
There are some elements that presenters must take into account when making a PowerPoint presentation . It’s not just drag-and-drop, then magic happens. Creating a PowerPoint presentation involves a process of generating the graphic content to display and the narrative around it. The purpose of PowerPoint is to serve as a tool to enhance communication, not to make it overly complex.

We emphasize the relevance of working the speech and graphic content together since the speech itself gives the timeframes for each slide, what elements it contains, or whether it is relevant to use a slide or not to speak about a topic.
Some points to highlight when preparing a presentation:
- Presenters often use the element of surprise. This means a presentation can start without a slide, use a video, or involve a discussion between two parties, then jump to the slide deck presentation. More on this topic later on.
- A good PowerPoint presentation can be your introduction card in multiple professional settings. The effort you put in terms of design and content shall pay back over time in contacts or business deals.
- Having a spare copy of your presentation, preferably in Google Slides presentation format, is a safe-proof technique in case the PPT file gets corrupted. The aesthetic remains the same and can be browsed by any computer with internet access.
How to Make a Presentation (5 Essential Points)
1. planning your presentation.
The first step in making a presentation is to plan the content according to our personal/business goals and the audience’s interest. Let’s break down each part in more detail.
Choosing the topic of your presentation
There are two situations for this. The first one is that you are open to presenting any topic of your preference. This usually happens in business presentations, inspirational presentations, product releases, etc. The second scenario is restricted, by which you have to pick a topic among a selected number of references. That’s the typical situation in which presenters see themselves when taking part in significant events – as not all topics are suitable for the main content of the event, and this is where creativity comes to play.
How to choose a topic, you may ask. Brainstorming is a good technique as long as you remain within the boundaries of this formula:
What you know and feel confident about + What is relevant to the current moment + What can resonate with your audience = Quality Content.
Again, if you experience restrictions due to the nature of an event, but your objective is to share specific information about your business, here are some tactics that can come to play:
- Do keyword research about the topics your business is involved. See the common patterns in your activity compared with the keywords. Then research the 15 articles on the 5 biggest volume keywords. Narrowing the possibilities in your business is a different take.
- Research whether there’s room for sponsored advertisement. That’s an alternative when directly speaking about your business is a no-no in a presentation.
- Turn your presentation into an inspirational story. That works in most events and brings the audience’s interest.
Another vital point to consider is how passionate you can be about the topic of your choice. Nothing speaks more about professionalism than a presenter being deeply involved with the topic in discussion. It sparks curiosity and gives validation as a reliable authority on the content. On the other hand, when a presenter delivers a talk about a topic they don’t connect with, body language usually betrays the presenter. Spectators feel that the speaker wished to be elsewhere, hence dooming the presentation’s performance (and badly impacting the presenter’s reputation).
Consider the purpose of the content to present. Is it going to be informative? Educational? Inspirational? That shall set the tone of your speech later on.
Like with any project, you can estimate the ROI of your presentation with two verifiable metrics: the behavior of the audience and how many contacts did you build after delivering an effective presentation .
Making a presentation has the implicit purpose of helping you construct your network of professional contacts. Even when the presentation has no explicit financial purpose – as in the case of non-profitable organizations, there is still the acknowledgment component. People want to feel validated for the work they do. People want to build long-lasting contacts that can later on turn to be part of a new project.
Considering the audience is imperative, and often one of the pitfalls many presenters fall prey to. You must be aware of the following:
- The knowledgeability of your audience about the topic to discuss. This filters the option of using technical jargon during a presentation.
- The age range and demographics of your audience. It is not the same to discuss a methodology to reduce financial risk to a group of corporate workers in their 40s than to a group of students in their early 20s. The language is different, the intention behind the message is different, and so is the information retention span.
On regards to presentation goals, they can be classified as professional goals (those who seek conversions or valuable business contacts), influential (to establish a brand in the market), educational (to inform a group of people about a topic you researched), etc. Depending on the presentation goals, you can then structure the content to list and the tone in which you speak to your audience.
2. Preparing content for your presentation
No presentation can be made without reference material. Even when you believe you are the most prominent authority about a topic – you have to prove it with valuable, referenceable material. For some niches, this is critical, such as scientific poster presentations, educational presentations, and other areas in which copyright might be an issue.
References for the material you used can be listed in different formats:
- If you are citing a book/article, you can do a bibliography slide, or screenshot the excerpt you want to cite, then include a proper source format below the image.
- You have to credit the author for images/videos that are subject to intellectual property rights. Depending on the context where the image is presented, you may even have to inquire the author about using the image. If the photo in question is yours, no citation is required. Learn more about how to cite pictures in PowerPoint .
- Graphs and charts should include a reference to what they mean, explaining in a short sentence their context. Cite the source if the graph is extracted from a book or article.

As a tip, prepare a document in which you jot down the references used to create the presentation. They can serve whenever a question is asked about your presentation and you must research extra material.
Define the presentation storyline
We interpret the storyline as what is the connecting thread of your presentation. What do you wish to discuss? What motivated you to present this topic in this particular setting and in front of an audience? What can your message deliver in terms of new information and quality to your spectators?
All those questions are worth asking since they shape the narrative you build around your presentation. The storyline is the step before building an actual outline of your presentation.
Define the presentation outline
Now that you have a clear idea of your reference material and the story to tell behind your presentation , it is time to list down your presentation structure in a Table of Contents format. Keep in mind this is for internal reference, as the outline is a tool for writing the speech and creating the slides. You don’t have to list the outline in a presentation; if you desire, you can do a simplistic version with an agenda slide.

Be specific. Don’t let any topic be broad enough to lead to confusion. Sometimes, it is best to list many elements in a presentation outline, then trim them down in a second iteration.
This is perhaps the biggest mistake presenters make in the professional context when creating a new presentation. Slides are free; you don’t have to jam everything in, wishing people get an instant idea about EVERYTHING you will discuss in one slide. Not only does it become overwhelming for the audience, but it is also a faux pas in terms of design: when you use too many elements, the hierarchy does not seem clear enough.
Opt for the “one-idea-per-slide” technique, which, as the term refers, implies using one slide per concept to introduce. Work with as many slides as required, but just one main idea by slide. Your presentation becomes clearer, easy to digest for a non-knowledgeable audience, and also serves as reference material on how to pace your presentation.
3. Designing your presentation
The following section contains guidelines about the different aspects that shape a presentation structure . If you are looking for an all-in-one solution that implements these teachings into presentation design, try SlideModel’s AI Presentation Maker . A time-saver AI-generation tool for presenters powered by Artificial Intelligence.
Event organizers have a saying in the presentation format, which can be online or a live event. Depending on which, users have to structure the elements of their presentation to match the final output. An example of this: it’s not the same to create a PPT slide deck for an event in which you stand on a stage, in front of a live audience, than when you present via Zoom call, using your computer screen to cast the presentation.
The format is different because text usage and images are perceived differently. For starters, an online presentation is most likely to draw users to read the entire content of your slides than a live presentation. The audience may not get your body language in an online presentation, merely watching slide after slide with the presenter’s voiceover. In some conditions, it can be incredibly dull and hard to follow.
Do your research with the event organizers about which format shall be used. When it comes to in-company presentations or educational presentations, the format is usually live, as the audience is selected and part of the same organization (that being a company or a school/university). If a webinar is required for an in-company format, ask the organizers about the length of the presentation, if it is possible to interact with the audience, deliverable requirements, etc.
The aspect ratio for a presentation format usually follows the 16:9 format or 4:3 format. Presentations built in 16:9 aspect ratio are the standard , rectangular format PPT templates, which also serve to be printed without many distortions in regular A4 files. As we work with a rectangular format, there are two axes – horizontal and vertical, in which presenters can arrange the content according to its importance (building a hierarchy). Working with a 4:3 format is more challenging as it resembles a square. Remember, in a square there are no visible tensions, so all areas have the same importance.

As a recommendation, the 4:3 aspect ratio is a safe bet for all projectors & beamers. When working with a 16:9 slide and the projector is 4:3, the content gets squeezed to fit the required ratio, and for that very reason, it is advised to increase the font size if you use a 16:9 slide on a 4:3 projector. Be mindful about logos or photographs getting distorted when this conversion happens.
The 16:9 ratio looks more visually appealing these days as we get used to TVs and mobile devices for browsing content. New projectors are usually intended for 16:9 format, so you won’t experience any inconvenience in this regard.

No, not every color works harmonically with other colors. Colors have a psychology behind their usage and impact, and to not make this guide extensive, we highly recommend you visit our article on color theory for presentations . You can find suggestions about which colors you should use for different kinds of messages to deliver and what each color represents in terms of color psychology.
The color you use in your presentations must be in accordance with your branding. For example: you should definitely not build a presentation with a bright, bold magenta neon tone when your logo contains green neon-like hues. If you work with a PPT presentation template that doesn’t match the color of your branding, we recommend you check our guide on how to change color themes in PowerPoint .
Regarding typefaces, do never use more than 3 different typefaces per design. It is best to stick to 1 or 2 typefaces, using the variations each font offers in terms of weight.
An example of this:
You create the heading title (H1 size) with Open Sans bold. Subtitles should be done in H2 size using Open Sans regular. Body text in paragraph size, using either Open Sans Regular or Light. Words to emphasize shall be bolded for important terms and italics for foreign terms to be explained.

Use a cohesive color scheme that fits the background, graphics (such as charts and bar graphs), text, and even images. It helps the audience to understand concepts more naturally and gives a pleasant experience to the sight.
Just as badly a slide deck filled with text is felt by the audience, the exact impact can be attributed to a slide deck that only contains images. The audience may feel disconnected, not understanding the purpose of the presentation. A second side-effect is when the spectators wish to browse the slides to study, as in the context of an educational presentation. If the presenter does not include any text guidance, the slide deck is a mere collection of images without any reference that helps remember the presentation.
Work in balance, like a 3:1 ratio between graphic elements and text. For every 3 graphic elements, a text box must be included.
Using metaphors in presentations is a great idea to introduce complex topics or to tell a story. Say, you want to make the audience aware of your company’s challenges to reach its current standing in the industry. Using a roadmap template that depicts a mountain is an excellent idea as it reinforces the ideas of “challenge” and “teamwork.”

4. Final touches and polishing your presentation
Before giving any presentation, you should dedicate at least one day to this polishing process. Let’s break down the process for easier understanding.
- Do a first iteration of your slides. The objective here is to grasp how everything looks in terms of design. Check the alignment of images and text, any color inconsistencies, typos, etc.
- Rehearse your presentation one time, tracking how much time it takes to perform the presentation.
- If any information is missing that’s worth adding to the slides, proceed to add it. If there are elements that can be reduced, trim them.
- For time-restricted presentations, get a clear idea about how much time it takes to complete your presentation, plus 5 extra minutes for a Q&A session.
- The second iteration should check the tone of your writing, and double-proof any spelling, punctuation and grammar errors.
After two complete iterations, your presentation is ready to go to the next stage.
Even though we believe the speech is partially built as you prepare your presentation slides, you should dedicate an extra section of time to prepare your speech correctly. This process involves the following steps:
- Identifying the purpose of your presentation. The core element of why you are speaking to this audience.
- Get to know your audience, their interests, their challenges, and what can they possibly wish to overcome.
- Adding value. This is vital – your presentation has to leave a lasting message to your audience on what they are interested.
- A strong start and a strong finish. Don’t neglect any of these elements.
Writing down your speech in notes is a must. It is the tool you can use to rehearse your presentation, and -in case you feel anxious- you can include some speaker notes in your presentation (which won’t be visible to your audience) to help you structure the speech.
Practice makes perfect. Rehearsing does not imply memorizing the entire presentation, as that would make your speech robotic, and prone to errors. How? Imagine a person asking you a question in the middle of your presentation, a question you didn’t expect. A prepared presenter can easily manage the situation because of the background built around the topic. A presenter that memorized a speech and robotically repeated its content can feel unease, losing focus for the remainder of the presentation.
Some valuable tips on the rehearsing process:
- Record your rehearsing sessions. You can use tools like Presenter View in PowerPoint to track your time.
- Make it a memorable event. Creating an engaging presentation requires creativity, so consider brainstorming for new takes on adding exciting elements to your presentation for attention retention.
- An exercise recommended by Tim Ferris is to mimic the conditions as closely as possible. This helps to reduce presentation anxiety, and also to get used to cameras and spotlights or evaluate your body language.
- If possible, ask a friend for feedback on your presentation performance. This is particularly helpful for new presenters to get used to interacting with the audience.
5. Presenting (your presentation)
Now it’s time to talk about the presentation and your performance when delivering it in front of an audience. Giving a presentation has many aspects to discuss, from start to end, the techniques to keep your audience interested in the topic, and also recommendations to make a memorable event. Let’s get started.
How to give a Memorable Presentation – Delivering an Impactful Presentation
There are multiple methods to approach a presentation and deliver an impactful presentation. Let’s be honest, not everyone feels comfortable when standing in front of an audience. For that reason, we want to lay out some fresh ideas to help you bring your best to your spectators.
The first element you ought to be aware of is body language . It has to feel natural, not overly acted but also not stiff. Think of a presentation as a similar scenario in which you have a deep conversation with a group of people about a topic you are passionate about. That mindset helps to ease anxiety out of the equation. Avoid crossing arms or constantly pacing across the stage – that only shows impatience and lack of interest.
Keep the concepts simple. Don’t overload your presentation with unnecessary jargon; if you feel something cannot be easily explained, go break down concept by concept until the whole idea is understandable. Graphics are a fantastic asset to help you in this process and boost your performance as a presenter.
Be mindful of not doing any of these common pitfalls:
- Including large chunks of text on a single slide.
- Using intense background colors that make it difficult to understand the contents of the slide.
- Don’t read every single element in your slides – this is perceived as boring by your audience.
One particularly interesting approach is by Guy Kawasaki, author of the book “The Art of the Start.” He considers the best presentations to be handled using 10 slides, lasting no longer than 20 minutes, and using a 30pt font size. That’s known as the 10-20-30 rule in presentations . It helps you to condense the content for the sake of information clarity.
In case you don’t use a PowerPoint presentation, there are multiple ways to make a presentation memorable:
- Tell a story, but connect with your audience in terms of body language. Play with the elements on the stage (much like TED presenters do), and let the audience feel the experience of your story by being as detailed as possible within the time frame.
- Using a video is an incredibly engaging tool, as it lets you introduce a topic you will discuss in more detail later.
- Use a visual impact in the form of an image with a dramatic element (i.e., climate change consequences, technological advancements, children engaging with technology or studying, etc.). This allows to hook the audience into what’s due to come next.
Knowing how to start a presentation is a critical skill all presenters ought to master. There are several approaches for this behalf, but for the sake of this guide, let’s stick to the following ones.
Using the Link-Back formula
This consists of throwing a story in front of your audience that explains who you are, what your background is, and why your speech should make a difference in the life of the spectators.
The Link-Back formula is beneficial for creating an emotional connection with the audience.
Using a Hook
Asking a rhetorical question, using a powerful fact, or other well-known hook techniques is a plus when starting a presentation. We shall talk about hook techniques for presenters in the next section.
Using a captivating visual
Much like the power of storytelling , visuals impact the audience’s psyche, especially if the presentation is about a trendy topic. Create a quality graphic with any of our designs at SlideModel, a graphic designer’s help, an AI Image Generator, or work with a video.
A hook is a tactic used by presenters as an opening statement but can be used in different areas of the presentation if it has an ample length. Much like the metaphor suggests, they serve to attract the audience to what you are communicating.
Research on attention span during lectures suggests a gradual decline in the audience’s interest in the presentation. That’s exponentially increased if you miss the chance to give a powerful first impression. Check this list of hook techniques to enhance the performance of your presentation skills:
- Asking rhetorical questions – better if a series of them on the topic to discuss.
- Using catchy phrases.
- Using a contrarian position, explain why such thinking harms the topic you wish to introduce.
- Historical event referencing.
- Making a powerful statement, best if data related. (i.e., “Every year, 8 million tons of plastic gets into the ocean, which equals to a truckload being dumped every minute” )
- Using the word “imagine”. It’s one of the powerful words in you can use in presentations .
- Add the comedy element – NB: be careful not to overdo it.
- Apply a “what if” scenario – this hook is similar to the “imagine” but with more data added.
- Tell a story.
- Spark curiosity.
- Smartly use quotations. Do not stick to text-book quotations but give your insight on why the quote is relevant for your speech.
Photo 9: Slide using a hook
Most people assume that ending a presentation equals doing a recap. It is a bad idea since your audience feels as if you haven’t planned a conclusion for your presentation.
Another bad practice is to end with a Q&A format. Although questions and answers are often a required part of any presentation, they shouldn’t be the end of your presentation. You can include questions during your presentation or opt for a proper closure of the presentation past the Q&A session.
There are some powerful strategies to give a memorable ending to a presentation:
- Include a CTA on the lines like “Join our journey!” or similar that make the audience part of a bigger story.
- Close using a relevant quote. The idea is to deliver something that can linger, so the audience remembers your content.
- Use a story to close your presentation, as long as you avoid using a case study. The idea is to close with a meaningful thought, not with boredom.
We recommend you check our article on how to end a presentation for more ideas before reaching this stage of your presentation.
How to Make a PowerPoint Presentation (Quick Steps)
In this section, we will see how to use PowerPoint to make a presentation . Starting from creating a blank presentation or choosing a pre-defined PowerPoint template to preparing the presentation structure by adding PowerPoint slides and then working on the design of the presentation, we will explain how to make a visually-appealing and eye-catching PowerPoint presentation and how to create a slideshow in PowerPoint.
1. Selecting a PowerPoint template
When making a PowerPoint presentation, Professional PowerPoint Templates bring the advantage of not needing to think about complex graphic design decisions. However, there are certain aspects worth considering prior to picking the perfect PowerPoint template.
- Color aesthetic : If your presentation has to be done quickly, stick to PowerPoint templates that resemble your company’s branding palette. Although color can be changed, it is best not to lose time with extra adjustments.
- Opt for minimalistic designs : It is one of the most suitable ways to remain elegant in the professional world. You won’t be signaled for using a template that speaks seriousness on its design – and take for granted everyone shall badly remember the presentation that overdid color or graphics (or even worse, typeface effects).
- Avoid using heavy transition effects : Not all computers are as powerful as the ones you own. The simpler you make your presentation, the best it shall play on any PC.
As in life, there are advantages and disadvantages of using Premium or Free PowerPoint Templates vs. starting from a blank slate.
Advantages of PowerPoint templates when making a presentation
- Speed up the presentation design process.
- Reusable designs, ready for any situation.
- Helps to present data in an understandable format.
- Complex design decisions are made for users.
- Color pairing and font pairing are done for users.
- Helps to reduce the usage of text in slides.
Disadvantages of PowerPoint templates
- We are not learning to use advanced PowerPoint tools, as designs come pre-made for users.
- It can hinder creativity.
- Not every presentation template for PowerPoint is suitable for any topic.
- A professional team of PowerPoint template designers must be behind those templates to ensure quality.
2. Add or delete slides in PowerPoint
When we create PowerPoint Design ideas , not every slide makes the cut for the final presentation. Users then feel overwhelmed about those slides: will they be visible in the final presentation? Should you make a new PPT file without those extra templates? How to clone the “good” slides into a new file?
Instead of worrying about that process, we have here a guide on how to add, delete and rearrange slides in PowerPoint that explains, step by step, how to get rid of the unwanted slides or add more content to your presentation.
3. Adding images to slide templates
Some presentation templates and slide decks include entirely editable placeholder areas, and those boxes do not imply text only – they can include images, graphs, videos, etc. Say you want to add more images to your slides – it is as easy as replicating one of those placeholder areas with CTRL+C / CTRL+V (CMD for Mac users) or going to Insert on the Ribbon’s menu, then Picture .
If you plan to move elements in your slide design, we recommend you get familiarized with how to lock an image in PowerPoint , so the images that shouldn’t be altered remain in position. This technique is ideal when your images are surrounded by plenty of editable graphics.
4. Adding notes to your slides
Presenters often struggle to remember key pieces of information due to performance anxiety or because they were moved from focus by an unexpected question. Using speaker notes in PowerPoint is the answer to prevent becoming stuck, since those notes won’t be available to the viewers – they remain visible only on the computer where the presentation is being streamed.
Keep in mind this technique works when the presenter is sitting next to the computer. If you have to stand in front of a crowd, opt to use different memory-recalling techniques when you feel out of focus.
5. Adding animations to your slides
Another technique presenters use adding animated objects or effects. This is as easy as following these steps:
- Select the object/text you desire to animate.
- Go to Animations in the Ribbon and select Add Animation .
- You can stack animations on a simple object to make unique effects.
Using animated presentation templates is an alternative when you don’t feel confident about adding animations.
6. Adding transitions to your slides
Transitions are animated effects that happen when you change between slides during a presentation. Some people love them, while others prefer to stay away from them.
If you want to add transitions to your slides, follow these steps:
- Select the slide you want to add the transition effect.
- Go to Transitions in the Ribbon, and choose a transition.
- If the transition allows the Effect Options menu, you can alter that transition’s direction and behavior.
- Click on Preview to visualize the effect.
- To remove a transition, select Transitions > None .
7. Adding audio narration to your slides
Sometimes, presenters opt to add audio narrations to the slides. The advantage of using this medium is to increase accessibility for visually impaired users. We created a guide on how to add audio narrations in PowerPoint that explains the procedure in detail.
Considerations for your PowerPoint presentation
Ideal typeface and font size.
There are multiple opinions on which typeface is ideal for presentations. Experience tells us the ideal typeface to work with is one that is system-available, meaning you don’t have to install a new font in the computer used to present. Why? You may ask. Simple: If the font used is not available on a computer, PowerPoint will automatically render a different font (sometimes even a different typeface) to replace and display the text appropriately. That action, which is replicated by other software such as Google Slides, Adobe Photoshop, Adobe Illustrator, Apple Keynote, etc., can drastically change your design.
Font size for titles should be between 36-44 pt. Paragraph font size between 24-28 pt. Use bold to emphasize concepts, and italics to insert foreign terms or quotations. Alternatively, you can make quotations to be displayed on a single slide, using 36 pt size, in italics.
Remember, these recommendations about size are intended for presentations in a live format. If the presentation is streamed through Zoom, using screen sharing, reduce the font size by 10-15% to avoid incredibly large texts. Test your presentation beforehand to be on the safe side.
The color scheme used is a primary part of your presentation design. When defining the presentation color palette , we recommend working within the colors that make part of your branding scheme.
If we speak about a personal presentation or a presentation with no logo, then opt for pastel tones that don’t create harsh contrast between text and background.
Above all things, avoid these conflictive color combinations:
- Yellow and green
- Brown and orange
- Red and green
- Neon colors combined
- Purple and yellow
- Red and purple
- Black and navy
- Navy and red (unless you use a muted red tone or control the amount of red used)
Sometimes, printables are a requirement by event organizers, which represents a challenge to many presenters. We want to give a helping hand on this behalf, offering tips that can improve your printing experience:
- Always work within margins when adding content. It helps not to downsize the presentation, which often renders the text illegible.
- If you have to print a presentation that uses intense background colors, opt for laser printing instead of inkjet. Laser printing won’t make the paper look odd when it is full-color print. The extra price is worth it when presenting a quality product.
- On the same lines about color-heavy presentations, ask for thicker printer paper than the average. This option is often advised when opting for laser printing.
- Run a print proof before ordering a large printing order. Colors can significantly change due to the RGB to CMYK conversion.
In this section, we want to list valuable tips to power up your presentations for their best performance. Some of these tips are tailored to presentation skills, others to design ideas, but ultimately, you can take in mind these tips the next time you need to make a powerful presentation in PowerPoint.
Tip #1. Using Video Presentations
An alternative to conventional presentations is to work with video presentations . These are particularly useful in academic and educational environments since they can convey large chunks of information in a memorable, easy-to-digest format.
If we consider that social media platforms like YouTube and TikTok are transitioning into professional content for creatives, you should consider using video presentations when the situation arises. As a plus, you can repurpose that presentation on your website or other official social media channels for your company.
Tip #2. Drop Shadows and Text Shadows
When we intend to create interesting contrasts between elements, color isn’t the only option to try. Learn how to work with drop shadows in PowerPoint to make images and objects stand out from the presentation. It is an effect that boosts a tri-dimensional feeling in the presentation.
Using text shadows in PowerPoint – with extreme caution – is an excellent method to highlight titles instead of using fancy colors or other 3D effects. Do not overdo the text shadow, as it makes the text illegible.
Tip #3. Working on your Presentation Skills
Giving presentations in front of an audience is, as we have seen, a process that involves many factors. One of those is the human element and the speaker’s ability to resonate with the audience. Therefore, we advise presenters to work on their presentation skills early, especially for mastering different kinds of presentation approaches, such as persuasive presentations (used in sales).
Tip #4. Editing Background Graphics in PowerPoint
Sometimes, PPT presentation templates include quality backgrounds that make the design pop from the screen. Yet, some of those backgrounds may not be suitable for all brands in terms of color, textures, etc.
Learn today how to edit background graphics in PowerPoint and create outstanding presentations in just minutes.
Tip #5. Google Slides compatibility
Finally, we want to remind users that almost every PowerPoint template has compatibility with Google Slides – if you intend to upload the presentation into the Cloud. Google Slides is an online tool for creating slideshow presentations, and one of its features is that we can convert PowerPoint presentations into Google Slides format. The converted slides are entirely editable, allowing presenters to count with a backup plan in case the PPT file doesn’t work or the computer to use doesn’t count with PowerPoint.
This is not an exhaustive list of presentation tips, but they offer a starting point for those who want to create attractive and effective PowerPoint presentations. You can also create presentations in other ways, and leveraging AI, for example. Check out the article how to create a PowerPoint presentation with ChatGPT to learn how to use Large Language Models to prepare presentations.
As we have seen, making a presentation is a complex process involving different skills, from knowing how to deliver a speech to having essential graphic design criteria.
While it is true that PowerPoint presentation templates make the process far more manageable, we shouldn’t entirely rely on them. A PowerPoint presentation isn’t a presentation on its own. It is a medium by which presenters showcase their ideas and structure the speech, but one cannot live without the other.
We hope this guide can give you a better understanding of how to create a successful presentation. See you next time!

Like this article? Please share
Business Presentations, Presentation, Presentation Approaches Filed under Business , Presentation Ideas
Related Articles

Filed under Business • April 22nd, 2024
Setting SMART Goals – A Complete Guide (with Examples + Free Templates)
This guide on SMART goals introduces the concept, explains the definition and its meaning, along the main benefits of using the criteria for a business.

Filed under Design • March 27th, 2024
How to Make a Presentation Graph
Detailed step-by-step instructions to master the art of how to make a presentation graph in PowerPoint and Google Slides. Check it out!

Filed under Presentation Ideas • February 29th, 2024
How to Make a Fundraising Presentation (with Thermometer Templates & Slides)
Meet a new framework to design fundraising presentations by harnessing the power of fundraising thermometer templates. Detailed guide with examples.
Leave a Reply
Improve your practice.
Enhance your soft skills with a range of award-winning courses.
How to Structure your Presentation, with Examples
August 3, 2018 - Dom Barnard
For many people the thought of delivering a presentation is a daunting task and brings about a great deal of nerves . However, if you take some time to understand how effective presentations are structured and then apply this structure to your own presentation, you’ll appear much more confident and relaxed.
Here is our complete guide for structuring your presentation, with examples at the end of the article to demonstrate these points.
Why is structuring a presentation so important?
If you’ve ever sat through a great presentation, you’ll have left feeling either inspired or informed on a given topic. This isn’t because the speaker was the most knowledgeable or motivating person in the world. Instead, it’s because they know how to structure presentations – they have crafted their message in a logical and simple way that has allowed the audience can keep up with them and take away key messages.
Research has supported this, with studies showing that audiences retain structured information 40% more accurately than unstructured information.
In fact, not only is structuring a presentation important for the benefit of the audience’s understanding, it’s also important for you as the speaker. A good structure helps you remain calm, stay on topic, and avoid any awkward silences.
What will affect your presentation structure?
Generally speaking, there is a natural flow that any decent presentation will follow which we will go into shortly. However, you should be aware that all presentation structures will be different in their own unique way and this will be due to a number of factors, including:
- Whether you need to deliver any demonstrations
- How knowledgeable the audience already is on the given subject
- How much interaction you want from the audience
- Any time constraints there are for your talk
- What setting you are in
- Your ability to use any kinds of visual assistance
Before choosing the presentation’s structure answer these questions first:
- What is your presentation’s aim?
- Who are the audience?
- What are the main points your audience should remember afterwards?
When reading the points below, think critically about what things may cause your presentation structure to be slightly different. You can add in certain elements and add more focus to certain moments if that works better for your speech.

What is the typical presentation structure?
This is the usual flow of a presentation, which covers all the vital sections and is a good starting point for yours. It allows your audience to easily follow along and sets out a solid structure you can add your content to.
1. Greet the audience and introduce yourself
Before you start delivering your talk, introduce yourself to the audience and clarify who you are and your relevant expertise. This does not need to be long or incredibly detailed, but will help build an immediate relationship between you and the audience. It gives you the chance to briefly clarify your expertise and why you are worth listening to. This will help establish your ethos so the audience will trust you more and think you’re credible.
Read our tips on How to Start a Presentation Effectively
2. Introduction
In the introduction you need to explain the subject and purpose of your presentation whilst gaining the audience’s interest and confidence. It’s sometimes helpful to think of your introduction as funnel-shaped to help filter down your topic:
- Introduce your general topic
- Explain your topic area
- State the issues/challenges in this area you will be exploring
- State your presentation’s purpose – this is the basis of your presentation so ensure that you provide a statement explaining how the topic will be treated, for example, “I will argue that…” or maybe you will “compare”, “analyse”, “evaluate”, “describe” etc.
- Provide a statement of what you’re hoping the outcome of the presentation will be, for example, “I’m hoping this will be provide you with…”
- Show a preview of the organisation of your presentation
In this section also explain:
- The length of the talk.
- Signal whether you want audience interaction – some presenters prefer the audience to ask questions throughout whereas others allocate a specific section for this.
- If it applies, inform the audience whether to take notes or whether you will be providing handouts.
The way you structure your introduction can depend on the amount of time you have been given to present: a sales pitch may consist of a quick presentation so you may begin with your conclusion and then provide the evidence. Conversely, a speaker presenting their idea for change in the world would be better suited to start with the evidence and then conclude what this means for the audience.
Keep in mind that the main aim of the introduction is to grab the audience’s attention and connect with them.
3. The main body of your talk
The main body of your talk needs to meet the promises you made in the introduction. Depending on the nature of your presentation, clearly segment the different topics you will be discussing, and then work your way through them one at a time – it’s important for everything to be organised logically for the audience to fully understand. There are many different ways to organise your main points, such as, by priority, theme, chronologically etc.
- Main points should be addressed one by one with supporting evidence and examples.
- Before moving on to the next point you should provide a mini-summary.
- Links should be clearly stated between ideas and you must make it clear when you’re moving onto the next point.
- Allow time for people to take relevant notes and stick to the topics you have prepared beforehand rather than straying too far off topic.
When planning your presentation write a list of main points you want to make and ask yourself “What I am telling the audience? What should they understand from this?” refining your answers this way will help you produce clear messages.
4. Conclusion
In presentations the conclusion is frequently underdeveloped and lacks purpose which is a shame as it’s the best place to reinforce your messages. Typically, your presentation has a specific goal – that could be to convert a number of the audience members into customers, lead to a certain number of enquiries to make people knowledgeable on specific key points, or to motivate them towards a shared goal.
Regardless of what that goal is, be sure to summarise your main points and their implications. This clarifies the overall purpose of your talk and reinforces your reason for being there.
Follow these steps:
- Signal that it’s nearly the end of your presentation, for example, “As we wrap up/as we wind down the talk…”
- Restate the topic and purpose of your presentation – “In this speech I wanted to compare…”
- Summarise the main points, including their implications and conclusions
- Indicate what is next/a call to action/a thought-provoking takeaway
- Move on to the last section
5. Thank the audience and invite questions
Conclude your talk by thanking the audience for their time and invite them to ask any questions they may have. As mentioned earlier, personal circumstances will affect the structure of your presentation.
Many presenters prefer to make the Q&A session the key part of their talk and try to speed through the main body of the presentation. This is totally fine, but it is still best to focus on delivering some sort of initial presentation to set the tone and topics for discussion in the Q&A.

Other common presentation structures
The above was a description of a basic presentation, here are some more specific presentation layouts:
Demonstration
Use the demonstration structure when you have something useful to show. This is usually used when you want to show how a product works. Steve Jobs frequently used this technique in his presentations.
- Explain why the product is valuable.
- Describe why the product is necessary.
- Explain what problems it can solve for the audience.
- Demonstrate the product to support what you’ve been saying.
- Make suggestions of other things it can do to make the audience curious.
Problem-solution
This structure is particularly useful in persuading the audience.
- Briefly frame the issue.
- Go into the issue in detail showing why it ‘s such a problem. Use logos and pathos for this – the logical and emotional appeals.
- Provide the solution and explain why this would also help the audience.
- Call to action – something you want the audience to do which is straightforward and pertinent to the solution.
Storytelling
As well as incorporating stories in your presentation , you can organise your whole presentation as a story. There are lots of different type of story structures you can use – a popular choice is the monomyth – the hero’s journey. In a monomyth, a hero goes on a difficult journey or takes on a challenge – they move from the familiar into the unknown. After facing obstacles and ultimately succeeding the hero returns home, transformed and with newfound wisdom.
Storytelling for Business Success webinar , where well-know storyteller Javier Bernad shares strategies for crafting compelling narratives.
Another popular choice for using a story to structure your presentation is in media ras (in the middle of thing). In this type of story you launch right into the action by providing a snippet/teaser of what’s happening and then you start explaining the events that led to that event. This is engaging because you’re starting your story at the most exciting part which will make the audience curious – they’ll want to know how you got there.
- Great storytelling: Examples from Alibaba Founder, Jack Ma
Remaining method
The remaining method structure is good for situations where you’re presenting your perspective on a controversial topic which has split people’s opinions.
- Go into the issue in detail showing why it’s such a problem – use logos and pathos.
- Rebut your opponents’ solutions – explain why their solutions could be useful because the audience will see this as fair and will therefore think you’re trustworthy, and then explain why you think these solutions are not valid.
- After you’ve presented all the alternatives provide your solution, the remaining solution. This is very persuasive because it looks like the winning idea, especially with the audience believing that you’re fair and trustworthy.
Transitions
When delivering presentations it’s important for your words and ideas to flow so your audience can understand how everything links together and why it’s all relevant. This can be done using speech transitions which are words and phrases that allow you to smoothly move from one point to another so that your speech flows and your presentation is unified.
Transitions can be one word, a phrase or a full sentence – there are many different forms, here are some examples:
Moving from the introduction to the first point
Signify to the audience that you will now begin discussing the first main point:
- Now that you’re aware of the overview, let’s begin with…
- First, let’s begin with…
- I will first cover…
- My first point covers…
- To get started, let’s look at…
Shifting between similar points
Move from one point to a similar one:
- In the same way…
- Likewise…
- Equally…
- This is similar to…
- Similarly…
Internal summaries
Internal summarising consists of summarising before moving on to the next point. You must inform the audience:
- What part of the presentation you covered – “In the first part of this speech we’ve covered…”
- What the key points were – “Precisely how…”
- How this links in with the overall presentation – “So that’s the context…”
- What you’re moving on to – “Now I’d like to move on to the second part of presentation which looks at…”
Physical movement
You can move your body and your standing location when you transition to another point. The audience find it easier to follow your presentation and movement will increase their interest.
A common technique for incorporating movement into your presentation is to:
- Start your introduction by standing in the centre of the stage.
- For your first point you stand on the left side of the stage.
- You discuss your second point from the centre again.
- You stand on the right side of the stage for your third point.
- The conclusion occurs in the centre.
Key slides for your presentation
Slides are a useful tool for most presentations: they can greatly assist in the delivery of your message and help the audience follow along with what you are saying. Key slides include:
- An intro slide outlining your ideas
- A summary slide with core points to remember
- High quality image slides to supplement what you are saying
There are some presenters who choose not to use slides at all, though this is more of a rarity. Slides can be a powerful tool if used properly, but the problem is that many fail to do just that. Here are some golden rules to follow when using slides in a presentation:
- Don’t over fill them – your slides are there to assist your speech, rather than be the focal point. They should have as little information as possible, to avoid distracting people from your talk.
- A picture says a thousand words – instead of filling a slide with text, instead, focus on one or two images or diagrams to help support and explain the point you are discussing at that time.
- Make them readable – depending on the size of your audience, some may not be able to see small text or images, so make everything large enough to fill the space.
- Don’t rush through slides – give the audience enough time to digest each slide.
Guy Kawasaki, an entrepreneur and author, suggests that slideshows should follow a 10-20-30 rule :
- There should be a maximum of 10 slides – people rarely remember more than one concept afterwards so there’s no point overwhelming them with unnecessary information.
- The presentation should last no longer than 20 minutes as this will leave time for questions and discussion.
- The font size should be a minimum of 30pt because the audience reads faster than you talk so less information on the slides means that there is less chance of the audience being distracted.
Here are some additional resources for slide design:
- 7 design tips for effective, beautiful PowerPoint presentations
- 11 design tips for beautiful presentations
- 10 tips on how to make slides that communicate your idea
Group Presentations
Group presentations are structured in the same way as presentations with one speaker but usually require more rehearsal and practices. Clean transitioning between speakers is very important in producing a presentation that flows well. One way of doing this consists of:
- Briefly recap on what you covered in your section: “So that was a brief introduction on what health anxiety is and how it can affect somebody”
- Introduce the next speaker in the team and explain what they will discuss: “Now Elnaz will talk about the prevalence of health anxiety.”
- Then end by looking at the next speaker, gesturing towards them and saying their name: “Elnaz”.
- The next speaker should acknowledge this with a quick: “Thank you Joe.”
From this example you can see how the different sections of the presentations link which makes it easier for the audience to follow and remain engaged.
Example of great presentation structure and delivery
Having examples of great presentations will help inspire your own structures, here are a few such examples, each unique and inspiring in their own way.
How Google Works – by Eric Schmidt
This presentation by ex-Google CEO Eric Schmidt demonstrates some of the most important lessons he and his team have learnt with regards to working with some of the most talented individuals they hired. The simplistic yet cohesive style of all of the slides is something to be appreciated. They are relatively straightforward, yet add power and clarity to the narrative of the presentation.
Start with why – by Simon Sinek
Since being released in 2009, this presentation has been viewed almost four million times all around the world. The message itself is very powerful, however, it’s not an idea that hasn’t been heard before. What makes this presentation so powerful is the simple message he is getting across, and the straightforward and understandable manner in which he delivers it. Also note that he doesn’t use any slides, just a whiteboard where he creates a simple diagram of his opinion.
The Wisdom of a Third Grade Dropout – by Rick Rigsby
Here’s an example of a presentation given by a relatively unknown individual looking to inspire the next generation of graduates. Rick’s presentation is unique in many ways compared to the two above. Notably, he uses no visual prompts and includes a great deal of humour.
However, what is similar is the structure he uses. He first introduces his message that the wisest man he knew was a third-grade dropout. He then proceeds to deliver his main body of argument, and in the end, concludes with his message. This powerful speech keeps the viewer engaged throughout, through a mixture of heart-warming sentiment, powerful life advice and engaging humour.
As you can see from the examples above, and as it has been expressed throughout, a great presentation structure means analysing the core message of your presentation. Decide on a key message you want to impart the audience with, and then craft an engaging way of delivering it.
By preparing a solid structure, and practising your talk beforehand, you can walk into the presentation with confidence and deliver a meaningful message to an interested audience.
It’s important for a presentation to be well-structured so it can have the most impact on your audience. An unstructured presentation can be difficult to follow and even frustrating to listen to. The heart of your speech are your main points supported by evidence and your transitions should assist the movement between points and clarify how everything is linked.
Research suggests that the audience remember the first and last things you say so your introduction and conclusion are vital for reinforcing your points. Essentially, ensure you spend the time structuring your presentation and addressing all of the sections.
Critical PowerPoint Shortcuts – Claim Your FREE Training Module and Get Your Time Back!
How to Make a PowerPoint Presentation (Step-by-Step)
- PowerPoint Tutorials
- Presentation Design
- January 22, 2024
In this beginner’s guide, you will learn step-by-step how to make a PowerPoint presentation from scratch.
While PowerPoint is designed to be intuitive and accessible, it can be overwhelming if you’ve never gotten any training on it before. As you progress through this guide, you’ll will learn how to move from blank slides to PowerPoint slides that look like these.

Table of Contents
Additionally, as you create your presentation, you’ll also learn tricks for working more efficiently in PowerPoint, including how to:
- Change the slide order
- Reset your layout
- Change the slide dimensions
- Use PowerPoint Designer
- Format text
- Format objects
- Play a presentation (slide show)
With this knowledge under your belt, you’ll be ready to start creating PowerPoint presentations. Moreover, you’ll have taken your skills from beginner to proficient in no time at all. I will also include links to more advanced PowerPoint topics.
Ready to start learning how to make a PowerPoint presentation?
Take your PPT skills to the next level
Start with a blank presentation.
Note: Before you open PowerPoint and start creating your presentation, make sure you’ve collected your thoughts. If you’re going to make your slides compelling, you need to spend some time brainstorming.
For help with this, see our article with tips for nailing your business presentation here .
The first thing you’ll need to do is to open PowerPoint. When you do, you are shown the Start Menu , with the Home tab open.
This is where you can choose either a blank theme (1) or a pre-built theme (2). You can also choose to open an existing presentation (3).
For now, go ahead and click on the Blank Presentation (1) thumbnail.

Doing so launches a brand new and blank presentation for you to work with. Before you start adding content to your presentation, let’s first familiarize ourselves with the PowerPoint interface.
The PowerPoint interface

Here is how the program is laid out:
- The Application Header
- The Ribbon (including the Ribbon tabs)
- The Quick Access Toolbar (either above or below the Ribbon)
- The Slides Pane (slide thumbnails)
The Slide Area
The notes pane.
- The Status Bar (including the View Buttons)
Each one of these areas has options for viewing certain parts of the PowerPoint environment and formatting your presentation.
Below are the important things to know about certain elements of the PowerPoint interface.
The PowerPoint Ribbon

The Ribbon is contextual. That means that it will adapt to what you’re doing in the program.
For example, the Font, Paragraph and Drawing options are greyed out until you select something that has text in it, as in the example below (A).

Furthermore, if you start manipulating certain objects, the Ribbon will display additional tabs, as seen above (B), with more commands and features to help you work with those objects. The following objects have their own additional tabs in the Ribbon which are hidden until you select them:
- Online Pictures
- Screenshots
- Screen Recording
The Slides Pane

This is where you can preview and rearrange all the slides in your presentation.
Right-clicking on a slide in the pane gives you additional options on the slide level that you won’t find on the Ribbon, such as Duplicate Slide , Delete Slide , and Hide Slide .

In addition, you can add sections to your presentation by right-clicking anywhere in this Pane and selecting Add Section . Sections are extremely helpful in large presentations, as they allow you to organize your slides into chunks that you can then rearrange, print or display differently from other slides.

The Slide Area (A) is where you will build out your slides. Anything within the bounds of this area will be visible when you present or print your presentation.
Anything outside of this area (B) will be hidden from view. This means that you can place things here, such as instructions for each slide, without worrying about them being shown to your audience.

The Notes Pane is the space beneath the Slide Area where you can type in the speaker notes for each slide. It’s designed as a fast way to add and edit your slides’ talking points.
To expand your knowledge and learn more about adding, printing, and exporting your PowerPoint speaker notes, read our guide here .
Your speaker notes are visible when you print your slides using the Notes Pages option and when you use the Presenter View . To expand your knowledge and learn the ins and outs of using the Presenter View , read our guide here .

You can resize the Notes Pane by clicking on its edge and dragging it up or down (A). You can also minimize or reopen it by clicking on the Notes button in the Status Bar (B).
Note: Not all text formatting displays in the Notes Pane, even though it will show up when printing your speaker notes. To learn more about printing PowerPoint with notes, read our guide here .
Now that you have a basic grasp of the PowerPoint interface at your disposal, it’s time to make your presentation.
Adding Content to Your PowerPoint Presentation
Notice that in the Slide Area , there are two rectangles with dotted outlines. These are called Placeholders and they’re set on the template in the Slide Master View .
To expand your knowledge and learn how to create a PowerPoint template of your own (which is no small task), read our guide here .

As the prompt text suggests, you can click into each placeholder and start typing text. These types of placeholder prompts are customizable too. That means that if you are using a company template, it might say something different, but the functionality is the same.

Note: For the purposes of this example, I will create a presentation based on the content in the Starbucks 2018 Global Social Impact Report, which is available to the public on their website.
If you type in more text than there is room for, PowerPoint will automatically reduce its font size. You can stop this behavior by clicking on the Autofit Options icon to the left of the placeholder and selecting Stop Fitting Text to this Placeholder .
Next, you can make formatting adjustments to your text by selecting the commands in the Font area and the Paragraph area of the Home tab of the Ribbon.

The Reset Command: If you make any changes to your title and decide you want to go back to how it was originally, you can use the Reset button up in the Home tab .

Insert More Slides into Your Presentation
Now that you have your title slide filled in, it’s time to add more slides. To do that, simply go up to the Home tab and click on New Slide . This inserts a new slide in your presentation right after the one you were on.

You can alternatively hit Ctrl+M on your keyboard to insert a new blank slide in PowerPoint. To learn more about this shortcut, see my guide on using Ctrl+M in PowerPoint .
Instead of clicking the New Slide command, you can also open the New Slide dropdown to see all the slide layouts in your PowerPoint template. Depending on who created your template, your layouts in this dropdown can be radically different.

If you insert a layout and later want to change it to a different layout, you can use the Layout dropdown instead of the New Slide dropdown.
After inserting a few different slide layouts, your presentation might look like the following picture. Don’t worry that it looks blank, next we will start adding content to your presentation.

If you want to follow along exactly with me, your five slides should be as follows:
- Title Slide
- Title and Content
- Section Header
- Two Content
- Picture with Caption
Adding Content to Your Slides
Now let’s go into each slide and start adding our content. You’ll notice some new types of placeholders.

On slide 2 we have a Content Placeholder , which allows you to add any kind of content. That includes:
- A SmartArt graphic,
- A 3D object,
- A picture from the web,
- Or an icon.
To insert text, simply type it in or hit Ctrl+C to Copy and Ctrl+V to Paste from elsewhere. To insert any of the other objects, click on the appropriate icon and follow the steps to insert it.
For my example, I’ll simply type in some text as you can see in the picture below.

Slides 3 and 4 only have text placeholders, so I’ll go ahead and add in my text into each one.

On slide 5 we have a Picture Placeholder . That means that the only elements that can go into it are:
- A picture from the web

To insert a picture into the picture placeholder, simply:
- Click on the Picture icon
- Find a picture on your computer and select it
- Click on Insert
Alternatively, if you already have a picture open somewhere else, you can select the placeholder and paste in (shortcut: Ctrl+V ) the picture. You can also drag the picture in from a file explorer window.

If you do not like the background of the picture you inserted onto your slide, you can remove the background here in PowerPoint. To see how to do this, read my guide here .
Placeholders aren’t the only way to add content to your slides. At any point, you can use the Insert tab to add elements to your slides.
You can use either the Title Only or the Blank slide layout to create slides for content that’s different. For example, a three-layout content slide, or a single picture divider slide, as shown below.

In the first example above, I’ve inserted 6 text boxes, 3 icons, and 3 circles to create this layout. In the second example, I’ve inserted a full-sized picture and then 2 shapes and 2 text boxes.
The Reset Command: Because these slides are built with shapes and text boxes (and not placeholders), hitting the Reset button up in the Home tab won’t do anything.
That is a good thing if you don’t want your layouts to adjust. However, it does mean that it falls on you to make sure everything is aligned and positioned correctly.
For more on how to add and manipulate the different objects in PowerPoint, check out our step-by-step articles here:
- Using graphics in PowerPoint
- Inserting icons onto slides
- Adding pictures to your PowerPoint
- How to embed a video in PowerPoint
- How to add music to your presentation
Using Designer to generate more layouts ideas
If you have Office 365, your version of PowerPoint comes with a new feature called Designer (or Design Ideas). This is a feature that generates slide layout ideas for you. The coolest thing about this feature is that it uses the content you already have.
To use Designer , simply navigate to the Design tab in your Ribbon, and click on Design Ideas .

NOTE: If the PowerPoint Designer is not working for you (it is grey out), see my troubleshooting guide for Designer .
Change the Overall Design (optional)
When you make a PowerPoint presentation, you’ll want to think about the overall design. Now that you have some content in your presentation, you can use the Design tab to change the look and feel of your slides.
For additional help thinking through the design of your presentation, read my guide here .
A. Picking your PowerPoint slide size
If you have PowerPoint 2013 or later, when you create a blank document in PowerPoint, you automatically start with a widescreen layout with a 16:9 ratio. These dimensions are suitable for most presentations as they match the screens of most computers and projectors.
However, you do have the option to change the dimensions.
For example, your presentation might not be presented, but instead converted into a PDF or printed and distributed. In that case, you can easily switch to the standard dimensions with a 4:3 ratio by selecting from the dropdown (A).
You can also choose a custom slide size or change the slide orientation from landscape to portrait in the Custom Slide Size dialog box (B).

To learn all about the different PowerPoint slide sizes, and some of the issues you will face when changing the slide size of a non-blank presentation, read my guide here .
B. Selecting a PowerPoint theme
The next thing you can do is change the theme of your presentation to a pre-built one. For a detailed explanation of what a PowerPoint theme is, and how to best use it, read my article here .
In the beginning of this tutorial, we started with a blank presentation, which uses the default Office theme as you can see in the picture below.

That gives you the most flexibility because it has a blank background and quite simple layouts that work for most presentations. However, it also means that it’s your responsibility to enhance the design.
If you’re comfortable with this, you can stay with the default theme or create your own custom theme ( read my guide here ). But if you would rather not have to think about design, then you can choose a pre-designed theme.
Microsoft provides 46 other pre-built themes, which include slide layouts, color variants and palettes, and fonts. Each one varies quite significantly, so make sure you look through them carefully.
To select a different theme, go to the Design tab in the Ribbon, and click on the dropdown arrow in the Themes section .

For this tutorial, let’s select the Frame theme and then choose the third Variant in the theme. Doing so changes the layout, colors, and fonts of your presentation.

Note: The theme dropdown area is also where you can import or save custom themes. To see my favorite places to find professional PowerPoint templates and themes (and recommendations for why I like them), read my guide here .
C. How to change a slide background in PowerPoint
The next thing to decide is how you want your background to look for the entire presentation. In the Variants area, you can see four background options.

For this example, we want our presentation to have a dark background, so let’s select Style 3. When you do so, you’ll notice that:
- The background color automatically changes across all slides
- The color of the text on most of the slides automatically changes to white so that it’s visible on the dark background
- The colors of the objects on slides #6 and #7 also adjust, in a way we may not want (we’ll likely have to make some manual adjustments to these slides)

Note: If you want to change the slide background for just that one slide, don’t left-click the style. Instead, right-click it and select Apply to Selected Slides .
After you change the background for your entire presentation, you can easily adjust the background for an individual slide.

Inside the Format Background pane, you can see you have the following options:
- Gradient fill
- Picture or texture fill
- Pattern fill
- Hide background
You can explore these options to find the PowerPoint background that best fits your presentation.
D. How to change your color palette in PowerPoint
Another thing you may want to adjust in your presentation, is the color scheme. In the picture below you can see the Theme Colors we are currently using for this presentation.

Each PowerPoint theme comes with its own color palette. By default, the Office theme includes the Office color palette. This affects the colors you are presented with when you format any element within your presentation (text, shapes, SmartArt, etc.).

The good news is that the colors here are easy to change. To switch color palettes, simply:
- Go to the Design tab in the Ribbon
- In the Variants area, click on the dropdown arrow and select Colors
- Select the color palette (or theme colors) you want
You can choose among the pre-built color palettes from Office, or you can customize them to create your own.
As you build your presentation, make sure you use the colors from your theme to format objects. That way, changing the color palette adjusts all the colors in your presentation automatically.
E. How to change your fonts in PowerPoint
Just as we changed the color palette, you can do the same for the fonts.

Each PowerPoint theme comes with its own font combination. By default, the Office theme includes the Office font pairing. This affects the fonts that are automatically assigned to all text in your presentation.

The good news is that the font pairings are easy to change. To switch your Theme Fonts, simply:
- Go to the Design tab in the Ribbon
- Click on the dropdown arrow in the Variants area
- Select Fonts
- Select the font pairing you want
You can choose among the pre-built fonts from Office, or you can customize them to create your own.
If you are working with PowerPoint presentations on both Mac and PC computers, make sure you choose a safe PowerPoint font. To see a list of the safest PowerPoint fonts, read our guide here .
If you receive a PowerPoint presentation and the wrong fonts were used, you can use the Replace Fonts dialog box to change the fonts across your entire presentation. For details, read our guide here .
Adding Animations & Transitions (optional)
The final step to make a PowerPoint presentation compelling, is to consider using animations and transitions. These are by no means necessary to a good presentation, but they may be helpful in your situation.
A. Adding PowerPoint animations
PowerPoint has an incredibly robust animations engine designed to power your creativity. That being said, it’s also easy to get started with basic animations.
Animations are movements that you can apply to individual objects on your slide.

To add a PowerPoint animation to an element of your slide, simply:
- Select the element
- Go to the Animations tab in the Ribbon
- Click on the dropdown arrow to view your options
- Select the animation you want
You can add animations to multiple objects at one time by selecting them all first and then applying the animation.
B. How to preview a PowerPoint animation

There are three ways to preview a PowerPoint animation:
- Click on the Preview button in the Animations tab
- Click on the little star next to the slide
- Play the slide in Slide Show Mode
To learn other ways to run your slide show, see our guide on presenting a PowerPoint slide show with shortcuts .
To adjust the settings of your animations, explore the options in the Effect Options , Advanced Animation and the Timing areas of the Animation tab .

Note: To see how to make objects appear and disappear in your slides by clicking a button, read our guide here .
C. How to manage your animations in PowerPoint

The best way to manage lots of animations on your slide is with the Animation Pane . To open it, simply:
- Navigate to the Animations tab
- Select the Animation Pane
Inside the Animation Pane, you’ll see all of the different animations that have been applied to objects on your slide, with their numbers marked as pictured above.
Note: To see examples of PowerPoint animations that can use in PowerPoint, see our list of PowerPoint animation tutorials here .
D. How to add transitions to your PowerPoint presentation
PowerPoint has an incredibly robust transition engine so that you can dictate how your slides change from one to the other. It is also extremely easy to add transitions to your slides.
In PowerPoint, transitions are the movements (or effects) you see as you move between two slides.

To add a transition to a PowerPoint slide, simply:
- Select the slide
- Go to the Transitions tab in the Ribbon
- In the Transitions to This Slide area, click on the dropdown arrow to view your options
- Select the transition you want
To adjust the settings of the transition, explore the options in the Timing area of the Transitions tab.
You can also add the same transition to multiple slides. To do that, select them in the Slides Pane and apply the transition.
E. How to preview a transition in PowerPoint

There are three ways to preview your PowerPoint transitions (just like your animations):
- Click on the Preview button in the Transitions tab
- Click on the little star beneath the slide number in the thumbnail view
Note: In 2016, PowerPoint added a cool new transition, called Morph. It operates a bit differently from other transitions. For a detailed tutorial on how to use the cool Morph transition, see our step-by-step article here .
Save Your PowerPoint Presentation
After you’ve built your presentation and made all the adjustments to your slides, you’ll want to save your presentation. YOu can do this several different ways.

To save a PowerPoint presentation using your Ribbon, simply:
- Navigate to the File tab
- Select Save As on the left
- Choose where you want to save your presentation
- Name your presentation and/or adjust your file type settings
- Click Save
You can alternatively use the Ctrl+S keyboard shortcut to save your presentation. I recommend using this shortcut frequently as you build your presentation to make sure you don’t lose any of your work.

This is the standard way to save a presentation. However, there may be a situation where you want to save your presentation as a different file type.
To learn how to save your presentation as a PDF, see our guide on converting PowerPoint to a PDF .
How to save your PowerPoint presentation as a template
Once you’ve created a presentation that you like, you may want to turn it into a template. The easiest – but not technically correct – way, is to simply create a copy of your current presentation and then change the content.
But be careful! A PowerPoint template is a special type of document and it has its own parameters and behaviors.
If you’re interested in learning about how to create your own PowerPoint template from scratch, see our guide on how to create a PowerPoint template .
Printing Your PowerPoint Presentation
After finishing your PowerPoint presentation, you may want to print it out on paper. Printing your slides is relatively easy.

To open the Print dialog box, you can either:
- Hit Ctrl+P on your keyboard
- Or go to the Ribbon and click on File and then Print

Inside the Print dialog box, you can choose from the various printing settings:
- Printer: Select a printer to use (or print to PDF or OneNote)
- Slides: Choose which slides you want to print
- Layout: Determine how many slides you want per page (this is where you can print the notes, outline, and handouts)
- Collated or uncollated (learn what collated printing means here )
- Color: Choose to print in color, grayscale or black & white
There are many more options for printing your PowerPoint presentations. Here are links to more in-depth articles:
- How to print multiple slides per page
- How to print your speaker notes in PowerPoint
- How to save PowerPoint as a picture presentation
So that’s how to create a PowerPoint presentation if you are brand new to it. We’ve also included a ton of links to helpful resources to boost your PowerPoint skills further.
When you are creating your presentation, it is critical to first focus on the content (what you are trying to say) before getting lost inserting and playing with elements. The clearer you are on what you want to present, the easier it will be to build it out in PowerPoint.
If you enjoyed this article, you can learn more about our PowerPoint training courses and other presentation resources by visiting us here .
🔒 Unlock the PowerPoint Shortcuts Trusted by Industry Leaders KKR, American Express, HSBC, and More!
Join over 114,880 professionals from diverse fields including consulting, investment banking, advertising, marketing, sales, and business development who have supercharged their PowerPoint game with our proven methods.
✅ Customize compelling presentations effortlessly.
✅ Master time-saving techniques for faster deck creation.
✅ Boost your career prospects with top-notch PowerPoint skills.
Get FREE access to the Critical PowerPoint Shortcuts module of our premium training course by entering your name and email below.
DISCLAIMER: PC Users Only!
We respect your privacy and will keep your info safe and confidential.
About The Author

Popular Tutorials
- How to Strikethrough Text (l̶i̶k̶e̶ ̶t̶h̶i̶s̶) in Word, Excel & PowerPoint
- How to Make Animated Fireworks in PowerPoint (Step-by-Step)
- Strikethrough Shortcut (l̶i̶k̶e̶ ̶t̶h̶i̶s̶) for Word, Excel & PowerPoint
- How to Create a Flash Card Memory Game in PowerPoint (Like Jeopardy)
- Keyboard Shortcuts Not Working: Solved
PowerPoint Tutorial Categories
- Strategies & Opinions
- Shortcuts & Hacks
- Pictures, Icons, Videos, Etc.
- New Features
- Miscellaneous
- Charts & Data Viz
We help busy professionals save hours and gain peace of mind, with corporate workshops, self-paced courses and tutorials for PowerPoint and Word.
Work With Us
- Corporate Training
- Presentation & Template Design
- Courses & Downloads
- PowerPoint Articles
- Word Articles
- Productivity Resources
Find a Tutorial
- Free Training
- For Businesses
We help busy office workers save hours and gain peace of mind, with tips, training and tutorials for Microsoft PowerPoint and Word.
Master Critical PowerPoint Shortcuts – Secure Your FREE Training Module and Save Valuable Time!
⌛ Master time-saving expert techniques.
🔥 Create powerful presentations.
🚀 Propel your career to new heights.
We value your privacy – we keep your info safe.
Discover PowerPoint Hacks Loved by Industry Giants - KKR, AmEx, HSBC!
Over 114,880 professionals in finance, marketing and sales have revolutionized their PPT skills with our proven methods.
Gain FREE access to a full module of our premium PowerPoint training program – Get started today!
We hate spam too and promise to keep your information safe.
You are currently viewing a placeholder content from Facebook . To access the actual content, click the button below. Please note that doing so will share data with third-party providers.

How it works
For Business
Join Mind Tools
Article • 10 min read
How to Structure a Presentation
Choosing the best format for your audience.
By the Mind Tools Content Team

Have you ever sat through a rambling, disorganized presentation? If so, you probably found it hard to follow what the speaker was saying.
When presentations don't flow well, it's easy for audiences to get lost. This is why it's important to think carefully about the structure and organization of your presentation.
In this article, we'll explore some common structures that you can use next time you speak in front of other people.
The Importance of Structure
Without a defined structure, your audience may not be able to follow your presentation. When this happens, your opportunity is lost, the communication fails, and your reputation takes a hit. For example, if your aim is to persuade people, you'll want to use a different approach from the one you'd use if you wanted to demonstrate how a product works.
Many factors can influence your choice of structure, but the most important consideration is your presentation's purpose or goal. You need to identify what you want to achieve – do you want to inspire, motivate, inform, persuade, or entertain people?
Your audience's needs also affect the structure you choose. For example, those who are new to your topic need more background information than people with more expertise and experience. So, in this case, you'd want to choose an approach that gives you ample time to explain the context of your subject, as well as to reinforce your main points.
Structures to Consider
Below, we outline several structures that you can use to organize your presentation.
1. Open – Body – Conclusion
The Open – Body – Conclusion approach is one of the most practical structures you can use for presentations. (Click here to download a worksheet that helps you use it.)
People often call it the "tell 'em" approach, because you:
- Tell audience members what you're going to tell them (introduction).
- Tell them (body).
- Tell them what you told them (conclusion).
This structure is simple, effective and easy to remember. Its repetitive nature allows you to reinforce your points, which helps others remember them. It is also flexible: you can adjust the introduction and body to persuade, motivate, educate, or entertain them.
One downside, however, is that repetition can quickly bore people. The approach is also "old hat" to many, which can cause them to lose interest. If you choose to use it, balance repetition with plenty of interesting facts, images, anecdotes, or stories to hold your audience's interest.
Let's look at each stage of the Open – Body – Conclusion structure in detail and discuss the elements that you need to include in each. We'll start with the body, rather than the introduction, because the rest of your presentation will be based on that.
The body of your presentation needs to contain your key points. You should present these in a logical order, so that your audience can follow them easily.
Keep in mind that the body should comprise a limited number of ideas: the more you try to include, the fewer people will remember. A good guide is to cover three to five main points, but no more.
When organizing your ideas, use the chunking principle to put the information into specific units. This will make the concepts easier to grasp, and help people remember what you have told them.
Make sure that you back up your main points with facts. Use good information-gathering strategies in your research, and consider citing the sources that you use. To add credibility to your presentation, consider using the following information to support your ideas:
- Data, facts or statistics.
- Images or diagrams.
- Stories and examples.
- Quotes or testimonials from experts or industry leaders.
Reliable sources will strengthen your credibility , and build trust with your audience.
Your opening, or introduction, has two main purposes: to grab your audience's attention, and to cover the key points that you intend to talk about.
Instead of telling people what you plan to say, you can use a different approach and explain why they are there. What will they learn from your presentation, and how will the content benefit them?
It's also important to get their attention right from the beginning. You can do this in several ways:
- Tell a story.
- Ask a rhetorical question.
- Play a short video.
- Make a strong or unexpected statement.
- Challenge your audience.
- Use a quotation or example.
- Appeal to people's self-interest.
- Request a specific action.
- Use suspense.
If you plan to answer questions at the end of your presentation, it's a good idea to mention this in the introduction, so people don't interrupt you mid-flow.
Many presenters overlook the importance of a conclusion – but the statements you finish with are what many audience members will remember best.
With the "tell 'em" approach, your conclusion summarizes the main points in the body of your presentation. If you want people to take action, be specific about what you want them to do.
Think carefully about how you want them to feel once you've finished; your conclusion is a great opportunity to reinforce this. Why not inspire them with a great story, a quote or a compelling call to action?
2. The Sandwich Approach
The Sandwich Approach is a variation of the Open – Body – Conclusion structure. This three-part structure covers:
- Advantages and/or benefits of your message or idea.
- Risks and concerns.
- How the benefits manage or eliminate those risks.
This approach is effective when you want to persuade audience members, or change their minds.
Having evidence to support your position is critical. However, factual data and reams of spreadsheets and charts are not highly persuasive. What people respond to is "vivid" evidence that brings your concept or argument to life.
To brush up on your persuasion skills, look at The Rhetorical Triangle . This tool asks you to consider your communication from three perspectives: those of the writer, the audience and the context. It's a method that builds credibility, and helps you ensure that your arguments are logical.
3. Monroe's Motivated Sequence
Monroe's Motivated Sequence is another good structure to use when you need to motivate or persuade. This sequence consists of five key steps:
- Getting your audience's attention – Use an interesting "hook" or opening point, such as a shocking statistic. Be provocative and stimulating, not boring and unemotional.
- Creating a need – Convince the audience there's a problem, explain how it affects them. Persuade them that things need to change.
- Defining your solution – Explain what you think needs to be done.
- Describing a detailed picture of success (or failure) – Give people a vision; something they can see, hear, taste, and touch.
- Asking the audience to do something straight away – Get them involved right from the start. If you do this, it's then much easier to keep them engaged and active in your cause.
4. Demonstration Structure
Use a simple demonstration structure when you are unveiling a new product or service.
Start by explaining why the product or service is so good. What makes it special? What problem will it solve for people?
Next, demonstrate what it does. How you do this will depend on your product but, whatever you do, make sure it works! Bring any important points to the audience's attention and provide helpful tips, where appropriate. Show them the results, and finish by giving them useful information, a good understanding of your topic, and something to remember.
Don't get too wrapped up in the detail; remember to keep it simple. Your presentation will be more powerful and your audience will remember more if you highlight just a few of the most important features. This will whet their appetite, and leave them wanting to know more.
5. Opportunity, Benefits, Numbers Structure
The Opportunity, Benefits, Number (OBN) structure is useful when you face busy people who want to hear what you have to say in the shortest time possible.
To use this structure, give audience members a quick summary of the opportunity that they need to consider, and outline the benefits that they can expect. Then, show them the numbers that back up your claims. [1]
For example, imagine you are explaining why your company should implement a new performance management system. First, you might give some background on the proposal – for example, you want to drive a high-performance culture. Then, you could explain the benefits, such as improving organizational performance and profits. Finally, you could compare the cost of bringing the system in with the predicted return on investment, based on a similar system at another organization.
Presentations that lack a clear flow are confusing and ineffective. This is why it's important to pay careful attention when choosing the most appropriate structure.
Different structures fulfill different purposes. Before you begin, think about why you are giving your presentation. Do you want to inform, persuade, inspire, or entertain your audience?
The most common structure for presentations is Open – Body – Conclusion. This is often effective because it gives you the opportunity to repeat your key points a number of times. However, other structures can be more appropriate, depending on the circumstances, such as when you're trying to persuade an audience, demonstrate a product, or provide information in the most time-efficient way.
Download Worksheet
[1] Martinuzzi, B. (2013). '11 Ways to Structure a Knockout Presentation,' from American Express OPEN Forum [online]. Available here . [Accessed 7 August 2014.]
You've accessed 1 of your 2 free resources.
Get unlimited access
Discover more content
Book Insights
The Executive Checklist: A Guide for Setting Direction and Managing Change
Animated Video
Managing Different Generations
Looking past X, Y and Z
Add comment
Comments (0)
Be the first to comment!

Get 30% off your first year of Mind Tools
Great teams begin with empowered leaders. Our tools and resources offer the support to let you flourish into leadership. Join today!
Sign-up to our newsletter
Subscribing to the Mind Tools newsletter will keep you up-to-date with our latest updates and newest resources.
Subscribe now
Business Skills
Personal Development
Leadership and Management
Member Extras
Most Popular
Newest Releases

What Is Stakeholder Management?

GE-McKinsey Matrix
Mind Tools Store
About Mind Tools Content
Discover something new today
Business reports.
Using the Right Format for Sharing Information
Making the Right Career Move
Choosing the Role That's Best for You
How Emotionally Intelligent Are You?
Boosting Your People Skills
Self-Assessment
What's Your Leadership Style?
Learn About the Strengths and Weaknesses of the Way You Like to Lead
Recommended for you
Ask for more.
Alexandra Carter
Expert Interviews
Business Operations and Process Management
Strategy Tools
Customer Service
Business Ethics and Values
Handling Information and Data
Project Management
Knowledge Management
Self-Development and Goal Setting
Time Management
Presentation Skills
Learning Skills
Career Skills
Communication Skills
Negotiation, Persuasion and Influence
Working With Others
Difficult Conversations
Creativity Tools
Self-Management
Work-Life Balance
Stress Management and Wellbeing
Coaching and Mentoring
Change Management
Team Management
Managing Conflict
Delegation and Empowerment
Performance Management
Leadership Skills
Developing Your Team
Talent Management
Problem Solving
Decision Making
Member Podcast

How To Write A Presentation 101 | Step-by-Step Guides with Best Examples | 2024 Reveals
Jane Ng • 05 Apr 2024 • 8 min read
Is it difficult to start of presentation? You’re standing before a room full of eager listeners, ready to share your knowledge and captivate their attention. But where do you begin? How do you structure your ideas and convey them effectively?
Take a deep breath, and fear not! In this article, we’ll provide a road map on how to write a presentation covering everything from crafting a script to creating an engaging introduction.
So, let’s dive in!
Table of Contents
What is a presentation , what should be in a powerful presentation.
- How To Write A Presentation Script
- How to Write A Presentation Introduction
Key Takeaways
Tips for better presentation.
- How to start a presentation
- How to introduce yourself

Start in seconds.
Get free templates for your next interactive presentation. Sign up for free and take what you want from the template library!
Presentations are all about connecting with your audience.
Presenting is a fantastic way to share information, ideas, or arguments with your audience. Think of it as a structured approach to effectively convey your message. And you’ve got options such as slideshows, speeches, demos, videos, and even multimedia presentations!
The purpose of a presentation can vary depending on the situation and what the presenter wants to achieve.
- In the business world, presentations are commonly used to pitch proposals, share reports, or make sales pitches.
- In educational settings, presentations are a go-to for teaching or delivering engaging lectures.
- For conferences, seminars, and public events—presentations are perfect for dishing out information, inspiring folks, or even persuading the audience.
That sounds brilliant. But, how to write a presentation?

How To Write A Presentation? What should be in a powerful presentation? A great presentation encompasses several key elements to captivate your audience and effectively convey your message. Here’s what you should consider including in a winning presentation:
- Clear and Engaging Introduction: Start your presentation with a bang! Hook your audience’s attention right from the beginning by using a captivating story, a surprising fact, a thought-provoking question, or a powerful quote. Clearly state the purpose of your presentation and establish a connection with your listeners.
- Well-Structured Content: Organize your content logically and coherently. Divide your presentation into sections or main points and provide smooth transitions between them. Each section should flow seamlessly into the next, creating a cohesive narrative. Use clear headings and subheadings to guide your audience through the presentation.
- Compelling Visuals: Incorporate visual aids, such as images, graphs, or videos, to enhance your presentation. Make sure your visuals are visually appealing, relevant, and easy to understand. Use a clean and uncluttered design with legible fonts and appropriate color schemes.
- Engaging Delivery: Pay attention to your delivery style and body language. You should maintain eye contact with your audience, use gestures to emphasize key points, and vary your tone of voice to keep the presentation dynamic.
- Clear and Memorable Conclusion: Leave your audience with a lasting impression by providing a strong closing statement, a call to action, or a thought-provoking question. Make sure your conclusion ties back to your introduction and reinforces the core message of your presentation.

How To Write A Presentation Script (With Examples)
To successfully convey your message to your audience, you must carefully craft and organize your presentation script. Here are steps on how to write a presentation script:
1/ Understand Your Purpose and Audience
- Clarify the purpose of your presentation. Are you informing, persuading, or entertaining?
- Identify your target audience and their knowledge level, interests, and expectations.
- Define what presentation format you want to use
2/ Outline the Structure of Your Presentation
Strong opening.
Start with an engaging opening that grabs the audience’s attention and introduces your topic. Some types of openings you can use are:
- Start with a Thought-Provoking Question: “Have you ever…?”
- Begin with a Surprising Fact or Statistic: “Did you know that….?”
- Use a Powerful Quote: “As Maya Angelou once said,….”
- Tell a Compelling Story : “Picture this: You’re standing at….”
- Start with a Bold Statement: “In the fast-paced digital age….”
Main Points
Clearly state your main points or key ideas that you will discuss throughout the presentation.
- Clearly State the Purpose and Main Points: Example: “In this presentation, we will delve into three key areas. First,… Next,… Finally,…. we’ll discuss….”
- Provide Background and Context: Example: “Before we dive into the details, let’s understand the basics of…..”
- Present Supporting Information and Examples: Example: “To illustrate…., let’s look at an example. In,…..”
- Address Counterarguments or Potential Concerns: Example: “While…, we must also consider… .”
- Recap Key Points and Transition to the Next Section: Example: “To summarize, we’ve… Now, let’s shift our focus to…”
Remember to organize your content logically and coherently, ensuring smooth transitions between sections.
You can conclude with a strong closing statement summarizing your main points and leaving a lasting impression. Example: “As we conclude our presentation, it’s clear that… By…., we can….”
3/ Craft Clear and Concise Sentences
Once you’ve outlined your presentation, you need to edit your sentences. Use clear and straightforward language to ensure your message is easily understood.
Alternatively, you can break down complex ideas into simpler concepts and provide clear explanations or examples to aid comprehension.
4/ Use Visual Aids and Supporting Materials
Use supporting materials such as statistics, research findings, or real-life examples to back up your points and make them more compelling.
- Example: “As you can see from this graph,… This demonstrates….”
5/ Include Engagement Techniques
Incorporate interactive elements to engage your audience, such as Q&A sessions , conducting live polls, or encouraging participation. You can also spin more funs into group, by randomly dividing people into different groups to get more diverse feedbacks!
6/ Rehearse and Revise
- Practice delivering your presentation script to familiarize yourself with the content and improve your delivery.
- Revise and edit your script as needed, removing any unnecessary information or repetitions.
7/ Seek Feedback
You can share your script or deliver a practice presentation to a trusted friend, colleague, or mentor to gather feedback on your script and make adjustments accordingly.
More on Script Presentation

How to Write A Presentation Introduction with Examples
How to write presentations that are engaging and visually appealing? Looking for introduction ideas for the presentation? As mentioned earlier, once you have completed your script, it’s crucial to focus on editing and refining the most critical element—the opening of your presentation – the section that determines whether you can captivate and retain your audience’s attention right from the start.
Here is a guide on how to craft an opening that grabs your audience’s attention from the very first minute:
1/ Start with a Hook
To begin, you can choose from five different openings mentioned in the script based on your desired purpose and content. Alternatively, you can opt for the approach that resonates with you the most, and instills your confidence. Remember, the key is to choose a starting point that aligns with your objectives and allows you to deliver your message effectively.
2/ Establish Relevance and Context
Then you should establish the topic of your presentation and explain why it is important or relevant to your audience. Connect the topic to their interests, challenges, or aspirations to create a sense of relevance.
3/ State the Purpose
Clearly articulate the purpose or goal of your presentation. Let the audience know what they can expect to gain or achieve by listening to your presentation.
4/ Preview Your Main Points
Give a brief overview of the main points or sections you will cover in your presentation. It helps the audience understand the structure and flow of your presentation and creates anticipation.
5/ Establish Credibility
Share your expertise or credentials related to the topic to build trust with the audience, such as a brief personal story, relevant experience, or mentioning your professional background.
6/ Engage Emotionally
Connect emotional levels with your audience by appealing to their aspirations, fears, desires, or values. They help create a deeper connection and engagement from the very beginning.
Make sure your introduction is concise and to the point. Avoid unnecessary details or lengthy explanations. Aim for clarity and brevity to maintain the audience’s attention.
For example, Topic: Work-life balance
“Good morning, everyone! Can you imagine waking up each day feeling energized and ready to conquer both your personal and professional pursuits? Well, that’s exactly what we’ll explore today – the wonderful world of work-life balance. In a fast-paced society where work seems to consume every waking hour, it’s vital to find that spot where our careers and personal lives harmoniously coexist. Throughout this presentation, we’ll dive into practical strategies that help us achieve that coveted balance, boost productivity, and nurture our overall well-being.
But before we dive in, let me share a bit about my journey. As a working professional and a passionate advocate for work-life balance, I have spent years researching and implementing strategies that have transformed my own life. I am excited to share my knowledge and experiences with all of you today, with the hope of inspiring positive change and creating a more fulfilling work-life balance for everyone in this room. So, let’s get started!”
🎉 Check out: How to Start a Presentation?

Whether you’re a seasoned speaker or new to the stage, understanding how to write a presentation that conveys your message effectively is a valuable skill. By following the steps in this guide, you can become a captivating presenter and make your mark in every presentation you deliver.
Additionally, AhaSlides can significantly enhance your presentation’s impact. With AhaSlides, you can use live polls , quizzes , and word cloud to turn your presentation into an engaging and interactive experience. Let’s take a moment to explore our vast template library !
Frequently Asked Questions
How to write a presentation step by step .
You can refer to our step-by-step guide on How To Write A Presentation Script: Understand Your Purpose and Audience Outline the Structure of Your Presentation Craft Clear and Concise Sentences Use Visual Aids and Supporting Material Include Engagement Techniques Rehearse and Revise Seek Feedback
How do you start a presentation?
You can start with an engaging opening that grabs the audience’s attention and introduces your topic. Consider using one of the following approaches: Start with a Thought-Provoking Question: “Have you ever…?” Begin with a Surprising Fact or Statistic: “Did you know that….?” Use a Powerful Quote: “As Maya Angelou once said,….” Tell a Compelling Story : “Picture this: You’re standing at….” Start with a Bold Statement: “In the fast-paced digital age….”
What are the five parts of a presentation?
When it comes to presentation writing, a typical presentation consists of the following five parts: Introduction: Capturing the audience’s attention, introducing yourself, stating the purpose, and providing an overview. Main Body: Presenting main points, evidence, examples, and arguments. Visual Aids: Using visuals to enhance understanding and engage the audience. Conclusion: Summarizing main points, restating key message, and leaving a memorable takeaway or call to action. Q&A or Discussion: Optional part for addressing questions and encouraging audience participation.

A writer who wants to create practical and valuable content for the audience
More from AhaSlides

- Speech Writing
- Delivery Techniques
- PowerPoint & Visuals
- Speaker Habits
- Speaker Resources
Speech Critiques
- Book Reviews
- Browse Articles
- ALL Articles
- Learn About Us
- About Six Minutes
- Meet Our Authors
- Write for Us
- Advertise With Us
What is an Ignite presentation, and why should you try it?
What if there was a template you could use to help you with all of these decisions? There is such a template, and it is growing in popularity. Read on to find out more about Ignite!
What is Ignite?
Promoted under the slogan, “Enlighten us, but make it quick,” Ignite is a presentation format where a presenter speaks while slides advance automatically to support them. An Ignite presentation is exactly 5 minutes, and contains exactly 20 slides. The slides advance automatically after each slide is displayed for 15 seconds.
With fixed timing and clear constraints, the Ignite style is suitable for many situations , including classroom presentations, Toastmasters meetings, and both corporate and conference events.
History of Ignite Presentations
Brady Forrest, technology specialist for O’Reilly Media, and Bre Pettis of MAKE magazine developed Ignite in 2006 as a way for the Seattle tech community to get together, socialize, and share their personal and professional passions. Ignite was born out of this desire to combine amazing, big ideas with networking. After the initial event in Seattle, Ignite has gone global in over 100 cities.
Examples of Ignite Presentations
Though Ignite began in the tech community, not all presentations must be tech-based. Three of my favorite Ignite presentations are shown below:
- Great Designers Steal, by Jeff Veen
- Jane the Concussion Slayer, by Jane McGonigal
- The Doodle Revolution, by Sunni Brown
Benefits of Ignite talks
“ A good Ignite presentation — like all good presentations — should leave an audience satisfied but still hungry for more. ”
There are several benefits inherent in the Ignite method which will aid you and your audience.
1. The Ignite style can prove much more fulfilling for an audience than the standard free-form presentation.
Garr Reynolds wrote, “One secret to a healthy life (and a great presentation).” In his article , Reynolds defined the concept hara hachi bu – to eat until you are 80% full. Reynolds believes we should apply this concept both to our meals and to our presentations. The Ignite presentation format is so short that it gives the audience just a taste; the presenter isn’t stuffing them full of information. A good Ignite presentation — like all good presentations — should leave an audience satisfied but still hungry for more.
2. The Ignite format emphasizes content decisions, not numbers of visuals or timing.
While the idea of speaking under such strict constraints may seem intimidating, the Ignite format helps a presenter eliminate some tough decisions about the execution of his or her speech. The speaker can instead spend time on making content-based choices. Spending much more time on speech content allows a speaker to pinpoint and explain the main idea as opposed to rambling aimlessly.
3. Preparation is mandatory.
Preparation is essential for any great presentation. Most of us, however, aren’t actually willing to put in the amount of preparation time it takes to resonate with our audiences. Even presenters who believe they can “wing it” are forced to prepare with the Ignite format . The extra practice and preparation leads to stronger speeches.
4. Ignite presentations respect audience time.
Many presenters ignore time limits. With a self-playing format that requires the extra element of practice and preparation, speakers are more likely to remain on track for time .
For example, I teach the Ignite format in my public speaking class. During non-Ignite presentations, students are likely to speak longer than the time allotted, but during Ignite presentations, students rarely go much longer than 5 minutes. The Ignite format does not guarantee that a speaker will finish at exactly 5:00; for example, the students who go over on time speak after the presentation has finished.
“ If done properly, an Ignite presentation will do just that: ignite an audience to support your idea, event, or cause. ”
5. The Ignite format encourages concision.
With only 20 slides, a presenter must make important decisions about introduction, body, and conclusion. There is an emphasis on cutting and reducing, and this is always a good thing when it comes to presentations. The age-old advice of Sir Arthur Quiller-Couch also applies to presentations: we must learn to “murder our darlings.” The act of cutting and reducing adds to the effectiveness of the speech. Why? Strong presenters know that refining a presentation allows the audience to receive, hear, and digest only the most important information.
There are drawbacks to the Ignite format:
- The fixed timing can be a drawback if your message cannot be communicated within 5 minutes. For example, the Ignite style probably wouldn’t work for a lecture on the composition of the human brain. If your topic is complex, an Ignite may serve as an introduction, but the format isn’t conducive for all of those intricate and dense details.
- If you need to use multimedia , Ignite won’t work for your presentation. Video doesn’t fit well into the format. Additionally, transitions and animations aren’t recommended because of the simplicity emphasized by the automatically-playing format. Remember, you don’t have a clicker, so you can’t control the slides while you present.
- Additionally, since the presentation runs automatically, the speaker doesn’t have time for extensive audience interaction during the presentation. However, since the presentation is short, the time after the speech works well for Q&A or discussion.
Though there are drawbacks to this presentation format, the benefits are much stronger, and I encourage you to try out Ignite for yourself. If done properly, an Ignite presentation will do just that: ignite an audience to support your idea, event, or cause.
Next in this series…
In future articles, I’ll examine how to prepare and deliver an Ignite talk and how to organize an Ignite event.
Please share this...
This is one of many public speaking articles featured on Six Minutes . Subscribe to Six Minutes for free to receive future articles.
Add a Comment Cancel reply
E-Mail (hidden)
Subscribe - It's Free!
Similar articles you may like....
- How Many Slides Should You Have? How Many Slides Do You Need?
- The 10-20-30 Rule: Guy Kawasaki on PowerPoint
- 10 Presentation Bad Habits My College Students – And You – Must UN-Learn (Part 2)
- Book Review: Presentation Patterns (Neal Ford, Matthew McCullough, Nathaniel Schutta)
- Flip Charts 101: How to Use Flip Charts Effectively
- How to Create Pro Slides in Less Time: Don’t Worry, Be CRAPpy
Find More Articles Tagged:
This format is nearly the same as the Pacha Kucha format, of 20 slides of 20 seconds each. Wikipedia states that pechakucha started in 2003, so the ignite format seems a sped-up version. http://en.wikipedia.org/wiki/PechaKucha
Nichol, you are right. Pecha Kucha and Ignite are similar formats with similar goals (brevity, dynamic, up-tempo, visual, …)
I really like the idea of ignite presentations. Too often we get caught up in slides and wordiness.
There’s a chance I could be speaking at an event soon and I think this would be a terrific time to try this out.
In Phoenix Arizona, we have hosted 13 large events of 18 Ignite Presentations in theaters of 800+ people. Having hosted over 200 presenters in the past few years – including a 10yr old presenter – I believe that anyone can deliver a clear passionate message in Ignite style.
http://www.youtube.com/user/IgnitePhoenix
Thanks Alex. Nice examples in the videos you chose, too.
I did an Ignite talk back in March here in Sydney, and it was a great learning experience. The talks that went down best on the night were the quirky or funny ones – which mine wasn’t!
That was perhaps the biggest takeaway for me: Once again, it comes down to knowing your audience. Ironically, I’d had some humour in my talk to begin with, but took it out because it felt a bit forced. That’s probably for the best.
I also took out the brief audience interactions I’d planned, because of the risk they wouldn’t work or would make me stumble. So the end result was a drier talk than I’d hoed for.
After reading Alex’s post, if you’re thinking of doing an Ignite talk, I’d highly recommend it. My advice is to pick a quirky, witty or impassioned topic. I also found this tip really helpful as a way to reduce nerves – whether you’re male or female: http://remotepossibilities.wordpress.com/2012/01/12/boost-testosterone-present-better/
Alex, I’m looking forward to your later posts in this series. It’s a great topic!
I loved this article on Ignite. I just did my first Ignite presentation at the American Evaluation Association (AEA) conference last month and loved the format. Learning to be concise and prioritize content are key.
Alex, this is brilliant – thanks for sharing. It’s good to let Ignite presenters know up-front they need to spend some serious time preparing, and your method is very sensible. There aren’t no good reasons for doing it in a “normal” presentation, but it’s a major part of the fun of Ignite. The main idea, in my opinion, is to make presentations enjoyable again, as an antidote to all the boring, death-by-powerpoint sessions we’re used to. Making the slides auto-advance adds an extra challenge and an element of danger to the presentations – once they start, there’s no going back.
Recent Tweets
What is an Ignite presentation, and why should you try it? (via @Pocket) cc @CVCollectiveMag @mastermynde @WeAreYQQ https://t.co/klvoNwd8uc — @hanspetermeyer Dec 4th, 2015
Love this… What is an Ignite presentation, and why should you try it? https://t.co/ZPyCV6hDGG by @6minutes — @DW8674 Dec 12th, 2015
I’d like to try this format. #aisl16la conference debrief: https://t.co/zxDG3DmOdv — @DaveWee1 Apr 15th, 2016
Should we try Ignite/Pecha Kucha for the PI Planning Briefing? (inspired by comments in PI Planning Briefing Retro) https://t.co/oZLtQYo3qO — @yuvalyeret May 17th, 2016
Why should you give an #ignitetalk? @alexrister1 names five benefits: https://t.co/Ja0bSC1krV #publicspeaking https://t.co/xIf9xO78EC — @ignitetalks Jun 8th, 2016
Great way to learn. https://t.co/KDkMbcRbGC — @SPGallagher Sep 4th, 2016
What is an Ignite presentation, and why should you try it? https://t.co/OGpb8twHQQ by @6minutes — @teacherka Dec 19th, 2016
What is an Ignite presentation, and why should you try it? Check out this blog post from Andrew Dlugan @6minutes https://t.co/9v5kmyyozu — @IgniteUXmi Feb 9th, 2017
What is an Ignite presentation, and why should you try it? https://t.co/NXW7aAVkeH — @reyaz4you Feb 10th, 2017
@cpaterso: Similar to @traintheteacher’s suggestion for Pecha Kucha: Ignite Presentation – you can adjust timings https://t.co/JalctBOU4O — @moTik Mar 24th, 2017
2 Blog Links
What is an Ignite presentation, and why should you try it? « Creating Communication — Nov 1st, 2012
Presentation Tips from Kevin Daum | Creating Communication — Jul 11th, 2013
Featured Articles
- Majora Carter (TED, 2006) Energy, Passion, Speaking Rate
- Hans Rosling (TED, 2006) 6 Techniques to Present Data
- J.A. Gamache (Toastmasters, 2007) Gestures, Prop, Writing
- Steve Jobs (Stanford, 2005) Figures of speech, rule of three
- Al Gore (TED, 2006) Humor, audience interaction
- Dick Hardt (OSCON, 2005) Lessig Method of Presentation
Books We Recommend
Six Minutes Copyright © 2007-2019 All Rights Reserved.
Read our permissions policy , privacy policy , or disclosure policy .
Comments? Questions? Contact us .
Presentation Guru
Powerful presentation formats you didn’t know about (but should).

We live in a world of public speakers who are so good at presenting information, they’re famous for it.
There’s something about their style and delivery that just gets us to listen. As public speakers, they’re skilled and well-practised. They don’t stammer, mutter or use filler words but are loud, clear and confident.
That’s one part of what makes them so good. The other part of what makes them exceptional presenters are their effective presentation formats. How an idea is packaged and presented, along with the visuals that are used to present it establish a presentation’s format. The number of slides, the types of slides, the design of the slides, and how frequently the slides change are part of the format.
The best speakers structure their presentations in ways that help them deliver their key points clearly, and keep their audience attentive and engaged throughout.
That’s why I decided to share some of the most popular (and not so popular) presentation formats that people use today, with you. I’ll also share presentation styles from a few well-known speakers and influencers who haven’t coined their presentation format, but are worth drawing inspiration from.
These presentation formats can help you with talks at conferences, delivering keynotes, hosting webinars and way more. They’ll help you with developing your personal brand and become an even more engaging speaker.
1) Guy Kawasaki’s pitch deck and the 10-20-30 Rule

Guy Kawasaki Pitch Deck Template
The Guy Kawasaki pitch deck is part of Kawasaki’s pitching format called the 10-20-30 Rule . It’s a simple guide for making your pitch to investors punchy and to the point.
Guy Kawasaki knows a thing or two about pitching to investors. He started multiple companies himself, including a venture capital firm – Garage Technology Ventures . Over the years, Garage Technology Ventures has invested in recognizable names like Pandora and Tripwire.
That’s one reason why his ideal pitch deck is so popular. He has decades of experience pitching and has listened to plenty of pitches. He knows what the good ones have, and what the bad ones lack.
Another reason Guy Kawasaki’s pitch deck is so well-liked is it’s simplicity. The pitch deck is just ten slides, and that’s the first rule in his 10-20-30 Rule. The second rule is to not speak for more than 20 minutes. And rule three is to only use fonts no smaller than 30 points.
Guy Kawasaki’s 10-20-30 Rule
- Use only 10 slides (no more than 15)
- Only talk for 20 minutes
- Use nothing smaller than 30 point font
With such a simple set of rules to follow, it helps entrepreneurs laser-focus on their business idea, along with the facts and figures that matter. In the entrepreneurship space, having that sort of structure goes a long way.
Now coming back to the actual pitch deck, what goes on the ten slides? Only the most fundamental pieces of information.
- Title Slide
- Problem/Opportunity
- Value Proposition
- Underlying Magic
- Business Model
- Go-To-Market Plan
- Competitive Analysis
- Management Team
- Financial Projections and Key Metrics
- Current Status, Accomplishments, Timeline and Use of Funds
- Thank you Slide
You can bookmark this redesigned Guy Kawasaki Pitch Deck Template from Venngage . It’s previewed above and follows his exact format (and includes example slides to help you out).
2) The Pecha Kucha presentation format

The PechaKucha presentation format was inspired by two Tokyo-based architects, Astrid Klein and Mark Dytham, back in 2003. In an attempt to streamline architectural design presentations, they decided on a format that emphasizes visuals and minimizes text and talking.
What they introduced was a presentation consisting of twenty slides, that are only shown for 20 seconds each, and so a presentation that lasts exactly six minutes and forty seconds. Always.
The concept quickly caught fire and spread throughout Tokyo, then Japan, then the world! Now it’s a hugely popular presentation style that hundreds of thousands of people give (and attend) every year through countless cities.
It has also moved beyond the business and professional setting. PechaKucha presentations also include people talking about their passions, interests, ideas and more. This article shows some great examples of PechaKucha presentations and where you can find a PechaKucha event near you.
The benefits of the PechaKucha presentation format
One basic sales fundamental is knowing your audience well, which is what inspired the PechaKucha format.
The two architects, based out of Japan, wanted to give more meaningful presentations to their clients. That meant highly visual slides that made more of an impact, with concise language that carried more weight. They also wanted to make the best use of their client’s time, rather than have them sit through a boring presentation for an hour.
The PechaKucha presentation helps you accomplish three things as the presenter:
- They become really great speakers who know their topic very well.
- Their slides are visually engaging, memorable and relevant.
- They don’t waste their audience’s time and energy with long presentations.
How does the Pecha Kucha presentation format help me as a presenter?
Using the PechaKucha format means you need a very clear understanding of what you want to communicate. This means searching your thoughts, practising your talk many times, and editing your talking points until your left with exactly what you need.
The visuals also play a huge part. They have to work with your talk, you can’t go back to them, and you don’t have much time to explain each one of them in great detail. That means designing visuals or choosing images that capture and hold your audience’s attention.
What you’re left with is a six-minutes-and-forty-seconds-long presentation that your audience will be grateful for.
Whether you’re presenting a new concept, a learning topic for your team or a brief keynote, making a pitch, or explaining something, the PechaKucha presentation is an effective mode of delivery. Granted, you can’t expect to present on anything and everything using this format. But in client meetings, meetings with your team, talks at networking events, the PechaKucha presentation style is a great choice.
3) Lessig Method presentation style

Lawrence Lessig is the pioneer behind the ‘Lessig Method’ presentation format. Unlike Guy Kawasaki’s pitch deck and the PechaKucha format, there are no slide limitations. The formatting is minimalist in design, but slide count is thrown out the window.
What you have instead is an emphasis on visuals and your key points. The slides are meant to synchronize with your talk, so that specific key terms appear as you’re actually saying them.
The Lessig Method helps to reinforce your message and establish pacing, keeping up the energy of your presentation and your audience tuned in. It helps minimize the opposite situation that many speakers experience, lingering on one slide too long, with the audience’s attention dropping off.
You can check out an example of Lessig himself using the Lessig method during his Ted Talk:
Note the simplicity of the images that Lessig uses in his Ted Talk, too. They are unadorned, high-quality, impressionable images that stick. It grabs the audience’s full attention. It also lessens the load on ‘designing’ a presentation.
4) Takahashi Style Presentation

Masayoshi Takahashi, a programmer in the early 2000s, had to give a presentation at Ruby Conference . Whether it was a matter of preference or just a statement, Takahashi chose not to use tools like PowerPoint. Instead, he developed a plain-text presentation deck that only had large, bold text on all of them. The text was similar to Japanese newspaper headlines. Each slide would emphasize a point, reinforcing his message and the key takeaways for the audience.
You can check out the original slide deck below:
This approach gets compared to the Lessig method often, but the key difference here is pacing. As I mentioned before, the Lessig Method is fast-paced and dynamic. It emphasizes keywords and also maintains the energetic cadence of your presentation. Whereas, the Takahashi method emphasizes each point through huge, bold text that jumps out at the audience. In a sense it’s ‘visually loud’ and hits your message home with a slightly different approach.
Influential Thought Leaders and their Presentation Styles
1) seth godin – marketer, author, and entrepreneur.

Seth Godin is a well recognized thought leader in the space of marketing, business and technology. He has authored numerous books, owned businesses, and is a top-tier marketer and writer.
As an exceptional speaker, he also has a presentation style that’s worth emulating.
Horrifyingly boring, text-heavy PowerPoint presentation decks were taking over offices and conferences. After years of seeing lousy PowerPoint presentations, Godin decided to do things his own way.
Slides should be visual. On his blog , Seth Godin famously states, “[…] make slides that reinforce your words, not repeat them”
That pretty much sums up his approach to presentation slide design. Only you can deliver your message, there’s no way around that. You can see what I mean by just checking out his Ted Talk:
Within a few minutes, you’ll see the images are vibrant, bold and simple. They are great examples that don’t require any design skills. Instead his visuals amplify his message, making it easy to remember what it was all about. They really carry each of his points.
I don’t think his approach disagrees with the Lessig or Takahashi methods (which make heavy use of text), but is a response to the misuse of text you find even in presentations today.
2) Ann Handley – Keynote business speaker, writer, marketer
Ann Handley is a best-selling author, the Chief Content Officer at MarketingProfs, and co-founder of Clickz (amongst other things). She is a talented communicator and a great speaker, too.
I really like her slide deck for her Slay the Ignosaurus talk she gave in San Francisco last year. You can see her whole presentation deck on her blog .
Two things make her presentation slides strong and impressionable.
- The introduction of a novel creature, i.e., Ignosaurus
- The recurring slides of the Ignosaurus
The Ignosaurus is a unique symbol for a problem Handley wants to address. It also sets the tone for the entire presentation.
The deck’s most effective quality is that it loops back to the Ignosaurus every few slides. This allows Handley to keep bringing the focus back to the problem she’s unpacking for us. As she introduces new concepts and ideas, she ties them back to the main problem. This establishes a strong connection between the issue and the solution she provides.
3)Leila Janah – Founder and CEO of Samasource and LXMI

Leila Janah is a remarkable entrepreneur, founding organizations that align with her personal values, Sama and LXMI.
Sama is a non-profit platform that assists AI teams in deploying machine learning more effectively and reliably. LXMI is a wellness brand that focuses on using natural ingredients, with transparent and responsible production and sourcing practices.
Both organizations emphasize empowering visible minorities, particularly women, to succeed in their fields. She brings together the technology and business sphere with social responsibility and the opportunity to do good.
As someone who is passionate, inspired by her own personal values, and all about representation for the disenfranchised, Leila is excellent at giving talks that resonate on an emotional level.
In 2015, at a Business for Social Responsibility (BSR) presentation, Janah spoke about the concept of ‘impact sourcing’ and its ability to resolve poverty.
Janah immediately connects her audience to something real and tangible, a person, Ken. She goes on to tell us the story about his life, his challenges, his aspirations, and how impact sourcing lifts people like Ken up.
She presents us with someone real, and connects her ideas to real work that has had a positive impact on his life. She doesn’t focus on the hundreds of people Sama has helped or present a number of impressive figures.
She focuses on one person and guides us through his experiences and the very direct way Sama helped improve the quality of his life. Sometimes the very simple and human story can make an impression that broader stories can’t.
Choosing the presentation format that works for you
Choosing the right presentation format really boils down to what you’re presenting and what your message is all about. It also comes down to what suits you best.
Remember, as a presenter your personality and how you like to communicate, should shine through as well. That has to be balanced with keeping your audience’s attention.
People want to listen to you, but you need to make it easy for them. Using a presentation format that helps you crystalize your message, but also holds your audience’s attention is invaluable. There are different, less popular presentation formats out there, but have, in many ways, been inspired by the ones I shared in this post.
And of course, there are thousands of impressive and compelling public speakers and presenters out there. I can’t get to them all, so I have shared with you three that really stuck out to me.
What are some presentation formats that you’ve found worked for you? It can be presentation formats that you came up with! Or maybe you’ve got a favorite presenter I should know about. Share your thoughts with me in the comments below.
- Latest Posts
Jeilan Devanesan
Latest posts by jeilan devanesan ( see all ).
- Powerful Presentation Formats You Didn’t Know About (But Should!) - 19th November 2019
- 6 Design Ideas for a Killer Presentation - 4th September 2018
Your email address will not be published. Required fields are marked *
Follow The Guru

Join our Mailing List
Join our mailing list to get monthly updates and your FREE copy of A Guide for Everyday Business Presentations

The Only PowerPoint Templates You’ll Ever Need
Anyone who has a story to tell follows the same three-act story structure to...

How to get over ‘Impostor Syndrome’ when you’re presenting
Everybody with a soul feels like an impostor sometimes. Even really confident and experienced...
How-To Geek
6 ways to create more interactive powerpoint presentations.
Engage your audience with cool, actionable features.
Quick Links
- Add a QR code
- Embed Microsoft Forms (Education or Business Only)
- Embed a Live Web Page
- Add Links and Menus
- Add Clickable Images to Give More Info
- Add a Countdown Timer
We've all been to a presentation where the speaker bores you to death with a mundane PowerPoint presentation. Actually, the speaker could have kept you much more engaged by adding some interactive features to their slideshow. Let's look into some of these options.
1. Add a QR code
Adding a QR code can be particularly useful if you want to direct your audience to an online form, website, or video.
Some websites have in-built ways to create a QR code. For example, on Microsoft Forms , when you click "Collect Responses," you'll see the QR code option via the icon highlighted in the screenshot below. You can either right-click the QR code to copy and paste it into your presentation, or click "Download" to add it to your device gallery to insert the QR code as a picture.
In fact, you can easily add a QR code to take your viewer to any website. On Microsoft Edge, right-click anywhere on a web page where there isn't already a link, and left-click "Create QR Code For This Page."
You can also create QR codes in other browsers, such as Chrome.
You can then copy or download the QR code to use wherever you like in your presentation.
2. Embed Microsoft Forms (Education or Business Only)
If you plan to send your PPT presentation to others—for example, if you're a trainer sending step-by-step instruction presentation, a teacher sending an independent learning task to your students, or a campaigner for your local councilor sending a persuasive PPT to constituents—you might want to embed a quiz, questionnaire, pole, or feedback survey in your presentation.
In PowerPoint, open the "Insert" tab on the ribbon, and in the Forms group, click "Forms". If you cannot see this option, you can add new buttons to the ribbon .
As at April 2024, this feature is only available for those using their work or school account. We're using a Microsoft 365 Personal account in the screenshot below, which is why the Forms icon is grayed out.
Then, a sidebar will appear on the right-hand side of your screen, where you can either choose a form you have already created or opt to craft a new form.
Now, you can share your PPT presentation with others , who can click the fields and submit their responses when they view the presentation.
3. Embed a Live Web Page
You could always screenshot a web page and paste that into your PPT, but that's not a very interactive addition to your presentation. Instead, you can embed a live web page into your PPT so that people with access to your presentation can interact actively with its contents.
To do this, we will need to add an add-in to our PPT account .
Add-ins are not always reliable or secure. Before installing an add-in to your Microsoft account, check that the author is a reputable company, and type the add-in's name into a search engine to read reviews and other users' experiences.
To embed a web page, add the Web Viewer add-in ( this is an add-in created by Microsoft ).
Go to the relevant slide and open the Web Viewer add-in. Then, copy and paste the secure URL into the field box, and remove https:// from the start of the address. In our example, we will add a selector wheel to our slide. Click "Preview" to see a sample of the web page's appearance in your presentation.
This is how ours will look.
When you or someone with access to your presentation views the slideshow, this web page will be live and interactive.
4. Add Links and Menus
As well as moving from one slide to the next through a keyboard action or mouse click, you can create links within your presentation to direct the audience to specific locations.
To create a link, right-click the outline of the clickable object, and click "Link."
In the Insert Hyperlink dialog box, click "Place In This Document," choose the landing destination, and click "OK."
What's more, to make it clear that an object is clickable, you can use action buttons. Open the "Insert" tab on the ribbon, click "Shape," and then choose an appropriate action button. Usefully, PPT will automatically prompt you to add a link to these shapes.
You might also want a menu that displays on every slide. Once you have created the menu, add the links using the method outlined above. Then, select all the items, press Ctrl+C (copy), and then use Ctrl+V to paste them in your other slides.
5. Add Clickable Images to Give More Info
Through PowerPoint's animations, you can give your viewer the power to choose what they see and when they see it. This works nicely whether you're planning to send your presentation to others to run through independently or whether you're presenting in front of a group and want your audience to decide which action they want to take.
Start by creating the objects that will be clickable (trigger) and the items that will appear (pop-up).
Then, select all the pop-ups together. When you click "Animations" on the ribbon and choose an appropriate animation for the effect you want to achieve, this will be applied to all objects you have selected.
The next step is to rename the triggers in your presentation. To do this, open the "Home" tab, and in the Editing group, click "Select", and then "Selection Pane."
With the Selection Pane open, select each trigger on your slide individually, and rename them in the Selection Pane, so that they can be easily linked to in the next step.
Finally, go back to the first pop-up. Open the "Animations" tab, and in the Advanced Animation group, click the "Trigger" drop-down arrow. Then, you can set the item to appear when a trigger is clicked in your presentation.
If you want your item to disappear when the trigger is clicked again, select the pop-up, click "Add Animation" in the Advanced Animation group, choose an Exit animation, and follow the same step to link that animation to the trigger button.
6. Add a Countdown Timer
A great way to get your audience to engage with your PPT presentation is to keep them on edge by adding a countdown timer. Whether you're leading a presentation and want to let your audience stop to discuss a topic, or running an online quiz with time-limit questions, having a countdown timer means your audience will keep their eye on your slide throughout.
To do this, you need to animate text boxes or shapes containing your countdown numbers. Choose and format a shape and type the highest number that your countdown clock will need. In our case, we're creating a 10-second timer.
Now, with your shape selected, open the "Animations" tab on the ribbon and click the animation drop-down arrow. Then, in the Exit menu, click "Disappear."
Open the Animation Pane, and click the drop-down arrow next to the animation you've just added. From there, choose "Timing."
Make sure "On Click" is selected in the Start menu, and change the Delay option to "1 second," before clicking "OK."
Then, with this shape still selected, press Ctrl+C (copy), and then Ctrl+V (paste). In the second box, type 9 . With the Animation Pane still open and this second shape selected, click the drop-down arrow and choose "Timing" again. Change the Start option to "After Previous," and make sure the Delay option is 1 second. Then, click "OK."
We can now use this second shape as our template, as when we copy and paste it again, the animations will also duplicate. With this second shape selected, press Ctrl+C and Ctrl+V, type 8 into the box, and continue to do the same until you get to 0 .
Next, remove the animations from the "0" box, as you don't want this to disappear. To do this, click the shape, and in the Animation Pane drop-down, click "Remove."
You now need to layer them in order. Right-click the box containing number 1, and click "Bring To Front." You will now see that box on the top. Do the same with the other numbers in ascending order.
Finally, you need to align the objects together. Click anywhere on your slide and press Ctrl+A. Then, in the Home tab on the ribbon, click "Arrange." First click "Align Center," and then bring the menu up again, so that you can click "Align Middle."
Press Ctrl+A again to select your timer, and you can then move your timer or copy and paste it elsewhere.
Press F5 to see the presentation in action, and when you get to the slide containing the timer, click anywhere on the slide to see your countdown timer in action!
Now that your PPT presentation is more interactive, make sure you've avoided these eight common presentational mistakes before you present your slides.
IMAGES
VIDEO
COMMENTS
Choose the Right 5-Minute Presentation Topics. Step 3. Use a Professional Presentation Template for Your Mini Presentation. Step 4. Start Your Quick Presentation With a Powerful Attention Grabber. Step 5. Practice Makes Perfect. Plan Your Short Presentation Length. 5-Minute Presentation Samples.
1. Speak as a Leader Bootcamp Welcome. This five-minute presentation by Nausheen I. Chen perfectly balances minimalism with informative text. The design uses background color to help create contrast within the presentation, and the final call-to-action is unique and actionable.
A strong and compelling three-minute presentation will consist of roughly 25 sentences. Write these down in advance so you have a clear outline in your head, making the presentation lively. Short and snappy is what you're aiming for. You can get to the meat of your presentation in three minutes; try it!
Here are 30 quick PowerPoint presentation tips to help you improve your presentations. Every presentation benefits from a few good visuals that drive your point home. (Image source: Envato Elements.) Plus, get PowerPoint tips on changing your slide design to make your content shine. We've even called on six presentation experts for their best tips.
12 Top PowerPoint Presentation Hacks. PowerPoint design hacks serve two purposes. They save you time, and they help you serve up impressive designs to wow your audience. What's more, you don't need to be a design expert to use the 12 PowerPoint design hacks we'll cover. Here's our list: 1. Use the Guides.
Time-saving PowerPoint hack #3: Use PowerPoint Templates. If you prefer non-paid options, however, there's still a lot of PowerPoint tips and hacks you can use to save time when working on your presentations. And one of the most effective ones is definitely to work with templates.
Length and Structure. The main part should make up about 70% of the presentation and also include a clear structure. Explain your ideas in detail and build them up logically. It should be organized chronologically, by priority or by topic. There should be a smooth transition between the individual issues.
When you're putting your own deck together, you'll certainly need to add slides and format them in different ways. In order to make a new slide appear in your presentation, first select the slide that you'd like your new slide to follow. Then click Home and choose New Slide. From there, you can choose your desired layout, and start ...
Create a presentation. Open PowerPoint. In the left pane, select New. Select an option: To create a presentation from scratch, select Blank Presentation. To use a prepared design, select one of the templates. To see tips for using PowerPoint, select Take a Tour, and then select Create, . Add a slide.
Apply the 10-20-30 rule. Apply the 10-20-30 presentation rule and keep it short, sweet and impactful! Stick to ten slides, deliver your presentation within 20 minutes and use a 30-point font to ensure clarity and focus. Less is more, and your audience will thank you for it! 9. Implement the 5-5-5 rule. Simplicity is key.
Select the text. Under Drawing Tools, choose Format. Do one of the following: To change the color of your text, choose Text Fill, and then choose a color. To change the outline color of your text, choose Text Outline, and then choose a color. To apply a shadow, reflection, glow, bevel, 3-D rotation, a transform, choose Text Effects, and then ...
A good presentation needs two fonts: a serif and sans-serif. Use one for the headlines and one for body text, lists, and the like. Keep it simple. Veranda, Helvetica, Arial, and even Times New Roman are safe choices. Stick with the classics and it's hard to botch this one too badly.
Creating a mini-slideshow? Let's explore how to make a successful short presentation. In this video, we'll discuss five-minute presentation topics, look at s...
Choose the presentation format. Colors & styles. Determine the use of metaphors and visual slides. Final touches and polishing your presentation. Proofreading and polishing process. Prepare your speech. Rehearse, rehearse and rehearse. "Presenting" (your presentation) How to give a memorable presentation.
This clarifies the overall purpose of your talk and reinforces your reason for being there. Follow these steps: Signal that it's nearly the end of your presentation, for example, "As we wrap up/as we wind down the talk…". Restate the topic and purpose of your presentation - "In this speech I wanted to compare…". 5.
With a shape selected, find the Shape Fill dropdown on the ribbon's Shape Format tab. Explore your options, and click on a new color to apply it. This is useful especially when you want to match your charts to your brand's own colors. ... 5 Quick PowerPoint Presentation Tips. Here are five of my favorite tips to develop presentations ...
To do that, simply go up to the Home tab and click on New Slide. This inserts a new slide in your presentation right after the one you were on. You can alternatively hit Ctrl+M on your keyboard to insert a new blank slide in PowerPoint. To learn more about this shortcut, see my guide on using Ctrl+M in PowerPoint.
Describing a detailed picture of success (or failure) - Give people a vision; something they can see, hear, taste, and touch. Asking the audience to do something straight away - Get them involved right from the start. If you do this, it's then much easier to keep them engaged and active in your cause. 4.
6/ Engage Emotionally. Connect emotional levels with your audience by appealing to their aspirations, fears, desires, or values. They help create a deeper connection and engagement from the very beginning. Make sure your introduction is concise and to the point. Avoid unnecessary details or lengthy explanations.
With Visme's Presenter Studio, you can record your presentation and share it with your audience. Record your screen, audio, and video, or switch off your camera for an audio-only presentation. Present asynchronously on your own time, at your own pace. Let your colleagues watch it at their convenience. Create Your Presentation.
What is Ignite? Promoted under the slogan, "Enlighten us, but make it quick," Ignite is a presentation format where a presenter speaks while slides advance automatically to support them. An Ignite presentation is exactly 5 minutes, and contains exactly 20 slides. The slides advance automatically after each slide is displayed for 15 seconds.
Here are the different options available for reformatting: Colors: Changes all the colors used in your presentation, as well as the color options available in the color picker. Fonts: Changes all the headings and body fonts used in the presentation. Effects: Changes the appearance (shading, border, etc.) of objects in your presentation. Background Styles: Choose the background style for the ...
1) Guy Kawasaki's pitch deck and the 10-20-30 Rule. Guy Kawasaki Pitch Deck Template. The Guy Kawasaki pitch deck is part of Kawasaki's pitching format called the 10-20-30 Rule. It's a simple guide for making your pitch to investors punchy and to the point. Guy Kawasaki knows a thing or two about pitching to investors.
Then, with this shape still selected, press Ctrl+C (copy), and then Ctrl+V (paste). In the second box, type 9. With the Animation Pane still open and this second shape selected, click the drop-down arrow and choose "Timing" again. Change the Start option to "After Previous," and make sure the Delay option is 1 second.